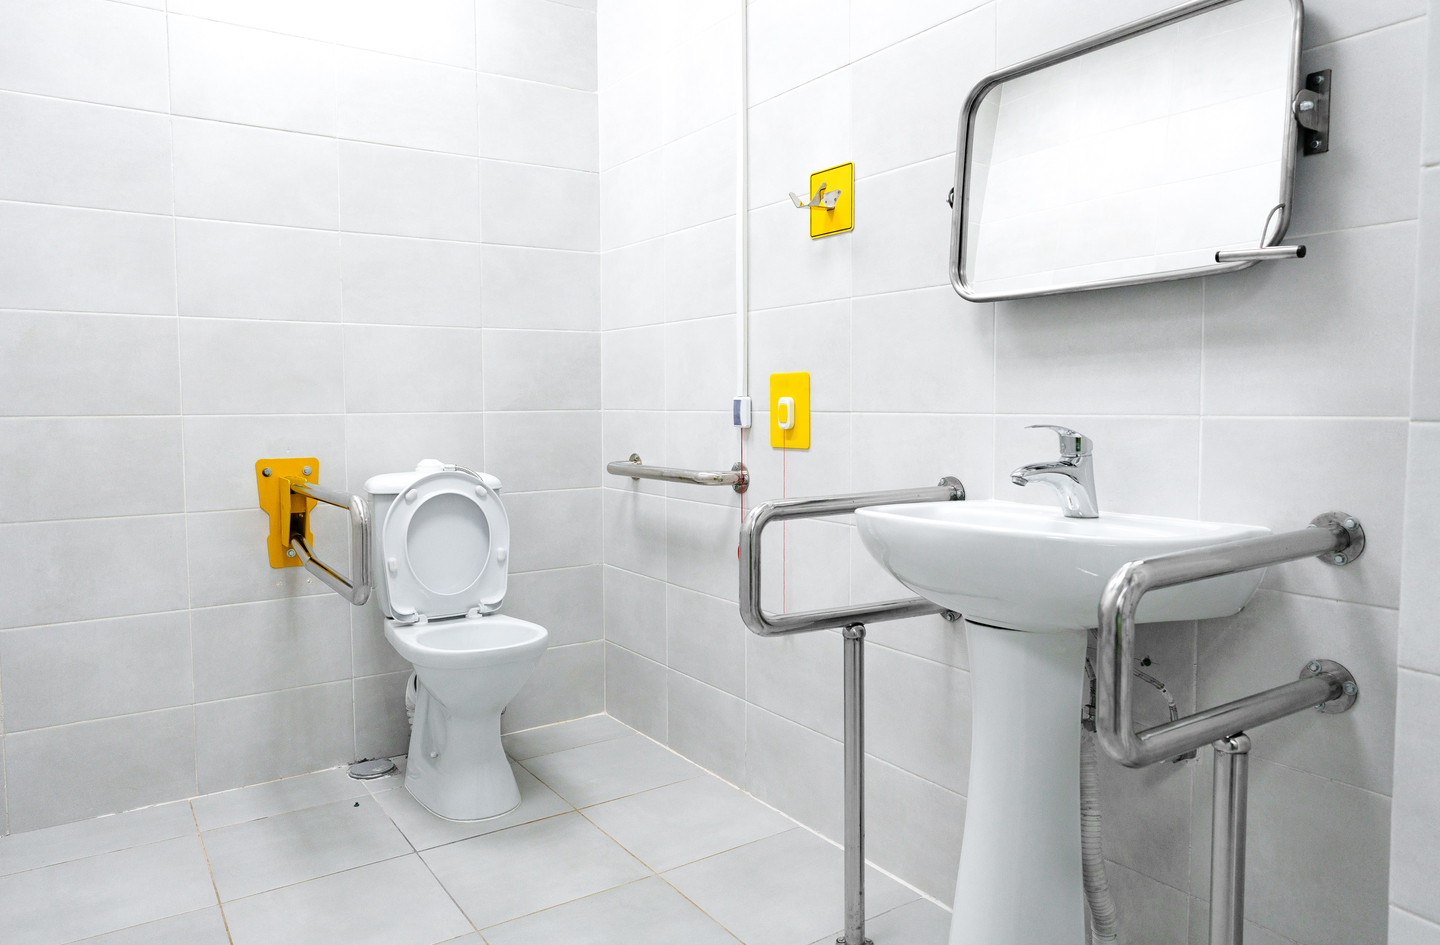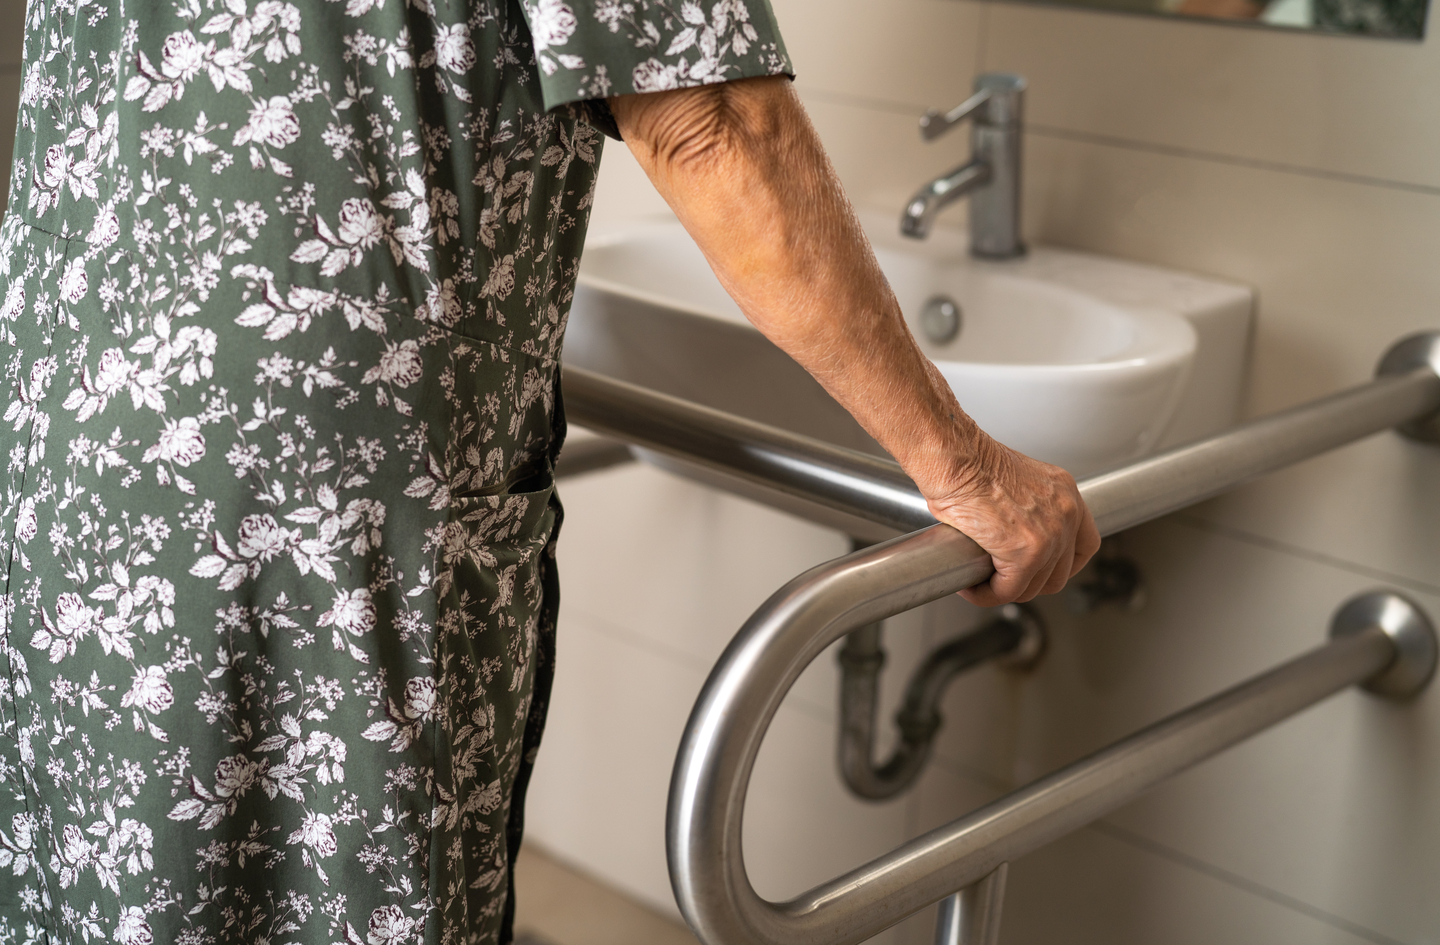
Fall Prevention for Seniors: A Priority-Based Home Plan

Author: Oded Feigin · Created On: August 03, 2026 · Last Updated: August 24, 2026

Fall prevention for seniors begins not with products, but with a plan. About 14 million adults age 65 and older fall each year in the United States,1 making falls the leading cause of injury in this age group. Before reaching for a bath mat or a grab bar, there is a more reliable first step: map the daily routes in your home, find where friction concentrates, and address hazards in priority order. Our fall-prevention priorities overview places this guide in the broader context of safer aging at home. This article walks through that priority sequence across six practical steps.
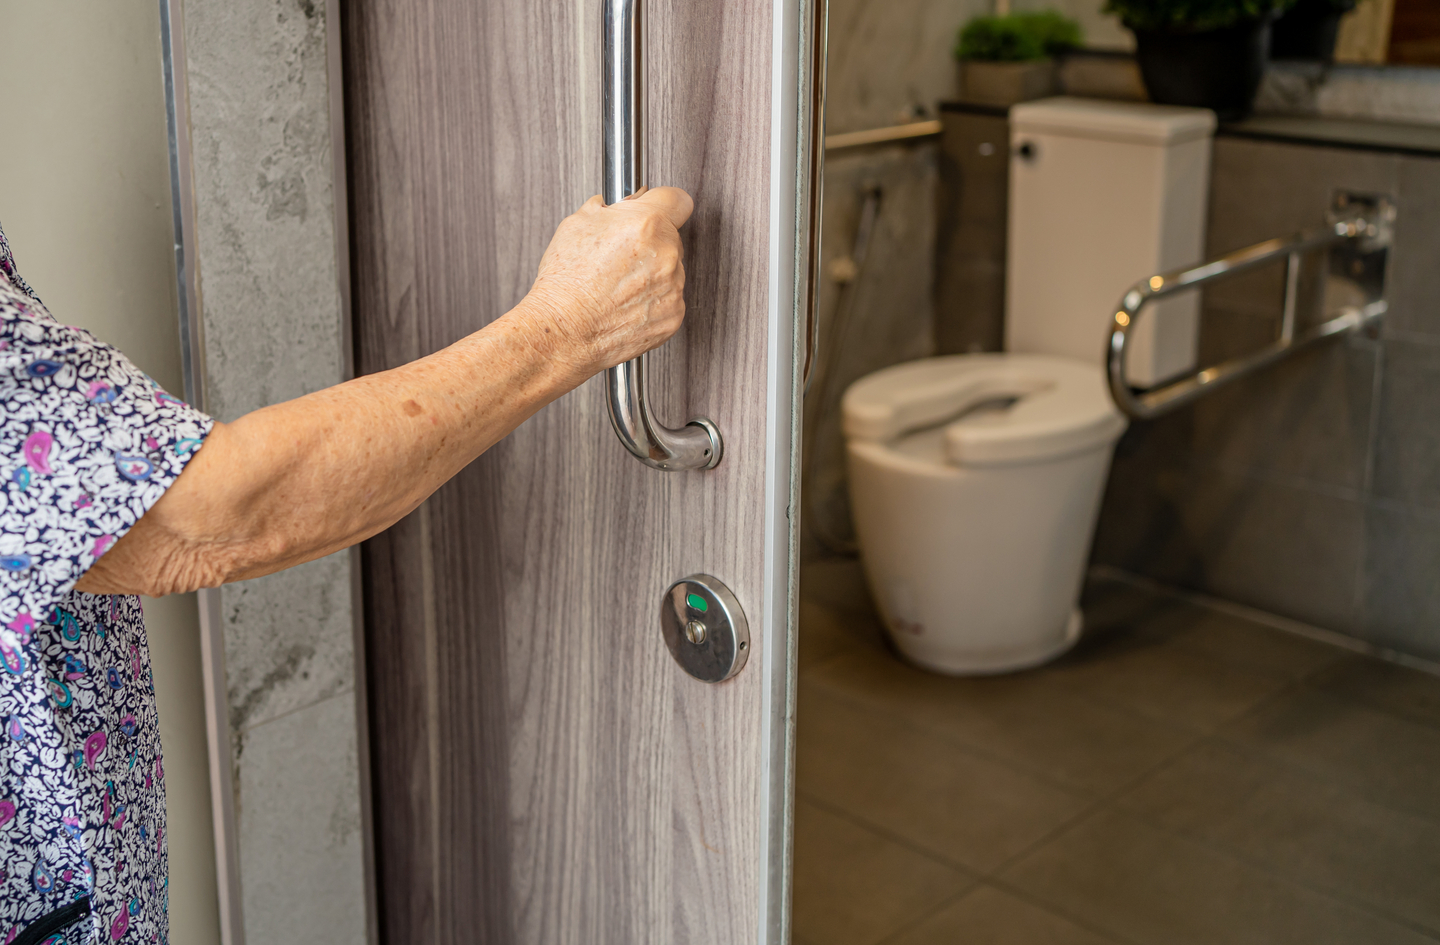
Fall prevention for seniors: a hand reaching to open an accessible bathroom door, revealing a toilet with a safety grab bar inside
A hand reaches toward the door of an accessible bathroom fitted with a safety grab bar at the toilet, representing one high-priority support point in a home fall-prevention plan.

Quick Answer

What is the right order for building a fall-prevention plan at home?

Address immediate hazards first (loose rugs, cords, clutter), then add support points (grab bars, handrails, transfer aids), then improve lighting, then reduce thresholds and improve room access, then build safer daily habits including footwear and medication review, and finally schedule a regular plan review. Two thirds of falls among community-dwelling older adults occur inside the home,2 so the priority order follows where risk actually concentrates, route by route.

Key Takeaways

  • About 14 million adults 65 and older fall each year in the United States; the total healthcare cost of non-fatal falls has reached $80 billion annually.1
  • Two thirds of falls among community-dwelling older adults happen inside the home, and bathroom falls are 2.4 times more likely to cause injury than falls in the living room.2
  • Effective fall prevention follows a sequence: remove hazards first, then add support, improve lighting, reduce thresholds, build safer habits, and review the plan regularly.

Before You Start: Walk the Routes

The single most useful thing to do before making any change is to walk the home like a planner, not an occupant. Most people move through their homes on autopilot, compensating for friction they have adapted to over years. That compensation masks real risk.

Walk the three routes used most often: bedroom to bathroom, kitchen to the main seating area, and front entry to the main living space. Walk them slowly and deliberately. Walk them at night, using whatever lighting is currently in place. At every point where you grip a surface, hesitate, change level, turn sharply, or reach beyond a comfortable zone, stop and note it. These friction points, not a generic product list, tell you what the home is asking you to solve.

For a focused look at what to learn first about home fall risks, safe movement patterns, and when to bring in professional guidance, see our article on fall prevention education at home.

Step 1: Remove Immediate Hazards

Immediate hazards are surface and pathway conditions that can trip, snag, or destabilize a person mid-stride. They are the highest-priority items on the plan because they act directly on every route, every day, and because removing them costs little or nothing. The goal of this step is to eliminate conditions that interrupt a walking stride or a footing adjustment before anything structural is addressed.

Loose Rugs and Unsecured Mats

Area rugs, bath mats, and runner rugs are among the most consistent fall contributors in residential settings. A rug that shifts underfoot during a weight transfer, or whose edge catches the front of a foot mid-stride, can redirect a step in ways that are very difficult to recover from. The fix is not always removal. Rugs with non-slip backing, double-sided carpet tape, or rug anchors can stabilize many in-place rugs. But rugs in high-transition zones (the path from the bed to the bathroom door, in front of the toilet, at the entry to the shower) deserve particular scrutiny. If a rug cannot be anchored flat and firmly, removal is the better outcome than a partially secured surface.

Bath mats outside the shower should be non-slip underneath, flat against the floor, and free of curled edges that a foot can catch on.

Cords and Pathway Obstructions

Extension cords, lamp cords, and charging cables that cross a walking path are clear trip hazards. Route any cord that crosses a floor path to the wall perimeter and secure it with a cord clip or cable cover. If a lamp or device cannot be repositioned to keep its cord off the floor, consider a battery-powered or rechargeable alternative. Phone and tablet chargers on the floor beside a bed or chair are easy to overlook because they are familiar, but a mid-stride snag on a thin cable can cause a sudden, uncontrolled step.

Pathway obstructions extend beyond cords. A stack of books on the floor near a reading chair, a step stool left in the kitchen, a bag or box in the hallway, or a pet’s water bowl in a frequently used corridor all narrow the effective walking path. The daily route should be wide, clear, and predictable. Anything that moves from day to day, or that might not be where it was the day before, belongs off the primary walking path.

Unstable Furniture Used for Support

In many homes, older adults grip chairs, countertops, windowsills, and tables as informal support points during movement. This is not inherently wrong; it reflects a real need. The problem is when the furniture used for support is not stable under a lateral load. A chair with wheels, a side table that can slide on a hard floor, a lightweight shelving unit not anchored to the wall – these can all move at the moment they are loaded, removing the expected support at the worst possible time.

Step 2: Add Support Points Where Transfers Happen

A transfer is any movement where the body shifts from one position to another: sitting to standing, standing to stepping into a shower, stepping down onto a stair. Transfers are mechanically demanding because they require single-leg balance at the moment of transition. Adding a fixed support point at each high-demand transfer significantly lowers the physical cost of the movement and reduces the consequence of a momentary loss of balance. Falls in bathrooms are 2.4 times more likely to cause injury than falls in the living room.2 Bathroom transfers are where support points matter most.
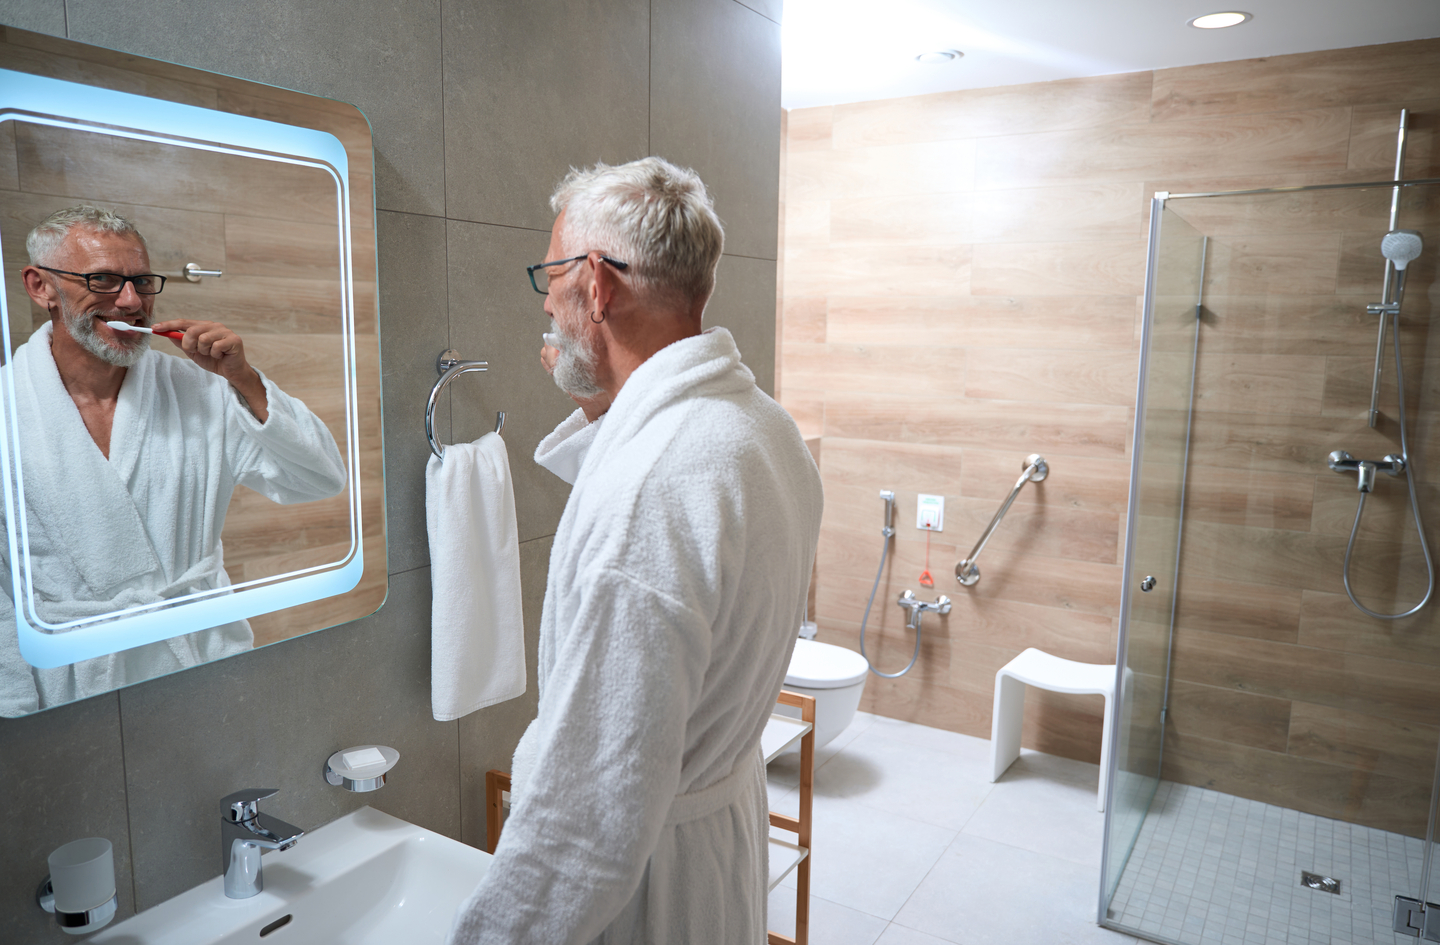
An older man brushes his teeth in a modern bathroom featuring a walk-in shower with safety grab bars and a shower stool
A modern bathroom fitted with safety grab bars in the walk-in shower and a shower stool, showing how support points and seated options reduce fall risk at the highest-risk transfer zones.

“Falls in bathrooms were 2.4 times more likely to cause injury compared to living rooms (95% CI = 1.2-4.9).”2

Gill TM and colleagues, community fall outcomes study, PLoS One, 2016

Grab Bars in the Bathroom

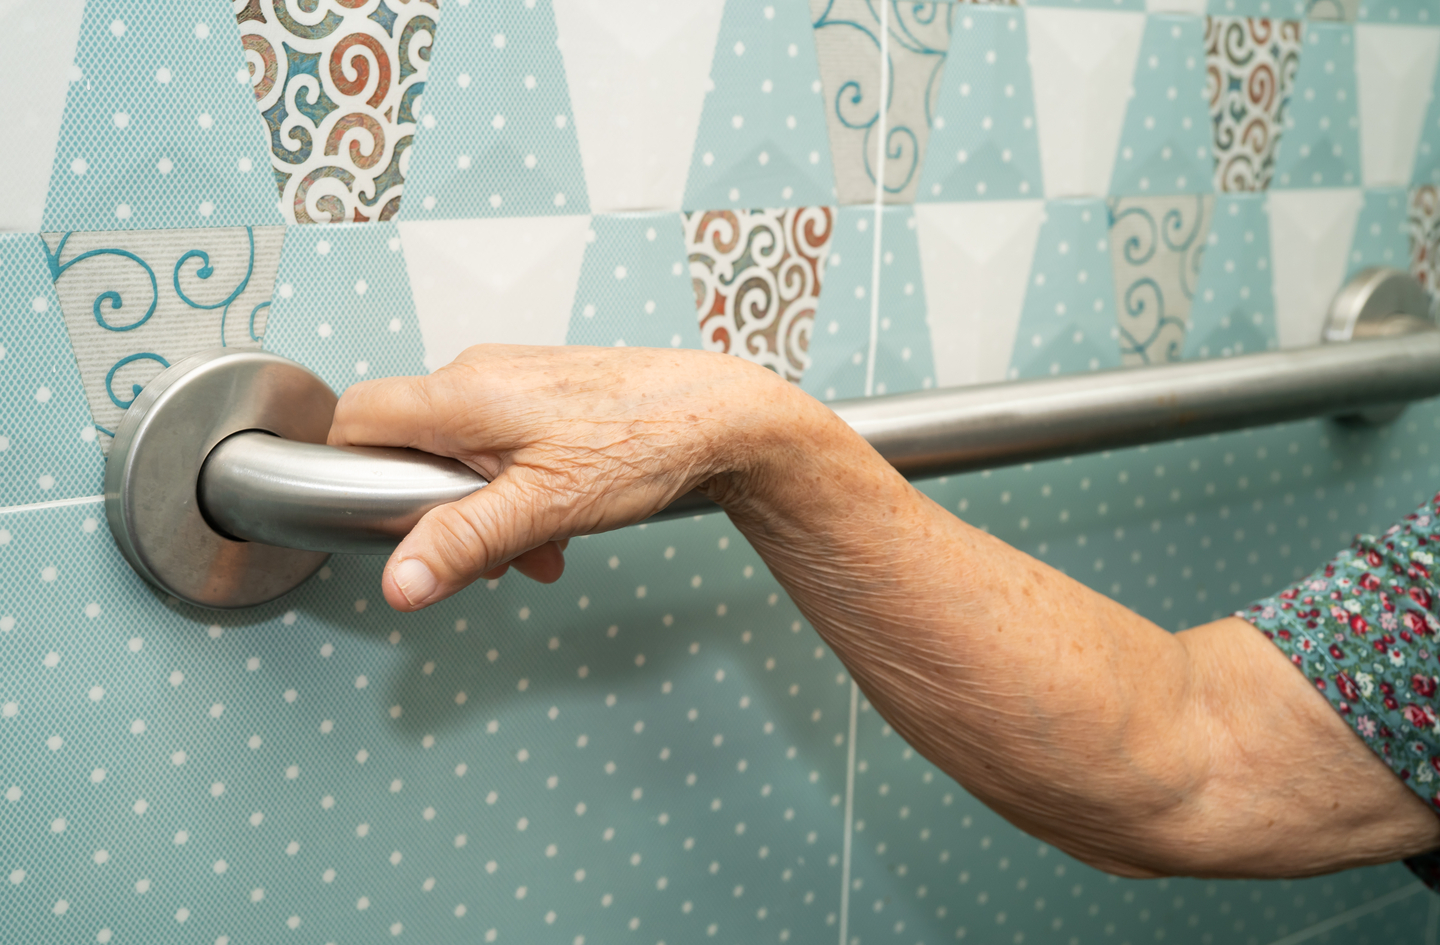
Grab bars address the bathroom’s specific combination of wet surfaces, confined space, and repeated transfers. The toilet transfer (sit-to-stand and stand-to-sit) and the shower or tub entry are the two highest-demand points. At the toilet, a bar on the dominant-hand side wall, positioned at a height that allows the elbow to be slightly bent when gripped from a seated position, gives effective mechanical leverage for the stand. At the shower, a vertical bar at entry and a horizontal bar along the shower wall at standing height give a stable guide through the step in and a support point once inside.

Grab bars must be anchored into wall studs or into blocking installed specifically for that purpose. A bar that pulls from drywall under a lateral load offers no real protection. If you are not certain of the mounting quality of an existing bar, a licensed contractor can inspect the installation and confirm or correct it. An estimated 234,094 nonfatal bathroom injuries are treated in U.S. emergency departments each year, and 81.1% of those injuries are caused by falls.3 The mounting quality of the bar is not a detail to guess at.

Handrails on Stairs and Steps

A staircase with a handrail on only one side, or with a rail that does not extend the full length of the run, leaves a critical support gap at the top and bottom steps where descent is initiated and terminated. Both are high-demand moments. Handrails should run continuously from the top newel post to the bottom, be graspable (round or oval cross-section, 1.25 to 1.5 inches in diameter is generally comfortable for most adult hands), and be at a height that allows the arm to hang nearly straight when the hand is on the rail at mid-stair. If the home has stairs and only one handrail, adding a second rail on the opposite wall is often among the highest-leverage investments in the plan.

Transfer Aids at the Bed and Chair

The sit-to-stand transfer from a bed or chair requires a forward lean over the base of support, a weight shift to the feet, and an upward push. Difficulty increases when the seat is too low, too soft, or too far from any fixed support. A bed rail or transfer pole gives a grip point during the push phase; a raised toilet seat reduces the vertical distance of the transfer itself. Falls were the mechanism of injury in 88.4% of hip fracture hospitalizations among adults 65 and older in 2019.4 A fixed grip at the transfer reduces balance demand at the critical moment.

Step 3: Improve Lighting Along Daily Routes

Lighting is consistently underweighted in fall-prevention planning, in part because its contribution to stability is indirect. Poor lighting does not cause a fall directly. It removes the visual information that allows the brain to anticipate and correct for surface changes before a foot makes contact. When that information is absent or degraded, the margin for recovery shrinks. A 2024 study of residential care facilities found that a 100-lux increase in lighting was associated with a 9 to 13% reduction in fall rate, and that 41.9% of bathrooms in those facilities measured below the 150-lux recommended threshold.7 The pattern in private homes is similar in principle.

Night Lights and Motion-Activated Lighting

The nighttime route from the bedroom to the bathroom is one of the highest-risk trips in the home. It combines reduced alertness, reduced contrast sensitivity, a need to navigate while still partly disoriented from sleep, and the urgency of a toileting need. Plug-in night lights along this route, placed low enough to illuminate the floor rather than create glare, lower the visual cost of the trip substantially. Motion-activated variants are useful because they turn on only when someone enters the path, removing the need to locate a switch in the dark.

Stair and Hallway Lighting

Stair lighting serves a specific function: it needs to illuminate the tread surface and the edge of each step, not just the staircase volume. Overhead lighting at the top or bottom of the stairs often leaves the individual treads in shadow. Step lights mounted at the base of each riser, or low-profile strip lights along the stair stringers, illuminate the tread surface directly and make the edge of each step easier to judge underfoot.

Hallways that connect bedrooms to bathrooms or living spaces benefit from continuous lighting rather than single-point fixtures. A fixture at one end of a long hallway creates bright and dim zones, and the transition into a dimmer zone can cause a momentary hesitation in step. Multiple lower-wattage fixtures, or a continuous strip of LED lighting at baseboard height, give more even illumination without glare from above.

Task Lighting in the Bathroom and Kitchen

The bathroom vanity is typically lit from above or from both sides of the mirror, which is good for facial illumination but does not necessarily light the floor near the toilet or shower entry. A secondary light source aimed at the floor zone, or a brighter overall fixture, reduces the contrast between the lit vanity area and the less-lit areas around the toilet and shower.

Step 4: Reduce Thresholds and Improve Room Access

Thresholds, door transitions, and sudden floor-level changes interrupt the rhythm of a walking stride. A foot that catches on a threshold edge does not have to travel far off course to cause a fall, because the interruption happens at speed. Even a threshold of half an inch can create a meaningful risk for someone whose foot clearance during a stride has reduced. Reducing or eliminating these transitions where possible is a high-value modification that is often underestimated because the individual elements appear too small to matter.

Door Transitions and Floor Changes

Flush or low-profile threshold strips are available as replacements for raised transition bars and can be retrofitted without flooring work in most cases. Where the floor height difference between two rooms is itself the source of the transition, a small beveled ramp strip (sometimes called a reducer strip) can soften the edge to a slope rather than a step, which is much easier to navigate. Standard doorways with a threshold height of three-quarters of an inch or more are the most common targets.

Carpet-to-hard-floor transitions in hallways are worth inspecting carefully. If the carpet has become proud of the adjacent floor due to pad compression, the resulting edge can catch a sliding foot and should be trimmed flat or fitted with a transition bar.

Bathroom Entry and Wet-Zone Access

The bathroom door threshold and the shower or tub lip are two of the most significant access transitions in the home. A traditional bathtub lip can be 18 to 22 inches above the floor, requiring a high step-over leg lift with full weight on the standing leg – a mechanically demanding position. A walk-in shower with a curbless or low-curb entry eliminates that specific transfer and replaces it with a much lower-demand step-in. If a tub is being retained and a full replacement is not feasible, a tub cut-out kit (a retrofit modification made by a licensed contractor) can lower the step-over height to a few inches.

The bathroom door itself deserves attention. A door that swings inward into a small bathroom can block the space needed to turn and transfer at the toilet, and cannot be opened from the outside if someone falls against it. An outswing door, a pocket door, or a barn-style sliding door each resolves this geometry problem differently. These are structural modifications that belong with a licensed contractor.

Step 5: Build Safer Daily Habits

This behavioral layer of the fall-prevention plan shapes how the person moves within the environment that the earlier steps have prepared. Some of the most effective habit changes are also the simplest. They do not require products or contractors. They require a decision made once, consistently applied.

Fall Rate per 1,000 Patient-Years: Exercise vs. No Exercise Control group (no exercise intervention): 850 falls per 1,000 patient-years. Exercise intervention group: 655 falls per 1,000 patient-years. Difference: 195 fewer falls, a 23% reduction. Source: Colon-Emeric et al., JAMA 2024, as cited in Sessa et al., PMC 2025 (PMC12224174). Additional context: 66.8% of falls among community-dwelling older adults occur inside the home (Gill TM et al., PLoS One 2016, PMC4700929), making home-based exercise a concentrated-impact intervention. Fall Rate per 1,000 Patient-Years: Exercise vs. No Exercise 0 200 400 600 800 1,000 850 655 No Exercise With Exercise Control group Exercise intervention Source: Home Age Fit analysis, 2026
Exercise interventions reduced fall rates from 850 to 655 per 1,000 patient-years (a 23% reduction) in a meta-analysis of 64 randomized trials;6 because 66.8% of falls occur at home,2 home-based movement routines represent a concentrated-impact habit. Compiled by Home Age Fit from Colon-Emeric et al. (JAMA, 2024) and Gill TM et al. (PLoS One, 2016).

Footwear and Floor Socks

Walking barefoot on smooth or hard floors, or in socks without grip, removes the friction layer between the foot and the surface. Slippers with thin, flat soles and no back strap can slide or come off mid-stride. The better habit is to wear lace-up or strap-fastened footwear with a rubber or textured sole whenever moving around the home, including the brief trip from the bed to the bathroom at night. A pair of slip-resistant slippers with a closed back, kept at the bedside, costs little and replaces a consistently risky improvisation with a consistent, lower-risk choice.

Medication Review and Timing

Some medications, including certain blood pressure drugs, diuretics, sedatives, and antidepressants, can affect balance, blood pressure on standing (orthostatic hypotension), and alertness, all of which increase fall risk. This is a conversation for a prescribing physician or pharmacist, not a self-assessment. But the habit layer is relevant here: taking diuretics late in the evening, for example, can increase the frequency of the nighttime bathroom route, which is itself a high-risk trip. A prescriber may be able to adjust the timing without changing the medication or dose.

Similarly, the first few minutes after rising from a lying or seated position can involve a brief drop in blood pressure. Sitting at the edge of the bed for 30 to 60 seconds before standing, rather than rising immediately, allows blood pressure to stabilize before the first step. This is a simple, cost-free habit that addresses a real physiological pattern.

The Nighttime Bathroom Route

Falls related to toileting occur in a significant share of emergency-department fall admissions among older adults, and more than 63% of those toileting-related falls occur between midnight and 6 AM.5 The nighttime bathroom route is the highest-frequency high-risk trip in the daily pattern for many seniors and deserves its own habit set.

Step 6: Sustain the Plan with Regular Review

A fall-prevention plan is not a one-time project. The home changes, the person’s needs change, and a condition that was well-managed six months ago may need re-examination. A scheduled review, done at least twice a year, turns the plan from a static document into a living system.

The Seasonal Walk

Twice a year, repeat the observation walk from the “Before You Start” section with fresh eyes. Look for anything that has been added or rearranged since the last review: new furniture, a new appliance cord, a rug that has migrated, a grab bar whose mounting may have loosened slightly. Seasonal changes matter too. In winter months, entry rugs can become wetter and more slippery, exterior steps may become hazardous depending on climate and drainage, and the shift to bulkier clothing can affect balance and stride width in ways that are worth anticipating rather than discovering.

The seasonal walk is also the time to test existing grab bars and handrails under load. A bar that has been in place for two years may have worked loose at one anchor point. This is easily caught and corrected if looked for; it is not caught at all if the inspection never happens.

Tracking Changes and New Needs

Any change in health status – a new medication, a recovered surgery, a change in vision, a balance issue that was not present before – is a signal to review the plan between the scheduled walks. The plan should respond to the person, not remain fixed around conditions that no longer match the current situation.

Occupational therapists (OTs) specialize in evaluating how a specific person’s mobility, balance, strength, and vision interact with the specific physical environment of their home. If a significant health change has occurred, or if the person or caregiver is uncertain whether the current setup is still adequate, an OT evaluation is the right next step. The guidance in this article is engineering-informed education; it is not a substitute for a professional evaluation of a specific person in a specific home.

Fall Prevention for Seniors: Common Planning Mistakes

Most fall-prevention plans fail not because the right products are absent, but because the planning logic is applied in the wrong order or is incomplete in predictable ways. The four patterns below are the most common.

Starting With Products Instead of Routes

Buying a grab bar before identifying where someone hesitates or grabs informally during the actual daily route is the most common planning error. The product gets installed where it is convenient to install, not where the route actually demands it. Walk the routes first. Let the friction points identify the support locations. Then buy or install. The grab bar installed at the right place, in the right orientation, anchored correctly, provides real benefit. The same bar installed in the wrong location provides false reassurance.

Treating the Bathroom as the Only Risk Zone

The bathroom is the highest-injury-risk room in the home, but it is not the only risk zone. Stairs, the front entry, the bedroom-to-bathroom path at night, and the kitchen all carry significant fall risk depending on the person’s daily pattern. A plan that addresses only the bathroom leaves gaps in the very routes that connect to it. Address the bathroom thoroughly, but map the full home, not just the room with the most visible risk.

Skipping the Nighttime Route

Many home walkthroughs happen during the day, in normal lighting, with the person fully alert. The nighttime bathroom route is a different experience entirely: lower alertness, lower light, a different physiological state, and often a degree of urgency. Planning only for daytime conditions misses the conditions under which many falls actually occur. Walk the route at night. Test the lighting. Confirm that the existing supports are reachable and in the right position during a nighttime transit specifically.

Fixing Once and Moving On

A plan reviewed once and then set aside becomes obsolete. Grab bars can loosen. Rugs can shift back to old positions. New furniture can re-introduce a pathway obstruction. A person’s balance or strength can change in ways that require a different level of support than was adequate a year ago. Aging in place is system tuning, not a one-time renovation. Scheduling the seasonal review, and treating it as a non-optional maintenance task, is what keeps the system working.

Frequently Asked Questions

Which room in the home has the highest fall risk?

The bathroom. Research on community-dwelling older adults found that bathroom falls are 2.4 times more likely to cause injury than falls in the living room.2 An estimated 234,094 nonfatal bathroom injuries are treated in U.S. emergency departments each year, with 81.1% caused by falls.3 Grab bars at the toilet and shower, non-slip mats, and improved lighting target this room’s specific risk profile.

How do I prioritize fall-prevention changes on a limited budget?

Start with immediate hazards: removing loose rugs, securing cords, and clearing pathways costs little or nothing. Night lights and slip-resistant footwear are low-cost, high-impact improvements. Grab bars and handrail upgrades come next and require a modest investment plus installation. Structural modifications (threshold reductions, door swing changes, curbless shower conversions) are the most expensive and should come after the lower-cost steps are in place.

Why is lighting such an important part of a fall-prevention plan?

Poor lighting removes the visual information needed to anticipate and correct for surface changes before a foot makes contact. A 2024 study in residential care settings found that a 100-lux increase in lighting was associated with a 9 to 13% reduction in fall rate, and that 41.9% of bathrooms measured below the recommended 150-lux threshold.7 Night lights on the bedroom-to-bathroom route address the highest-frequency nighttime risk without structural changes.

How often should I review the home fall-prevention plan?

At least twice a year, plus after any significant health change, new medication, change in balance or vision, or rearrangement of the home. A plan that worked well six months ago may need adjustment if furniture has moved, if a grab bar has worked loose, or if the person’s mobility has shifted. Scheduling the review in advance, rather than relying on a problem to prompt it, is what keeps the plan current.

When should I bring in a professional for a home fall-prevention assessment?

When changes involve structural work (mounting grab bars into tile, replacing a handrail, modifying a threshold, or converting a tub to a walk-in shower), a licensed contractor is needed. When a person’s mobility, balance, or vision has changed significantly, an occupational therapist can evaluate the specific person-environment fit that general guidance cannot address. An OT assessment is especially valuable after a fall, surgery, or new neurological or musculoskeletal diagnosis.

Limitations and Edge Cases

  • This guide addresses the standard community-dwelling home. Apartments, condos, and rental units may have restrictions on structural modifications (grab bar installation, threshold changes, door swing alterations); a landlord’s written permission and reversible mounting solutions are often required.
  • The lighting data cited above comes from a New Zealand residential care study (Emad et al., 2024) and should be understood as directional evidence for the lighting-fall relationship, not a precise figure for all home environments.
  • Person-specific factors (medical conditions, mobility aids, specific balance or vision impairments) require an occupational therapist’s evaluation. This guide provides an educational planning framework, not a substitute for that assessment.

References

  1. National Council on Aging – Get the Facts on Falls Prevention. NCOA, 2024. Reports 14 million annual falls among adults 65+ and $80 billion annual healthcare cost for non-fatal falls.
  2. PubMed Central – PLoS One – Gill TM, Murphy TE, Gahbauer EA, Allore HG. Circumstances and Outcomes of Falls Among High-Risk Community-Dwelling Older Adults. PLoS One. 2016;11(1):e0148370.
  3. CDC – Morbidity and Mortality Weekly Report – Stevens JA, Haas EN, Haileyesus T. Nonfatal Bathroom Injuries Among Persons Aged 15 Years or Older. MMWR. 2011;60(22):729-733.
  4. PubMed Central – Journal of Aging Health – Moreland BL, Legha JK, Thomas KE, Burns ER. Hip Fracture-Related Emergency Department Visits, Hospitalizations and Deaths by Mechanism of Injury among Adults Aged 65 and Older, United States 2019. Journal of Aging Health. 2022.
  5. PubMed Central – Association Between Toileting and Falls in Older Adults Admitted to the Emergency Department and Hospitalised: A Cross-Sectional Study. PMC, 2023.
  6. PubMed Central – Risk Assessment and Prevention of Falls in Older Community-Dwelling Adults: A Review. PMC, 2025. Cites Colon-Emeric et al., JAMA 2024, meta-analysis of 64 randomized trials on exercise interventions.
  7. PubMed Central – Journal of Applied Gerontology – Emad Y and colleagues. Shedding Light on Falls: The Effect of Lighting Levels on Fall Risk in Long-Term Residential Care Facilities. Journal of Applied Gerontology, 2024.

Conclusion

Effective fall prevention for seniors is a system, not a single fix. It follows a specific order: remove immediate hazards first, add support at transfer points, improve lighting on daily routes, reduce thresholds, build safer habits, and sustain the plan with regular review. Each step reinforces the next.

For the broader context on how to sequence these priorities across the home, see the overview in our fall-prevention priorities guide for how this plan fits within safer aging at home.
Wheelchair Accessible Kitchen Design: A Practical Guide

Author: Oded Feigin · Created On: July 31, 2026 · Last Updated: August 24, 2026

A wheelchair accessible kitchen is one of the most impactful and least-planned rooms in home accessibility. Standard kitchen design places counters at 36 inches, runs plumbing beneath the sink, and puts appliance controls at the back of each unit – each decision adding friction for a seated user. A 2024 study in the International Journal of Environmental Research and Public Health found that 49% of wheelchair users with spinal cord injury report difficulty preparing even simple meals5. Our accessible kitchen design overview covers the broader picture; this guide focuses on the specific measurements, layout logic, and planning decisions that make each area work.

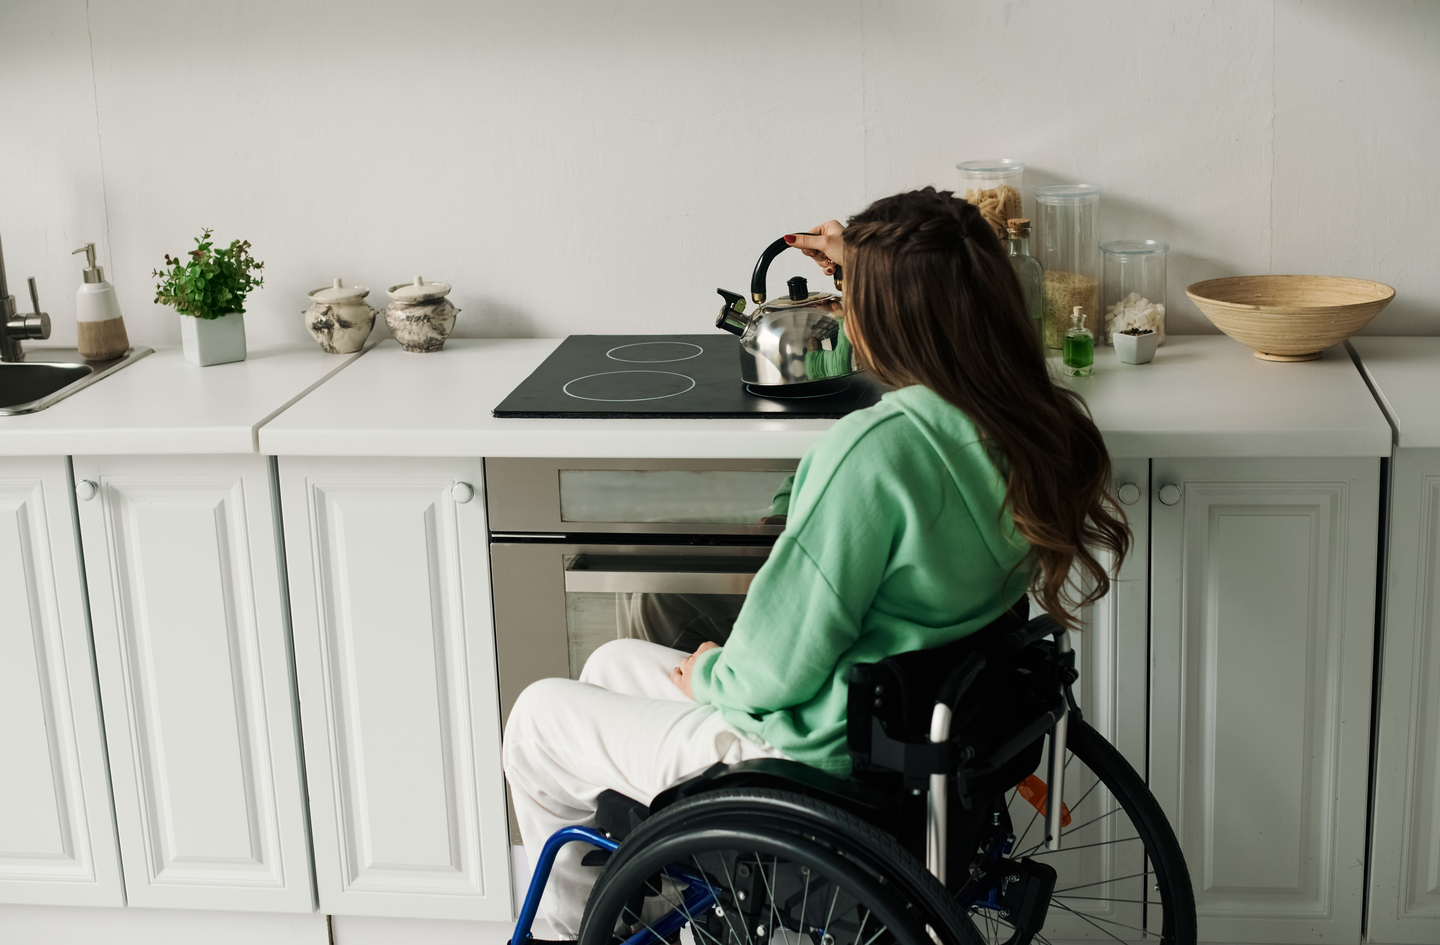
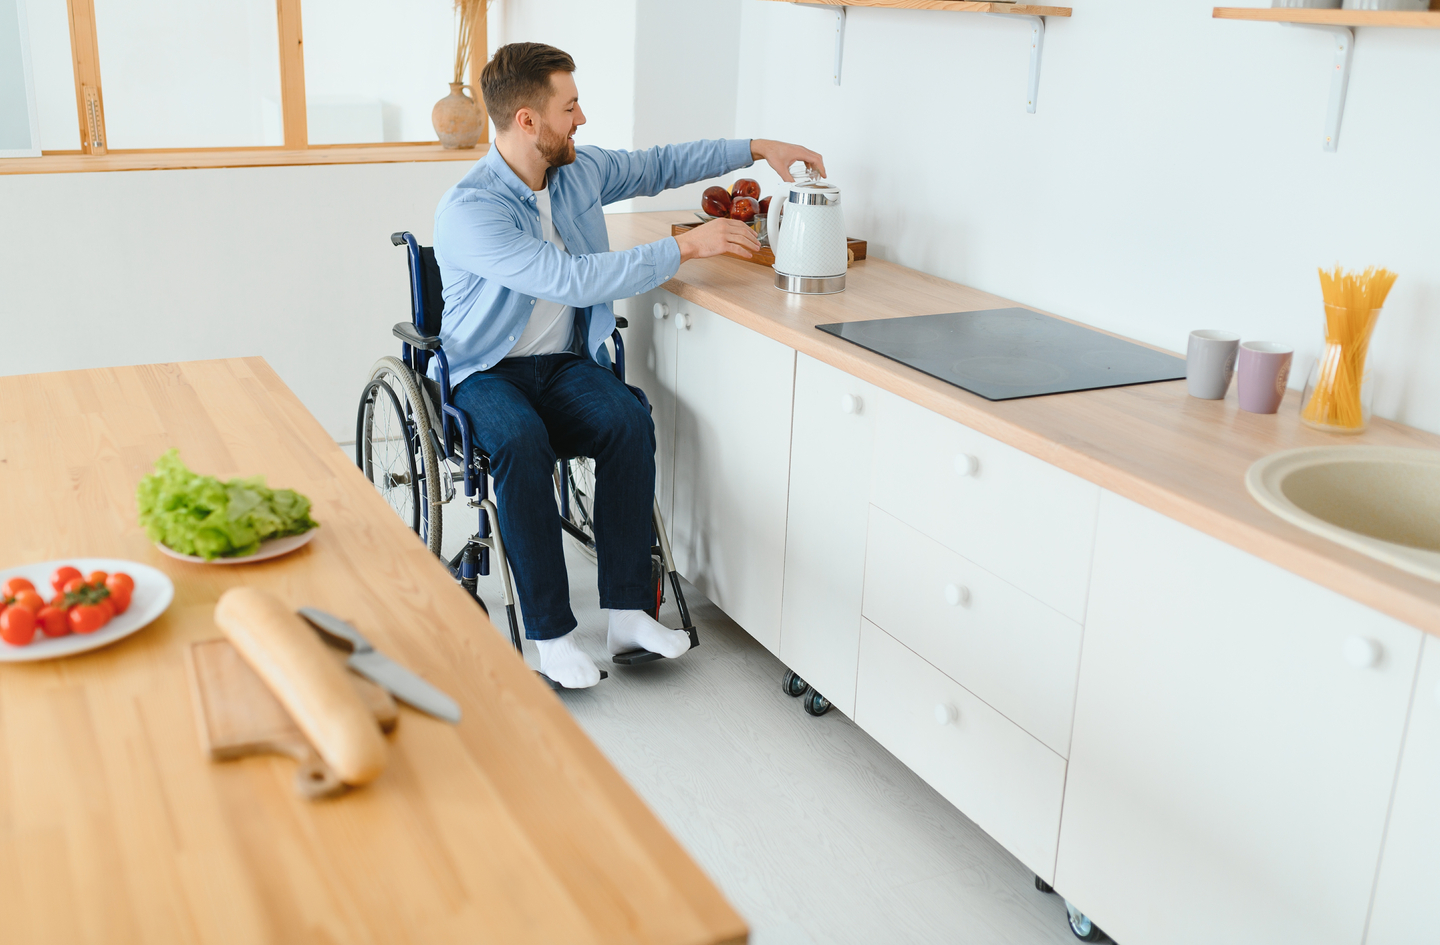
A man in a wheelchair reaches for an electric kettle at a lowered wheelchair accessible kitchen counter in a modern bright kitchen.
A lowered counter at the right height lets a wheelchair user operate independently without strain or overhead reach.

Quick Answer

What does a wheelchair-accessible kitchen actually require?

A wheelchair accessible kitchen needs at least a 60-inch diameter turning circle in the work area1, counters no higher than 34 inches with 27-inch knee clearance underneath2, a 40-inch minimum aisle in pass-through layouts (60-inch in U-shaped designs)3, and storage organized within the 15-to-48-inch side-reach range1. These measurements come from the ADA Standards for Accessible Design and serve as evidence-based planning targets for residential retrofits.

Key Takeaways

  • A 60-inch diameter clear floor space is the minimum turning area for a manual wheelchair in a kitchen work zone.
  • ADA-compliant counter height for wheelchair use is 34 inches maximum, with knee clearance of 27 inches high and 30 inches wide under any work surface.
  • Kitchen aisles need 40 inches minimum for a pass-through layout and 60 inches for a U-shaped design.
  • The practical side-reach zone for wheelchair users runs from 15 to 48 inches above the floor, placing most overhead cabinets and floor-level storage outside daily independent use.
  • Research found that more than three in four wheelchair users who needed accessible worktops or adjustable cabinets did not have them at home.

Step 1: Map Turning Space and Traffic Routes First

Before specifying a counter height or cabinet position, map where a wheelchair can turn. This step comes first because every subsequent decision flows from whether a wheelchair can pivot and approach each work area without a multi-point reposition. In most home kitchens, this mapping step reveals which constraints matter most before any contractor is hired.

The 60-inch rule and how to apply it

The ADA Standards for Accessible Design require a clear floor space of 60 inches in diameter for a wheelchair to complete a full circular turn, or a T-shaped space within a 60-inch square with arms and stem at least 36 inches wide1. At least one such turning area must be positioned where the person actually works, not somewhere convenient on the drawing. Take a tape measure and mark 60 inches on the floor. Move it through the room. Every place that circle cannot clear appliances, cabinets, and furniture is a friction point worth solving before construction begins.

Turning space and appliance doors interact in ways the drawing often misses. A refrigerator door swept open adds 30 or more inches to the clearance demand. An oven door dropped open creates a low barrier across the aisle. Mapping the turning circle first makes these door-swing conflicts visible before tile is set and cabinets are ordered.

Aisle widths: the minimum that shapes the layout type

ADA §804 sets the minimum aisle width for wheelchair accessible kitchen work areas at 40 inches for a pass-through layout and 60 inches for a U-shaped kitchen enclosed on three contiguous sides3. A standard kitchen aisle is often 36 inches, which leaves a wheelchair several inches short of maneuvering room. Adding aisle width is the highest-leverage structural change in most kitchen accessibility retrofits because it determines whether a wheelchair can rotate, approach the sink, open an oven door, and pass another person without constant repositioning.

Once turning space is located and aisles are measured, a clear-eyed decision can be made about the kitchen layout type: whether to optimize within the existing footprint, expand an aisle by moving a cabinet run, or reconfigure the kitchen shape entirely. A licensed contractor and an occupational therapist can assess which option is structurally feasible for the specific home and user.

Step 2: Set Counter and Work Surface Heights

A standard kitchen counter at 36 inches sits well above a wheelchair user’s comfortable working height. Lowered work surfaces change what cooking looks like from a seated position: no more straining upward, no more working blind over a counter edge that cannot be seen into from a wheelchair. This is the design change most often requested in accessible kitchen retrofits, and the one with the most downstream consequences for plumbing, cabinetry, and structure.

The ADA height standard and what it means in practice

The ADA Standards specify that work surfaces in accessible kitchens must be 34 inches maximum above the floor, with an adjustable range from 29 to 36 inches permitted2. The 34-inch maximum is the height at which a wheelchair user’s arms can work without the shoulder elevation that fatigues over time. For households where both wheelchair users and standing users share the kitchen, a split layout with one lowered section and one standard-height section, or an adjustable-height counter mechanism, lets each person work comfortably. A licensed contractor should assess the structural and electrical requirements before ordering any adjustable unit.

Knee clearance: the requirement beneath the surface

A lowered counter is not usable unless there is space for a wheelchair to approach it from the front. ADA §306 requires knee clearance of 27 inches high, 30 inches wide, and 17 to 25 inches deep under any counter where a seated person is expected to work2. The base cabinet beneath a wheelchair-accessible work section must be either removed entirely or replaced with a recessed unit that provides open leg space. Plumbing and structure go with the cabinet when this modification happens, making it a project for a licensed plumber and contractor.

Toe space matters too. At least 9 inches of height at 6 inches of depth allows a wheelchair to roll close enough to use the surface above. Without adequate toe space, even a correctly lowered counter keeps the user at arm’s length.

Step 3: Design the Wheelchair Accessible Kitchen Sink

The kitchen sink is the most-used and hardest-to-adapt element in most kitchens. A standard deep sink with centered plumbing, an apron front, and back-mounted controls requires reaching, leaning, and managing hot pipes against the legs simultaneously. A properly planned accessible sink resolves these problems through three coordinated changes that must be specified together, not added one at a time.

Rim height, knee clearance, and pipe insulation

The ADA standard sets the wheelchair accessible kitchen sink rim at 34 inches maximum, with knee clearance of 27 inches high, 30 inches wide, and 17 to 25 inches deep2. Under-sink water supply and drain pipes must be insulated, enclosed, or routed to prevent contact with the user’s legs. This is a plumbing specification as well as an ergonomic one, and it belongs in the renovation scope from the beginning rather than as a post-installation add-on.

Offset drain position and shallow basin depth

A centered drain forces the trap and supply lines directly into the knee clearance space. An offset drain, positioned toward the back or corner of the basin, routes the pipe to the side of the knee space rather than through it. A shallow basin of 5 to 6 inches allows the user to work inside the sink without the basin wall blocking reach to the bottom. These two details are among the most frequently overlooked at the planning stage and the most costly to correct after installation, because changing a drain position after tile is set may require cutting the finished floor.

When specifying a wheelchair accessible kitchen sink cabinet, confirm that the drain offset and shallow basin are built into the fixture selection before ordering. A standard undermount sink in a modified cabinet often still has a centered drain that requires rerouting.

Faucet controls: position and operating force

ADA §309 requires faucet controls operable with one hand and no more than 5 pounds of operating force1. Lever-style and single-handle controls meet this standard; round knobs that require grip and rotation do not. Front-mounted or side-mounted controls, rather than the standard rear position, bring the faucet within easy reach from a seated position without requiring the user to lean across the basin. A touchless or motion-sensing faucet removes the control step entirely for users with limited hand strength.

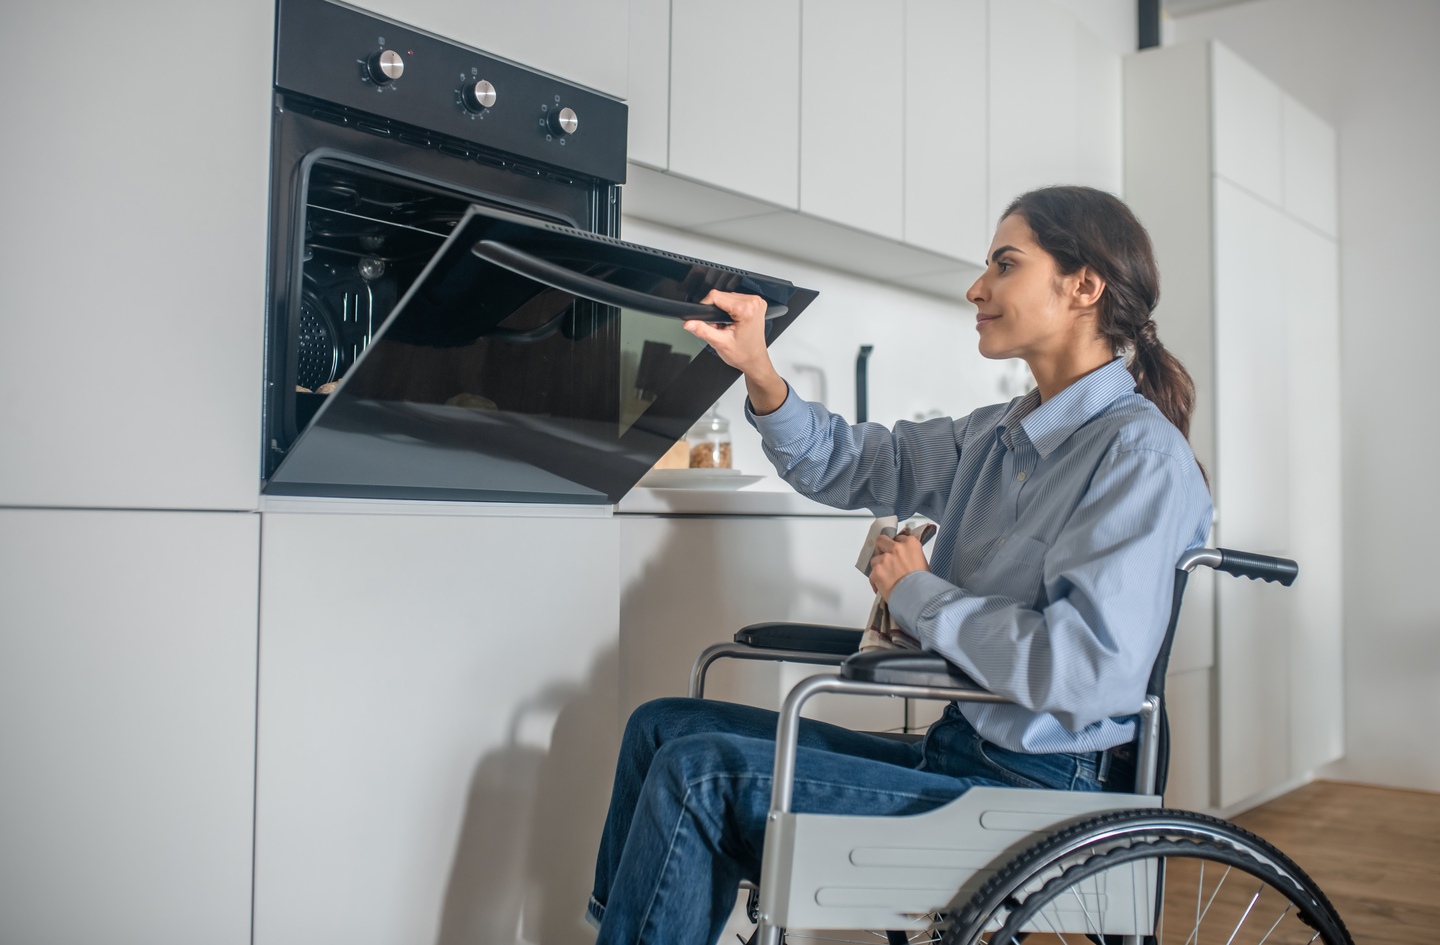
A woman in a wheelchair opens a built-in oven door in a modern white kitchen, showing accessible appliance placement at a reachable height.
Appliances positioned at accessible heights, with front-mounted controls and a clear side landing surface, are a planning priority for independent wheelchair kitchen use.

Step 4: Plan Appliance Placement for Seated Reach

Standard kitchen appliances were designed around a standing user. Refrigerator freezer shelves at 60 inches, range controls at the back of the cooktop, and wall ovens with controls above 50 inches all require reaching that exhausts or excludes a seated user. Accessible appliance placement addresses reach, control location, and approach clearance for each major appliance as a coordinated plan.

The reach zone and where standard appliances fail it

The ADA reach range for wheelchair users is 15 to 48 inches above the floor for both forward and side reaches when the approach is unobstructed1. A standard refrigerator freezer shelf sits at 54 inches or higher. A conventional wall oven positions controls above 48 inches. A gas or electric range with rear-mounted controls requires a forward reach of 20 or more inches over an active cooking surface, placing the user’s arm over heat while seated below the panel. Each of these exceeds the reach zone and adds physical effort and risk to daily cooking.

Refrigerator: French-door and counter-depth configurations

French-door refrigerators with bottom freezer drawers keep the most-used fresh-food section accessible between 15 and 60 inches for most of the cabinet depth. Counter-depth models project only to the depth of adjacent cabinets, reducing the forward reach required to access back shelves. Side-by-side refrigerators split the freezer vertically, keeping some frozen items accessible, but their full-depth design typically makes back shelves unreachable from a wheelchair. French-door counter-depth models are generally the most accessible configuration for a user approaching from the front.

Cooktop: smooth-top with front or side controls

A smooth ceramic or induction cooktop, mounted at accessible counter height with knee clearance underneath, eliminates the raised burner grid that makes a standard gas range difficult to manage from a seated position. Controls located at the front edge keep every burner setting within the reach zone and remove the need to reach over active heat. An induction cooktop offers an additional consideration: the surface between cooking zones does not heat, which reduces the consequence of incidental contact from a position where pulling back quickly requires more effort than when standing.

Oven and microwave: position over type

A wall oven mounted with its door opening at counter height, or a drawer-style oven, allows a wheelchair user to pull out a rack and slide a dish laterally onto an adjacent surface rather than lifting it straight up from a floor-level oven. A clear counter section at the same height as the open oven rack should be within 15 inches to one side. A microwave mounted at counter height with front-panel controls provides a heated food access point without the overhead reach an over-range unit requires. A licensed contractor should verify structural support and electrical access for any wall-oven height change before finalizing the position.

Kitchen Independence Barriers for Wheelchair Users Study 1, Hertig-Godeschalk et al. J Spinal Cord Med 2018: 78.7% of wheelchair users who needed accessible worktops lacked them; 75.7% lacked adjustable cabinets; 29.7% lacked an accessible sink. Study 2, Froehlich-Grobe et al. IJERPH 2024: 49% reported difficulty preparing simple meals. Kitchen Independence Barriers for Wheelchair Users Unmet adaptation needs, Hertig-Godeschalk et al. 2018 Accessible worktop 79% Adjustable cabinets 76% Accessible sink 30% Meal preparation difficulty, Froehlich-Grobe et al. 2024 Simple meal prep 49% 0 25% 50% 75% 100% Percentage of wheelchair users Lacking needed adaptation Reporting meal difficulty Source: Home Age Fit analysis, 2026
Three in four wheelchair users who need accessible worktops or adjustable cabinets lack them at home; independently, 49% report difficulty preparing simple meals. Compiled by Home Age Fit from Hertig-Godeschalk et al. (J Spinal Cord Med, 2018) and Froehlich-Grobe et al. (IJERPH, 2024).

Step 5: Reorganize Storage Within the Reach Zone

Standard kitchen storage is built for standing users: overhead cabinets run to 7 feet, base cabinets require bending to reach the back, and corner units demand a twisting reach around the door. For a wheelchair user whose practical reach zone runs from 15 to 48 inches above the floor, most of this storage either requires assistance or goes unused. Reorganizing storage around the actual reach zone changes what independent cooking looks like at each meal.

The reach zone in practice: what fits where

The 15-to-48-inch side-reach range means that lower wall cabinet shelves, drawer units at counter level, and pull-out base cabinet trays are all accessible1. Upper cabinets typically start at 54 inches above the floor, which exceeds the reach ceiling by 6 inches. The planning principle: identify the 20 items used daily and locate all of them below 48 inches. Items used occasionally can remain higher; items used rarely should be removed to reduce the physical temptation to reach for them.

Pull-out drawers, rollout trays, and lever hardware

Full-extension pull-out drawers let a wheelchair user access the back of a base cabinet from a frontal approach, eliminating the deep forward lean that standard fixed-shelf cabinets require. Rollout trays in lower cabinets work similarly for pots and pans. Drawer-style dishwashers bring dish loading and unloading into the reach zone. Cabinet hardware matters throughout: lever-style pulls or D-ring handles open with a light single-hand pull, while recessed finger-pulls require grip and wrist extension that fatigue quickly at repetitive use. These wheelchair accessible kitchen cabinets details add up across every meal.

Corner storage and open shelving options

Corner base cabinets are among the least accessible storage areas in any kitchen. A standard lazy-Susan spinning unit requires reaching around the door frame. A half-shelf pull-out brings items forward and into view from the front. If corner storage is a necessity, a licensed kitchen designer can specify which hardware systems work for the specific cabinet opening size and wheelchair approach direction. A right-side approach configuration does not work for left-side approach without different hardware.

Open shelving in place of upper cabinet doors removes the door-swing demand and keeps contents visible from a seated position. Open shelving also makes it faster to scan and locate items without opening multiple doors – relevant for wheelchair accessible kitchen cupboards where reaching to open overhead doors repeatedly adds physical cost over the course of meal preparation.

Step 6: Plan the Kitchen Island or Table

A wheelchair accessible kitchen island adds a mid-room work surface at accessible height, provides knee clearance for a close frontal approach, and can serve as a landing zone, prep area, and social seating in one structure. Not every kitchen has the footprint for an island. In a small wheelchair accessible kitchen layout, the island may replace a section of base cabinetry removed to create required aisle width.

Island height, knee clearance, and perimeter aisle

A wheelchair accessible kitchen island designed for seated work needs at least one section at 34 inches or lower, with knee clearance of 27 inches high and 30 inches wide on the approach side. If the island also functions as a wheelchair accessible kitchen island with seating on the opposite face, a two-tier design with a lowered section on one face accommodates both users. The perimeter clearance around the island matters as much as the island dimensions: there must be enough clear aisle between the island and each surrounding cabinet run to complete the 60-inch turning circle while appliance doors are open1.

The accessible kitchen table option

A standard dining table at 30 inches provides knee clearance for most wheelchairs when its leg structure does not intersect the approach path. A pedestal table is often more accessible than a four-leg model because knee clearance is continuous around the pedestal base rather than interrupted by corner legs. A wheelchair accessible kitchen table works best when positioned at the edge of the turning space, not in the center of it, so the same floor area supports both meal preparation and dining without competing for the turning radius the other requires.

Common Planning Mistakes to Avoid

The most expensive errors in a wheelchair accessible kitchen renovation happen in the planning stage, not during construction. Correcting a clearance problem after tile is set and cabinets are installed costs far more than measuring correctly in advance.

Mistake 1: Designing for a generic wheelchair rather than the specific user

Wheelchair dimensions vary considerably. A manual chair is typically 23 to 27 inches wide and about 42 inches long from footrest to back. A power wheelchair can be 24 to 30 inches wide and 40 to 48 inches long. Designing a kitchen for a generalized wheelchair user without knowing the actual chair dimensions, the user’s reach preferences, and the specific mobility pattern produces a kitchen that is theoretically accessible but practically restrictive. An occupational therapist’s assessment of the specific person and chair is the most useful investment before any structural planning is committed to paper.

Mistake 2: Lowering one counter without planning the landing zone

A single lowered work surface in an otherwise standard kitchen creates one accessible work point. A complete accessible counter plan identifies every task the user performs and ensures each has an accessible surface nearby. If the microwave is mounted at 34 inches but the only clear counter space is a standard-height run 8 feet away, the accessible appliance creates a new problem: the user must transport hot food to a distant, non-accessible surface. Every landing zone must be at the same height as the task it receives.

Mistake 3: Specifying the sink position before confirming pipe routing

Moving a sink to a new position, or reconfiguring an existing sink for knee clearance, requires rerouting drain, supply, and sometimes vent pipes. In a slab-on-grade foundation, this may require cutting concrete. The structural and plumbing implications of sink relocation should be confirmed by a licensed plumber before any kitchen layout is finalized, not after a cabinet order is placed. This is the single most common cause of mid-project cost overruns in accessible kitchen renovations.

Mistake 4: Skipping a physical mock-up of critical dimensions

A pull-out shelf that extends fully into a tight aisle blocks the wheelchair user attempting to reach the next station. A door swing that clears the counter at 24 inches open but contacts the wheelchair at 30 inches passes the drawing review but fails in use. Before finalizing any layout involving new cabinetry, mock up the key interactions: use cardboard to approximate a lowered counter section, tape on the floor to mark the island footprint, and open a stand-in door to simulate the full swing. These low-cost tests catch real conflicts before irreversible changes are made.

“Most older adults want to stay in their homes, yet rising housing costs and limited options create serious barriers.”

Rodney Harrell, Vice President, AARP Public Policy Institute8

A 2024 AARP survey of 3,090 adults age 50 and older found that 75% want to remain in their current homes as they age, and 39% anticipate needing kitchen modifications8. Yet fewer than 4% of U.S. homes currently include even three basic accessibility criteria: single-floor living, no-step entry, and wide hallways7. The kitchen accessibility gap is structural, not just personal.

Key ADA Measurements for a Wheelchair Accessible Kitchen
Design Element ADA Measurement Standard (non-ADA) ADA Section
Turning circle (min. diameter) 60 in (1,525 mm) N/A §304.3.1
Counter/work surface height (max) 34 in (865 mm) 36 in §804 / §606.3
Adjustable counter range 29-36 in (735-915 mm) Fixed 36 in §804.3
Knee clearance height (min) 27 in (685 mm) Not specified §306.3
Knee clearance width (min) 30 in (760 mm) Not specified §306.3
Knee clearance depth (min) 17 in (430 mm) Not specified §306.3
Aisle width – pass-through kitchen 40 in (1,015 mm) 36 in §804.3.1
Aisle width – U-shaped kitchen 60 in (1,525 mm) 36-42 in §804.3.2
High side reach (max, unobstructed) 48 in (1,220 mm) N/A §308.3.1
Low reach (min) 15 in (380 mm) N/A §308.2.1
Toe space (min height at 6 in depth) 9 in (230 mm) Not required §306.2

What the Finished Kitchen Should Feel Like

The measurements in the table above are starting points; the real target is a kitchen where a user can prep food, reach the refrigerator, fill a kettle at the sink, transfer a dish to the oven, and carry a cup of coffee to the table in one uninterrupted sequence without repositioning or asking for help.

The CDC’s 2022 BRFSS data found that 12.2% of U.S. adults report a mobility disability involving serious difficulty walking or climbing stairs4. Research on wheelchair users specifically documents unmet kitchen adaptation rates above 75% for the most commonly needed modifications6. Those figures represent people adapting daily to kitchens never planned for them, adding physical effort to every meal. A functional accessible kitchen reduces that effort systematically and sustains it over time.

Frequently Asked Questions

What is the standard counter height for a wheelchair accessible kitchen?

The ADA Standards set the maximum accessible work surface height at 34 inches above the floor, with an adjustable range from 29 to 36 inches2. Standard kitchen counters are 36 inches, which exceeds the accessible maximum by 2 inches. For households with both seated and standing users, a split-level counter or motorized adjustable surface accommodates both without locking either user into an uncomfortable height.

How wide do kitchen aisles need to be for wheelchair use?

ADA §804 requires a minimum of 40 inches of clear aisle width in a pass-through kitchen and 60 inches in a U-shaped kitchen enclosed on three contiguous sides3. Standard kitchen aisles are typically 36 inches, falling short of both thresholds. Expanding an aisle by even 4 inches often requires removing or relocating a cabinet run. A licensed contractor should assess the specific wall and cabinet configuration before deciding how much width is achievable.

What appliances work best in a wheelchair accessible kitchen?

The best wheelchair accessible kitchen appliances share two traits: controls within the 15-to-48-inch reach zone, and a door or drawer that opens without blocking maneuvering space1. Specific choices that work well include French-door refrigerators with bottom freezer drawers, front-control smooth-top or induction cooktops at lowered counter height, wall ovens with the door opening at counter level, and drawer-style or counter-height dishwashers. Rear-mounted appliance controls are the most common accessibility failure point in standard kitchens.

What knee clearance does a wheelchair accessible kitchen sink need?

A wheelchair accessible kitchen sink requires 27 inches of knee clearance height, 30 inches of width, and 17 to 25 inches of depth, plus 9 inches of toe space at 6 inches of depth2. Under-sink pipes must be insulated or enclosed to protect the user’s legs from contact. An offset drain routed to the corner of the basin keeps plumbing out of the knee space. A shallow basin of 5 to 6 inches makes reaching the bottom feasible without leaning forward.

Does a wheelchair accessible kitchen island make sense in a small kitchen?

A wheelchair accessible kitchen island in a small layout is only viable if the 60-inch aisle clearance can be maintained on all sides while the island is in place1. In a small wheelchair accessible kitchen layout, this typically requires removing a section of base cabinetry from one wall to create the perimeter clearance the island demands. An occupational therapist or kitchen designer familiar with accessible layouts can run the geometry before any purchase is made.

Limitations and Edge Cases

  • All ADA measurements in this guide are drawn from standards written for commercial and government buildings. Residential home modifications are not legally required under the same code, but the measurements are widely used as evidence-based planning targets by occupational therapists and accessibility contractors working in private homes.
  • Wheelchair dimensions vary significantly across manual chairs, power chairs, sports chairs, and scooters. The ADA minimums presented here are a planning baseline; a specific user benefits from an occupational therapist’s assessment of their actual chair, mobility pattern, and daily kitchen tasks before any renovation scope is finalized.
  • For structural changes including wall relocation, slab cutting, or significant plumbing rerouting, consult a licensed contractor and, where applicable, a structural engineer before finalizing any layout decision based on this guide.

References

  1. U.S. Access Board – ADA Standards for Accessible Design, Chapter 3: Building Blocks. Sections §304 (Turning Space), §305 (Clear Floor Space), §308 (Reach Ranges), §309 (Operable Parts). Current (2010 ADA Standards).
  2. U.S. Access Board – ADA Guide: Chapter 6, Lavatories and Sinks. Knee Clearance §306.3; Sink/Counter Rim Height §606.3; Toe Space §306.2. Current (2010 ADA Standards).
  3. U.S. Access Board – ADA Standards for Accessible Design, Chapter 6: Plumbing Elements and Facilities. Section §804 Kitchens and Kitchenettes (Kitchen Aisle Widths §804.3.1 and §804.3.2). Current.
  4. Centers for Disease Control and Prevention – Disability Impacts All of Us Infographic. 2022 BRFSS data on U.S. adult mobility disability prevalence (12.2%). Updated July 15, 2024.
  5. Froehlich-Grobe, K. et al. – “Self-Reported Difficulty with and Assistance Needed by People with Spinal Cord Injury to Prepare Meals at Home.” International Journal of Environmental Research and Public Health, Vol. 21(11), November 2024. DOI: 10.3390/ijerph21111463.
  6. Hertig-Godeschalk, A. et al. – “Availability and need of home adaptations for personal mobility among individuals with spinal cord injury.” Journal of Spinal Cord Medicine, 2018;41(1):91-101. PMC5810812.
  7. Harvard Joint Center for Housing Studies – “Housing America’s Older Adults 2023.” December 2023. (Finding: fewer than 4% of U.S. homes include single-floor living, no-step entrance, and wide hallways as a combined set of basic accessibility features.)
  8. AARP Public Policy Institute – “2024 Home and Community Preferences Survey.” Press release, December 10, 2024. Survey of 3,090 U.S. adults age 50 and older. Quote by Rodney Harrell, Vice President, AARP Public Policy Institute.

Conclusion

A wheelchair accessible kitchen is planned from the floor up: map the turning circle and confirm aisle widths first, then set counter and sink heights with proper knee clearance, then position appliances within the reach zone and reorganize storage to match it. Each step depends on the one before it, and getting the geometry right on paper before any contractor is hired prevents the mid-project corrections that drive cost and delays. An occupational therapist’s assessment of the specific person, chair, and kitchen tasks is the most useful starting point before any structural decision is locked in.

For a broader view of how these decisions connect to daily routes, work zones, and whole-home planning priorities, see the accessible kitchen design overview on how the kitchen fits the wider accessible home system.

Cabinet Access for Seniors: Reachable Kitchen Storage Solutions

Author: Oded Feigin · Created On: July 31, 2026 · Last Updated: August 24, 2026

Most kitchens store daily items at heights that require stretching, bending, or awkward twisting, and those demands add up across dozens of tasks each day. Cabinet access for seniors is one of the most practical levers in an accessible kitchen because the storage system determines where the effort lands on the body every single time. The accessible kitchen design overview covers the wider planning framework; this spoke goes deep on the specific storage solutions, reach ranges, and hardware choices that change how much effort the kitchen actually asks of you. According to the 2024 AARP Home and Community Preferences Survey, 39% of adults over 50 who anticipate needing home modifications cite kitchen upgrades as a priority.3

Senior woman placing a plate in a wall cabinet while her partner carries a box, illustrating cabinet access for seniors in a bright modern kitchen
Reaching into wall cabinets is a daily task that storage design can make easier, without requiring a step stool or an overhead stretch.

Quick Answer

Which kitchen storage solution does the most to improve cabinet access for seniors?

Full-extension drawers offer the lowest day-to-day effort for base storage because they bring the entire cabinet contents to the front without bending into the cabinet. For upper cabinets, pull-down shelf mechanisms drop stored items into a comfortable 15-to-48-inch reach zone, the range defined by ADA Section 308.2.1 as the standard forward-reach window for standing adults.1 The right solution depends on which cabinets you use most and the physical task those cabinets currently demand.

Key Takeaways

  • The ADA sets a maximum unobstructed forward reach of 48 inches above the floor; a standard kitchen counter acts as an obstruction that drops this ceiling to 44 inches over the countertop.1
  • Full-extension drawers eliminate the bend-into-cabinet motion at base level; pull-down shelves address the overhead-reach problem at wall-cabinet level.
  • Easy-grip bar or D-ring pulls reduce grip demand because the hand can apply force along its natural closing arc, not through a pinch or a twist.
  • Corner cabinet solutions (pull-out drawers and swing-out shelves) outperform lazy susans on usable reach because they bring contents forward rather than asking the arm to reach laterally into the corner.
  • According to Harvard’s Joint Center for Housing Studies, 44% of households aged 65 and older currently need some form of home accessibility feature.4

Cabinet Access for Seniors: Five Solutions at a Glance

The five approaches in this article address different parts of the reach and effort problem. This table shows where each one fits before the detailed sections explain the reasoning.

Solution Primary Reach Problem Addressed Retrofit Feasibility Approximate Cost Range Who Benefits Most
Pull-down shelves Overhead reach into upper cabinets (above 44 in.) High (fits existing 24-in. or 36-in. wall cabinets) $150-$500 per unit (hardware only) Standing adults with limited shoulder range; anyone who avoids step stools
Full-extension drawers Bending or reaching into base cabinets Moderate (requires new cabinet boxes or pull-out inserts) $50-$200 per insert; $300-$900 per new base unit Anyone using base cabinets daily; wheelchair users needing front access
Easy-grip pulls Grip and pinch force at every door and drawer Very high (two-screw swap) $5-$30 per pull Anyone with reduced hand grip, arthritis, or fatigue from repetitive opening
Corner pull-outs and swing-outs Lateral reaching and visual loss into corner cabinets Moderate (often requires existing hinge-side clearance) $100-$400 per corner unit Anyone avoiding deep corner reaches; improves for all mobility levels
Reach-zone reorganization Mismatched item placement across the whole kitchen Very high (no hardware required) $0 Anyone, before any hardware change; often the highest-leverage first step

What the Reach Zone Tells You About Cabinet Placement

Before evaluating any hardware solution, it helps to understand what the reach zone actually is and why standard kitchen heights often fall outside it.

The ADA forward-reach window

The U.S. Access Board’s ADA Standards define the standard forward-reach envelope for a standing adult as 15 to 48 inches above the finish floor (Section 308.2.1).1 Items stored within this band are reachable without overhead extension or significant bending. Items below 15 inches require kneeling or bending; items above 48 inches require shoulder elevation or a step stool.

That 48-inch ceiling applies only when there is no obstruction in the path. A kitchen counter changes the calculation. Under ADA Section 308.2.2, when a forward reach passes over an obstruction deeper than 20 inches (such as a countertop), the maximum comfortable high reach drops to 44 inches above the floor.1 Most base kitchen cabinets are 34 to 36 inches tall, and standard wall cabinets mount with their bottom shelf starting 18 inches above that. The bottom of a typical upper cabinet sits at 52 to 54 inches above the floor, which is 8 to 10 inches above the ADA over-obstruction reach ceiling. Every time someone reaches for an item on that lowest upper-cabinet shelf, they are already working above the comfortable reach boundary for a standing adult.

Why reorganization is often the first step

Before changing any hardware, the most impactful first action is often simply moving frequently used items into the 15-to-44-inch zone that already exists in the kitchen. Pots, pans, and daily dishes stored above 44 inches can usually shift to a lower drawer or to the counter. Items below 15 inches (inside the base of a tall pantry, for example) can move up. This reorganization costs nothing and can reduce a substantial portion of daily overhead reaching without any installation.

The engineering framing here is straightforward: the home already has a comfortable reach zone. The friction comes from items stored outside it. Solving that storage mismatch is a systems observation, not a renovation.

ADA Kitchen Reach Zones and Pull-Down Shelf Access Diagram showing ADA-defined kitchen reach zones from floor to 65 inches above floor level. The comfortable reach zone is the green band from 15 to 48 inches. The pink band above 48 inches is where standard upper wall cabinets are mounted, with their bottom shelf at 54 inches. A downward arrow on the right side shows how a pull-down shelf mechanism moves items from the 54-inch cabinet position down into the top of the comfortable reach zone. Data from U.S. Access Board ADA Standards Section 308 and Rev-A-Shelf 5PD product specifications. Kitchen Reach Zones: ADA Standard vs. Cabinet Height 15 in. 48 in. 54 in. Above ADA ceiling Upper cabinets mount here Comfortable reach zone 15 to 48 in. per ADA Section 308 Below min. reach floor level ADA min. reach Standard upper cabinet bottom shelf (54 in.) Pull-down shelf moves items into reach zone Source: Home Age Fit analysis, 2026
Standard upper cabinets mount with their bottom shelf at roughly 54 inches, which is 6 to 10 inches above the ADA comfortable-reach ceiling of 44 to 48 inches. A pull-down shelf mechanism moves stored items from that above-ceiling position down into the comfortable zone during retrieval. Compiled from U.S. Access Board ADA Standards Section 3081 and Rev-A-Shelf 5PD product specifications.6

Pull-Down Shelves: Bringing Upper Cabinets Within Reach

Pull-down shelf mechanisms are spring-assisted or gas-assisted frames that mount inside an existing wall cabinet. When the handle is pulled, the shelf swings downward and forward, bringing stored items from 52-to-54-inch cabinet height into a lower, more comfortable position.

How the mechanism works and what to expect

A typical pull-down shelf system connects to the interior of the cabinet at two pivot points. The user grasps a pull-rod or handle at a comfortable height and guides the shelf down. Most systems hold the shelf in position while the user retrieves or replaces items, then spring back into the closed position when released.

The Rev-A-Shelf 5PD series, one of the most widely installed pull-down systems, brings items down 10 inches and pulls them 14 and three-quarter inches forward from the cabinet, holding up to 26 pounds per shelf.6 The telescoping pull-rod adjusts from 34 to 50 inches, allowing the hand engagement point to stay within the ADA-defined comfortable reach window even before the shelf descends.6

Where pull-down shelves work well and where they don’t

Pull-down systems are designed for standard 24-inch and 36-inch wall cabinet widths, making them a strong retrofit option in most kitchens without structural change. They are most useful for upper cabinets that currently store daily items such as plates, glasses, and spice jars above comfortable reach.

The mechanism does require a single-hand pull-and-guide motion. For someone with significant arm weakness or very limited grip, operating the shelf still demands some upper-body involvement, though at a lower height than the cabinet position itself. An occupational therapist can evaluate whether the specific motion suits an individual’s shoulder and arm function.

Pull-down shelves are less practical in wall cabinets shorter than 30 inches (the mechanism needs interior height to operate) and in cabinets where the contents weigh more than the system’s rated capacity. Overloading a spring-assisted mechanism reduces both smoothness and safety over time.

“If items are stored out of reach, meaning whether they are too high or too low, it could require someone to over-extend themselves, develop back issues, or create a dangerous situation where they need to use a stool.”

Danise Levine, certified aging-in-place architect and assistant director, Center for Inclusive Design and Environmental Access (IDEA Center), University at Buffalo7

Full-Extension Drawers: The Lowest-Effort Base Storage Change

At base-cabinet level, the storage problem is different. The reach zone issue is not overhead; it is depth. Standard lower cabinet doors open onto a dark cavity that requires bending and reaching back to find items. Full-extension drawers solve this by bringing the entire contents forward to the face of the cabinet.

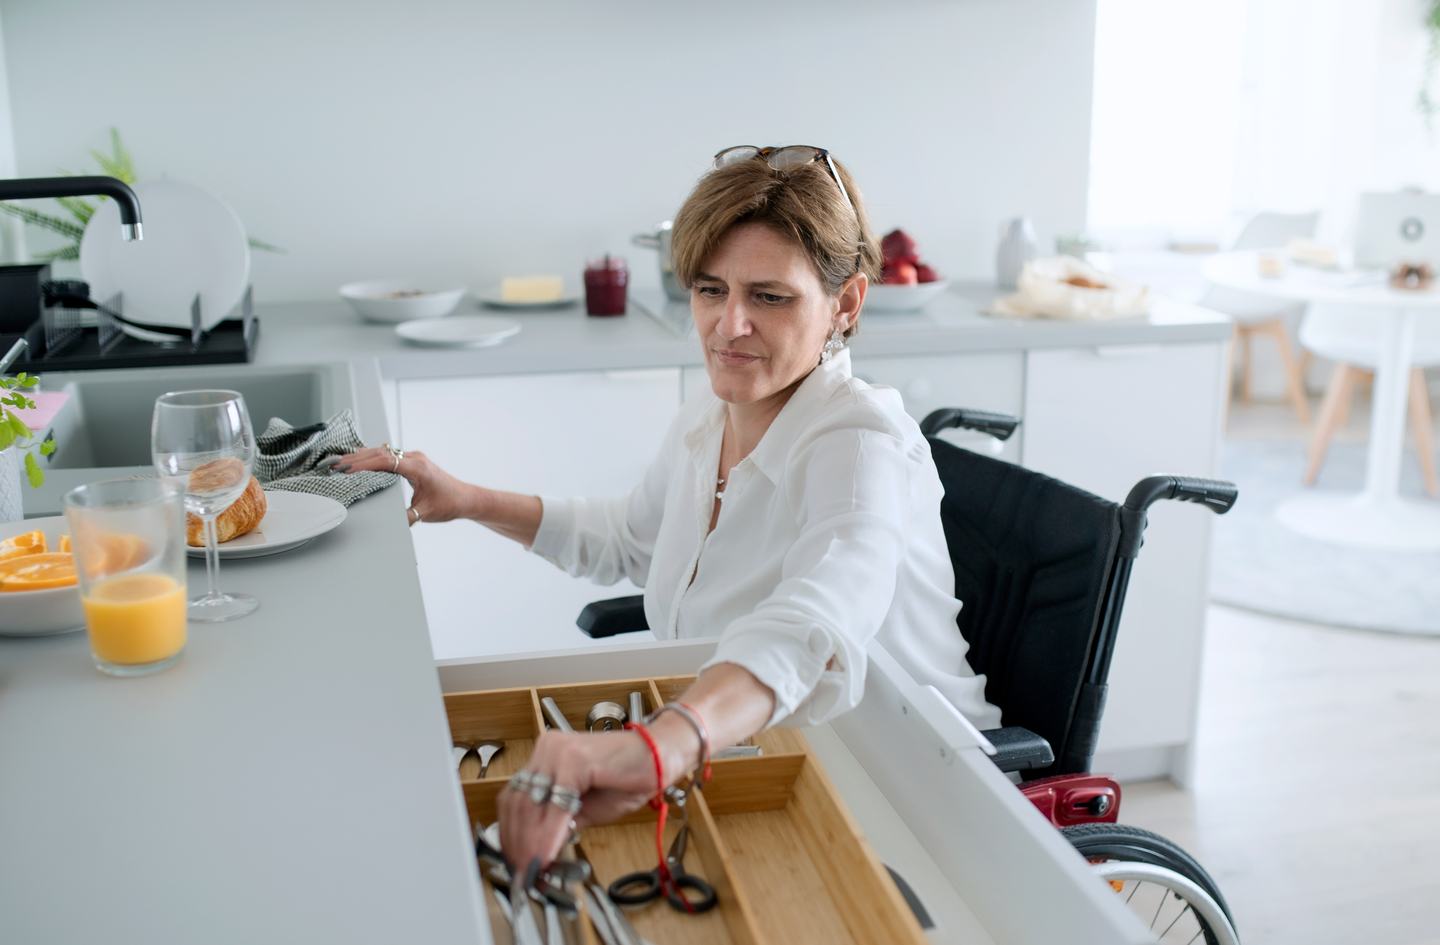
A woman in a wheelchair reaching into an open kitchen drawer to retrieve silverware, demonstrating accessible drawer storage at a comfortable height
Drawers bring kitchen contents to the front of the cabinet, eliminating the need to bend, crouch, or reach into the back of a lower cabinet.

The ergonomic case for drawers at base level

When a lower cabinet uses a hinged door and interior shelf, retrieving an item from the back of the shelf combines three physical demands: opening the door (grip and pull), bending forward (trunk flexion), and reaching into the cabinet (shoulder and arm extension). Full-extension drawer slides replace all three of those demands with a single forward pull and a visual scan of contents at counter height.

The usable depth of a full-extension drawer equals the cabinet’s interior depth, usually 21 to 22 inches. A soft-close mechanism reduces the return-motion effort and eliminates the slam that can jar items out of position. For wheelchair users especially, drawers are significantly more accessible because they allow front access at a seated knee height rather than requiring lateral reaching into a base cavity.

Drawer inserts vs. replacing cabinet boxes

There are two approaches to converting lower cabinets to full-extension drawers. Pull-out insert trays fit inside an existing door cabinet, providing a forward-rolling shelf without replacing the box. They are the lower-cost option and fit most standard base cabinets. The trade-off is that inserts typically stop short of full extension, leaving some reach into the back of the box.

Replacing the cabinet box with a true drawer-stack unit provides the most effective result. The cost is higher and requires removing and reinstalling the face frame and counter sections that abut the unit. For a kitchen with several lower cabinets holding daily-use items, the investment often ranks among the highest-leverage storage changes in the room.

Easy-Grip Hardware: How Pull Geometry Reduces Grip Force

Cabinet pulls and handles are the interface point between the hand and every door and drawer in the kitchen. Most kitchen hardware was designed for appearance rather than grip mechanics, and the shape of a pull has a direct effect on how much force the hand must generate to open it.

Why bar and D-ring pulls reduce effort

A knob requires a pinch grip: the fingers wrap around a small convex surface and the hand applies force in multiple directions at once. For anyone with reduced grip strength or joint sensitivity, this geometry is demanding. A bar pull or D-ring handle allows the hand to hook or cup around a larger surface and pull in a single direction aligned with the arm. The force path is more efficient because the grip is distributed across more finger joints at once.

For maximum usability, the clear grip length (the open space between the pull and the cabinet face) should be at least one inch to allow a full-finger grip without the knuckles contacting the door. Standard bar pulls range from 3 to 18 inches in length; longer pulls are grippable at multiple positions, which is useful when carrying a load in the other hand.

Placement matters as much as the pull style

A well-shaped pull in a poor position still creates friction. Drawer pulls should be centered horizontally on the drawer face and placed in the upper third of a tall drawer. Door pulls should be mounted on the pull side (opposite the hinge) to minimize the door’s rotational resistance. A door pull placed near the center of the door face rather than near the latch increases the force needed because it reduces the mechanical leverage available from the hinge distance.

Hardware swap-outs are the highest-feasibility change in this entire comparison. Two screws are the usual requirement, there is no structural work, and the parts are reversible. For kitchens where grip fatigue or arthritis affects daily cooking, this is the most practical first step before any larger project begins.

Corner Cabinet Access: Solving the Hardest Storage to Reach

Corner cabinets are the most difficult storage location in the standard kitchen. Their depth means the back-corner space sits beyond arm’s reach from the door opening, and their position means they are usually accessed from the side rather than from the front.

Lazy susans: widely used but limited for aging-in-place planning

A two-shelf lazy susan rotates so items at the back can spin to the front. The mechanism works well for storing lightweight items accessed occasionally. Its limitations for cabinet access for seniors include the rotation action itself (rotating a loaded shelf requires grip and arm strength), and the fact that items still sit inside the corner footprint and must be reached at arm’s extension through the door opening. For someone with limited shoulder or elbow range, this still produces a full-extension reach.

Pull-out drawers and swing-out shelves: the stronger choice

Pull-out corner drawers (also called “magic corner” or “Le Mans” systems) work on a pivot-and-slide mechanism. When the door opens, the first shelf swings forward and out, pulling the second shelf behind it. The contents come to the front of the cabinet opening, within the kitchen’s normal reach zone, without any rotation or deep reach.

The engineering advantage is significant: the arm reaches into a moving shelf that comes to it, rather than extending into a fixed corner. The trade-off is a higher cost than a basic lazy susan and installation complexity, which usually requires removing the existing corner-cabinet door and frame. An L-shaped corner can accommodate either a full-radius swing-out or a half-moon shelf depending on the specific cabinet opening, and the choice depends on the exact corner configuration.

A simpler alternative for corner base cabinets is a diagonal door with a single roll-out shelf behind it. This eliminates the deep corner reach by angling the cabinet opening 45 degrees and using a shallow pull-out, which brings the stored items within a shorter forward reach. It is less dramatic than a magic-corner system but also less expensive and easier to install.

Which Solution Best Fits Your Situation

These five approaches address different reach and effort problems. Choosing among them starts with identifying which specific friction point in the kitchen costs the most effort each day.

For someone currently using a step stool to reach upper cabinets

A pull-down shelf system in the most-used upper cabinet addresses this directly. The step stool is a fall-risk tool in the kitchen; according to NCOA, 14 million older adults fall each year, and reducing occasions that require elevation is a concrete risk-reduction step.2 A pull-down system eliminates the stool for daily-use items. It does not require any structural change to the cabinet and can be installed in an existing wall cabinet in a few hours.

For someone with reduced grip strength or hand pain

Start with the hardware. Bar pulls and D-ring handles are the lowest-cost and most reversible change available, and they affect every drawer and door in the kitchen. If grip remains a limiting factor after hardware changes, and if the base cabinets hold daily-use items, pull-out inserts for lower cabinets are the practical next step. These changes can be stacked without any conflict: new hardware plus a pull-out insert plus a pull-down shelf can all coexist in the same kitchen.

For someone using a wheelchair or planning for seated access

Base cabinet access takes priority. Full-extension drawers or pull-out inserts at knee height allow seated front-access to kitchen contents without requiring a lateral reach into the back of a standard cabinet door. Corner pull-out systems are especially valuable for wheelchair users because they bring the corner contents forward and out of the corner footprint, within a reach that is achievable from a seated position at the side of the cabinet. Counter-height considerations and under-counter knee clearance also affect this setup; an occupational therapist can evaluate the specific kitchen layout for a wheelchair user’s reach and approach angles.

For a family planning ahead, not responding to a current limitation

This is the scenario where reach-zone reorganization is the highest-leverage first move. Moving daily-use items into the 15-to-44-inch band already within the kitchen, without any hardware change, reduces the cumulative load on the shoulder and back every single day. Among aging-in-place remodeling projects tracked by NAHB in Q1 2023, kitchen storage changes did not appear among the top five project types (which were led by grab bars at 93% and curbless showers at 83%).5 Storage reorganization is precisely the kind of high-leverage, low-cost adjustment that preventative planning can make before any renovation becomes necessary.

Frequently Asked Questions

What is the recommended cabinet height for seniors to avoid overhead reaching?

The ADA sets the maximum comfortable forward reach at 48 inches above the floor, dropping to 44 inches when a counter acts as an obstruction (ADA Section 308.2.2).1 For kitchen wall cabinets, this means items stored on the lowest shelf at standard mounting height (52 to 54 inches above the floor) are typically already above comfortable reach, even for a standing adult. Moving the most-used items to cabinets or drawers within the 15-to-44-inch zone reduces overhead reaching on a daily basis.

Are pull-down cabinet shelves worth the cost for aging in place?

Pull-down shelves are a practical retrofit for wall cabinets storing daily-use items. Units such as the Rev-A-Shelf 5PD hold up to 26 pounds per shelf and bring contents down 10 inches into the comfortable reach zone.6 They fit existing 24-inch and 36-inch cabinets without structural change. The value is highest when upper cabinets hold items used at least a few times per week and when avoiding a step stool is a safety priority. An occupational therapist can confirm the best placement if arm function is a limiting factor.

What type of cabinet hardware is easiest to open with arthritis or limited grip?

Bar pulls and D-ring handles are typically easier to operate than knobs for adults with limited grip. A knob demands a pinch across a rounded surface; a bar or D-ring lets the hand hook and pull in a single direction aligned with the arm, which loads the finger joints less. Choose pulls with at least one inch of clearance between the handle and the cabinet face. This is the most reversible change in any accessible kitchen hardware project and typically requires only a two-screw swap.

What is the best corner cabinet solution for seniors who have difficulty reaching?

Pull-out “magic corner” systems outperform lazy susans for reaching ease because they bring contents forward to the cabinet opening rather than rotating items at arm’s extension. For wheelchair users or people with limited lateral reach, this forward-delivery motion makes corner contents accessible without deep reaching. Lazy susans remain usable for lighter, occasionally accessed items. A 45-degree diagonal door with a roll-out shelf is a simpler, lower-cost option that eliminates the deep-corner reach without a full magic-corner mechanism.

How do drawers compare to cabinet doors for kitchen accessibility?

Full-extension drawers reduce base-cabinet access effort by eliminating the bending and reaching that standard hinged-door cabinets require. A drawer delivers the entire cabinet contents to the front of the opening at counter height; a hinged-door cabinet requires bending forward and reaching into the back of the cavity to find items. For daily-use items stored in base cabinets, this represents a consistent reduction in trunk flexion and shoulder effort. Pull-out insert trays offer a lower-cost partial version of the same benefit inside an existing door cabinet.

Limitations and Edge Cases

  • The ADA reach-range figures cited here describe a general population standard, not an assessment for a specific person. An individual’s comfortable reach depends on height, shoulder mobility, arm length, and any specific joint limitation. An occupational therapist can determine what reach zone applies to the person using the kitchen.
  • Pull-down shelf weight ratings (26 lbs for the Rev-A-Shelf 5PD) apply to the mechanism at new installation. Actual useful capacity may be lower if the cabinet carcass or mounting wall is not sound. Structural capacity of the cabinet should be confirmed before installation.
  • Corner cabinet pull-out systems require specific hinge-side clearance and door opening dimensions to operate correctly. Not every corner cabinet configuration can accommodate a magic-corner system without modification to the surrounding cabinet run. A licensed cabinet installer can assess the specific opening.
  • This spoke covers storage access within the kitchen. Adjacent topics, including counter height for standing or seated cooking, sink access, appliance placement, and pathway clearance for walkers or wheelchairs, are part of the broader kitchen planning picture that the accessible kitchen design overview addresses.

References

  1. U.S. Access Board – ADA Standards for Accessible Design, Chapter 3: Building Blocks, Section 308 (Reach Ranges), 2010 Standards, verified current 2025.
  2. National Council on Aging (NCOA) – Get the Facts on Falls Prevention, May 30, 2025. Cites CDC surveillance data.
  3. Kitchen and Bath Design News – AARP Pinpoints Upgrades Needed for Aging Homeowners, January 30, 2025. Reporting on AARP Home and Community Preferences Survey 2024 (n = 3,090 adults 18+, conducted June-July 2024).
  4. Joint Center for Housing Studies, Harvard University – Aging Society and Inaccessible Housing Stock Suggest Growing Need for Remodeling. Blog post citing underlying working paper data.
  5. Eye On Housing (NAHB) – Remodeling Market Index Special Question Analysis: Aging-in-Place, Eric Lynch, May 9, 2023. Q1 2023 survey of professional remodelers.
  6. Rev-A-Shelf – 5PD Series Pull-Down Shelf System product specifications, retrieved July 2026.
  7. Reviewed (USA TODAY Network) – 5 Kitchen Organization Ideas for Aging-in-Place Remodeling, June 28, 2023. Danise Levine, IDEA Center, University at Buffalo, cited expert.

Conclusion

Cabinet access in the kitchen is a daily-effort problem, not a single-hazard problem. Standard upper cabinets mount above the ADA comfortable-reach ceiling; standard lower cabinets require bending into a cavity; corner cabinets demand lateral reaches that can tire the shoulder and back across dozens of tasks each week. The five solutions compared here, pull-down shelves, full-extension drawers, easy-grip hardware, corner pull-outs, and reach-zone reorganization, address different parts of that friction pattern. None requires a full kitchen rebuild. The most powerful first step is often the one that costs nothing: identifying which daily-use items sit outside the comfortable reach zone and moving them.

For the wider planning picture around counters, appliances, pathways, and workflow, see the overview in accessible kitchen design to understand how storage fits the kitchen as a whole system.

Accessible Kitchen Requirements: Key Measurements

Author: Oded Feigin · Created On: July 31, 2026 · Last Updated: August 24, 2026

Accessible kitchen requirements matter long before mobility changes make the kitchen hard to use. Most kitchens are built around a standing adult at 36 inches – a height that works until it doesn’t. The overview in Accessible Kitchen Design covers the broader planning logic; this article goes deep on the specific numbers. Three out of four adults aged 50 and older want to stay in their homes1 – and the kitchen is often where that plan is tested first. Knowing the exact clearances, counter heights, knee space dimensions, and reach zones helps you plan earlier and ask better questions before calling a contractor.

A person in a wheelchair in a sunlit kitchen, illustrating the space and counter height considerations central to accessible kitchen requirements
A well-planned kitchen gives a wheelchair user comfortable access to the counter, the sink, and the window – the result of clearances and heights set before the renovation, not adjusted after.

Quick Answer

What are the core accessible kitchen requirements?

The 2010 ADA Standards cap kitchen work surfaces at 34 inches high2, require a minimum 40-inch aisle in pass-through kitchens and 60 inches in U-shaped layouts5, mandate knee clearance of at least 27 inches high and 30 inches wide under counters3, and set an unobstructed reach range of 15 to 48 inches for controls and storage4. A 60-inch turning circle also applies wherever a wheelchair must change direction6.

Key Takeaways

  • The ADA-compliant kitchen counter maximum is 34 inches – two inches lower than the standard 36-inch U.S. kitchen counter – and at least one 30-inch section must meet that height.
  • Knee clearance under a counter or sink must be 27 inches high, 30 inches wide, and at least 11 inches deep at the 9-inch height, tapering to 8 inches deep at the 27-inch height.
  • Unobstructed reach for controls and storage extends from 15 to 48 inches; reaching over a counter deeper than 20 inches reduces the maximum to 44 inches.
  • These measurements come from federal standards that apply directly to public and commercial kitchens; for private homes, the same figures function as a planning benchmark, not a legal mandate.

Counter Heights and Work Surfaces

The standard U.S. kitchen counter sits at 36 inches – a height optimized for a standing adult of roughly average height. That 36-inch standard creates an immediate barrier for a seated wheelchair user, whose eye level and arm reach operate from a fundamentally different position. Accessible kitchen requirements address this by capping the work surface and establishing a minimum usable section width.

What height does an accessible kitchen counter need to be?

The 2010 ADA Standards for Accessible Design specify that a kitchen work surface must be 34 inches maximum above the finish floor or ground2. That two-inch reduction from the standard 36-inch height may seem minor, but it meaningfully changes the ergonomics of a seated approach. At 34 inches, a wheelchair user can reach the surface without raising the shoulder into an awkward, fatiguing position, and the knee clearance underneath becomes geometrically possible within the same counter thickness.

An adjustable counter is also permitted, covering the range from 29 inches minimum to 36 inches maximum2 – useful in a household where both seated and standing users share the kitchen.

How wide does the accessible section of counter need to be?

At least one 30-inch-wide section of counter must provide the accessible work surface2. This minimum width gives a wheelchair user enough lateral room to set down a plate, position a cutting board, or operate an appliance without the counter ending before the task does. In practice, a single 30-inch section is the code floor; a more functional layout extends that accessible counter length to match the primary prep zone.

What height is required for an accessible kitchen sink?

The sink rim or the counter surface – whichever is higher – must not exceed 34 inches above the finish floor10. This is consistent with the counter height requirement; the sink is treated as part of the kitchen work surface for measurement purposes. An adjustable-height sink is also permitted where rough-in plumbing allows, using the same 29-to-36-inch range10.

One detail specific to the sink that does not apply to a dry counter: the water supply and drainage pipes underneath must be insulated, enclosed, or otherwise configured to prevent contact with bare skin10. A knee-clearance zone under a sink is only useful if a seated user can position their legs there comfortably, and uninsulated pipes make that impossible for anyone with reduced sensation.

Accessible Kitchen Counter and Sink Height Reference
Element Standard (Typical U.S.) ADA Accessible Maximum Adjustable Range (Optional)
Kitchen work surface 36 in. 34 in. 29-36 in.
Sink rim or counter (whichever higher) 36 in. 34 in. 29-36 in. (where plumbing allows)
Minimum accessible section width No requirement 30 in. minimum N/A

Aisle and Clearance Widths

Clearance widths in a kitchen determine whether a wheelchair can approach the counter, pass another person, or exit without backing into an obstacle. These are not comfort dimensions – they are functional minimums that determine whether the kitchen is usable at all from a seated position. The ADA establishes different requirements for different kitchen configurations, because a straight corridor kitchen and a closed U-shape present fundamentally different maneuvering demands.

What aisle width is required in a pass-through accessible kitchen?

In a pass-through kitchen – one with counters and appliances on opposite walls that a person passes through rather than working entirely within – the clear floor space between all opposing base cabinets, countertops, appliances, or walls must be 40 inches minimum5. This 40-inch minimum allows a standard wheelchair (which is typically 25 to 27 inches wide) to navigate the corridor while leaving room to turn slightly or reposition without scraping the cabinets on either side.

What aisle clearance applies to a U-shaped accessible kitchen?

In a U-shaped kitchen – one enclosed on three contiguous sides by cabinets, counters, or appliances – the clearance between all opposing elements rises to 60 inches minimum5. The reason is geometry: a U-shaped kitchen is a partially enclosed space, and a wheelchair user entering it must eventually turn around to exit. A 60-inch clearance provides the diameter needed for a full circular turn (the turning radius requirement, covered below). A U-shape with only 40 inches of clearance would let a wheelchair enter but require a series of awkward back-and-forth repositioning moves to exit.

This is one of the more consequential accessible kitchen requirements for renovation planning. Many original U-shaped kitchens were built at 42 to 48 inches of interior width – functional for two standing adults cooking simultaneously, but not wide enough for an accessible-kitchen classification. Opening that interior clearance to 60 inches usually means losing at least one run of base cabinets or reconfiguring the layout entirely.

How much clear floor space is required at each kitchen appliance?

Each kitchen appliance or fixture that a wheelchair user is expected to approach and operate requires a clear floor space of at least 30 inches by 48 inches6. This rectangle – roughly the footprint of a wheelchair parked in position – must be free of level changes and must not slope more than 1:48 in any direction. A forward approach places the 48-inch dimension perpendicular to the counter; a parallel approach places the 30-inch dimension along it. Which approach applies depends on the fixture and whether knee clearance is provided beneath it.

Knee Space and Toe Clearance

Knee clearance is the dimension that makes seated cooking and food preparation possible. Without it, a wheelchair user can approach a counter but cannot pull in close enough to reach the work surface comfortably, operate a sink, or use a cooktop without reaching at full arm extension from a distance. The ADA knee clearance standards define the minimum geometry of the space under a counter that must be kept clear for a seated approach.

What is the required height for knee clearance under an accessible counter?

The ADA defines the knee clearance zone as the space under an element between 9 inches and 27 inches above the finish floor3. The 27-inch upper boundary is the critical figure: it means the underside of the counter, or any drawer frame, apron, or obstruction, must sit at 27 inches or higher to allow knee clearance. This is why accessible counters are frequently designed without the traditional apron front – a standard apron at 30 to 32 inches blocks what would otherwise be usable knee space.

How wide and how deep must knee clearance be?

Knee clearance must be at least 30 inches wide3. That 30-inch minimum aligns precisely with the minimum width of the accessible counter section above it, so a counter designed to meet both requirements can position the knee space and the work surface in one continuous zone rather than staggering them.

The depth tapers with height: at the 9-inch level, the space must be at least 11 inches deep; at the 27-inch level, at least 8 inches deep, with a maximum depth of 25 inches throughout3. The taper means the counter apron or cabinet face can angle inward slightly as it rises, as long as the minimum dimensions are preserved at each height.

What is the toe clearance zone under an accessible cabinet?

Toe clearance occupies the zone from the floor up to 9 inches high. The ADA requires this zone to extend at least 17 inches under the element, with a maximum depth of 25 inches3. It must also be at least 30 inches wide. Toe clearance allows the footrests of a wheelchair to slide partially under the counter while the user’s knees are positioned in the knee clearance zone above – the two zones work together to allow a close, upright seated approach to the work surface.

A person in a wheelchair reaching toward a kitchen stovetop, demonstrating why reach range and counter height are central to accessible kitchen requirements
A person in a wheelchair reaching toward the stovetop shows the everyday reality of the reach range standards: a 48-inch maximum high reach and a counter no higher than 34 inches change whether this task is safe and repeatable, or requires a difficult stretch.

Reach Ranges at the Kitchen

Reach ranges define where controls, outlets, cabinet pulls, and storage can be placed for a seated wheelchair user to access them without an unsafe reach. Falls are the leading cause of fatal and non-fatal injuries among older adults7, and kitchen injuries often originate from reaching – not from a slip or a collision, but from the cumulative strain and instability of stretching beyond a comfortable arc.

“A lot of injuries that happen in the kitchen are from people reaching [for] something that they shouldn’t have been trying to reach [for].”

Jennifer Szakaly, Gerontologist and Care Manager at Caregiving Corner9

The ADA’s reach range standards translate that real-world risk into measurable planning parameters. When a kitchen is laid out within those parameters, the reach that might produce a fall or a shoulder injury simply does not occur – because everything a user needs is already within their arc.

What is the accessible forward reach range?

For an unobstructed forward reach – reaching straight ahead without leaning over a counter or obstacle – the accessible range is 15 inches minimum to 48 inches maximum above the finish floor4. This means a gas burner control, an outlet, or a cabinet pull placed higher than 48 inches is outside the accessible zone for a standard wheelchair user. Equally, anything below 15 inches requires bending too far forward from the chair, which carries its own instability risk.

When the reach is over an obstruction – for example, reaching over a countertop to access the back burner or a wall outlet – the depth of that obstruction affects the maximum reach height. If the obstruction is between 20 and 25 inches deep, the maximum forward reach drops from 48 inches to 44 inches4. This is why controls and outlets mounted on the back wall above a deep counter are particularly problematic: the counter depth reduces the available reach before the wall even comes into play.

What is the accessible side reach range?

The unobstructed side reach range – reaching parallel to a wall, not over an obstruction – is also 15 to 48 inches4. The symmetry with forward reach is intentional: a kitchen designed within the 15-to-48-inch band works whether a user approaches a surface from the front or from the side, which matters in a kitchen because appliance placement, cabinet configuration, and aisle direction all affect which approach is available at any given moment.

When reaching over an obstruction on a side approach – for example, reaching sideways over a base cabinet to access a wall-mounted control – the maximum side reach drops to 46 inches if the obstruction exceeds 10 inches deep, and the obstruction itself may not be higher than 34 inches4. The practical implication: a wall switch or outlet on the side wall above a base cabinet must be placed within this reduced reach envelope.

How do reach ranges affect cabinet and appliance placement?

The 15-to-48-inch reach window is the most discipline-imposing of all the accessible kitchen requirements for cabinet designers. Standard upper cabinets often place shelf bottoms at 54 to 60 inches, well above the 48-inch maximum. Accessible kitchen layouts respond by eliminating upper cabinets in primary use zones, lowering shelf installations, or shifting storage to pull-out drawers, rollout trays, and base-cabinet pull-downs that bring contents into the reach band rather than requiring the user to enter the upper half of the room.

ADA Accessible Kitchen: Eight Key Measurements Horizontal bar chart synthesizing measurements from four ADA Standards sections: counter height 34 in (Section 804), U-shape aisle 60 in (Section 804), pass-through aisle 40 in (Section 804), knee space height 27 in (Section 306), knee space width 30 in (Section 306), reach range high 48 in (Section 308), reach range low 15 in (Section 308), turning circle 60 in (Section 304). Source: Home Age Fit analysis of 2010 ADA Standards Sections 304, 306, 308, and 804. ADA Accessible Kitchen: Eight Key Measurements Turning circle 60 in. U-shape aisle 60 in. Upper reach limit 48 in. Pass-through aisle 40 in. Counter height max 34 in. Knee space width 30 in. Knee space height 27 in. Lower reach limit 15 in. Source: Home Age Fit analysis, 2010 ADA Standards Sections 304, 306, 308, 804 (2026)
Synthesizing measurements from four ADA Standards chapters shows how the accessible kitchen dimensions cluster: the two 60-inch requirements (turning space and U-shape aisle) are the most space-demanding, while counter height, knee space, and reach range all fall in the 15-to-48-inch planning band. Compiled by Home Age Fit from 2010 ADA Standards Sections 304, 306, 308, and 804.

Turning Space and Approach Clearances

A wheelchair user who can reach the counter but cannot turn around to exit the kitchen has not gained useful independence – they have gained access to a dead end. Turning space is the measurement that converts an accessible counter into a usable kitchen, because it determines whether a user can orient themselves toward each appliance and surface in sequence, rather than backing in and backing out of every position.

What turning space is required in an accessible kitchen?

The ADA requires a turning space in one of two configurations. The first is a circular space with a minimum diameter of 60 inches6. At 60 inches across, a standard manual or power wheelchair can complete a 360-degree turn in place. The second configuration is a T-shaped turning space: overall 60 inches wide and 60 inches deep, with each arm and stem of the T at least 36 inches wide6. The T-shape requires less total floor area than a 60-inch circle but demands that the three segments of the T are each wide enough for the wheelchair to enter and reverse from.

How does turning space affect kitchen layout planning?

In a galley or corridor kitchen, the turning space is typically placed at one end of the run – usually near the entry or near the most frequently used appliance. In an L-shaped kitchen, the corner area adjacent to the turn often provides the natural location for a turning circle. In a one-wall kitchen, turning space is in the open floor area in front of the counter, which means the counter depth and the room depth together must accommodate both the 30-by-48-inch clear floor space at the counter and the 60-inch turning circle without overlapping into the door swing or traffic path.

For homeowners planning an accessible kitchen renovation, the turning space requirement often reveals the first layout problem: a kitchen island or peninsula that brings interior clearance below 60 inches eliminates the turning space entirely. The layout question is whether the floor plan can preserve that 60-inch zone while providing sufficient counter and storage.

Which Standards Govern Accessible Kitchen Requirements

The measurements discussed throughout this article originate primarily from two federal frameworks: the 2010 ADA Standards for Accessible Design and the Architectural Barriers Act (ABA) Standards. Understanding which applies to your situation determines whether these numbers are legal requirements or planning benchmarks. Demand is rising regardless: 73 percent of remodelers say aging-in-place requests have significantly or somewhat increased over the prior five years8.

What do the ADA and ABA standards cover?

The Americans with Disabilities Act (ADA) applies to places of public accommodation, commercial facilities, and certain residential facilities (such as hotels, assisted living, and multi-unit housing subject to federal requirements). The Architectural Barriers Act applies to facilities that receive federal funding or are owned by the federal government. For residential kitchens in private single-family homes, neither the ADA nor the ABA creates a direct legal requirement5. The Fair Housing Act applies to multi-family housing of four or more units, with its own (somewhat less stringent) accessibility requirements for kitchen design.

This does not mean the measurements are irrelevant for private homeowners. Occupational therapists, Certified Aging-in-Place Specialists (CAPS), and accessibility-focused contractors use ADA kitchen measurements as the design target for private home renovations, because those figures represent the accumulated research and engineering judgment on what a seated adult needs to operate a kitchen safely and independently. The measurements were developed for regulation, but they function equally well as a planning benchmark.

Do local building codes add accessible kitchen requirements?

Some jurisdictions adopt the International Building Code (IBC), which incorporates ADA Standards by reference for commercial and certain residential construction. Others have adopted versions of the ICC A117.1 Accessible and Usable Buildings and Facilities standard, which covers similar ground with some differences in residential applications. Local amendments can tighten or loosen these requirements. For a specific home renovation, the local building department and a licensed contractor are the right resources for determining what is code-required versus what is a best practice.

Planning Considerations Beyond the Numbers

The measurements in this article define the accessible kitchen’s skeleton. They tell you where counters can be, how wide aisles need to be, and how far a hand can reasonably reach. What they do not tell you is which combination of those measurements serves a specific person in a specific kitchen – and that distinction matters as much as the numbers themselves.

How do these measurements work as a planning system?

The counter height, the knee clearance, the aisle width, the reach range, and the turning circle are interdependent. A counter at 34 inches without knee clearance underneath is still inaccessible for a seated user. A 60-inch aisle without a 30-by-48-inch clear floor space in front of the refrigerator leaves the most-used appliance unreachable. An accessible sink without pipe insulation makes the knee space dangerous. Accessible kitchen requirements are a system, not a checklist of isolated features.

The most useful starting point is observation: map the routes used most often in the current kitchen, identify where approach clearances fall short, note which controls or storage items require a reach that exceeds 48 inches, and locate where there is no room to turn. Those specific friction points define the scope of what an accessible kitchen renovation actually needs to address.

When does a professional evaluation add more than the measurements alone?

The ADA measurements here are based on a reference wheelchair user. Real users vary in seated height, arm length, grip strength, and trunk stability. An occupational therapist can evaluate how a specific person’s mobility interacts with a specific kitchen layout and translate that into modification priorities that may differ from the generic ADA targets. For kitchens with structural walls that limit aisle widening or plumbing configurations that complicate sink relocation, a licensed contractor or accessibility specialist can identify which standard measurements are achievable and which need a design workaround. Bringing the numbers in this article to that conversation – as prepared questions rather than assumed answers – is the most efficient way to use both resources.

Frequently Asked Questions

What is the minimum counter height for an accessible kitchen?

The maximum, not minimum, is the key figure: an accessible kitchen counter must be no higher than 34 inches above the finish floor per the 2010 ADA Standards2. There is no floor on how low the counter can be set, though adjustable counters must go no lower than 29 inches. The standard U.S. counter at 36 inches exceeds the accessible maximum by two inches – a small gap that meaningfully changes the ergonomics of a seated approach.

How wide does the aisle need to be in an accessible kitchen?

Aisle width depends on the kitchen configuration. A pass-through kitchen requires 40 inches of clearance between all opposing surfaces5. A U-shaped kitchen – enclosed on three sides – requires 60 inches of clearance, because that space must also serve as the turning area for a wheelchair. Many original kitchens fall short of one or both of these minimums and require layout changes to meet accessible kitchen requirements.

What is knee clearance and why does it matter for accessible kitchen design?

Knee clearance is the open space under a counter or sink that allows a wheelchair user to pull close enough to work comfortably. The ADA requires knee clearance that is at least 27 inches high, 30 inches wide, and 11 inches deep at the 9-inch height above the floor (tapering to 8 inches deep at 27 inches)3. Without knee clearance, a seated user must reach from a greater distance, which raises fatigue and the risk of an unstable reach.

Do ADA accessible kitchen requirements apply to a private home?

Not as a direct legal mandate. The ADA applies primarily to places of public accommodation and commercial facilities, not private single-family homes. The Fair Housing Act applies to multi-unit residential buildings of four or more units. For a private home, ADA kitchen measurements serve as a planning benchmark rather than a code requirement. Occupational therapists and Certified Aging-in-Place Specialists routinely use these figures as targets for home modification projects because they reflect the engineering logic of what a seated user needs.

What is the accessible reach range for kitchen storage and controls?

The unobstructed accessible reach range runs from 15 to 48 inches above the floor for both forward and side approaches4. When reaching over a counter or obstruction deeper than 20 inches, the maximum forward reach drops to 44 inches. This range defines where controls, outlets, appliance handles, and frequently used storage should be located in a kitchen designed for a wheelchair user or for adults planning ahead for changing mobility.

Limitations and Edge Cases

  • The measurements in this article are drawn from the 2010 ADA Standards, which apply to a reference wheelchair user. Individual differences in seated height, arm length, trunk stability, and grip strength mean that an occupational therapist evaluation for a specific person may produce different targets than the regulatory figures.
  • The ADA kitchen sections (primarily Section 804) address kitchens in covered facilities. Residential applications in private homes are governed by local building codes and the Fair Housing Act, which may differ. Verify applicable requirements with a licensed contractor and the local building department before finalizing any renovation plan.
  • This article covers the measurement framework for accessible kitchen requirements. For planning the broader layout, approach routes, lighting, and appliance sequence, see the hub on accessible kitchen design for the wider context.

References

  1. AARP – 2024 Home and Community Preferences Survey, AARP Public Policy Institute, 2024. Fieldwork conducted June-July 2024; 75% of adults 50+ want to remain in their current homes.
  2. 2010 ADA Standards for Accessible Design – Section 804.3, Kitchen Work Surfaces. U.S. Department of Justice, 2010. Counter maximum 34 in.; adjustable range 29-36 in.; minimum accessible section 30 in. wide.
  3. 2010 ADA Standards for Accessible Design – Section 306, Knee and Toe Clearance. U.S. Department of Justice, 2010. Knee zone 9-27 in. high; 30 in. wide minimum; depth tapers from 11 in. at 9-in. height to 8 in. at 27-in. height.
  4. U.S. Access Board – Chapter 3 Guide: Operable Parts and Reach Ranges. Unobstructed forward and side reach: 15-48 in.; obstructed forward reach max reduces to 44 in. when obstruction exceeds 20 in. depth.
  5. ADA Compliance – 2010 ADA Standards Section 804: Kitchens and Kitchenettes. Pass-through aisle minimum 40 in.; U-shaped kitchen minimum 60 in.
  6. U.S. Access Board – Chapter 3 Guide: Clear Floor or Ground Space and Turning Space. Circular turning space 60-in. diameter; T-shaped turning space 60 in. x 60 in., each arm 36 in. wide; clear floor space 30 in. x 48 in. minimum.
  7. National Council on Aging – Get the Facts on Falls Prevention. Citing CDC data: 14 million (1 in 4) adults 65+ fall each year; falls are the leading cause of fatal and non-fatal injuries among older adults; non-fatal falls cost approximately $80 billion in healthcare costs in 2020.
  8. NAHB – Practical Strategies for Aging-in-Place Remodels, NAHB/Westlake Royal Remodeling Market Index, June 2025. 73% of remodelers report significantly or somewhat increased aging-in-place requests; 56% actively involved in modification work.
  9. AARP Caregiving – Create an Accessible, Organized Kitchen to Age in Place, 2024. Features Jennifer Szakaly, Gerontologist and Care Manager at Caregiving Corner, and Melanie Summers, Professional Organizer.
  10. U.S. Access Board – Chapter 6 Guide: Lavatories and Sinks. Sink rim maximum 34 in.; adjustable-height option 29-36 in.; supply and drain pipes must be insulated or enclosed to prevent contact.

Conclusion

Accessible kitchen requirements are a set of interlocking measurements: a counter no higher than 34 inches, knee clearance at least 27 inches high and 30 inches wide, a reach band from 15 to 48 inches, aisles of 40 or 60 inches depending on layout, and a 60-inch turning circle. Each number is specific, derived from engineering research on what a seated user needs to operate a kitchen safely and repeatedly. Understanding these figures before a renovation – rather than discovering them mid-project – is what makes the planning process faster and the outcome more durable.

For the broader picture of how these measurements fit into kitchen layout, appliance selection, and approach route planning, see the overview in Accessible Kitchen Design for planning context that connects the numbers to the full system.

Home Safety in the Kitchen Burn and Fall Prevention for Seniors

Author: Oded Feigin · Created On: July 27, 2026 · Last Updated: August 24, 2026

Falls are the leading cause of injury for adults 65 and older, and 1 in 4 Americans in that age group falls each year.1 Most of those falls happen at home – and the kitchen concentrates several distinct risk zones into a single, frequently used space. This spoke covers home safety in the kitchen burn and fall prevention by naming the five hazard categories that deserve attention first. For context on where the kitchen fits within your wider home safety planning, see the overview in Fall-Prevention Priorities.

Seniors practicing home safety in the kitchen burn and fall prevention - an older couple cooking breakfast together at a stovetop in a bright kitchen
The kitchen is an active space where slippery surfaces, reach demands, seating transfers, cluttered paths, and hot-item carrying all converge – making it worth mapping your specific hazards before reaching for a renovation.

Quick Answer

What are the highest-priority kitchen fall and burn hazards for seniors to address?

The five highest-priority kitchen fall and burn hazards are: slippery floor zones (especially near the sink and stove), unsafe reach areas above and below comfortable standing height, unstable or poorly matched seating, cluttered walking paths, and carrying hot items across uncleared routes. Addressing these in that order reduces the most avoidable risk before any renovation is considered.

Key Takeaways

  • The kitchen and dining room account for 7.2% of at-home falls that result in emergency department visits for adults 65 and older – with women experiencing kitchen falls at a higher rate (8.1%) than men (5.6%).3
  • Surface type alone is a weaker lever than most expect: a 2019 trial found that purpose-built compliant flooring reduced serious fall injury odds by less than 2% compared with standard flooring, pointing to route and behavior changes as higher-leverage interventions.4
  • All five hazard zones – slippery floors, unsafe reach zones, unstable seating, cluttered paths, and hot-surface carrying routes – can be addressed without structural renovation; each starts with an observation walk and targeted adjustments.

1. Slippery Floors and Wet Surface Zones

Stairs, ramps, landings, and floor surfaces account for the largest share of home-structure consumer product injuries – more than 3.1 million emergency department visits in 2024, with adults 65 and older carrying the highest injury rate in that category.6 In a kitchen, floor risk is not uniform across the room. The zone near the sink accumulates water from handwashing, dishwashing, and produce rinsing. The area in front of the refrigerator collects condensation and drips from an ice dispenser. A wet ceramic or smooth vinyl surface requires a measurably different friction coefficient than a dry one – and that difference can convert a confident step into an unstable one without any visible warning.

The Physics of Kitchen Slip Risk

Slip resistance is not a property of the full floor; it is a property of the floor-footwear-condition combination at a specific location. A textured porcelain tile that tests as adequate when dry can produce significantly lower dynamic friction when wet. Most residential kitchen flooring products do not carry a wet-surface friction rating, so surface choice alone does not resolve the problem in the zones that matter most. A 2019 randomized trial – the Flooring for Injury Prevention (FLIP) Study, which followed 357 residents in 150 long-term care rooms over four years – found that purpose-built compliant flooring designed to absorb fall energy did not reduce the odds of serious fall-related injury compared with standard flooring (12.5% versus 13.3%, odds ratio 0.98).4 The practical implication is important: changing the material under someone’s feet does less to prevent a fall than changing what happens on, around, and through the wet zones where slips actually occur.

This does not make floor surface choices irrelevant. Matte, textured, and slip-resistant finishes are still a better baseline than polished tile or smooth gloss vinyl, particularly in wet zones. But surface selection is a starting point, not a solution. The more effective approach is identifying which specific zones in your kitchen regularly become wet and building a response around those zones.

What Actually Reduces Slip Risk in Wet Zones

Mapping the wet zones comes before buying anything. Observe where the floor is regularly damp – near the sink, at the refrigerator base, and under the range hood – then focus the response there. Non-slip mats with secure perimeter grip and no raised edges address these specific zones without structural change. An edge that curls, a mat that slides on the surface beneath it, or a mat positioned where you step on and off it while carrying items creates its own trip hazard. Mat maintenance is not optional: a quarterly check of edge condition and backing grip is part of the safety system, not a one-time task.

Footwear is part of the equation. Many kitchen slips involve socks or open-back slippers on wet tile. Closed-heel footwear with a textured rubber sole keeps more slip-resistance off the floor. An occupational therapist can identify which combination of surface treatment, mat placement, and footwear adjustment makes the most meaningful difference for a specific kitchen and person.

2. Overhead and Low Reach Zones

Among at-home falls that result in emergency department visits, the kitchen and dining room account for 7.2% of cases for adults 65 and older – and women experience kitchen-related falls at a higher rate (8.1%) than men (5.6%).3 A meaningful share of those falls involves reaching: extending the arm upward to a cabinet above shoulder height, bending forward to a drawer near floor level, or standing on a step stool for overhead storage. Each movement shifts weight away from a stable base, raises or lowers the body’s center of gravity, and reduces the balance margin – especially when a joint or muscle is under load at the end of the motion.

Why Reaching Changes the Balance Equation

Balance depends on keeping the body’s center of gravity within the support base formed by the feet. Reaching overhead extends the upper body’s weight upward and forward, raising the center of gravity and narrowing the effective support base. For adults with any reduction in hip strength, ankle proprioception, or visual acuity – all of which change with age – that shift is less forgiving than it was at 40. A step stool without bilateral handrails and a non-slip platform narrows the support base further. Even a brief moment of instability at the top of the reach – when the hand is occupied with a heavy or awkward object – can produce a fall before any corrective step is possible.

Low-cabinet reaching introduces a different load pattern: bending at the trunk to reach into a deep lower shelf requires straightening back up with the retrieved load, which demands hip and back extensor strength at a moment when the trunk is flexed and the center of gravity is forward. That transition – from crouch to stand while loaded – is where many kitchen falls actually happen, with no obvious single “slip” to blame.

Reorganizing for Safer Daily Access

The target storage zone for daily-use items sits between roughly hip height and shoulder height – the range within which most adults can retrieve and return items without significant trunk lean or deep knee flexion. This is a storage audit, not a renovation. Move daily dishes, glasses, coffee supplies, and frequently used dry goods into this zone. Upper cabinets above shoulder height become storage for seasonal items, accessed with a stable step stool only when needed and ideally with another person nearby. Below-knee drawers can hold heavy pots used at the stove where a counter is immediately at hand.

Pull-out shelves and lazy Susans in base cabinets reduce the need to crouch into a lower unit’s back corner – a posture that puts the most demanding phase (standing back up) at the end of a loaded reach. A drawer organizer that brings items forward cuts reach distance without any cabinet modification. A licensed contractor can evaluate pull-out hardware for a specific cabinet, and an occupational therapist can identify which reorganization changes best fit the person’s reach range and strength.

An elderly couple smiling while working together in a kitchen, with the man washing dishes at the sink and the woman drying them next to white-tiled walls with wooden shelves
Routine kitchen tasks like washing and drying dishes involve wet surfaces, wet hands, and turns between the sink and counter – all of which benefit from cleared paths and stable footing in the immediately surrounding zone.

3. Unstable or Mismatched Seating

Kitchen seating is one of the less-discussed fall hazards because the risk is rarely about falling from the seat itself – it is about falling during the sit-to-stand transfer. Falling once doubles the risk of falling again,1 which means every daily transition from a kitchen chair carries added consequence for anyone who has already had a kitchen fall. A chair without armrests removes the ability to push up from the sides, transferring the entire load to the legs at their most mechanically disadvantaged position – with the trunk well forward and the knee at maximum flexion. A chair whose legs slide slightly on smooth tile under that push load adds lateral instability at the moment of peak effort. Each of these conditions independently adds hesitation; they frequently occur together in kitchens where chairs were chosen for appearance.

What Makes Kitchen Seating a Transfer Hazard

Seat height is a more important variable than seat comfort for transfer safety. The target seat height for a senior managing any joint stiffness is one that allows feet to rest flat on the floor with knees at roughly 90 degrees – typically 17 to 20 inches from floor to seat surface for average stature, rising to 21 or 22 inches for taller adults or those with limited knee flexion. A seat lower than that range forces a deeper knee bend to stand, increasing the mechanical demand on the knee and hip extensors at the point when they are asked to do the most work. A seat surface that is deeper than the user’s thigh length causes a forward slide toward the edge before standing, introducing an unstable starting posture before the transfer even begins.

Chair legs that taper outward at the bottom reduce lateral stability under the sideways push load that often accompanies a one-sided stand. A chair with no armrests or with armrests that end well behind the seat front requires the user to push from a position of mechanical disadvantage, using shoulder and elbow extension rather than the stronger downward press through the palm near the body’s midline. None of these are dramatic hazards in isolation – they are friction points that accumulate load over dozens of transfers every day.

Adjustments That Lower Transfer Effort

The most immediate change is checking whether existing chairs can be fitted with rubber furniture cups on tile – these reduce the lateral slide under push load without replacing the chair. A firm seat cushion raising height by two or three inches can bring an undersized chair into a more favorable range for a specific person’s knee geometry. Sturdy armrests that extend to the front of the seat allow pressing down through the arms near the end of the stand, reducing the load on the legs when leg strength is the limiting factor.

For stool seating at a kitchen island, the question is whether the bar-height seat (typically 28 to 30 inches) is accessible given the person’s hip and knee range, and whether the stool has a footrest at a height that allows the feet to rest rather than dangle. Island seating carries the highest fall consequence in the kitchen because the seat is higher and nearby structure to catch a stumble is typically absent. An occupational therapist can assess the specific transfer pattern and recommend appropriate changes.

4. Cluttered Walking Paths and Insufficient Clearance

In 2024, 43,020 adults aged 65 and older died from preventable falls – a 21% increase in the age-adjusted fall death rate since 2018.25 Path obstruction in a kitchen is a contributing factor that is easy to underestimate because the clutter is often functional: a bag on the floor near the entry, a recycling bin placed at the midpoint of the main route, a pet bowl positioned where traffic turns, a chair left pushed back from the table into the aisle after a meal. Each item is individually minor. Together they narrow clearance, force a route deviation mid-step, or introduce an ankle-height obstacle on a path that has been walked thousands of times without incident – until the day when fatigue, a medication effect, or a moment of distraction reduces the available reserve.

Measuring the Risk in Your Kitchen Route

The most-used kitchen routes are not always obvious from a static view of the room. They are defined by movement patterns: the path from the entry to the coffee maker, from the counter to the table, from the stove to the sink, from the refrigerator to the prep surface. Walk each route slowly and notice where your foot placement shifts to avoid an object, where you step over something rather than around it, and where the clearance narrows through a turn. A walker requires at least 32 inches of clear width through a turn. A cane shifts the support base to one side and needs a clear path without ankle-height obstacles to the non-dominant side. Even for someone not currently using a mobility aid, a path that requires a small foot adjustment to avoid a floor-level item on each pass adds cumulative friction that builds toward a fall on a high-fatigue day.

Pay particular attention to transitions between flooring materials: a threshold between the kitchen’s vinyl and an adjacent room’s hardwood, or a low step between a kitchen and a breakfast area, introduces both a surface-friction change and a height change within a single stride – two variables at once on a route that may be walked in reduced-lighting conditions, in a hurry, or while carrying something.

Clearing Paths Without Structural Change

Path clearing is the kitchen modification that requires the least expense and produces the most immediate impact. Relocate items from floor level to counter height, wall hooks, or rolling carts positioned flush against a wall. Check whether the recycling bin sits in the primary travel route and find a wall-aligned position for it. Check whether the refrigerator door or oven door extends into the walking path when open. A rug that bunches at an edge, a mat at a height transition between floor surfaces, or loose items in the arc of a turn deserve attention first – these are the friction points that accumulate toward an eventual fall.

Furniture placement is part of path planning. A dining chair pushed back enough to block the path between the table and the counter is a recurring obstacle that a return-to-table habit removes at no cost. An occupational therapist can walk the kitchen routes, observe specific movement patterns, and identify friction points a general survey would miss.

5. Carrying Hot Items Across Unsafe Routes

Among the roughly 14 million falls among adults 65 and older each year,1 falls that occur while carrying hot items in a kitchen introduce a compounded injury outcome: when both hands are occupied with a heavy pot, a hot tray, or a steaming serving dish, the carrier cannot reach out to brace a fall, cannot look down at the path, and cannot easily shift attention to an obstacle mid-route. A fall that would produce only impact injury on an unencumbered person can produce both an impact injury and a significant scald burn when the carried item lands with or on the person. That compounding makes the stove-to-counter carry route one of the highest-consequence paths in the kitchen even though it is often only two to four steps long.

Why the Carry Route Is a Distinct Hazard Category

The carry route from stove or oven to counter or table crosses the busiest zone in the kitchen: between the cooktop, the sink, and the prep counter, where cabinet edges, open appliance doors, and floor transitions all converge. A floor obstacle that would normally be stepped over without incident becomes a serious fall risk when a loaded hot item is in the carrier’s hands. A wet spot near the sink – within two steps of most stovetops – becomes a slip risk at the moment when the carrier’s attention is on the pot rather than the path. These two hazards from earlier priorities (slippery floors and cluttered paths) directly interact with the carry-route hazard, making the hot-item carry route a synthetic risk that combines three of the five priority zones.

Reducing Risk on the Hot-Item Carry Route

The most effective change is reducing carry distance. A countertop immediately adjacent to the stove or oven – clear of cutting boards, small appliances, and other items – means the pot or tray does not need to travel more than a lateral slide to reach a stable resting surface. That slide-not-carry motion keeps both hands in contact with the item and eliminates the step-while-loaded phase entirely. For heavy pots used for boiling or stewing, a wheeled kitchen cart positioned at stove height can allow a drain-in-place or strain-at-the-stove arrangement that removes the need to carry a full, heavy, hot pot at all.

When a carry cannot be avoided – moving a hot dish from the oven to a table in a different room, for example – clearing the route before starting the carry is the single most effective preparatory step. Remove the chair that is pushed back into the aisle, check that the mat near the sink is flat and dry, and identify the landing surface before lifting. Forearm-length oven mitts reduce scald exposure if a spill occurs during the carry. An occupational therapist can assess the specific kitchen layout and suggest workflow changes – including cooktop placement, counter-height adjustments, or counter extension options – that reduce the combined fall-and-burn risk without requiring counter reconstruction.

Where At-Home Falls Send Older Adults to the ER Horizontal bar chart showing percentage of at-home fall-related emergency department visits by room for adults aged 65 and older: Bedroom 25.0%, Stairs 22.9%, Bathroom 22.7%, Kitchen and Dining Room 7.2% (highlighted in ochre), Other areas 22.2%. Data from Moreland BL et al., American Journal of Lifestyle Medicine, 2020 (PMC8669898), based on 2015 NEISS national sample data. Where At-Home Falls Send Older Adults to the ER Bedroom 25.0% Stairs 22.9% Bathroom 22.7% Kitchen / Dining 7.2% Other areas 22.2% Other rooms Kitchen / Dining Source: Home Age Fit analysis, 2026
The kitchen and dining room account for 7.2% of at-home falls that result in emergency department visits among adults 65 and older – with women experiencing kitchen falls at a higher rate (8.1%) than men (5.6%). Compiled by Home Age Fit from Moreland BL et al., American Journal of Lifestyle Medicine, 2020, and National Council on Aging fall-rate data.

At-a-Glance: Kitchen Hazard Priority Comparison

Hazard Zone Primary Risk Type Main Trigger First Action Renovation Required?
Slippery Floors Slip and fall Wet surface in the sink or refrigerator zone Map wet zones; place non-slip mats with secured edges No
Overhead / Low Reach Balance loss during reach Overhead or floor-level cabinet access for daily items Reorganize daily items to hip-to-shoulder storage zone No
Unstable Seating Fall during transfer Sit-to-stand from low, armless, or sliding seat Check seat height; add rubber feet and armrests if absent No
Cluttered Paths Trip and fall Floor-level items on daily travel routes Walk each route; relocate floor-level obstacles No
Hot-Item Carry Routes Fall plus burn (compounded) Obstacle mid-carry with hands occupied by hot item Clear route before lifting; reduce carry distance to a slide No

Home Safety in the Kitchen Burn and Fall Prevention: Applying the Five Priorities

The five hazard zones are not equally urgent for every kitchen or every person. The right starting point depends on which routes are used most often and which zones already show signs of hesitation or avoidance. A useful practice is to walk each primary kitchen route – from the entry to the coffee maker, from the counter to the table, from the stove to the sink, and from the refrigerator to the prep surface – once slowly, paying attention to where you grip a counter for support, where you take a shorter step than usual, or where you pause before a turn. Those hesitation points are the friction points the home is asking you to solve first.

“Falling once doubles the risk of falling again.”

National Council on Aging, Get the Facts on Falls Prevention1

That recurrence principle matters in the kitchen specifically because kitchen routes are repeated so many times each day. A person who has slipped once near the sink, or who has caught themselves stepping around a floor-level obstacle, is navigating those friction points under a heightened state of hesitation on every subsequent pass. Reducing the friction in those specific zones reduces the daily hesitation load – not just the risk of a future fall, but the confidence and ease of the daily routine.

For most kitchens, path-clearing and reach-zone reorganization can be completed in an afternoon without tools or purchases. The seating check takes a few minutes and perhaps a rubber furniture cup. The slip-zone check is a standing inspection of the wet zones and mat condition. The hot-item carry route is a question of counter clearance.

The higher-cost options – pull-out cabinet shelves, a rolling cart at stove height, a replacement chair with armrests – come after the observation walk, when the specific friction point needing a durable fix is identified. System before symptom: understand the route before investing in the solution.

Applying the 7.2% kitchen share of at-home falls3 to 14 million annual falls among adults 65 and older1 – of which roughly 79% occur at home – puts the kitchen’s contribution at approximately 800,000 emergency department visits per year. That synthesis of two independent data sources explains why the kitchen warrants a dedicated priority framework rather than a few items on a general home safety checklist.

Frequently Asked Questions

What is the most dangerous area in the kitchen for seniors?

The wet zone near the sink and the carry route from the stove to the nearest landing surface are the two highest-consequence spots. Research found that kitchen and dining room falls account for 7.2% of at-home falls leading to emergency department visits for adults 65 and older, with women at 8.1% compared with men at 5.6%.3 Both zones involve a combination of surface risk and movement risk simultaneously.

Do anti-slip mats actually prevent kitchen falls?

Anti-slip mats reduce slip risk in specific wet zones, but their effect depends on placement, backing condition, and edge maintenance. A 2019 trial found that purpose-built compliant flooring did not significantly reduce serious fall-related injuries versus standard flooring (odds ratio 0.98).4 Mat maintenance – checking for curled edges, degraded backing, and slide on the surface beneath – matters as much as the initial placement decision.

How should seniors reorganize kitchen cabinets to reduce fall risk?

Move daily-use items – dishes, glasses, and frequently used dry goods – to the zone between hip and shoulder height. This eliminates the need for overhead reaching or deep crouching during routine tasks and requires no renovation, only a storage audit. Upper and lower cabinets can hold seasonal or infrequently used items, accessed with proper support and ideally with another person present.

What should seniors do before carrying hot items from the stove?

Clear the carry route of any floor-level obstacles before lifting. Position a clear counter immediately adjacent to the stove so the pot or tray can be slid rather than carried. When carry distance is unavoidable, forearm-length oven mitts reduce scald exposure if a spill occurs. A wheeled cart at stove height can eliminate the need to carry a heavy pot at all by allowing strain and transfer at the stove.

When should a senior consult an occupational therapist about kitchen safety?

After any kitchen fall, and proactively when a daily task – reaching overhead, standing from the table, or moving items from the stove – requires gripping a surface for support, produces hesitation, or is being avoided. An occupational therapist can walk the specific kitchen routes, observe transfers and reach patterns, and recommend changes tailored to the individual’s mobility, strength, and kitchen layout rather than a general checklist.

Limitations and Edge Cases

  • This article covers residential kitchens for community-dwelling adults; commercial kitchens introduce additional hazard categories (floor drainage, equipment weight, workflow speed) that are outside this scope.
  • The fall location data cited here (Moreland et al., 2020) uses 2015 NEISS emergency department data; it reflects the types of kitchen falls severe enough to require ED care, not all kitchen falls.3
  • For adults with significant mobility impairment, post-surgical recovery needs, or neurological conditions affecting balance, the priority framework here is a starting point for conversation with a licensed occupational therapist, not a substitute for an individual evaluation.

References

  1. National Council on Aging – Get the Facts on Falls Prevention, retrieved 2026-07-27. Primary source for annual fall rate (14 million, 1 in 4 adults 65+), recurrence risk (falling once doubles the risk of falling again), and fall-related healthcare costs ($80 billion non-fatal, 2020).
  2. Centers for Disease Control and Prevention – Facts About Falls, retrieved 2026-07-27. Source for 43,020 older adult fall deaths in 2024 and the 21% increase in age-adjusted fall death rate from 2018 to 2024.
  3. PubMed Central – Moreland BL, Kakara R, Haddad YK, Shakya I, Bergen G. A Descriptive Analysis of Location of Older Adult Falls That Resulted in Emergency Department Visits in the United States, 2015. American Journal of Lifestyle Medicine, 2020; 15(6): 590-597. Source for kitchen/dining room (7.2%), women (8.1%), and men (5.6%) share of at-home fall-related ED visits.
  4. PubMed Central – Mackey DC, Lachance CC, Wang PT, Feldman F, Laing AC, Leung PM, Hu XJ, Robinovitch SN. The Flooring for Injury Prevention (FLIP) Study of compliant flooring for the prevention of fall-related injuries in long-term care: A randomized trial. PLOS Medicine, 2019. Source for compliant vs. standard flooring injury rates (12.5% vs. 13.3%, OR 0.98, p = 0.950).
  5. National Safety Council – Injury Facts – Older Adult Falls, retrieved 2026-07-27. Independent aggregation of CDC and NCHS data on older adult fall deaths and injury rates.
  6. National Safety Council – Injury Facts – Consumer Product Injuries Data Details, retrieved 2026-07-27. Source for stair, ramp, landing, and floor-related emergency department visits (3,101,789 in 2024) and the disproportionate injury rate for adults 65 and older in that category.

Conclusion

The kitchen’s five highest-priority fall and burn hazards – slippery floor zones, unsafe reach areas, unstable seating, cluttered paths, and hot-item carry routes – each operate through a different physical mechanism, and each can be addressed through observation and targeted adjustment before any structural renovation is needed. Start with the route walk: identify which of the five zones produces the most daily hesitation, then address that zone first. See the overview in Fall-Prevention Priorities for how the kitchen fits within the wider home safety priority framework.

Fall Prevention Education at Home: What to Teach First

Author: Oded Feigin · Created On: July 27, 2026 · Last Updated: August 24, 2026

Falls rarely begin with a single obvious hazard. In 2024, fall-related deaths among Americans 65 and older reached 43,020, making unintentional falls the leading cause of injury death in that age group.1 Yet most households begin their fall prevention work by buying a product. The more effective path starts with a teaching sequence: understanding who is at risk, why the risk exists, and which changes to address in which order. This spoke covers what patient education on fall prevention at home should teach first, building on the planning overview in Fall-Prevention Priorities: A Practical Guide to Safer Aging at Home.

An older adult's hand grips a stainless steel safety grab bar, illustrating a core topic in patient education on fall prevention at home
Grab bars address a specific friction point: the moment of balance transfer. They belong in the education sequence after route mapping has identified where those transfer moments occur most often.

Quick Answer

What should patient education on fall prevention at home teach first?

Start with a risk inventory and route observation before making any physical changes. A 2024 JAMA systematic review found that 27.5% of community-dwelling adults 65 and older fall each year,3 and most falls involve multiple overlapping risk factors. Teaching seniors and caregivers to map those factors, then address footwear and medications before structural modifications, produces a more effective and ordered intervention than leading with products.

Key Takeaways

  • Over 14 million older Americans fall each year; falling once doubles the risk of falling again (NCOA, 2025).2
  • Adults 75 and older take an average of 2.2 fall-risk-increasing medications, making medication review one of the highest-leverage early steps.3
  • 83% of older adults in one clinical study wore improperly fitted shoes, a modifiable risk often correctable before any home renovation begins.4
  • Occupational-therapist-led home hazard reduction for high-risk individuals can lower falls by an estimated 38%.5
  • Teaching the education sequence in the right order means the household understands real friction points before a contractor is called.

Why the Order of Teaching Matters

Seniors rarely fall because of a single, obvious hazard. Risk accumulates: a slightly uneven floor, lighting that fades at a threshold, a threshold that breaks a walking stride, a medication that causes postural dizziness in the morning. The National Council on Aging reported in May 2025 that over 14 million older Americans experience a fall each year,2 and that falling once doubles the probability of falling again. Each fall increases the likelihood of the next, which means the most valuable educational window is the one before the first serious fall occurs.

The order of teaching shapes outcomes because it determines what gets attention and what gets skipped. When fall prevention education leads with products, such as grab bars, non-slip mats, or raised toilet seats, the underlying risk profile often goes unexamined. A grab bar in the shower is genuinely useful when the bathroom route has been mapped and the specific transfer points identified. Installed without that foundation, it addresses one symptom without touching the system.

This spoke outlines a six-step teaching sequence aligned with a systems-over-symptoms approach. The steps are ordered by what can be learned and acted on with the lowest effort and highest return. None of these steps requires a licensed professional at the outset, though step six explains clearly when one is needed.

Step 1: Build a Risk Inventory Before Buying Anything

By the end of this step, the household has a written record of the specific factors that increase fall risk for this person in this home. That record is the foundation that every subsequent decision rests on.

What belongs in a home fall risk inventory

A useful risk inventory covers five domains: fall history, physical factors, medications, sensory changes, and home conditions. Fall history is the single strongest predictor. A 2024 JAMA systematic review found that 27.5% of community-dwelling adults 65 and older reported a fall in the prior year,3 and prior fall is among the highest-weighted predictors of future falls in clinical screening tools. If the senior has fallen within the last twelve months, that fact alone changes the urgency and depth of every subsequent step.

Physical factors include lower body strength, balance and gait, and the presence of conditions that affect coordination or reaction time. These are not assessed here for clinical purposes; they are noted as planning context. Someone with known balance impairment needs a different home configuration than someone whose primary risk is environmental. The inventory is not a diagnosis; it is a planning input that shapes the route observation in step two.

How to document fall history without creating anxiety

For many seniors, the topic of falls carries social weight. Acknowledging multiple falls can feel like admitting a broader decline, which is why many do not report falls to their doctors. The NCOA noted in 2025 that fewer than half of older adults who fall tell their physician.2 A useful framing for the conversation: falls are a systems feedback signal, not a character judgment. The home produced conditions that allowed the fall to occur. The inventory is about understanding those conditions.

Document three things for each fall: where it happened, what the person was doing, and what time of day. These details reveal patterns. Most falls occur during transitions, such as moving from bed to standing, from sitting to walking, or entering and leaving the shower. They cluster in the morning, when postural hypotension from medications may be present, and in high-traffic rooms that have limited support points nearby.

What to add about sensory changes

Vision and hearing both affect fall risk in ways that are easy to overlook during a product-focused conversation. The NCOA’s 2025 data indicates that hearing loss increases fall risk nearly threefold, while hearing aids reduce risk by approximately 50%.2 Vision loss is associated with nearly double the fall risk. These figures suggest that sensory health belongs in a fall risk inventory alongside medications and home conditions, not treated as a separate medical matter outside the household’s planning scope. Noting current correction (glasses, hearing aids) and whether they are worn consistently at home is a useful starting point.

Step 2: Walk the Routes and Map Friction Points

Route observation is the single most information-dense step in home fall prevention education. Conducted before any modifications, it reveals what the home is actually asking the body to do along the paths used most often.

Accessible bathroom with stainless steel grab bars, folding armrest, and emergency call panels installed as part of a planned home fall prevention layout
This accessible bathroom shows support at toilet transfer height, a folding armrest for leverage, and emergency call access. These features emerge from route observation, not from a product catalog.

The five routes to walk first

Not every room carries the same risk. Fall risk is heaviest along the routes used most often, most urgently (the bathroom at 2 a.m.), and at the greatest level of fatigue (returning to the bedroom after a meal). The five highest-priority routes are: bedroom to bathroom, bedroom to kitchen, entry to main living space, kitchen to seating area, and any route involving a staircase. Walk each one slowly, ideally at the time of day the senior normally uses it.

On each route, mark every point where the person grips something, hesitates, changes speed, changes level, or reaches. These are the friction points. They signal where the body is already compensating for a gap in support, visibility, or surface stability. A friction point is far more actionable than a generic room-by-room safety checklist because it is specific to this person’s movement patterns in this home.

What to record at each friction point

For each marked friction point, record four things: the surface underfoot, the lighting level, whether a stable support structure is within arm’s reach, and whether a threshold or level change is present. These four factors account for the mechanical conditions behind most falls. Poor lighting and absent support points together compound risk far more than either would alone. Research published in a peer-reviewed scoping review found that occupational-therapist-led home hazard reduction programs, delivered to high-risk individuals, can lower falls by an estimated 38%,5 and much of that reduction comes from identifying and correcting exactly these friction-point conditions.

One non-obvious friction sequence: the path between the bed and the bathroom light switch, navigated in partial darkness after waking. Reaching for a switch that requires a step and a turn is a genuine transfer sequence. Many people navigate it on muscle memory alone, which works until it does not. Noting it in the route walk costs nothing and often leads to one of the simplest improvements: a nightlight, a motion-activated switch, or a bedside lamp within arm’s reach without standing.

How to include both the senior and the caregiver in the route walk

The route walk is most useful when both the senior and the caregiver complete it together. The senior knows where they hesitate or grip; the caregiver notices patterns the senior may have normalized. Walking the bedroom-to-bathroom route together at the actual time it is used (not during a midday inspection) reveals lighting conditions and fatigue levels that a daytime walkthrough misses. The observation is collaborative, not supervisory. The senior’s first-hand experience of which transitions feel effortful is the primary data source; the caregiver’s role is to record and notice, not to assess or judge.

Step 3: Teach Safe Movement Before Modifying the Space

Safe movement habits reduce fall risk regardless of the home environment. Teaching them before making structural changes means the resident arrives at step four with a better-calibrated sense of where physical modifications are genuinely necessary versus where a behavioral change is sufficient.

The sit-to-stand sequence

The transition from sitting to standing is one of the highest-risk movement moments in daily home life. It demands simultaneous coordination of hip extension, knee extension, and postural adjustment, often against stiffness after extended rest. A deliberate sit-to-stand sequence reduces the load on each joint and allows time for blood pressure to adjust. The sequence: move to the front of the seat, plant feet hip-width apart, tilt forward so the nose crosses over the toes, then push through the feet rather than pulling with the arms. Pausing at the seat edge for two full seconds before standing allows postural blood pressure to equalize, which matters especially in the morning or after meals when medications that cause orthostasis are most active.

Transition pauses at level changes

Stairways, thresholds, and bath enclosure entries share one property: they demand simultaneous attention to foot placement and balance adjustment while the body is already in motion. The most protective habit is a brief, deliberate pause at each level change. One second is enough. This is not about moving slowly; it is about not dividing attention between movement planning and environmental scanning at the moment of highest mechanical demand. Teaching this habit costs nothing and requires no installation, which makes it a higher return-on-effort step than most product purchases.

Lighting awareness as a movement habit

Many seniors do not adjust their movement behavior when lighting is poor, partly because familiarity with a space creates an overestimation of visibility. The habit to teach: before moving through a darker space, pause one to two seconds to allow visual adaptation. This is especially relevant for the bedroom-to-bathroom route at night and for entering a covered garage or porch from a brightly lit interior. No modification is needed; only a pause before moving. When that habit is in place, the route walk in step two becomes more accurate because the resident can distinguish between spaces where a lighting change would help and spaces where the pause habit alone is sufficient.

Step 4: Fix Footwear Before Fixing the Floor

Footwear is among the most modifiable fall risk factors, and among the most under-addressed in home fall prevention education. A 2024 review published in the Annals of Geriatric Medicine and Research reported that over 30% of adults 65 and older fall each year, with 50% of those experiencing a recurrence.4 Footwear contributes to a meaningful share of those falls, and it is often correctable without any home modification.

Why shoe fit matters more than floor surface

Most fall prevention attention focuses on floors: rugs, thresholds, smooth tile. These are real friction points. But footwear creates a portable version of the same risk that travels with the person through every room. An improperly fitted shoe alters gait mechanics, reduces sensory ground feedback, and shifts the balance envelope in ways that accumulate over time. A descriptive study by Lopez and colleagues found that 83% of older adults at an outpatient clinic wore improperly fitted shoes on at least one foot.4 A separate cohort study by Maden and colleagues found that 26% of older adults wearing ill-fitting footwear experienced a fall in the prior year, compared with only 15% among those wearing correctly fitted shoes.4

These figures suggest that correcting footwear fit is a higher-leverage intervention than is typically recognized in patient education programs. It costs far less than a grab bar installation and can be acted on before an occupational therapist or contractor visits.

What safe home footwear looks like

The CDC’s STEADI fall prevention program identifies four footwear features associated with lower fall risk: a flat heel, a firm non-slip sole, a closed back, and a fastening system (laces, Velcro, or buckle) that prevents the shoe from moving on the foot. Shoes without fixation, worn as backless slippers, or with smooth leather soles are associated with higher fall incidence. Socks-only or barefoot walking on smooth home floors markedly increases risk over time, particularly in kitchens and bathrooms where surfaces may be wet or waxed.

The practical recommendation for home use: closed-back shoes with non-slip soles, worn during all waking hours indoors, not only when going outside. Many households treat indoor shoes as optional. Patient education that reframes home footwear as a daily safety practice, rather than a special-occasion precaution, produces a behavior change that requires no home modification and no professional visit.

Medication Class and Fall Risk: Odds Ratios in Older Adults Data from Colon-Emeric et al., JAMA 2024 (PMID 38683363). Antipsychotics odds ratio 2.30 (95% CI 1.24-4.26). Sedative-hypnotics odds ratio 2.05 (95% CI 1.95-2.15). Loop diuretics odds ratio 1.36 (95% CI 1.17-1.57). Baseline OR 1.0 shown as dashed reference line. Home Age Fit synthesis chart. Medication Class and Fall Risk: Odds Ratios Antipsychotics Sedative-hypnotics Loop diuretics 0 0.5 1.0 1.5 2.0 2.5 2.30 2.05 1.36 Higher-risk classes (OR above 2.0) Elevated-risk class (OR 1.0-2.0) Source: Home Age Fit analysis, Colon-Emeric et al., JAMA (2024)
Antipsychotics and sedative-hypnotics more than double the odds of falling in older adults, while loop diuretics carry a 36% elevation, according to a 2024 JAMA systematic review by Colon-Emeric and colleagues.3 Medication review belongs in fall prevention education before any home structural modification.

Step 5: Review Medications Before Redesigning the Home

Medications are the most commonly overlooked modifiable fall risk factor in home-based education. A 2024 JAMA systematic review by Colon-Emeric and colleagues found that adults aged 75 and older are prescribed an average of 2.2 fall-risk-increasing medications.3 These are not fringe prescriptions. They include widely used classes: antipsychotics, sedative-hypnotics, loop diuretics, and other agents that affect blood pressure, coordination, or alertness.

Three mechanisms that link medications to fall risk

The first mechanism is postural hypotension: medications that lower blood pressure can cause a brief but significant drop in cerebral perfusion when a person stands after sitting or lying. This dizziness window, often lasting 20 to 60 seconds after standing, is when many morning falls occur. The second is sedation and slowed reaction time: sedative-hypnotics and some antipsychotics reduce the speed and accuracy of the neurological corrections that maintain balance during unexpected movement. The third is muscle weakness and fatigue: loop diuretics and several medications for chronic conditions can cause electrolyte imbalances that reduce muscle function over time.

Understanding these three mechanisms helps seniors and caregivers recognize their own risk signals: morning dizziness, slower response to a misstep, unexpected fatigue during routine tasks. These are not side effects to tolerate silently; they are measurable inputs to fall risk that a physician or pharmacist can often adjust or redistribute across the day.

How to prepare for the medication review conversation

This spoke is educational planning guidance, not medical advice. A physician or clinical pharmacist is the right professional for any medication change decision. What patient education can do is prepare both the senior and the caregiver for that conversation. Document all current medications, including over-the-counter products, supplements, and sleep aids. Note the timing of each dose and any symptoms that follow: dizziness, drowsiness, or feeling unsteady. Bring this record to the next appointment and ask specifically about fall risk. “Which of these medications carries the highest fall risk, and are any of them adjustable?” is a more productive starting point than a general safety question, and it signals to the physician that the household has done its homework.

Why medications belong in the sequence before home modifications

A grab bar cannot counteract postural hypotension. A non-slip mat does not slow a sedative-hypnotic’s effect on reaction time. Environmental modifications reduce exposure to fall conditions; they do not eliminate the internal risk factors that medications create. Addressing medications first, or at minimum in parallel with the route walk, means the household understands the full risk profile before deciding which home changes are most urgent. The 2024 JAMA review found that exercise programs reduced fall rates among community-dwelling older adults by roughly 23% (rate ratio 0.77),3 while environmental modifications in high-risk groups reduced rates by approximately 26% (rate ratio 0.74). A medication review with a physician is working on a third lever entirely, one that neither exercise nor home modification addresses.

Step 6: Know When a Professional Assessment Is Required

Steps one through five can be completed without a licensed professional. Step six addresses the threshold conditions where a professional is not optional, not because the household has failed, but because scope matters. Engineering-informed education covers the planning framework; a qualified professional provides the evaluation specific to this home and this person.

When to involve an occupational therapist

An occupational therapist brings clinical knowledge of how a specific person’s movement, strength, and cognition interact with the friction points identified in step two. Research published in a peer-reviewed scoping review found that OT-led home hazard reduction programs, delivered to high-risk individuals, can reduce falls by an estimated 38%.5 The same evidence base found that multifactorial interventions including an environmental assessment component produced a 21% reduction in post-intervention falls. These figures apply specifically to high-risk populations: seniors with a recent fall history, balance impairment, or multiple fall-risk medications. For lower-risk individuals, the self-conducted route walk in step two is a productive first pass, with an OT referral for anything the household cannot resolve.

An OT referral is particularly valuable when the senior uses a mobility aid such as a cane, walker, or wheelchair; when cognitive changes affect safe decision-making during movement; or when the household cannot complete the route walk effectively because the senior is reluctant to participate or because the home layout is complex.

When to involve a licensed contractor

Grab bar installation, ramp construction, stair modification, and threshold removal belong with a licensed contractor. These are structural changes where the installation must meet local building standards and where anchoring to the correct wall structure is load-critical. A grab bar anchored only to drywall, not to framing or blocking, can fail at exactly the moment a person relies on it most. An aging-in-place or accessibility-experienced contractor can assess wall structure, recommend blocking placement, and install hardware to the correct load specifications. This spoke does not provide structural specifications; it identifies where the route observation has flagged a structural gap that belongs with a professional assessment.

When to involve a physician or pharmacist

Any concern about a specific medication’s contribution to fall risk belongs with the prescribing physician or a clinical pharmacist. A pharmacist-led medication review, sometimes called a Comprehensive Medication Review or a brown bag review, evaluates all medications together for interaction effects and fall risk. This is available through most primary care practices and many retail pharmacies. The senior’s documented list from step five is the input that makes this conversation productive. Bring it; do not rely on the practice’s system records to be complete, particularly for supplements and over-the-counter sleep aids.

Common Mistakes in Fall Prevention Education

The most frequent failure in home fall prevention education is starting with products. The installation of a grab bar or the removal of a rug is visible, measurable, and satisfying. But if the risk inventory in step one has not been done, the product may address a surface with low actual friction while leaving high-risk routes unchanged. Visible action that misses real risk is not just ineffective; it can create false reassurance that the education work is complete.

Teaching only one audience

Fall prevention education in households with both a senior and a caregiver often defaults to addressing only one of them. Teaching the caregiver the route observation method without including the senior treats the senior as a passive subject of safety planning rather than its primary agent. Teaching only the senior without equipping the caregiver leaves the household without a second observer who can notice gradual changes in gait, hesitation, or grip behavior over time. Both should complete step two together and understand the risk inventory from step one. The senior’s first-hand experience is the primary data; the caregiver’s role is to support that observation, not replace it.

Skipping the medication step because it feels clinical

Many caregivers and seniors skip step five because it feels like it requires a professional. The medication review with a physician does require a professional. But the preparation for that conversation, documenting current medications, noting timing and symptoms, forming specific questions, is patient education work that happens before the appointment. Skipping it means arriving at the physician visit without the information needed to make the conversation productive. Adults 75 and older carry an average of 2.2 fall-risk-increasing medications.3 Patients and caregivers who arrive informed get more actionable guidance from that conversation.

Waiting for a fall to begin education

The most costly timing mistake is reactive education: starting fall prevention work only after a fall has occurred. The NCOA’s 2025 data shows that falling once doubles the risk of falling again.2 The educational window before the first serious fall is the one with the highest potential return. Homes that complete steps one through four while the senior is fully mobile can address friction points without time pressure, involve the senior as a full decision-maker, and make changes that reflect actual movement patterns rather than retrofitting after an injury has already changed those patterns.

Frequently Asked Questions

What is the first thing to address in fall prevention education at home?

Start with a risk inventory before making any physical changes. Document fall history, current medications, sensory changes, and physical factors. This record identifies which of the subsequent steps carries the highest priority for this specific person. A 2024 JAMA review found that 27.5% of community-dwelling adults 65 and older fell in the prior year,3 with prior fall being one of the strongest individual predictors of future falls.

How does footwear affect fall risk at home?

Footwear affects gait mechanics, ground feedback, and balance envelope more than most people recognize. A clinical study found 83% of older adults wore improperly fitted shoes on at least one foot,4 and fall rates were notably higher in the ill-fitting group. Safe home footwear has a flat heel, a firm non-slip sole, a closed back, and a fastening system. Socks-only or barefoot walking indoors significantly increases fall risk on smooth floors.

Why should medications be reviewed as part of fall prevention education?

Adults 75 and older carry an average of 2.2 fall-risk-increasing medications, according to a 2024 JAMA systematic review.3 Antipsychotics, sedative-hypnotics, and loop diuretics affect blood pressure, reaction time, and muscle function in ways that directly increase fall probability. A medication review with a physician or pharmacist is often more impactful than any single home modification and can happen before any structural change is made.

When should an occupational therapist be involved in home fall prevention?

An OT assessment is most valuable for high-risk individuals: those with a recent fall history, balance or gait impairment, cognitive changes, or multiple fall-risk medications. For this group, OT-led home hazard programs can reduce falls by an estimated 38%.5 For lower-risk households, a self-conducted route walk is a productive starting point, with an OT referral for any friction point the household cannot clearly identify or address.

How often should fall prevention education be reviewed at home?

Review the risk inventory and route observation whenever a significant change occurs: a new medication, a health event affecting strength or balance, a home modification, or any fall. For households without recent changes, a once-a-year review is a reasonable baseline. The NCOA reports that falling once doubles the risk of falling again,2 so any fall should trigger an immediate review of all six steps, not just the step most directly related to the fall’s location.

Limitations and Edge Cases

  • The six-step sequence is a general educational framework, not a clinical assessment. It does not replace an in-person evaluation by an occupational therapist, physician, or licensed contractor for a specific home or person.
  • The fall statistics cited here are drawn primarily from US-based research populations. Program availability, building standards, and medication practice patterns vary by country and region.
  • Seniors using powered wheelchairs or with significant cognitive impairment may require earlier professional involvement than this sequence assumes, starting with an OT referral alongside or before step two.

References

  1. National Safety Council – Older Adult Falls, Injury Facts, 2025.
  2. National Council on Aging – Get the Facts on Falls Prevention, May 30, 2025.
  3. JAMA (PubMed Central) – Colon-Emeric CS, McDermott CL, Lee DS, Berry SD. Risk Assessment and Prevention of Falls in Older Community-Dwelling Adults: A Review. JAMA. 2024;331(16):1397-1406.
  4. PubMed Central – Annals of Geriatric Medicine and Research – Kim and Hegazy. Enhancing Footwear Safety for Fall Prevention in Older Adults. Annals of Geriatric Medicine and Research. 2024.
  5. PubMed Central – Scoping Review – Supporting Implementation of Occupational Therapy-Led Falls Hazard Reduction at Home: A Scoping Review. 2025.

Conclusion

Patient education on fall prevention at home works best when the steps are ordered by what can be learned and acted on most readily, before structural modifications begin. Risk inventory, route observation, safe movement habits, footwear correction, and medication review can all be acted on before a contractor is called. They address the system behind the symptoms, which is what makes them durable improvements rather than one-time fixes. For the broader planning context, the fall-prevention priorities overview covers how this educational sequence fits into whole-home fall risk planning.

The most protective window is before the first serious fall. Observe before you renovate, and prepare the questions before you hire the professional.

Handicap Bathroom Layout Dimensions: What Size You Actually Need

Author: Oded Feigin · Created On: July 16, 2026 · Last Updated: August 24, 2026

Most bathrooms were never designed for changing mobility. The distances between fixtures, the height of the toilet seat, the width of the door opening – these measurements determine whether a bathroom supports independence or quietly resists it. Planning handicap bathroom layout dimensions correctly is a decision, not an afterthought. The U.S. Access Board’s ADA Standards set a 60-inch diameter turning circle as the baseline – the space a wheelchair needs to rotate freely – and that one number shapes every other clearance in the room.2 For the broader framework on safer bathroom access, see our bathroom safety planning overview. This article covers the specific heights, clearances, and room sizes that make accessible bathroom layout function as intended.

An elderly couple stands in a bathroom, where the man is applying toothpaste onto the woman's toothbrush. They are both wearing white shirts and are focused on the task at hand near a bathroom sink.
A bathroom that works is one you can share. Accessible layout dimensions keep everyday routines within easy reach.

Quick Answer

What are the key dimensions for an accessible bathroom layout?

The governing dimension is a 60-inch minimum diameter turning circle for a wheelchair, per U.S. Access Board ADA Standards.2 From there: toilet clearance requires 60 inches from the side wall and 56 inches from the rear wall; the toilet seat should sit 17-19 inches above the floor; grab bars belong at 33-36 inches above the floor; and a transfer-type accessible shower must be at least 36 by 36 inches with a 36-inch-wide entry opening.

Key Takeaways

  • The 60-inch wheelchair turning circle (U.S. Access Board, Section 304.3.1) is the master dimension that determines minimum bathroom size and fixture placement.
  • Toilet clearance requires 60 inches from the side wall and 56 inches from the rear wall – not just grab bars and a raised seat.
  • Grab bars belong 33-36 inches above the floor; this range matches seated elbow height and provides genuine transfer leverage, not just a handhold.
  • A 2021 peer-reviewed study found that approximately 40.2% of Medicare beneficiaries who kept falling had no bathroom modifications in place, representing 1.9 million people.6
  • Getting dimensions right is a planning task. The ADA Standards define the floor, not the target – more space reduces hesitation and improves comfort beyond the minimum.

Why Handicap Bathroom Layout Dimensions Matter

A CDC study found that approximately 234,000 nonfatal bathroom injuries among people aged 15 and older were treated in U.S. emergency departments in a single year – and 81.1% of those injuries were caused by falls.4 In 2021, emergency departments recorded approximately 3 million visits from older adult falls overall.5 The bathroom is not dangerous because of one dramatic hazard. It’s dangerous because a small room asks a person to change direction, transfer body weight, and stand from a low seat – often with wet hands and no support within reach. Every one of those demands has a dimensional answer.

The dimensions in accessible bathroom design aren’t arbitrary standards. Each one traces back to a physical requirement: the space a wheelchair needs to rotate, the height that reduces hip flexion during a toilet transfer, the bar position that matches where a seated arm naturally pushes during a stand. Understanding that logic helps you use the numbers as a planning framework, not just a compliance checklist.

A 2021 peer-reviewed cross-sectional study of Medicare beneficiaries found that 55.5% of those with at least one fall had bathroom modifications in place, but approximately 40.2% of those who kept falling had no modifications at all – representing roughly 1.9 million people.6 The gap isn’t awareness. It’s planning. This article starts with the dimensions so you can plan in the right order.

A note on applicability: The ADA Standards for Accessible Design (2010) apply legally to new construction and alterations in public and commercial facilities, not to private homes. For residential renovation, the ICC/ANSI A117.1 standard uses nearly identical dimensional values. Treat the figures here as best-practice targets for a private home – and bring a licensed contractor or occupational therapist into structural or plumbing decisions.

What Is the Minimum Room Size for an Accessible Bathroom?

The ADA Standards don’t specify a single minimum room size. Instead, they specify clearances at each fixture, and you derive the room size by fitting those clearances together without overlap. In practice, the smallest fully accessible bathroom that accommodates a wheelchair user with a toilet, sink, and shower is approximately 60 inches by 96 inches (5 feet by 8 feet) – but that’s tight, and it assumes careful fixture placement. A toilet-only accessible room can be achieved in about 60 inches by 60 inches (5 by 5 feet) if the turning space and toilet clearance are overlapped where permitted.

The key principle: the clearances at fixtures can overlap each other as long as each required clear floor space is available when it’s needed. The toilet’s required clear floor space and the turning circle can share the same square footage. This is what allows a reasonably compact accessible bathroom to function – you’re planning space choreography, not adding every clearance as a separate, non-overlapping zone.

The 60-inch constraint and what it means for layout

Because the turning circle is 60 inches in diameter, no wall can be closer than 30 inches from the center of a required turning point. In a bathroom, the turning point typically falls in the open floor area between the toilet, shower, and door. This means that a bathroom narrower than 60 inches across cannot accommodate a full turning circle without positioning the turn against a wall, which is permitted only when the alternative T-turn option is used (covered in the next section).

A bathroom that’s wider than 60 inches – say, 64 to 72 inches – gives meaningful extra margin. That extra space isn’t wasted. It reduces the number of precise maneuvers required to park next to the toilet, approach the shower seat, or reverse out toward the door. More room means less physical effort over thousands of daily entries and exits.

When a larger room changes the planning options

A bathroom 72 inches or wider opens options not available in a minimum-compliant layout: a roll-in shower (which needs 60 inches of entry width) becomes feasible, and the toilet can be positioned for two-sided approach when assistance is needed. Planning for extra width upfront – even while still independent – is far less expensive than a structural retrofit later.

How Much Clearance Does a Wheelchair Need in a Bathroom?

The U.S. Access Board’s ADA Standards state the requirement plainly. The turning space must be at least 60 inches in diameter as a circular space.2

“The turning space shall be a space of 60 inches (1,525 mm) diameter minimum.”

U.S. Access Board, ADA Standards for Accessible Design, Section 304.3.12

That 60-inch circle doesn’t need to be entirely unobstructed. The base of a toilet, a low cabinet, or a fold-down shower seat can exist within the turning space as long as the clear floor space at each fixture is unobstructed when it’s being used. What the 60-inch diameter rules out is any wall, fixed cabinet, or structural element that prevents the wheelchair from completing a rotation.

Two men measuring and planning a home renovation using a tape measure, illustrating the precision required when planning handicap bathroom layout dimensions
Precise measurement is the starting point for any accessible bathroom renovation – every clearance in an ADA-aligned layout traces back to specific figures from the U.S. Access Board standards.

The T-turn alternative

When a bathroom can’t accommodate a full 60-inch circular turning space, the ADA Standards allow a T-shaped turning space as an alternative. A T-turn consists of three overlapping rectangles: the overall shape is an uppercase T, with each leg of the T being 36 inches wide and 60 inches long, and the intersection 36 by 36 inches. The T-turn requires more careful spatial planning and is harder to navigate than a full circle, but it can fit in a narrower bathroom where a circular turning space can’t.

For aging-in-place planning in a private home, the T-turn is often a useful fallback in bathrooms between 48 and 60 inches wide. It’s a compromise – a circular turning space is meaningfully easier to use in practice – but it can work in tight spaces where a full 60-inch diameter isn’t achievable without structural changes.

Clear floor space versus turning space

Clear floor space at a fixture is the dedicated rectangle of floor area needed to approach or use that fixture, separate from the turning space requirement. At a toilet, for example, a 60 by 56 inch clear floor space is required for the transfer approach. At a lavatory, an 18 by 48 inch clear floor space is required. These floor spaces can overlap the turning circle but can’t overlap each other when both are in use. Mapping this on a floor plan before construction is one of the most useful pre-build steps a contractor or occupational therapist can take.

How Much Space Do You Need Around the Toilet?

The U.S. Access Board specifies the toilet clearance in direct terms. The ADA Standards require 60 inches measured perpendicular from the side wall and 56 inches measured perpendicular from the rear wall.1

“Clearance around a water closet shall be 60 inches (1,525 mm) minimum measured perpendicular from the side wall and 56 inches (1,420 mm) minimum measured perpendicular from the rear wall.”

U.S. Access Board, ADA Standards for Accessible Design, Section 604.31

Those two dimensions describe a floor space rectangle (60 by 56 inches) that surrounds the toilet. The 60-inch side measurement is what allows a wheelchair user to position the chair parallel to the toilet – alongside it, not in front of it – for a lateral transfer. Without that space on at least one side, a parallel transfer isn’t possible, and the person either must use a frontal approach (physically harder) or require a caregiver to assist from a position that isn’t mechanically efficient.

Toilet centerline to side wall

The ADA Standards also specify that the toilet centerline must be 16-18 inches from the side wall. This keeps the toilet close enough to the wall that the grab bar is reachable during transfer, but far enough that transfer space isn’t lost. The 16-18 inch centerline pairs with a side grab bar starting no more than 12 inches from the rear wall and extending to 54 inches – together defining the reach zone throughout the sit-to-stand motion.

What this means for existing bathrooms

Many existing bathrooms place the toilet against a wall with less than 18 inches of side clearance. A toilet with 12 inches to the wall on the transfer side can’t support an independent lateral transfer. Repositioning the toilet requires relocating the drain – a structural plumbing change that needs a licensed plumber and, in most jurisdictions, a permit. An occupational therapist can evaluate whether the layout can be adapted or whether relocation is the right call for the specific person.

What Height Should a Toilet Be for Accessibility?

Per ADA Standards Section 604.4, the toilet seat height must be between 17 inches (430 mm) and 19 inches (485 mm) above the finished floor, measured to the top of the seat.1 A standard residential toilet typically puts the seat at 14 to 15 inches. The ADA range is 2 to 5 inches higher.

The mechanical reason for the higher seat: every inch of additional seat height reduces the depth of hip flexion required to sit down and the vertical distance to travel to stand up. For a person with hip or knee limitations, reduced flexion means reduced pain and less muscular effort on the eccentric phase of sitting. For a person with reduced leg strength, a shorter stand-up distance means the sit-to-stand transfer demands less force from the quadriceps and glutes.

Raised seat adapters versus comfort-height toilets

A raised seat adapter adds 2, 3.5, or 4 inches to an existing toilet seat. A standard 15-inch seat plus a 3.5-inch riser reaches 18.5 inches – within the ADA range. The adapter is reversible and requires no plumbing work, making it the practical starting point for rentals or lower-budget situations. A “comfort height” or “ADA-height” toilet achieves the same seat height as a permanent fixture. Either works; the choice depends on budget, ownership, and how long the change needs to last.

Why seat height isn’t the only toilet variable

The 17-19 inch seat height addresses the vertical transfer distance. It doesn’t address the lateral transfer approach, the grab bar reach, or the clearance space around the toilet. A toilet raised to 19 inches but positioned against a wall with 10 inches of side clearance is still inaccessible for a lateral transfer. Height is one variable in a system, not the system itself. Observe the full transfer path – approach, turn, lower, sit, stand, turn, exit – before deciding which dimensions need to change first.

Where Should Grab Bars Be Installed?

According to ADA Standards Section 609.4, horizontal grab bars must be installed with the top of the gripping surface between 33 and 36 inches above the finished floor.1 That range isn’t arbitrary. It corresponds to the elbow height of most adults when seated on a toilet at the ADA-compliant 17-19 inch seat height. A bar at 33-36 inches allows a seated person to push down with a bent elbow – the mechanically strong position for generating upward force – rather than reaching up to a bar that’s too high or pressing down on a bar that’s too low.

At the toilet, the ADA Standards require two bars: one on the side wall and one on the rear wall. The side wall bar runs at least 42 inches long, starting no more than 12 inches from the rear wall and extending to at least 54 inches from the rear wall. The rear wall bar is at least 36 inches long, with its inner end no more than 6 inches from the toilet’s side. Both bars sit at 33-36 inches above the floor.

ADA Accessible Bathroom: Key Dimensional Requirements Horizontal bar chart showing six key ADA minimum dimensions for accessible bathrooms in inches. Turning space diameter: 60 inches (U.S. Access Board Section 304.3.1). Toilet side clearance: 60 inches (Section 604.3). Roll-in shower depth: 60 inches (Section 608.2.2). Toilet rear clearance: 56 inches (Section 604.3). Transfer shower each side: 36 inches (Section 608.2.1). Door clear opening: 32 inches (Section 4 of ADA door standards). All data from U.S. Access Board ADA Standards for Accessible Design (2010). Fall-risk context from PMC peer-reviewed research (PMC10028600, 2021; PMC10363339, 2023). ADA Accessible Bathroom: Key Dimensional Requirements Turning space 60 in. Toilet side clearance 60 in. Roll-in shower depth 60 in. Toilet rear clearance 56 in. Transfer shower 36 in. Door clear opening 32 in. Primary clearances (turning, toilet, shower depth) Entry minimums (transfer shower sides, door) Source: Home Age Fit analysis, 2026
Three major accessible bathroom clearances (turning space, toilet side clearance, roll-in shower depth) all converge on 60 inches – the wheelchair turning circle is the master governing dimension. Compiled by Home Age Fit from U.S. Access Board ADA Standards for Accessible Design, Sections 304, 604, and 608, with fall-risk context from PMC10028600 (2021) and PMC10363339 (2023).

Notice in the chart above that three major accessible bathroom requirements all land at exactly 60 inches: the turning circle diameter, the toilet side clearance, and the roll-in shower entry depth. This isn’t coincidence – it reflects the wheelchair’s footprint and turning behavior as the governing constraint. When you plan the room around a single 60-inch clearing dimension, you’re simultaneously satisfying multiple requirements at once. This is the original Home Age Fit synthesis: the 60-inch number isn’t one requirement among many – it’s the master dimension from which the rest of the accessible bathroom layout derives.

Grab bars in the shower area

In a transfer-type shower (36 by 36 inches), a horizontal grab bar on the control wall and a horizontal bar on the back wall are both required, both at 33-36 inches above the floor. A fold-down seat is also required, positioned on the wall opposite the controls. In a roll-in shower (30 by 60 inches), horizontal bars run on three walls (both side walls and the back wall), all at 33-36 inches. The logic is consistent: every bar sits in the zone where a seated person’s elbow naturally rests, providing push-down leverage for a stand rather than a pull-up grip that requires upper body strength most people don’t have at the point when the bars are most needed.

Wall blocking for future grab bar installation

Install blocking in walls during any bathroom remodel – solid wood or plywood at the grab bar height zones – even if you’re not installing bars immediately. Blocking costs almost nothing relative to the renovation budget. A bathroom that’s been blocked during construction can have grab bars added in an afternoon without structural concern. An unblocked tiled bathroom requires a professional assessment of stud locations or reinstallation of the tile surround. If you’re remodeling for any reason, add blocking.

What Size Shower Works for an Accessible Bathroom?

The ADA Standards define two types of accessible shower compartments, each with its own minimum dimensions. A transfer-type shower compartment must be 36 inches by 36 inches clear inside, with a 36-inch-wide minimum entry on the face of the compartment.1 A standard roll-in type shower compartment must be 30 inches wide by 60 inches deep clear inside, with a 60-inch-wide minimum entry.1

The two types serve different users and different transfer strategies. A transfer shower is designed for someone who transfers from a wheelchair to a shower seat: the chair pulls up to the open side of the 36-inch entry, the person slides laterally onto the built-in seat, and then bathes in a seated position. A roll-in shower is designed for someone who rolls the wheelchair directly into the shower without a transfer: the chair enters through the 60-inch-wide opening and stays in the shower during use. The 60-inch entry width matches the turning circle dimension because the person needs to rotate or maneuver within or at the threshold of the shower.

Which shower type fits most residential situations

For most aging-in-place home renovations, the transfer-type shower (36 by 36 inches) is more practical. It fits within the footprint of a standard 3-foot-by-3-foot shower stall, which many homes already have or can create with modest framing. The roll-in shower (30 by 60 inches) requires a footprint that’s 5 feet long, which often means reconfiguring the bathroom layout substantially or borrowing space from an adjacent closet or bedroom. The roll-in shower becomes the right choice when the person uses a power wheelchair that’s difficult to transfer from, or when an occupational therapist’s evaluation identifies roll-in bathing as the safer approach for the specific individual.

Thresholds, curbs, and the wet area floor

A transfer-type shower may have a low threshold (no more than 1/2 inch) or no threshold at all. A roll-in shower must have no threshold or a 1/2-inch maximum beveled curb. Near-zero thresholds require the wet area floor to slope toward the drain at about 1/4 inch per foot. Wet area flooring must be slip-resistant, and the drain must not create a catching edge for wheelchair casters or feet.

In older bathrooms, a curb of 3 to 4 inches is common. Eliminating it is a structural waterproofing decision requiring a licensed contractor. If curb elimination isn’t feasible, a transfer bench extending over a reduced-height curb is a common intermediate solution – an occupational therapist can evaluate what works for the specific person.

How Wide Does the Bathroom Door Need to Be?

The ADA Standards require a minimum clear door width of 32 inches for accessible doorways where the opening depth is 24 inches or less, and 36 inches clear where the opening is deeper.3 Clear width is measured from the door stop to the face of the open door – it’s not the nominal door size. A standard 32-inch nominal door in a typical frame provides approximately 29-30 inches of clear width, which falls short of the 32-inch minimum. A 36-inch nominal door in a standard frame provides approximately 33-34 inches clear.

For most accessible bathroom applications, a 36-inch nominal door is the practical minimum. A 38-inch nominal door (less common but available) provides the 36-inch clear recommended as the comfortable width for a standard manual wheelchair without precision maneuvering at the threshold.

Door swing direction and space

An inward-swinging door requires the person inside to back away while opening it – awkward in a small room and problematic if someone has fallen near the door. An outward-swinging or sliding door (pocket or barn style) eliminates this problem, allows emergency access from outside, and removes the swing radius from the floor area calculation. For accessible bathrooms, outward-swinging or sliding doors are strongly preferred over inward-swinging doors.

Threshold at the door entry

A zero threshold at the bathroom entry is the target. Any height change requires a wheelchair to lift its front casters, which takes more force than rolling on a flat surface – and takes more balance for someone using a walker or rollator. Where a threshold exists (common in older construction), the ADA Standards permit a maximum of 1/2 inch with a beveled edge on both sides. A threshold of 1/4 inch or less is the target for a truly low-effort entry. If the existing floor level change between the hallway and bathroom is more than 1/2 inch, a licensed contractor can evaluate whether a small ramp transition piece is appropriate or whether the bathroom floor level needs to be adjusted – a more significant structural decision.

Door hardware

ADA door hardware must be operable with a closed fist – no pinching or wrist-twisting. Lever handles meet this requirement; round knobs don’t. Lever hardware is one of the simplest accessible improvements and one of the most frequently overlooked. The lever extends the moment arm compared to a knob, requiring less grip force to operate the latch – a direct application of mechanical advantage.

Frequently Asked Questions

What is the smallest functional accessible bathroom you can build?

A toilet-only accessible room can work in roughly 60 by 60 inches if turning space and toilet clearance overlap correctly. A full accessible bathroom with toilet, sink, and shower requires closer to 60 by 96 inches as a functional minimum. An occupational therapist can evaluate whether a specific floor plan is usable for the specific person before construction begins.

Do ADA bathroom dimensions apply to private home renovations?

ADA Standards are legally required for public and commercial facilities, not private homes. For residential renovation, the ICC/ANSI A117.1 standard uses nearly identical dimensional values. Treating ADA dimensions as best-practice targets is practical regardless – they reflect the physical requirements of wheelchair use and transfer mechanics. A licensed contractor or certified aging-in-place specialist can confirm what applies in your jurisdiction.

Can I make a too-small bathroom accessible without a major renovation?

Partially. Raised toilet seats, fold-down shower benches, grab bars (where walls have adequate blocking or studs), and lever door hardware all improve usability without structural work. What they can’t fix is insufficient floor clearance. If the toilet has 10 inches to the side wall, no product addresses that – the toilet or wall must move. An occupational therapist visit identifies which limits are product problems and which are spatial problems.

What is the single most important accessible bathroom modification?

Grab bars at the toilet, at 33-36 inches above the floor and within reach during the sit-to-stand transfer, are consistently the highest-impact starting point. A 2023 meta-analysis of 10 randomized trials with 1,960 participants found home hazard modification programs produced a 7% reduction in falls.7 Bars are relatively low cost, don’t require major structural work with proper wall blocking or stud anchoring, and address the most physically demanding moment in bathroom use.

Are grab bar height requirements the same in the shower and at the toilet?

Yes. The U.S. Access Board specifies 33-36 inches above the floor for horizontal grab bars in both locations per ADA Section 609.4.1 The shared height range reflects consistent seated elbow height regardless of where the bar is used. What differs is the bar length and position relative to the specific fixture: at the toilet, bars span the side and rear walls at defined positions; in a transfer shower, bars are on the control wall and back wall; in a roll-in shower, bars run on three walls.

Limitations and Edge Cases

  • The dimensions in this article apply to standard adult wheelchair users (manual chairs, standard width). Power wheelchair users, bariatric chairs, and three-wheeled scooters have different turning radii and may require clearances larger than the ADA minimums. An occupational therapist should assess the specific equipment before planning a renovation.
  • All figures are sourced from the 2010 ADA Standards for Accessible Design, which govern U.S. public and commercial construction. Residential applications use ICC/ANSI A117.1 (nearly identical values) and may be subject to local building codes that differ in specific requirements. Always verify with a licensed contractor in your jurisdiction before construction.
  • This article covers dimensional planning – floor areas, heights, and clearances. It doesn’t cover waterproofing, structural support for grab bars, plumbing rough-in, or ventilation requirements, all of which involve licensed professional decisions beyond the scope of educational content.

References

  1. U.S. Access Board – ADA Standards for Accessible Design, Chapter 6: Plumbing Elements and Facilities (Sections 604, 608, 609), 2010.
  2. U.S. Access Board – ADA Standards for Accessible Design, Chapter 3: Building Blocks (Section 304 – Turning Space), 2010.
  3. U.S. Access Board – ADA Standards Guide, Chapter 4: Entrances, Doors, and Gates (clear width requirements), 2010.
  4. Centers for Disease Control and Prevention – “Nonfatal Bathroom Injuries Among Persons Aged ≥15 Years – United States, 2008,” Morbidity and Mortality Weekly Report, Vol. 60, No. 22, 2011.
  5. National Council on Aging – “Get the Facts on Falls Prevention” (citing CDC data: 3 million older adult fall ED visits in 2021), 2024.
  6. PubMed Central / National Library of Medicine – “Bathroom modifications among community-dwelling older adults who experience falls,” peer-reviewed cross-sectional study of Medicare Current Beneficiary Survey data, 2021.
  7. PeerJ / PubMed Central – “Home hazard modification programs for reducing falls: a systematic review and meta-analysis of 10 randomized trials (n=1,960),” 2023.

Conclusion

The dimensions in accessible bathroom design aren’t a collection of independent rules – they’re a system built around one governing number. The 60-inch wheelchair turning circle sets the spatial requirement that determines minimum room size, toilet placement, shower entry width, and the floor area available for every transfer. Once you understand that the turning circle is the master dimension, the rest of the numbers follow from it: 56 inches of rear toilet clearance, 36 inches for a transfer shower, 33-36 inches for grab bar height, 32 inches minimum at the door.

Planning these dimensions before construction is far less expensive than retrofitting a room that falls short. Doing that planning before mobility changes make the bathroom difficult is the version that most protects independence. For the broader safety framework connecting these dimensions to the rest of the home, see our bathroom safety planning overview.

Wheelchair Accessible Bathroom: What It Is and When It’s the Right Call

Author: Oded Feigin · Created On: July 16, 2026 · Last Updated: August 24, 2026

A wheelchair accessible bathroom is built around one engineering constraint: a person using a wheelchair must be able to enter, position, transfer, and exit without the room itself becoming the obstacle. It is a planning decision first and a construction project second, and it connects directly to the broader framework of bathroom safety planning. According to the U.S. Census Bureau, roughly 60% of US homes lack even the most basic aging-ready features5, which means most bathrooms were never designed with wheelchair access in mind. This guide explains what the standard actually requires, how to read the dimensions, and how to decide when a full wheelchair-accessible remodel is the right call versus a simpler set of targeted upgrades.

An elderly man helps a woman in a wheelchair as she applies skincare products in a modern bathroom. The two reflect their happy expressions in a large mirror mounted above the wooden vanity.
A person in a wheelchair navigating a room: the turning radius, door clearance, and floor space that matter in this setting are the same dimensions that govern wheelchair accessible bathroom design.

Quick Answer

What exactly is a wheelchair accessible bathroom, and what does it take to make one?

A wheelchair accessible bathroom meets the minimum clearance requirements set by the ADA Standards for Accessible Design: a 60-inch turning circle, a 32-inch clear door width, 60 inches of clear floor space alongside the toilet, and roll-under sink clearance of at least 27 inches1. It is not the same as a grab-bar retrofit or a “senior-friendly” bathroom. The distinction matters because falls are the primary cause of 81% of nonfatal bathroom injuries treated in US emergency departments6, and a room that looks accessible but fails on clearances offers neither the safety nor the function a wheelchair user needs.

Key Takeaways

  • A wheelchair accessible bathroom requires a minimum 60-inch turning circle, a 32-inch clear door opening, and 60 by 56 inches of clear floor space at the toilet (U.S. Access Board, ADA Standards).
  • 60% of US homes lack even the most basic aging-ready features5 (U.S. Census Bureau, 2023), so most bathrooms need deliberate planning to reach wheelchair-accessible clearances.
  • Planning before a health event is almost always less expensive and less disruptive than a crisis-driven remodel: full accessible conversions average $8,400 but can reach $16,000 depending on scope8.
  • A wheelchair accessible bathroom is not the only answer to bathroom safety. Targeted upgrades (grab bars, threshold removal, door widening) can close specific gaps at a fraction of the cost when full wheelchair clearance is not needed.
  • The right call depends on the user’s actual mobility, the home’s layout, and the likely trajectory of need over the next 5 to 10 years, not just on current ability.

What Is a Wheelchair Accessible Bathroom?

A wheelchair accessible bathroom is a bathroom designed so that a person who uses a manual or power wheelchair can enter, move within, use each fixture, and exit independently. That description sounds simple. The engineering behind it is not.

Independence requires room to turn. It requires a door wide enough to pass through without scraping knuckles or wheel guards. It requires a toilet positioned so that a lateral transfer from chair to seat is physically possible. It requires a sink low enough and open enough underneath that a wheelchair can roll beneath it. None of those conditions exist by accident, and none of them are met by simply adding a grab bar to a standard bathroom.

Is “wheelchair accessible” the same as “ADA compliant”?

Not exactly. “ADA compliant” refers to meeting the ADA Standards for Accessible Design, which are the legal baseline for commercial facilities, federally funded construction, and renovations in covered building types. “Wheelchair accessible” describes a functional outcome: a bathroom a wheelchair user can actually use. The two overlap substantially, because the ADA standards were written to produce functional access. But a bathroom can be called “accessible” in a general sense, with grab bars and a wider door, while still falling short of the specific floor-space clearances the ADA requires for full wheelchair operation.

For residential planning purposes, “wheelchair accessible bathroom” is the more useful framing. It focuses attention on the functional question: can someone who uses a wheelchair enter, turn, and use every fixture without the room blocking them?

Who benefits from wheelchair accessible bathroom design?

The obvious answer is a person who currently uses a wheelchair. The more useful answer, for planning purposes, is broader. Wheelchair accessible clearances also accommodate power scooters, rolling walkers, and caregiver-assisted transfers. They reduce hesitation points for people with balance issues, weak grip, or reduced lower-body strength, because wider floors and open knee space remove environmental friction before a person has to fight it.

The demographic context matters here. The National Council on Aging estimates that 1 in 4 Americans age 65 and older falls each year7. Planning a wheelchair accessible bathroom before that risk profile describes a household is not overcaution. It is the difference between a planned upgrade and a crisis-driven renovation.

Is a wheelchair accessible bathroom only for people who already use a wheelchair?

No, and this is one of the more persistent misconceptions about accessible design. A bathroom that meets wheelchair-accessible clearances is also a better bathroom for most other users. Turning space benefits anyone who needs room to help a family member. Wide doorways reduce friction for anyone carrying laundry or equipment. Low-threshold showers and roll-under sinks are features that age well as a household’s mobility changes.

The case for planning ahead, not just for current wheelchair users but for households that may need wheelchair access in the next 5 to 15 years, is precisely the systems-first thinking that separates a useful renovation from one that solves only today’s problem while creating tomorrow’s obstacle.

What Dimensions Does a Wheelchair Accessible Bathroom Require?

The ADA Standards for Accessible Design specify the minimum clearances for a wheelchair accessible bathroom in precise terms. These are not guidelines or suggestions. They are the floor below which a bathroom does not function as accessible, regardless of how it is marketed or labeled.

Understanding these dimensions as a system, not as a checklist, is what separates a bathroom that works from one that looks accessible but fails in practice.

Turning radius: the dimension that defines every layout decision

A wheelchair requires a 60-inch minimum diameter circular floor space to complete a full turn1. Alternatively, the ADA Standards allow a T-shaped space: a 60-inch overall width, 60-inch overall depth, with each arm and stem at least 36 inches wide. That T-shape accommodates a three-point turn rather than a full rotation, which is a meaningful distinction in tighter spaces.

Most bathroom planning starts with the question of whether a 60-inch turning circle can fit. That question governs everything else: where the toilet goes, where the vanity goes, where the door swings, and whether the entry is wide enough to allow the chair to enter pointing in a direction that makes turning possible at all.

One planning note: some state and local building codes adopt ANSI A117.1-2017 rather than the ADA standard. That version requires a 67-inch turning circle for residential construction. Before finalizing any wheelchair accessible bathroom layout, check which standard your local jurisdiction enforces.

Door width: the entry constraint that eliminates most bathrooms immediately

The ADA Standards require a 32-inch minimum clear width for a doorway when the depth of the opening is 24 inches or less, and a 36-inch clear width when it is deeper2. “Clear width” means the unobstructed space available to pass through when the door is open at 90 degrees, not the rough opening or the nominal door size.

Most standard residential interior doors have a clear width of 28 to 30 inches. They are not wheelchair accessible. A door upgrade to a 36-inch nominal door, which typically delivers a 32-inch or 33-inch clear opening depending on frame thickness and door hardware, is one of the first physical changes in an accessible remodel. For power wheelchair users, a 36-inch clear opening is a more practical target, given that many power chairs are 24 to 26 inches wide and require margin for approach angles.

Clear floor space at the toilet: where transfers happen

The ADA requires a minimum 60-inch-wide by 56-inch-deep clear floor space beside the toilet3. That space accommodates the wheelchair parking position from which a lateral transfer to the toilet seat occurs. The 60-inch dimension runs perpendicular to the toilet; the 56-inch depth runs parallel to the bowl.

This is the clearance that most existing bathrooms fail most dramatically. A bathroom where the toilet is set in a 30-inch-wide alcove, or where a vanity and wall are positioned within 40 inches of the toilet, has no usable transfer space. Adding grab bars in that configuration provides grip support for ambulatory users but does not solve the wheelchair-transfer problem. The floor space has to exist first.

Roll-under clearance at the lavatory: what the sink actually needs

For a wheelchair user to approach the lavatory from a seated position and use it independently, the vanity or sink must provide at least 27 inches of vertical knee clearance, and the rim or counter must be no higher than 34 inches4. The approach clear floor space is 30 inches wide by 48 inches deep for a forward approach.

A standard bathroom vanity with a cabinet beneath the sink provides zero knee clearance. Converting to roll-under access requires either a wall-mounted sink with an open knee space below (and insulated pipes to prevent contact burns) or an open-base vanity designed for roll-under access. The exposed pipe situation is not cosmetic: uninsulated hot-water pipes at knee height are a burn risk for wheelchair users with reduced leg sensation.

ADA Wheelchair Accessible Bathroom Clearances at a Glance
Element ADA Minimum Requirement What Fails This Standard
Turning space 60-inch diameter circle (or T-shape: 60″x60″, each arm/stem min. 36″)1 Most 5’x8′ bathrooms with full vanity and toilet alcove
Door clear width 32 inches minimum (36″ if depth >24″)2 Standard 28-30″ interior residential door
Toilet clear floor space 60″ wide x 56″ deep3 Toilet in alcove or beside full-depth vanity
Sink knee clearance 27 inches high minimum4 Any standard cabinet-base vanity
Lavatory/counter height 34 inches maximum4 Standard 36″ vanity tops

How Big Does a Wheelchair Accessible Bathroom Need to Be?

The honest answer is: larger than most standard US bathrooms, and the exact square footage depends on the layout, not just the footprint. A 5×8-foot bathroom (40 square feet) can, in some configurations, accommodate a 60-inch turning circle if fixtures are positioned carefully and there is no deep vanity projecting into the floor space. More often, a meaningful wheelchair accessible bathroom starts at 60×96 inches (about 40 square feet minimum for a stripped-down configuration) or more practically at 72×84 inches (42 square feet) or larger when a roll-in shower is included.

The question most people ask is “what is the smallest possible wheelchair accessible bathroom?” That is the wrong starting question. The right starting question is “what movement does this person actually need to perform in this bathroom, and does the layout support those movements without requiring the wheelchair to be repositioned multiple times?” A 60-inch turning circle in the wrong part of the room is not useful if the door opens into it, or if the toilet is positioned to require turning before transfer.

What is the smallest wheelchair accessible bathroom that actually works?

For a bathroom with toilet, wall-mounted sink, and no shower (a half-bath or a bathroom where the shower is in an adjacent room), a footprint of approximately 60×84 inches (35 square feet) can accommodate the ADA minimum clearances if the toilet is positioned on the 60-inch wall with full side clearance and the door swings outward or is a pocket or barn-door configuration. An outward-swinging door is important: an inward-swinging door eats into the turning space and transfer clearance.

Add a roll-in shower (which requires 36×36 inches minimum, more practically 36×60 or 60×60 for a fold-down bench), and the footprint requirement climbs to roughly 80×96 inches or more for a functional layout. These are minimum targets, not comfortable targets. Generous layouts give wheelchair users room to maneuver without performing precise multi-point turns at every fixture transition.

“All persons, but especially older adults, should be aware of bathroom activities that are associated with a high risk for injury.”

CDC Morbidity and Mortality Weekly Report, “Nonfatal Bathroom Injuries Among Persons Aged 15 Years, United States, 2008”6
Why Accessible Bathroom Planning Matters: Two Independent Measures Bar 1: 60% of US homes lack even the most basic aging-ready features, per U.S. Census Bureau American Housing Survey 2019 data, published October 2023. Bar 2: 81.1% of nonfatal bathroom injuries treated in US emergency departments were caused by falls, per CDC Morbidity and Mortality Weekly Report 2011 (2008 NEISS-AIP data). These are distinct measures from different surveys and different populations; they are not directly comparable to one another. Why Accessible Bathroom Planning Matters: Two Measures 0% 25% 50% 75% 100% US homes lacking aging-ready features 60% Bathroom injuries caused by falls 81% US homes not aging-ready Bathroom injuries from falls Source: Home Age Fit analysis, Census Bureau (2023) and CDC MMWR (2011)
Two independent measures from different surveys: home aging-readiness data from the U.S. Census Bureau (2023) and bathroom injury data from the CDC MMWR (2011). Each reflects a distinct population and methodology; together they show why accessible bathroom planning benefits from early planning rather than a crisis response. Compiled by Home Age Fit from U.S. Census Bureau and CDC MMWR.

When Is a Wheelchair Accessible Bathroom the Right Planning Decision?

Making a bathroom wheelchair accessible is not the right answer to every bathroom safety question. It is the right answer when one specific set of conditions applies: a household member uses a wheelchair now, is likely to use one within a planning horizon of 5 to 10 years, or regularly assists someone who does. Outside those conditions, targeted accessibility upgrades, rather than a full wheelchair-accessible conversion, often deliver better value per dollar spent.

The decision framework starts with movement, not with a product catalog. What route does the person use to reach the bathroom? What transfer does the person need to perform at the toilet? What grip points does the person rely on? What happens if the person’s condition changes in the next three to five years? Those questions, not a product brochure, determine whether full wheelchair clearances are necessary or whether a more targeted set of changes addresses the actual friction points.

Planning before a health event versus remodeling after one

The most expensive wheelchair accessible bathroom remodel is almost always the one done in a hurry after a fall or sudden mobility change. The structural changes the space requires, including door frame widening, threshold removal, drain relocation, and wall blocking for grab bars, are far easier to accomplish during a planned renovation than as emergency retrofits.

If a household has any reason to expect that wheelchair access might be needed within a decade, the cost of building for that access now, as part of a renovation already underway, is a fraction of the cost of removing a freshly finished bathroom later to start over.

Full wheelchair accessible conversion versus targeted accessibility upgrades

A full wheelchair accessible conversion addresses all five clearance requirements: turning space, door width, toilet side clearance, roll-under sink access, and, if a shower is included, a roll-in configuration. This is the right scope when the primary user is a full-time wheelchair user and the bathroom is that person’s primary one.

Targeted accessibility upgrades address a subset of those requirements based on the actual mobility pattern of the user. A person who uses a rollator but not a wheelchair may need threshold removal, a grab bar at the toilet, and a fold-down shower bench but does not need 60 inches of side clearance at the toilet. Matching the scope of work to the actual movement pattern reduces cost and avoids over-engineering a space. An occupational therapist with a home-modification specialty can map those requirements before any scope is committed.

A man in a wheelchair inside a well-lit room, illustrating the space and mobility considerations central to wheelchair accessible bathroom planning
Accurate measurement is the foundation of any wheelchair accessible bathroom remodel. Door clearances, turning radius, and fixture positioning must be verified against ADA standards before work begins, not during or after it.

How Much Does a Wheelchair Accessible Bathroom Remodel Cost?

A full wheelchair accessible bathroom conversion costs between $2,700 and $16,000, with most projects landing at an average of $8,400, according to HomeAdvisor cost data updated in June 20268. That range reflects the difference between a partial upgrade, such as door widening and grab bars, and a comprehensive conversion that includes a roll-in shower, wall-mounted roll-under vanity, toilet repositioning, and threshold removal throughout.

The cost spread is wide because the scope of work varies significantly by what the existing bathroom provides and what clearances it lacks. A bathroom that already has an outward-swinging door, a 36-inch doorway, and adequate floor space at the toilet may need only vanity replacement, shower conversion, and grab bar installation. A bathroom with a 28-inch inward-swinging door, a toilet in a 30-inch alcove, and a standard cabinet vanity needs more structural intervention before any cosmetic work begins.

What drives the cost of a wheelchair accessible bathroom remodel higher or lower?

The largest cost drivers in a wheelchair accessible bathroom conversion are structural changes8: widening a doorway requires cutting into the wall framing and possibly relocating a load-bearing element or a plumbing line; repositioning the toilet involves rough plumbing rework; relocating the shower drain for a roll-in configuration requires concrete cutting in a slab foundation. Each can add several thousand dollars to a project on its own.

Cost is lower when the existing layout already provides some of what wheelchair access requires. A bathroom in a newer home with a 36-inch doorway, an open floor plan, and a single-threshold or zero-threshold entry may need only fixture replacement and grab bar blocking rather than structural rework. Cost is also lower when work is bundled into a broader renovation that is already opening walls and replumbing, because the incremental cost of building for accessibility at that point is much smaller than a stand-alone project.

The cost of not planning for accessibility, on the other hand, is harder to quantify but real: it includes the physical and financial cost of a fall, the disruption of an emergency renovation, and the loss of independence that comes when a bathroom becomes unusable. Physics, not sentiment, makes the case for planning before the need is urgent.

What Most Wheelchair Accessible Bathroom Plans Miss

Most planning conversations about wheelchair accessible bathrooms focus on the 60-inch turning circle and the door width. Those are the right starting points, but they are not the whole picture. In practice, the three most common gaps in wheelchair accessible bathroom plans are the approach angle to the toilet, the door hardware, and the pipe insulation below the sink.

The approach angle to the toilet matters because a 60-inch turning circle gives a wheelchair user room to turn, not room to approach the toilet from the correct lateral position for a safe transfer. If the toilet is positioned so that the only approach from the turning space puts the wheelchair at a diagonal or facing head-on, the transfer is harder or impossible even with the correct side clearance. A plan that shows the clearances as boxes on a floor plan without mapping the actual transfer sequence can miss this entirely.

Door hardware is a detail that matters more than it seems. A round knob requires grip and rotation, which a wheelchair user with limited hand function may not be able to manage. ADA-compliant door hardware uses a lever handle, which can be operated with a closed fist or forearm. It is an inexpensive hardware swap that is easy to overlook in a budget focused on structural work.

Pipe insulation below a roll-under sink is a safety requirement, not an optional finish detail. A wheelchair user with reduced sensation in the legs can receive a contact burn from an uninsulated hot-water supply line or drain pipe without feeling the heat until damage has occurred. Foam pipe insulation or a wrap cover is an inexpensive addition that most bathroom renovation budgets do not explicitly include.

The broader pattern here is that wheelchair accessible bathroom planning works best as a systems-led sequence, not a clearance checklist. The sequence starts with the entry: can the person approach the door and operate the hardware? It moves through the turn: is there room to point the chair toward the next fixture? It checks each transfer: toilet, shower, sink. A bathroom that passes the clearance checklist but fails the sequence test is not accessible in practice. Walk the route in a wheelchair, or with a tape measure simulating one, before finalizing any layout.

An occupational therapist specializing in home modification can perform this sequence evaluation as part of a home visit. For structural changes specific to a particular home and person, that professional evaluation is not optional – it is where engineering-informed planning hands off to someone who can certify the outcome.

Frequently Asked Questions

What is the minimum size for a wheelchair accessible bathroom?

The ADA Standards specify clearances, not total square footage. A wheelchair accessible half-bath (toilet and sink only) can fit in approximately 60 by 84 inches if the toilet has full side clearance, the door swings outward, and the sink is wall-mounted with knee clearance below. Add a roll-in shower and the minimum footprint rises to roughly 80 by 96 inches or larger. A turning circle of 60 inches1 must fit without overlapping an inward-swinging door.

What door width does a wheelchair accessible bathroom need?

A wheelchair accessible bathroom door requires a minimum 32-inch clear width (the open, unobstructed passable space), or 36 inches clear if the doorway depth exceeds 24 inches2. Clear width is measured from the face of the door to the stop on the opposite side, with the door open 90 degrees. Most standard residential interior doors (28 to 30 inches nominal) do not meet this standard. A 36-inch nominal door typically delivers 32 to 34 inches of clear width depending on hardware and frame thickness, and is the standard target for accessible residential doorways.

How big does a wheelchair accessible bathroom need to be to include a shower?

A roll-in shower requires a minimum 36 by 36 inches of floor space, though 36 by 60 inches is more functional for a fold-down bench. Combined with toilet clearance, turning space, and a sink, a full wheelchair accessible bathroom with shower typically needs at least 80 by 96 inches to work without tight maneuvering. Smaller footprints are possible with outward-swinging or pocket doors and wall-mounted sinks, but they require a professional layout review to confirm that transfer sequences work.

What are the ADA dimensions for a wheelchair accessible bathroom at the toilet?

The ADA requires a clear floor space of 60 inches wide by 56 inches deep beside the toilet3. This space accommodates wheelchair positioning for a lateral transfer to the toilet seat. The 60-inch dimension runs perpendicular to the toilet bowl; the 56-inch depth runs parallel to it. Grab bars at the side wall and at the rear wall of the toilet are also required under ADA standards. The toilet seat height should be 17 to 19 inches from the floor to facilitate transfers from standard wheelchair seat heights.

How much does it cost to make a bathroom wheelchair accessible?

A full wheelchair accessible bathroom conversion costs between $2,700 and $16,000, with an average of $8,400 according to HomeAdvisor (updated June 2026)8. The wide range reflects the difference between targeted upgrades (door widening and grab bars) and a full conversion including roll-in shower, wall-mounted vanity, toilet repositioning, and threshold removal. Projects that require structural work, such as cutting into load-bearing framing to widen a doorway or relocating a shower drain in a slab foundation, fall toward the high end. Bundling accessible bathroom work into a broader renovation reduces the incremental cost significantly.

Limitations and Edge Cases

  • This article covers ADA Standards for Accessible Design as they apply to residential planning. Local building codes may adopt ANSI A117.1-2017 or a state-level accessibility standard that imposes stricter clearances (such as the 67-inch turning radius). Always confirm which standard governs your jurisdiction before finalizing a layout.
  • Cost figures are US national averages from HomeAdvisor (June 2026) and vary substantially by region, contractor, and scope. Projects in high-cost metro areas or those requiring significant structural work routinely exceed the stated range.
  • This spoke covers the wheelchair accessible bathroom as a design and planning topic, not the broader question of how it fits within a whole-home safety and circulation strategy. For the wider context of bathroom layout, route safety, and when to involve a licensed occupational therapist, see the overview in the bathroom safety planning hub.

References

  1. U.S. Access Board – ADA Guide, Chapter 3: Clear Floor or Ground Space and Turning Space. Current standard; specifies 60-inch minimum diameter turning circle.
  2. U.S. Access Board – ADA Guide, Chapter 4: Entrances, Doors, and Gates. Specifies 32-inch minimum clear width for accessible doorways.
  3. U.S. Access Board – ADA Guide, Chapter 6: Toilet Rooms. Specifies 60 by 56-inch minimum clear floor space at accessible water closets.
  4. U.S. Access Board – ADA Guide, Chapter 6: Lavatories and Sinks. Specifies 27-inch knee clearance and 34-inch maximum counter height for accessible lavatories.
  5. U.S. Census Bureau – Aging-Ready Homes in the United States, Press Release, October 2023. Based on 2019 American Housing Survey data. Reports that approximately 50 million or 40% of US homes have the most basic aging-ready features.
  6. CDC Morbidity and Mortality Weekly Report – Nonfatal Bathroom Injuries Among Persons Aged 15 Years, United States, 2008, published 2011. Reports that 81.1% of nonfatal bathroom injuries treated in US emergency departments were caused by falls (NEISS-AIP data).
  7. National Council on Aging – Get the Facts on Falls Prevention. Reports that 14 million (1 in 4) Americans age 65 and older fall each year; falls caused 38,000 deaths in 2021 among that age group.
  8. HomeAdvisor – How Much Does Remodeling a Bathroom to Be Handicap Accessible Cost?, updated June 19, 2026. Reports a cost range of $2,700 to $16,000 with an average of $8,400.

Conclusion

A wheelchair accessible bathroom is defined by its clearances, not its appearance. The 60-inch turning circle, 32-inch doorway, 60 by 56-inch toilet side space, and 27-inch roll-under clearance at the sink are the engineering constraints that make independent use physically possible. Meeting those constraints costs more than a grab-bar retrofit and less than most people assume when the work is planned before urgency forces the decision.

The right call depends on who will use the bathroom, what their mobility requires now and likely within the next decade, and what the existing layout provides. That analysis is the starting point before any contractor conversation or product selection. For the broader framework of how a wheelchair accessible bathroom fits within a bathroom’s full safety and layout picture, see the overview in bathroom safety planning.

The Senior Bathroom Safety Products Worth Installing: How to Judge Quality

Author: Oded Feigin · Created On: July 16, 2026 · Last Updated: August 24, 2026

Roughly one in four adults age 65 and older falls each year – 14 million falls annually in the United States.1 The bathroom is among the highest-risk rooms in any home, and senior bathroom safety products range from well-engineered fixtures rated to withstand 250 pounds of force to low-cost units whose anchoring fails under daily use. The Bathroom Safety Planning overview covers how the full bathroom system fits together. This article covers a narrower question: how to judge which senior bathroom safety products are actually worth installing, using four evaluation filters – load rating, anchoring method, movement fit, and daily-use ergonomics.

An elderly woman with gray hair sits on a shower chair in a tiled bathroom, using a grab bar for support. She wears a floral pink dress and is positioned near a shower curtain and a handheld bidet sprayer.
Grab bars and shower seating turn the highest-risk room in the house into one of the safest: provided they’re anchored to hold real weight.

Quick Answer

What makes a senior bathroom safety product worth installing?

A grab bar or shower seat is worth installing when it carries a structural load rating of at least 250 pounds applied at any point on the bar, fastener, or mounting device – the minimum required under ANSI A117.1 and ADA standards.4 The anchoring method must match the wall type (stud mounting is the only method that reliably meets this threshold in most residential walls), and the product’s shape and placement must match the specific movement it supports, not just the general bathroom zone.

Key Takeaways

  • ANSI A117.1 and ADA standards both require grab bars and shower seats to withstand 250 pounds of force applied at any point on the bar, seat, fastener, or supporting structure.
  • More than 65% of bathroom injuries among adults occur in or near the tub and shower zone; toilet transfers account for 14% of injuries and that share rises to 19-37% among adults age 65 and older.3
  • Suction-cup grab bars do not meet the ANSI structural load requirement and are not suitable as primary support in bathrooms.
  • ANSI A137.1:2022 requires wet interior tile to have a Dynamic Coefficient of Friction (DCOF) of at least 0.42; choosing tile below this threshold adds measurable slip risk in wet bathroom zones.7

Before You Begin: Understanding What “Safe” Really Means

The word “safe” appears on nearly every grab bar, shower seat, and non-slip bath mat on the market. It rarely refers to an independently verified standard. Before evaluating any specific product, it helps to know that two concrete frameworks exist for what structural safety actually means in bathroom fixtures: the ADA Standards for Accessible Design and the parallel ANSI A117.1 accessibility standard. Both specify exactly how much force a grab bar or shower seat must withstand and where that force can be applied. In 2023, the unintentional fall death rate for adults age 65 and older reached 69.9 per 100,000 in the United States – a figure that has more than doubled for adults age 85 and older since 2003.2

A grab bar gripped hard during an off-balance moment delivers a dynamic jerk load, not a slow steady push. A shower seat carries a user’s full body weight as they lower and rise. Products calibrated only for marketing descriptions, not engineering tests, often fail at exactly those moments. The five steps below are a practical framework for filtering products by the criteria that actually determine whether they hold. You do not need to be a contractor or an engineer to use them. You need to ask for the number, not the adjective.

Step 1: Read the Load Rating, Not the Marketing Language

The single most useful number on any grab bar or shower seat product page is the structural load rating. A bar described as “heavy duty,” “commercial grade,” or “professional strength” is communicating marketing positioning. A bar described as rated to 250 pounds or 500 pounds at any mounting point is communicating a testable engineering specification. These are not the same thing, and only the second tells you whether the product meets the minimum threshold set by the accessibility standard.

What the 250-pound standard actually requires

Under ANSI A117.1 (the American National Standard for Accessible and Usable Buildings and Facilities), grab bars must meet a specific structural load requirement. The ADA Access Board’s official Chapter 6 guidance puts it in plain language:

“The structural strength of grab bars must withstand a vertical or horizontal force of 250 lbs. at any point on the grab bar, fastener, mounting device, or supporting structure.”

ADA Access Board, Chapter 6: Toilet Rooms Guide (ANSI A117.1, Section 609.8 Structural Strength)4

This is a structural integrity test, not a user-weight rating. It means the bar, its fasteners, and the wall assembly behind it must resist 250 pounds of force applied at any single point – in any direction. A bar secured only into drywall, even with oversized anchors, will not meet this threshold under realistic conditions. A bar reaching a wall stud typically can, depending on the hardware and installation quality.

The same 250-pound structural load requirement applies to shower seats. Under ADA Section 610.4, the seat, its fasteners, mounting device, and supporting structure must all resist 250 pounds of vertical or horizontal force at any point.5 A fold-down shower seat mounted only into tile and cement board, without reaching structural framing, does not meet this standard.

How to read a product listing for load information

Most product pages use one of three approaches. The most useful states a specific pound rating applied “at any point on the bar and mounting hardware.” The second states a weight capacity without specifying whether it applies to the full mounting assembly or only the bar material – this is weaker, because bar material can be strong while fasteners and wall anchors are not. The third uses only adjectives like “heavy duty” with no numeric rating.

One reliable shortcut: look for explicit ANSI A117.1 or ADA compliance language. When a product states it meets these standards, the manufacturer is claiming structural testing to the 250-pound specification. This does not guarantee a specific installation will hold – that depends on wall type and installation quality – but it confirms the product was designed to meet an independent standard.

Step 2: Match the Anchoring Method to Your Wall Type

A grab bar’s load rating describes how much force the product and its hardware were designed to resist. Whether the installed bar actually resists that force in your bathroom depends on the wall it is anchored into. The bar and the wall are two separate parts of the same structural system, and a high-rated bar in an inadequate wall assembly is not a high-rated installation.

The three wall types found in most residential bathrooms

Most bathroom walls fall into three categories. The most common is tile over cement board over structural framing – typical in bathrooms built after roughly 1970. The studs behind the cement board are the anchoring target; lag screws reaching a stud through tile and board can meet the 250-pound specification when properly driven.

The second is tile over standard drywall, more common in older bathrooms and lower-cost construction. Drywall alone compresses under sustained load; toggle bolts and plastic anchors typically fail below the 250-pound threshold under repeated dynamic loads. If you cannot confirm stud location behind the tile, a licensed contractor should assess the wall before installation.

The third is solid-surface or composite panel bathrooms, found in prefabricated and manufactured homes. These surfaces carry their own anchoring requirements from the panel manufacturer, and grab bar installation typically requires consulting that documentation or a licensed contractor.

Why suction-cup grab bars are not a substitute for wall-mounted bars

Suction-cup grab bars are widely marketed as tool-free, renter-friendly bathroom safety solutions. They are useful as supplemental grip points in low-demand applications. They are not a substitute for wall-mounted bars in high-demand transfer zones like shower entry and exit or toilet transfers. Suction cups cannot reliably generate 250 pounds of resistance force across all surface textures and under wet conditions. Textured tile, older porcelain, and surfaces with mineral buildup all reduce suction seal quality. Suction pressure ratings also refer to ideal static conditions, not to the dynamic jerk loads generated in an off-balance grab – exactly when a secure grip point is most needed.

If your situation requires a non-permanent solution, a suction bar with a high manufacturer-stated rating is better than no bar. Treat it as supplemental support, not primary support, and inspect the seal before each use.

When to bring in a licensed contractor

Installing a grab bar in a tiled bathroom wall is not a straightforward DIY task in most homes. Locating studs through tile accurately, driving fasteners without cracking the tile, and confirming the wall assembly before committing the installation all require proper tools or experience. If the installation is in the shower zone (where more than 65% of bathroom injuries occur), the stakes of a failed installation are high.3 An occupational therapist can advise on placement; a licensed contractor handles the structural work. Both are worth consulting for primary support points in high-use zones.

Step 3: Match the Product to the Specific Movement It Supports

Bathroom injuries do not distribute evenly across the room. More than 65% of all nonfatal bathroom injuries in the United States occur in or near the tub and shower zone, while approximately 14% involve the toilet – specifically the act of standing up, sitting down, or using the toilet.3 Among adults age 65 and older, that toilet-transfer proportion rises to between 19% and 37% of all bathroom injuries.3 This data shapes which products matter most in which zones, and it shows that a product plan focused only on the shower misses a significant share of actual risk.

But knowing the zones is only half the answer. Within each zone, the specific movement determines which product form is useful. A horizontal bar mounted at the wrong height for a particular person’s movement arc provides less support than no bar, because it trains the person to reach for a point that does not naturally fall along their movement path.

Products for shower and tub entry and exit

The injury data from the tub and shower zone is worth noting in more detail: only 2% of bathroom injuries occur during shower entry, when the floor is still dry.3 The risk peaks during use and, especially, during exit – when both the floor and the user are wet, and when fatigue from standing has accumulated. Products for this zone should support the transition from standing in the shower to stepping out over the threshold, and the reverse movement going in.

A vertical or angled grab bar mounted on the wall adjacent to the shower opening supports this movement best: the hand slides along a rail during the step rather than reaching for a fixed point. For bathtub transfers, a horizontal bar at tub-rim height on the wall the user faces as they lower in is the more relevant product form.

Products for the toilet transfer zone

The toilet transfer is the most frequently overlooked zone in bathroom safety planning. Rising from a toilet seat involves extending the knees and hips from a flexed position while the center of gravity shifts forward – one of the more physically demanding movements of the daily bathroom routine for anyone with reduced leg strength or balance uncertainty.

Products in this zone include safety rails that bolt to the toilet flange (providing armrest-style push-up points on both sides), raised toilet seats that reduce the vertical distance of the sit-to-stand transfer, and wall-mounted grab bars positioned within reach of the seated user’s hand. A raised seat reduces how far the knees must flex. A safety rail provides push-up leverage. A wall-mounted bar steadies the final phase of standing. Some users benefit from one; some benefit from all three. Matching the product to the physical demand comes first.

An elderly person wearing a floral green dress leans on a metal safety rail next to a bathroom sink. The person's hand is visible grasping the sturdy support bar while they stand in the tiled room.
Senior bathroom safety products work best when selected for the specific movement a person performs most often, matched to their actual physical demands rather than the general zone where they are installed.
Where Injuries Cluster and Where Adults Plan to Act A horizontal bar chart in two clearly labeled sections. Section 1, labeled Injury Location as a percentage of bathroom injuries, from CDC MMWR 2008 data, shows the tub or shower zone at 65 percent and the toilet and transfer zone at 14 percent of all bathroom injuries. Section 2, labeled Planned Modifications as a percentage of planners, from AARP 2024 data, shows 72 percent of adults 50 and older planning bathroom modifications intend to install grab bars and no-slip tile. A note states that only 2 percent of injuries occur during shower entry; exits and use are the primary risk zones. Where Injuries Cluster and Where Adults Plan to Act INJURY LOCATION (% of bathroom injuries) – CDC MMWR, 2008 data Tub or shower zone 65% Toilet and transfer zone 14% PLANNED MODIFICATIONS (% of planners) – AARP 2024 Survey Grab bars + no-slip tile 72% Only 2% of injuries occur during shower entry; exits and use are the primary risk zones. Source: Home Age Fit analysis, 2025
The tub and shower zone accounts for more than 65% of bathroom injuries (CDC MMWR, 2008 data), and 72% of adults 50 and older who plan bathroom safety modifications target grab bars and no-slip tile in that same zone (AARP 2024). Compiled by Home Age Fit from CDC MMWR June 2011 and AARP Home and Community Preferences Survey 2024.

Step 4: Evaluate Daily-Use Ergonomics, Not Just Load Specs

A grab bar that meets the 250-pound structural requirement and is properly anchored into studs can still be the wrong product if the grip diameter is too wide, the surface texture is too smooth, or the placement does not match where the user’s hand naturally lands during the movement. Load specs confirm the product will not pull out of the wall. Ergonomics determine whether it will actually be used, and used correctly, every day.

Bar diameter and surface texture

The ADA Accessibility Guidelines specify that grab bars for adults should have an outside diameter of between 1.25 inches and 2 inches.5 This range reflects the grip mechanics of an adult hand. Bars below 1.25 inches are too narrow for a secure wrap grip under load. Bars above 2 inches are too wide for most adults to close their fingers around effectively, particularly under the reduced grip strength common with age-related changes in hand and forearm musculature.

Surface texture is equally important and less often specified on product pages. A bare stainless or chrome tube transmits little friction to a wet hand. Most well-designed bars for bathroom use have a knurled texture, a satin or brushed finish, or a coated grip section in the primary contact zone. Confirm the finish type from the product description before purchase. A bar that looks like a grab bar but grips like a towel rod is a compromise that becomes obvious on the first wet-hand morning.

Placement relative to the body’s movement arc

The most common ergonomic error is placing a grab bar at a height that felt intuitive in planning but does not align with where the user’s hand lands during the actual movement. The bar needs to be reachable without a deliberate reaching motion – it should be where the hand naturally extends during the transfer, not where you have to seek it.

For toilet support, the relevant reach zone is from a seated position, with the elbow at roughly 90 degrees of flexion, progressing upward during the stand. A bar too far forward requires leaning; too far back requires twisting. An occupational therapist can evaluate placement for a specific person’s body proportions and movement patterns – the correct professional for this decision.

Non-slip flooring and the DCOF standard

Slip-resistant flooring is one of the most effective and underrated bathroom safety modifications, partly because it requires no visible hardware and fits any home aesthetic when selected carefully. The relevant performance standard for tile and ceramic flooring in wet interior spaces is ANSI A137.1:2022, which requires a Dynamic Coefficient of Friction (DCOF) of at least 0.42 for tile products intended to be walked upon when wet.7 DCOF measures the friction of a tile surface under a moving foot – the relevant condition during a bathroom walk, not a static stand.

When selecting tile for a bathroom wet zone, ask for the product’s DCOF rating in the specification sheet. Tiles rated below 0.42 DCOF were not certified for wet interior walking surfaces. Many polished tiles fall into this category; a honed or textured finish on the same material typically tests higher. This specification choice cannot be corrected without replacing the tile after installation.

Step 5: Run a Short Pre-Purchase Quality Check

Before committing to any senior bathroom safety product, a five-point check covers the criteria that separate products worth installing from products that look similar but behave differently under real use. This check takes less than five minutes and applies to grab bars, shower seats, toilet safety rails, and non-slip flooring products.

The five-point pre-purchase check

1. Load rating stated as a number, not an adjective. The product listing should state a specific weight or force capacity, ideally with language indicating it applies to any point on the bar, seat, or mounting hardware. “Holds up to 300 lbs” without specifying at which point and under which mounting conditions is not a complete specification. Prefer products that explicitly cite ANSI A117.1, ADA compliance, or a specific pound rating at any mounting point.

2. Anchoring method clearly specified. The product packaging or listing should name the fastener type, the number of fasteners, and what wall materials the rating was tested against. Products that state “suitable for most bathroom walls” without specifying what that means are not giving you the information you need to assess whether your wall qualifies.

3. Bar diameter between 1.25 and 2 inches. Confirm the outer diameter is listed and falls in the ADA-specified range for adult grips. This is a specification field that is often absent from low-cost products; its absence is itself a signal.

4. Surface texture on the grip zone. Confirm the finish is described as textured, knurled, satin, or brushed – or has a grip coating in the hand contact zone. “Polished chrome” and “mirror finish” are smooth-surface descriptors and suggest a bar that was designed for appearance rather than grip.

5. Finish material, not finish appearance. Stainless steel, powder-coated steel, and aircraft-grade aluminum are durable finishes for bathroom environments. “Chrome” is both a genuine metal plating and a chrome-look plastic coating used on cheaper products. Confirm the core material in the specifications rather than relying on the appearance of the product in photos.

A note on the planning-to-action gap

In 2024, AARP found that 43% of adults age 50 and older plan to modify their homes for future physical limitations, and 72% of those planners are targeting bathroom upgrades including grab bars and no-slip tile.6 The planning instinct is present. The product-selection framework is often what is missing – specifically, the habit of asking for the load rating and anchoring spec before the finish color. This five-point check is one attempt to close that gap.

Common Mistakes When Choosing Senior Bathroom Safety Products

Most product-selection errors in this category fall into a small number of patterns. The most common is buying by appearance and price rather than specs. A bar that looks exactly like a compliant grab bar can be an unrated decorative accessory marketed in the same category. The appearance is indistinguishable to the eye. The load capacity and mounting hardware are not.

Treating suction bars as primary support

Suction-cup grab bars are appropriate as temporary supplemental support in low-risk zones. They are not appropriate as primary support in shower entry zones or toilet transfer zones, where surface conditions and dynamic load patterns make them unreliable when support matters most.

Installing into drywall without reaching framing

This is the single most common installation error and the one most likely to result in failure under load. Drywall anchors can hold a towel ring. They cannot reliably hold a human body load applied at a dynamic jerk angle. If the studs are not in the right location for ideal bar placement, a blocking solution – a solid plate secured to the studs, then tiled over – is the correct structural approach.

Focusing only on the shower zone and skipping the toilet

Transfer injuries at the toilet account for a meaningful share of bathroom injuries, and that share rises substantially among older adults. A plan that addresses the shower completely while leaving the toilet zone unsupported misses a significant risk. Safety rails and raised seats in this zone are among the lower-cost interventions in the category and among the most frequently overlooked.

Choosing placement by convenience, not by movement arc

Grab bar placement is often driven by stud location and aesthetics rather than by where the user’s hand lands during the target movement. Stud-finding informs anchoring; movement analysis drives placement. When the two conflict, a blocking solution in the wall before tiling resolves the conflict permanently.

What Quality Senior Bathroom Safety Products Look Like

A quality senior bathroom safety product is not necessarily the most expensive one in the category. It is the one that meets a set of verifiable specifications, is installed in a wall assembly that can support those specifications, and is placed where it actually supports the movement it is meant to help.

For grab bars: a structural load rating to 250 pounds at any mounting point, stainless steel or powder-coated steel construction, a bar diameter between 1.25 and 2 inches, a textured or satin grip surface, and flanged ends with at minimum 1.5 inches of wall clearance between the bar and the wall (per ADA guidance on clearance for the gripping hand). Installation reaching structural framing, not drywall only.

For shower seats: a structural load rating to 250 pounds, fold-down or fixed wall-mount design reaching structural framing, a seat surface with drainage holes or non-porous material that does not retain water, and a seat depth that allows the user to sit fully back rather than perching at the edge. Installation by a licensed contractor in any wall with uncertain framing location.

For non-slip tile: a DCOF of 0.42 or higher confirmed in the product specification sheet, applied in the full wet zone (not just under a bath mat). An occupational therapist can provide guidance on the full bathroom layout; a licensed contractor handles the installation.

Limitations and Edge Cases

  • This guide covers standard residential bathroom configurations. Prefabricated bathrooms, fiberglass tub surrounds, and composite panel systems have their own anchoring requirements; contact the manufacturer directly before installing grab bars in those surfaces.
  • The 250-pound structural load specification applies to accessible design standards. A specific user’s needs may require higher-rated hardware; an occupational therapist or accessibility specialist can assess the specific person and situation.
  • The bathroom injury location data cited here (CDC MMWR, 2011) is drawn from 2008 emergency department surveillance data. It is the most specific federal government dataset available on this question; no equivalent federally-published breakdown for a more recent year was found in research for this article.
  • The flooring DCOF standard (ANSI A137.1:2022) applies to tile and ceramic products. Different slip-resistance standards apply to other flooring materials; consult the product specification sheet and the relevant industry standard for non-tile surfaces.

Frequently Asked Questions

What is the minimum weight capacity for a bathroom grab bar?

Under ANSI A117.1 and ADA standards, a compliant grab bar must withstand a vertical or horizontal force of at least 250 pounds applied at any single point on the bar, fastener, mounting device, or supporting structure.4 This is a structural integrity requirement, not a user-weight limit; the installation – bar, hardware, and wall assembly together – must meet the threshold, not just the bar material itself.

Can I use a suction-cup grab bar as my main bathroom support?

Suction-cup grab bars do not meet the 250-pound structural load requirement in ANSI A117.1 and are not suitable as primary support in high-demand zones like shower entry or toilet transfers. They can serve as supplemental grip points in low-risk areas. For primary support, a flanged wall-mounted bar anchored into structural framing is the standard recommendation from accessibility guidelines.4

Where in the bathroom are seniors most likely to be injured?

More than 65% of nonfatal bathroom injuries among adults occur in or near the tub and shower zone, according to the CDC’s analysis of 2008 emergency department data.3 Toilet transfers account for approximately 14% of bathroom injuries overall; among adults age 65 and older, that share rises to between 19% and 37%. Planning should address both zones, not only the shower.

What diameter grab bar is recommended for seniors?

The ADA Accessibility Guidelines specify an outer diameter of 1.25 to 2 inches for grab bars used by adults.5 This range supports a secure wrap grip for most adult hand sizes. Bars outside this range – too narrow to grip firmly, or too wide to close the fingers around effectively – are not compliant with accessibility design standards and typically provide less functional support.

What slip-resistance rating should bathroom tile meet?

ANSI A137.1:2022, published by the Tile Council of North America, requires tile intended for use on level interior surfaces that will be walked upon when wet to have a Dynamic Coefficient of Friction (DCOF) of at least 0.42.7 DCOF measures friction under a moving foot, which is the relevant condition in a bathroom walk. Confirm this rating in the product specification sheet before selecting tile for a shower floor or bathroom wet zone.

References

  1. National Council on Aging (NCOA) – Get the Facts on Falls Prevention. NCOA, 2024.
  2. CDC National Center for Health Statistics – Unintentional Fall Deaths Among Adults Aged 65 and Older: United States, 2023. NCHS Data Brief No. 532, June 2025.
  3. CDC Morbidity and Mortality Weekly Report (MMWR) – Nonfatal Bathroom Injuries Among Persons Aged 15 Years and Older, United States, 2008. June 10, 2011.
  4. United States Access Board – ADA Accessibility Guidelines, Chapter 6: Toilet Rooms. Cites ANSI A117.1, Section 609.8 Structural Strength. Accessed July 2026.
  5. United States Access Board – ADA Accessibility Guidelines, Chapter 6: Bathing Rooms. Sections 609 (Grab Bars) and 610 (Seats). Accessed July 2026.
  6. AARP Public Policy Institute – 2024 Home and Community Preferences Survey. AARP, 2024.
  7. Tile Council of North America (TCNA) – ANSI A137.1:2022 American National Standard Specifications for Ceramic Tile. TCNA, 2022.

Conclusion

Choosing senior bathroom safety products by load rating, wall anchoring, movement fit, and daily-use ergonomics produces installations that hold because they are built to hold, not because they look like they should. The 250-pound structural load requirement is the starting line, not a ceiling. Matching anchoring to the actual wall type ensures the spec survives installation. Matching the product to the specific movement removes the gap between a product that looks right and one that works right every morning.

For a broader view of how bathroom products fit within the larger context of safer access, see the Bathroom Safety Planning overview for how the full system fits together.