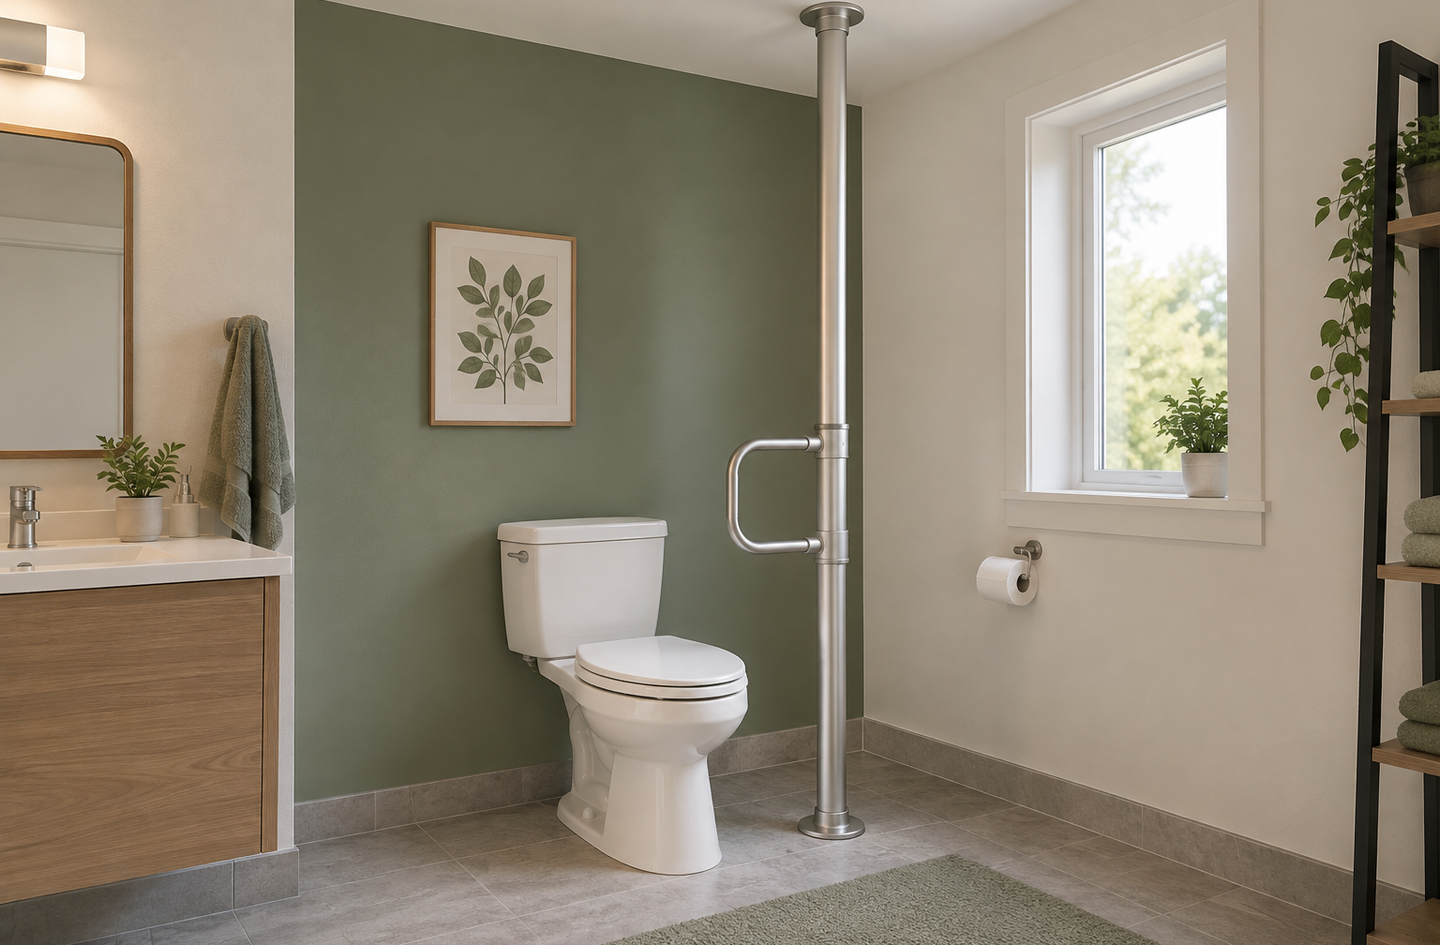
How to Make Tile Floor Less Slippery Without Replacing Them

Author: Oded Feigin · Created On: September 18, 2026 · Last Updated: September 18, 2026

How to make tile floor less slippery is a practical question. Tile wears well and is expensive to replace, yet loses friction the moment soap residue accumulates. An estimated 234,094 nonfatal bathroom injuries were treated in U.S. emergency departments in 2008,1 with falls accounting for 81.1% of them.1 Most of those floors were not broken. Contamination was the problem, not the structure. This guide walks through four approaches for an existing tile floor, with trade-offs compared. For flooring material choices and wet-zone design, see the slip-resistant flooring overview.
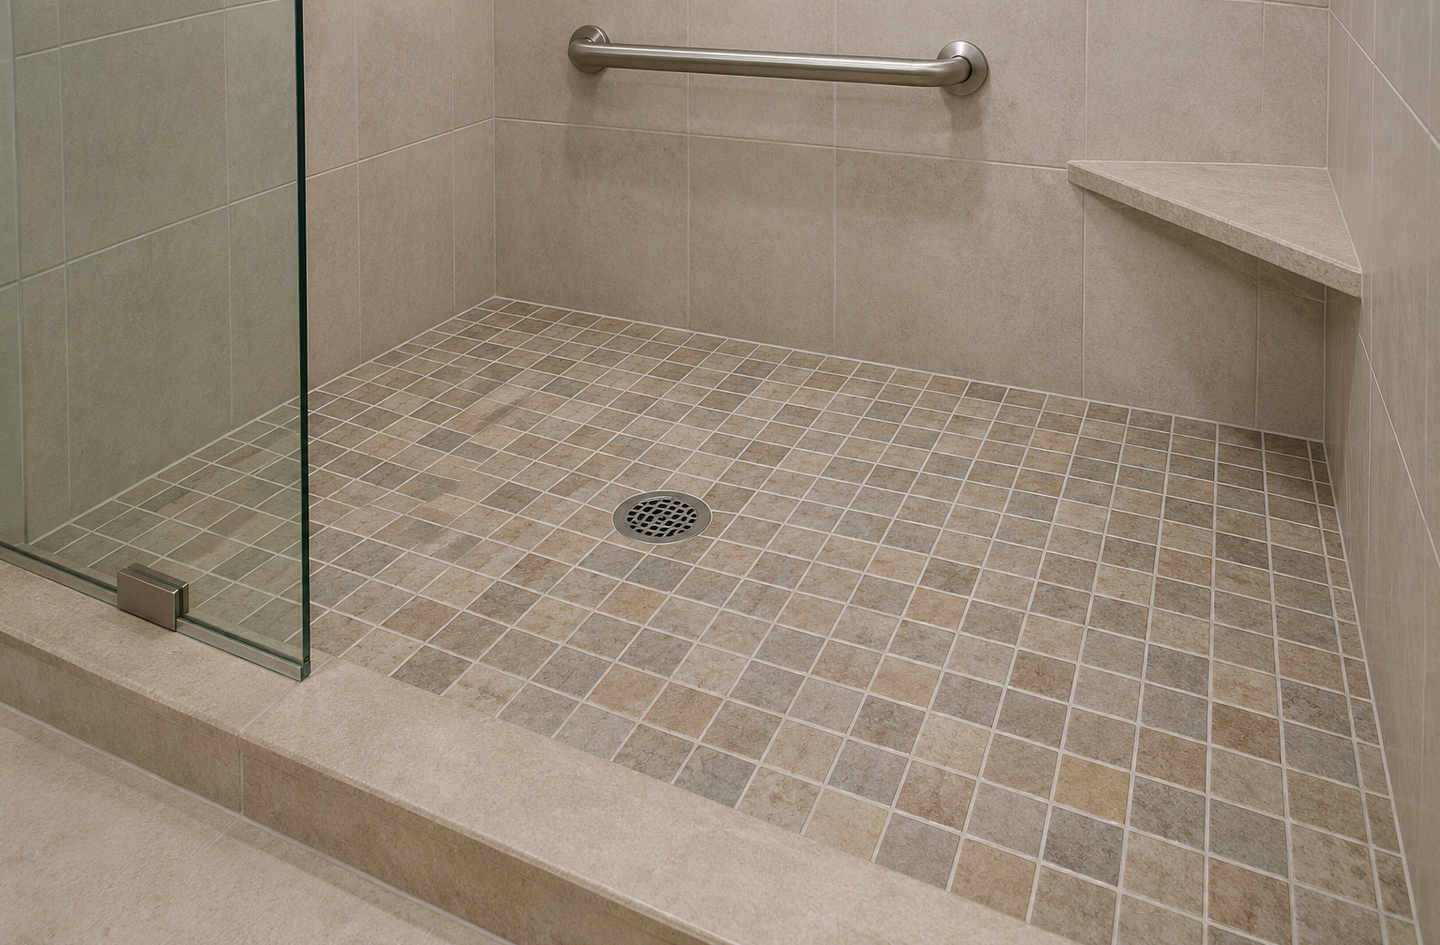
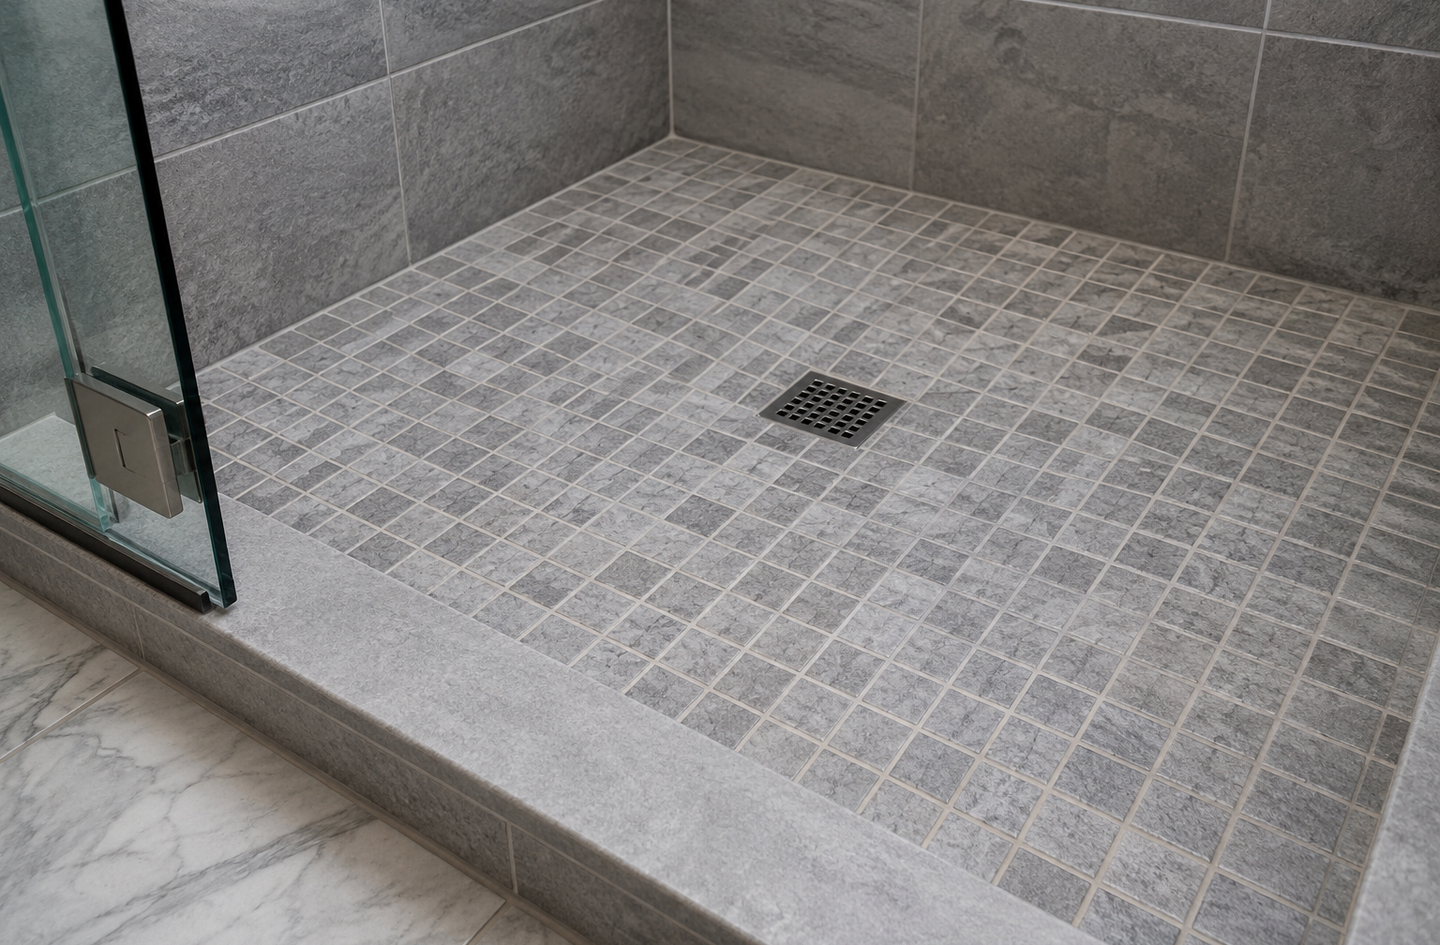
Walk-in shower featuring textured mosaic tiles demonstrating how to make tile floor less slippery through surface patterning, with grab bar and built-in corner seat
Textured mosaic tiles in a walk-in shower provide meaningful grip through surface patterning rather than surface coatings or replacement.

Quick Answer

How do you make an existing tile floor less slippery without replacing it?

Start by removing soap scum and hard-water deposits, which drop friction by 10-20% on their own.4 Then choose from three additional layers of protection: secured anti-slip mats in wet zones, peel-and-stick traction strips at transitions, or a chemical anti-slip treatment applied to the tile surface. Each approach addresses a different part of the slip problem. Each has a different durability and maintenance commitment.

Key Takeaways

  • Tile floors lose 30-50% of their dry friction coefficient when wet, and a further 10-20% when soap residue is present.4
  • Deep cleaning alone restores baseline friction by removing the contamination layer before adding any other treatment.
  • ANSI A326.3 sets 0.42 as the minimum acceptable dynamic coefficient of friction (DCOF) for wet interior floors designed for pedestrian use.5
  • Anti-slip mats, traction strips, and surface treatments address different risk points and none replaces the others entirely.
  • Heavily worn or polished tile may fall below the 0.42 threshold even when clean, which is the scenario where surface treatment or replacement earns serious consideration.

What Makes Tile Slippery

Tile floors lose friction in a predictable sequence. When a tile is clean and dry, the surface texture creates enough contact points to hold a shoe in place. Add water and a thin liquid film reduces contact between shoe sole and tile. Add soap residue, and the friction drops further still.

Dynamic coefficient of friction (DCOF) is the measure used to quantify how much resistance a floor surface offers to a shoe already in motion across it. ANSI A326.3 sets 0.42 as the minimum acceptable DCOF for wet interior pedestrian surfaces intended for regular foot traffic.5 A typical satin-finish ceramic tile tests at roughly 0.80-0.90 when clean and dry. Once wet and soapy, friction on the same tile routinely falls below 0.42.

Research measuring friction loss across surface conditions found:

“DFC values drop by 30-50% from arid to damp conditions, and by a further 10-20% from damp to foamy conditions.”4

In-Ju Kim, researcher, PLOS ONE (2026)

Soap scum is the compound formed when calcium and magnesium ions in hard water react with soap; the residue bonds to tile and grout lines and holds friction-lowering moisture against the surface long after water itself drains away.

The four steps in this guide interrupt the slip problem at different points. Cleaning removes the contamination. Mats and traction strips add a high-friction zone on top of the existing tile. Surface treatments change the tile’s own texture. Understanding which problem a floor actually has narrows the approach considerably.

Contamination is the most common cause of a tile floor becoming slippery in a home that was previously safe-feeling, and it is the one problem every other treatment assumes you have already solved.

Step 1: Deep-Clean the Tile Surface First

No other treatment works at full effectiveness on a contaminated surface. A surface coating applied over hard-water scale bonds poorly and wears through faster than the product label suggests. A mat placed over a filmy tile layer provides grip only where the mat sits. Before any other approach, the tile needs to be genuinely clean.

What you are removing depends on what has accumulated. Hard-water deposits respond to acidic cleaners: diluted white vinegar, citric acid solutions, or a commercial bathroom descaler. Soap scum responds to alkaline cleaners: a diluted dish soap solution, a baking soda paste, or a dedicated soap scum remover. Grout lines hold both types of buildup in a porous surface standard mopping misses.

How to deep-clean for friction restoration

Apply the appropriate cleaner to a dry surface and allow it to dwell for five to ten minutes before scrubbing. Use a stiff-bristle brush on grout lines rather than a sponge or microfiber cloth. Rinse thoroughly with clean water twice, since soap residue left by the rinse water creates the same contamination layer you are trying to remove. Let the floor dry completely before assessing what additional steps are needed.

How to verify the surface is clean

Pour a small amount of water on a cleaned, dry tile. Clean tile allows water to sheet off or spread across the surface with visible motion. A contaminated tile holds water in flat, motionless puddles because the soap film creates surface tension across the area. If the water does not move, the contamination is still present and deep cleaning should be repeated with an appropriate cleaner for the specific type of buildup.

Plan to repeat this process every two to four weeks in a bathroom used daily. Grout lines accumulate buildup faster than tile faces and benefit from a monthly scrub with a stiff brush regardless of how the tile itself looks.

One limitation to understand: deep cleaning restores the friction a tile’s texture is capable of producing. If the tile is older, polished, or has a dense high-gloss factory finish, cleaning removes the contamination but the tile’s own texture may still fall below 0.42 DCOF when wet. In that case, one of the remaining three steps adds the grip the tile’s surface does not provide on its own.

Step 2: Secure Anti-Slip Mats in High-Risk Zones

An estimated 65.8 per 100,000 people sustain injuries in or around the tub or shower annually, the highest rate of any bathroom zone.1 Anti-slip mats address the specific exit and entry points where a wet, bare foot makes first contact with the bathroom floor. The zone just outside the tub or shower, the area in front of a standing shower, and the floor between the toilet and sink are where that contact is most abrupt.
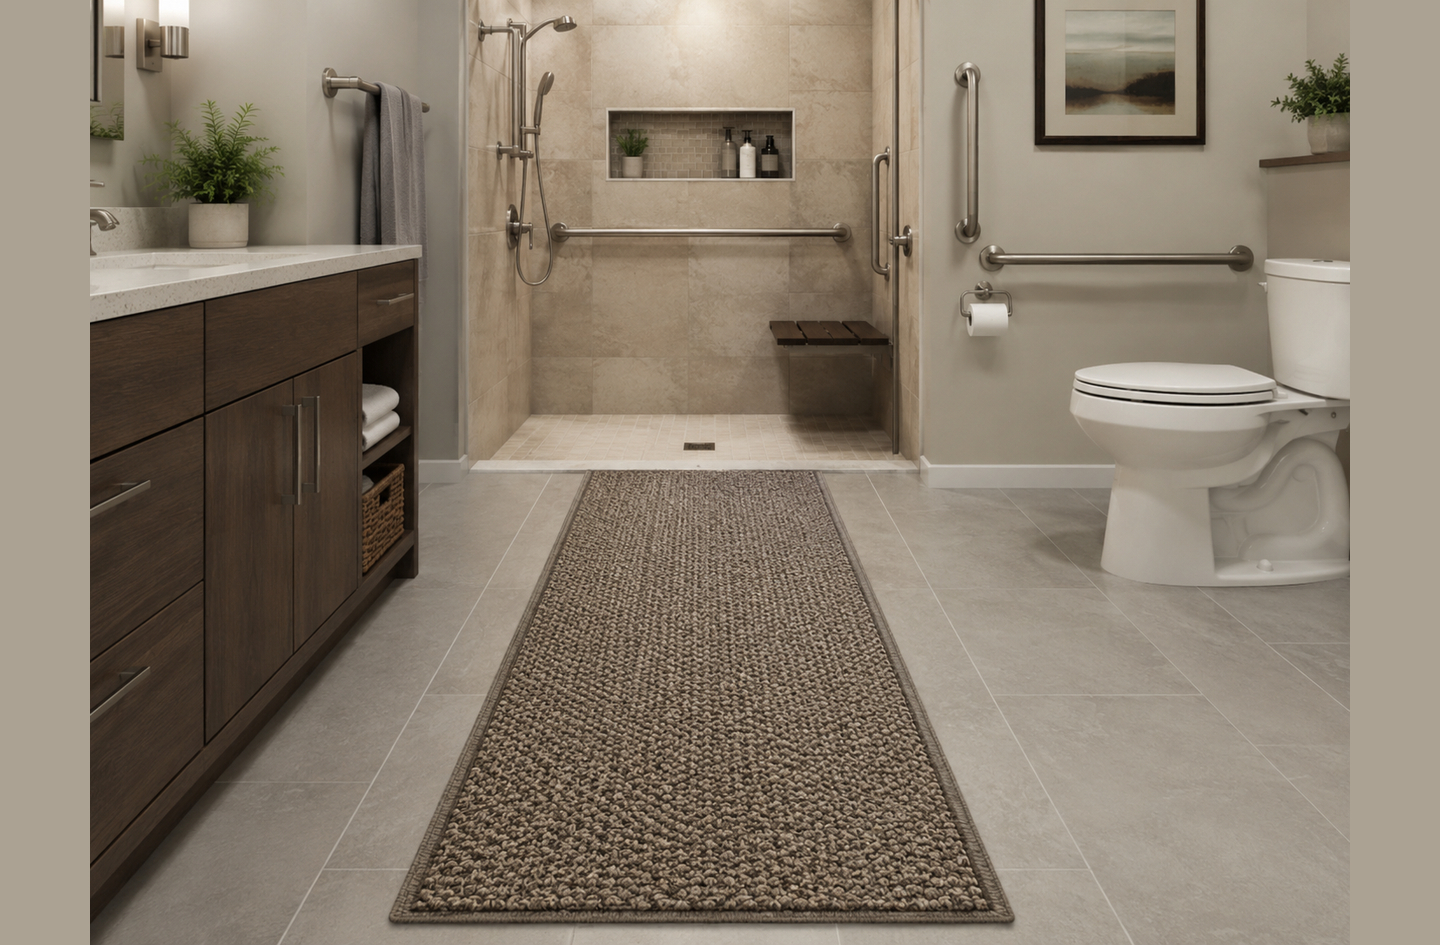
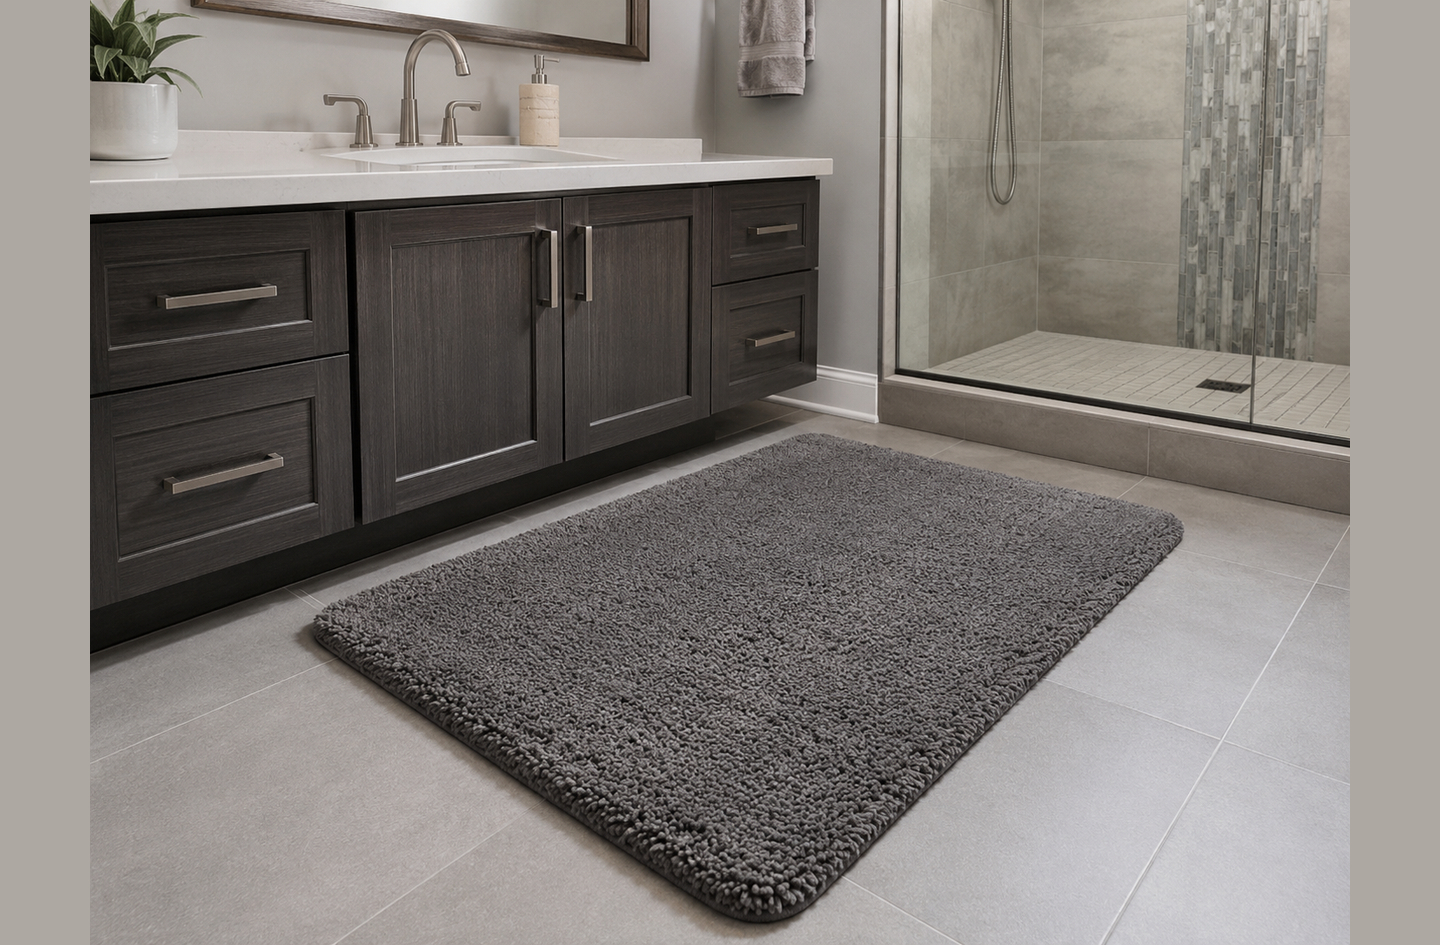
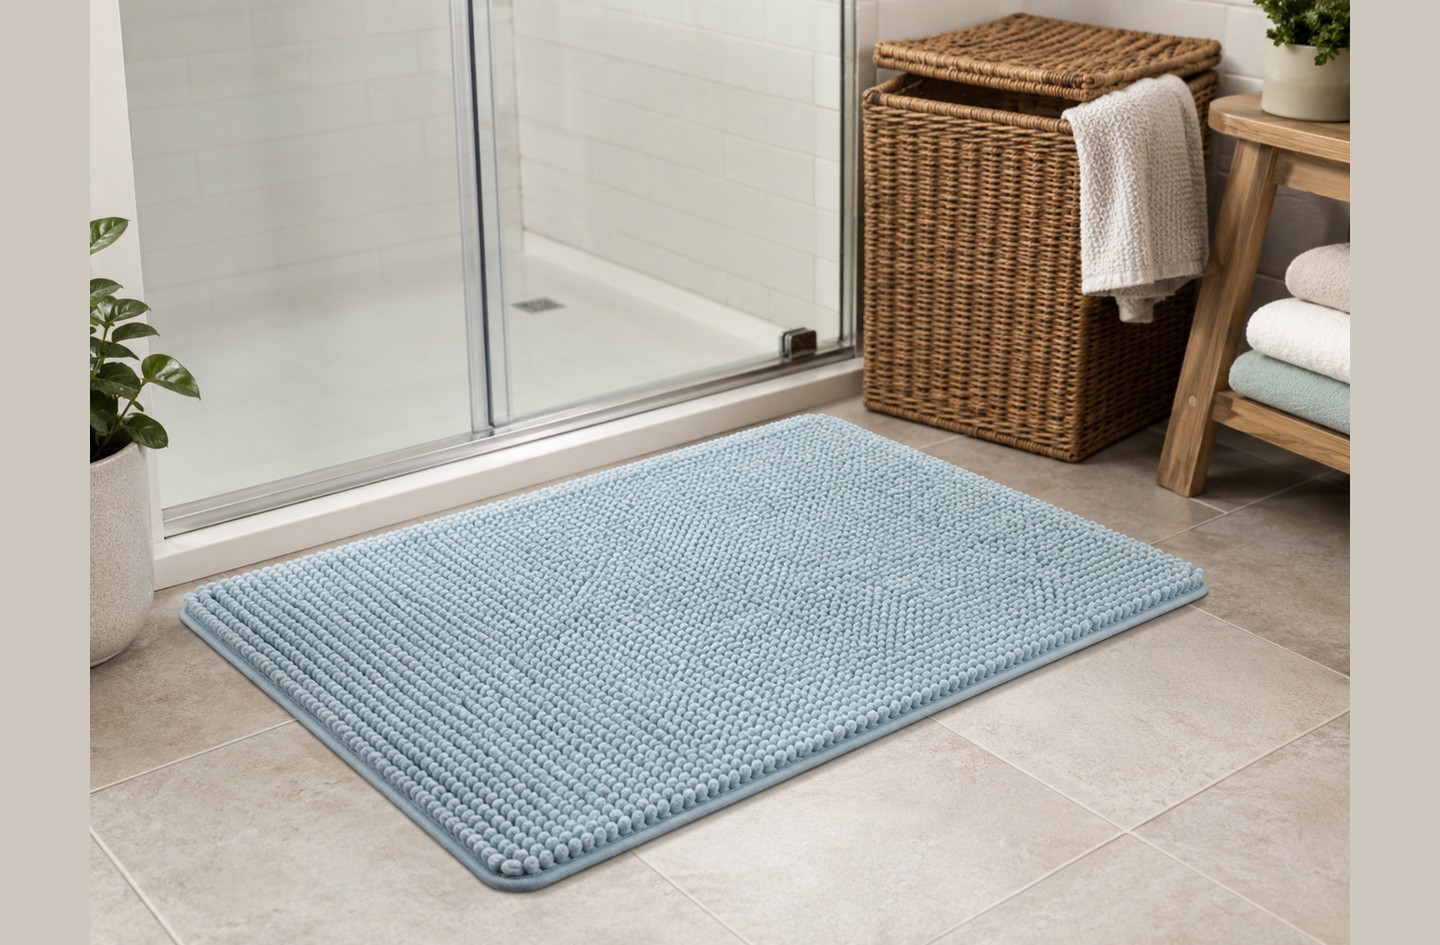
A long textured runner rug on tile flooring in an accessible bathroom alongside a walk-in shower with a folding bench and grab bars
A textured runner rug along a bathroom tile floor reduces slip exposure across the full wet-zone path rather than at a single exit point.

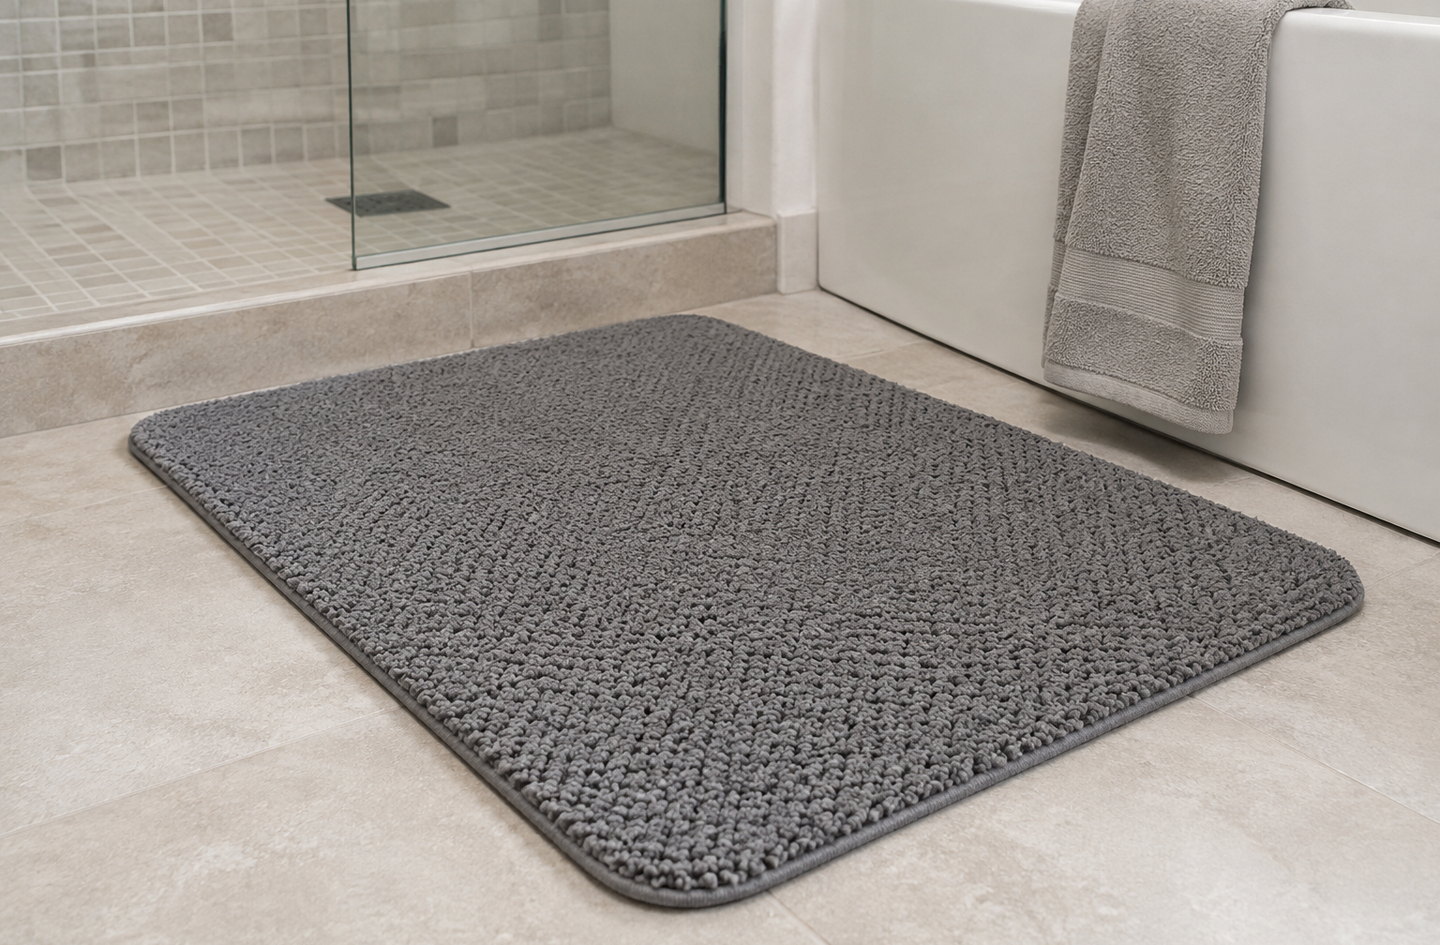
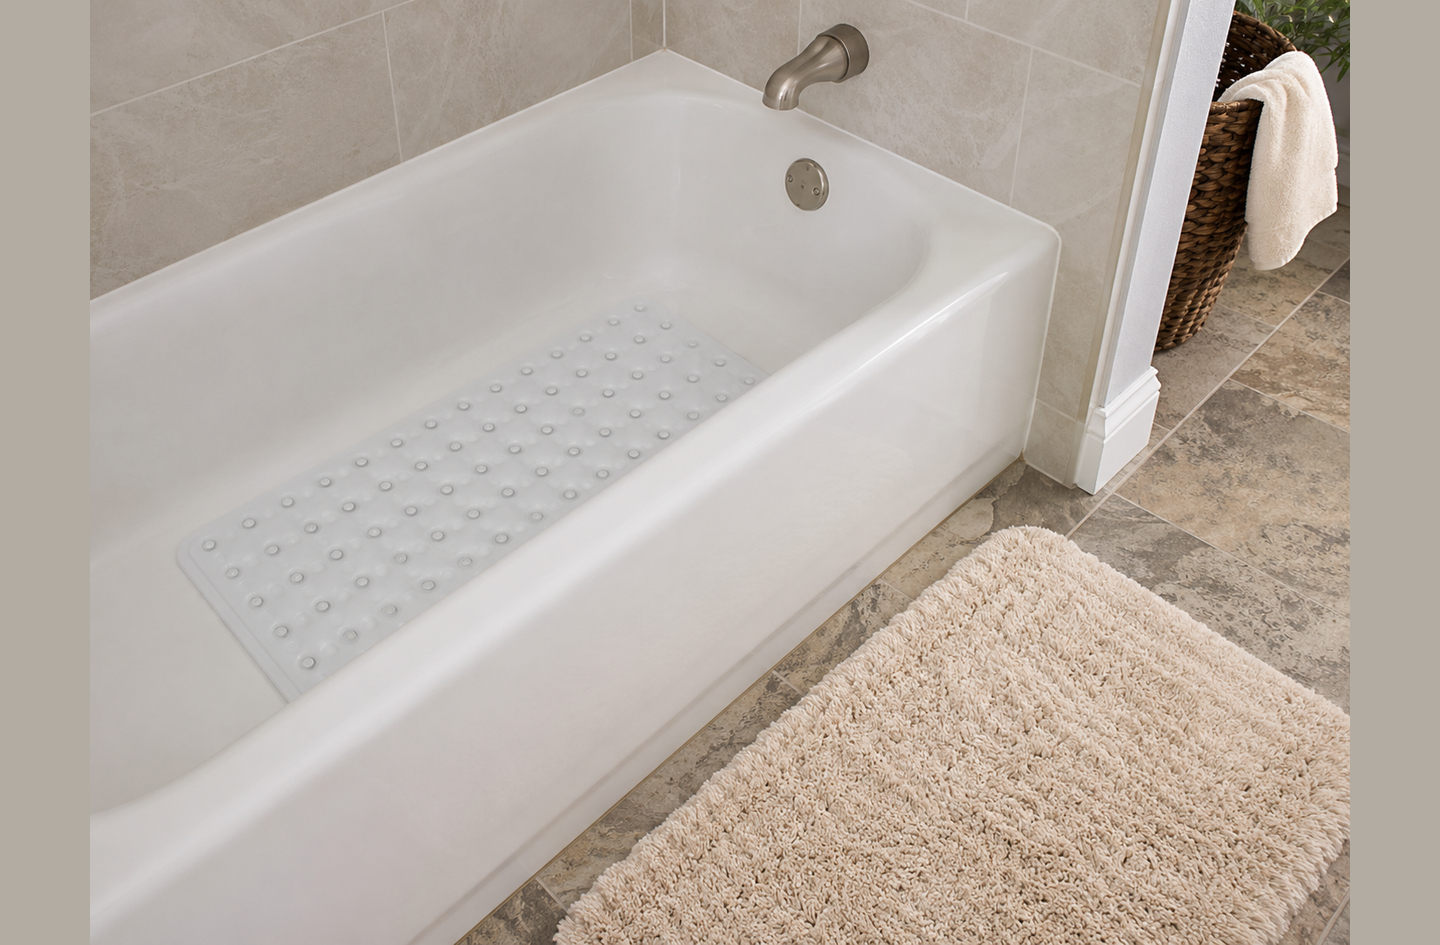
The effectiveness of a mat comes almost entirely from its backing, not its top surface. A heavy, textured mat with a foam backing slides on a smooth or slightly damp tile. A lighter mat with natural rubber sheet backing or a true suction-cup base holds reliably.

Backing types and where each works

Natural rubber sheet backing grips dry to slightly damp tile consistently and stays flat without curling at edges. Suction-cup backing holds particularly well on smooth, glazed tile when the tile surface is clean; on textured or grout-heavy floors, suction cups have fewer contact points and release more easily under lateral foot pressure. Avoid thin foam backing, which compresses and loses grip on any wet surface.

Sizing and placement

A mat covering only the center of the exit zone leaves the highest-risk foot placement (the first wet step out of the tub) on bare tile. Measure the full area you want to cover, including the turning space where someone pivots toward a towel bar or sink. For detailed guidance on mat selection by grip, fit, drainage, and edge profile, the non-slip bath mat selection guide covers each criterion for wet-zone placement.

Place mats without folded edges or thickness changes at their perimeter. A mat adding a visible edge in a narrow bathroom path creates a tripping hazard at the same location where a fall risk exists.

Mats are the fastest, most reversible option for immediate risk reduction in a high-frequency wet zone, but their backing condition degrades over time and a mat with worn or compressed backing offers little more than a dry mat placed on a slippery floor.

Step 3: Apply Traction Strips at Wet-Zone Transitions

Traction strips address a different risk point: the transition moment. A person stepping from a tub floor onto a bath mat passes through an instant when one foot is on one surface and the other is on a different one. The tub floor edge, a shower threshold, and a step-down at a doorway are where that moment happens most often.

Traction strips are adhesive-backed bands of rubber, silicone, or abrasive grit applied directly to a limited area of a floor surface to concentrate high friction at a specific transition zone. They do not cover the full floor; they add grip precisely where the surface change is sharpest.

Where to place traction strips

Place strips along the front edge of a tub floor where the first exiting foot lands. Apply them on a shower curb or threshold where the step-down is small but the wet foot contacts a narrow tile edge. Add strips at any transition where the floor material changes from tile to a different surface. In a multi-level home with tile meeting a stair nosing, strips at the nosing edge address a high-consequence transition point.

Application and maintenance

Clean and dry the surface completely before applying any strip. Soap film or moisture under the adhesive leads to early lifting. Peel the backing and press firmly from one end to the other, working out air pockets as you go. Most products require 24-48 hours of cure time before foot traffic. Replace strips every one to three years, or sooner in a high-traffic shower entry where repeated wet and dry cycles weaken adhesive bond. A lifted edge is itself a tripping hazard and signals time for replacement regardless of overall schedule.

Traction strips work well alongside secured mats, since each addresses a different location in the wet route. For comparison of anti-slip bathroom rugs and how their backing and edge profiles interact with tile surfaces, the anti-slip bathroom rugs guide covers backing grip, edge stability, and fit by tile type.

Strips are the most targeted intervention available for a specific transition point and cost far less than a surface treatment, but they are not a substitute for whole-floor friction improvement when the issue is across the entire bathroom surface.

Step 4: Apply an Anti-Slip Surface Treatment

A surface treatment changes the tile itself, adding friction without anything placed on top of the floor. This approach is most relevant for smooth, glazed tile where the tile’s own surface offers minimal grip in wet conditions. Two types are available for residential use.

Chemical etching treatments

Chemical etching is a treatment applied to a tile surface where a mild acid reaction opens microscopic channels or pores in the glaze, creating more contact points for a shoe sole without changing the visible appearance of the floor or altering the cleaning routine. Most products are applied by mopping the solution onto a clean, dry surface, allowing it to dwell for a specified time, then rinsing thoroughly. The result is permanent for the tile’s surface texture, though the treatment does not prevent future contamination buildup.

Polymer-based coatings

Polymer-based anti-slip coatings apply a thin film containing anti-slip particles or texturing agents. Unlike etching, coatings leave a surface deposit that wears with foot traffic and requires reapplication every two to four years. Coatings work on surfaces where chemical etching produces limited results, including certain types of natural stone and sealed or epoxy-coated grout.

What to realistically expect from surface treatment

A well-applied chemical etch on glazed ceramic tile typically raises the measured DCOF by 0.05 to 0.15 points. For a tile testing at 0.38 DCOF when wet (below the 0.42 threshold), a 0.10 improvement pushes the surface above the minimum threshold. Results depend on the tile’s existing surface composition. A polished tile with a dense, low-porosity glaze responds less to etching than a standard satin-finish tile. Neither etching nor coating lasts indefinitely in a bathroom used daily.

An occupational therapist or licensed contractor can assess your specific floor and advise which product type fits the tile’s composition. If you are managing a floor for a specific person’s balance or mobility situation, that consultation is worth the investment before choosing a product and applying it.

Surface treatment is the only approach in this guide that addresses the tile’s baseline friction rather than compensating for it, which makes it the right choice for smooth glazed tile in a high-use wet zone where mats and strips alone leave the underlying surface unchanged.

How to Make Tile Floor Less Slippery: Comparing the Four Approaches

Each approach solves a different part of the problem at a different cost and commitment. The table below reflects typical residential bathroom conditions; results vary with tile type, usage frequency, and water chemistry.

Approach Typical cost (DIY) Duration Reversible? Addresses baseline texture? Best use
Deep cleaning Low (materials only) Ongoing, every 2-4 weeks N/A No (removes contamination only) First step for any floor before other measures
Anti-slip mat Low ($15-$60) 1-3 years before backing wears Yes No Tub/shower exit and in-zone wet coverage
Traction strips Low ($10-$30 per zone) 1-3 years before adhesive degrades Partial (adhesive residue) No Threshold edges and step transitions
Surface treatment Medium ($30-$80 per application) 2-4 years, then reapply No (etching is permanent) Yes Glazed or polished tile with inadequate baseline friction
Tile Floor DCOF by Surface Condition Horizontal bar chart showing DCOF values for satin-finish ceramic tile under three conditions based on Kim et al. PLOS ONE 2026: Clean, dry: 0.82 (representative baseline); Wet, water only: 0.49 (after 30-50% drop); Wet with soap residue: 0.41 (after further 10-20% drop). ANSI A326.3 minimum threshold for wet interior floors is 0.42. Compiled by Home Age Fit from Kim et al. 2026 and ANSI A326.3. Tile Floor DCOF by Surface Condition 0.82 0.49 0.41 Clean, dry Wet with water Wet + soap residue ANSI min. 0.42 DCOF value ANSI 0.42 minimum Source: Home Age Fit analysis, 2026
The same tile floor crosses the ANSI 0.42 safety threshold once soap residue is present alongside water, even though it tests safely above the threshold when wet with clean water alone. Data compiled by Home Age Fit from Kim et al., PLOS ONE 2026, and ANSI A326.3.

The non-slip bathroom flooring comparison guide covers how different flooring materials compare on wet traction if you are also weighing whether to stay with tile or choose a different surface type altogether: non-slip bathroom flooring options.

When Replacement Becomes the More Durable Fix

The four approaches above address tile floors where the surface and structure are intact. Replacement enters the conversation when the tile itself has deteriorated past the point where treatment or coverings provide a durable long-term answer.

Signals that suggest replacement over treatment

A tile with a visibly worn, polished surface (often seen in high-traffic bathrooms where years of foot traffic have buffed the glaze smooth) may test below 0.42 DCOF even when clean and wet. If two or three rounds of surface treatment have not produced a lasting friction improvement, the tile’s texture may no longer have the porosity the treatment chemistry needs to bond to. Replacement replaces that substrate.

Grout lines that are crumbling, missing, or significantly lower than the tile face create a pattern of small height changes across the floor. These height changes are a tripping hazard, and they affect mat placement and traction strip adhesion. Regrouting is a lower-cost option than full replacement and addresses this specific problem; a licensed contractor can assess whether regrouting alone suffices or whether the substrate under the tile is also failing.

When to bring in a professional assessment

A home visit from an occupational therapist or an accessibility specialist provides a different lens than any product decision. Over 14 million older adults report a fall each year,2 and the healthcare cost of nonfatal older adult falls reached $80 billion annually as of 2024.3 For a specific person with balance, strength, or vision changes, a professional assessment of the full bathroom route, not just the tile, produces a more accurate priority list than a general guide. The floor is one friction point in a route that also includes the toilet transfer, the shower entry, and the lighting between the bed and the bathroom at night.

Replacement is not the first answer; it is the answer when the tile’s structure or texture is the source of the problem and non-replacement approaches have a demonstrably shorter service life than the residency they are protecting.

Frequently Asked Questions

How often do anti-slip tile treatments need to be reapplied?

In a bathroom used daily, plan to reapply most treatments every two to four years. Chemical etching is permanent at the surface texture level, but the opened pores fill with mineral deposits over time and the friction improvement diminishes. The water bead test (water beads up on clean tile, spreads flat on contaminated tile) is a practical check between scheduled applications.

Does grout condition affect how slippery a tile floor is?

Yes. Grout holds more soap and mineral buildup than tile faces because grout is porous. Crumbling or missing grout also creates small height changes across the floor surface that affect where a mat lies flat and how well adhesive strips bond. Regrouting is worth doing before applying any surface treatment, since a treatment applied over failing grout seals in a structural problem.

What is DCOF and how do I know if my tile meets the standard?

DCOF (Dynamic Coefficient of Friction) measures the resistance a floor surface offers to a shoe in motion across it. ANSI A326.3 sets 0.42 as the minimum for wet interior pedestrian use.5 A certified measurement on your specific floor requires a tribometer device and takes roughly 30 minutes per room; a flooring contractor or accessibility specialist familiar with ANSI A326.3 testing handles this assessment.

Does tile size or texture affect slip risk?

Yes. Larger tiles with fewer grout lines have less edge texture than mosaic patterns and tend to hold less water in grout channels. High-gloss glazed tile starts with a lower dry DCOF than unglazed or satin-finish tile. After deep cleaning removes contamination, tile texture is the primary factor determining whether cleaning alone is sufficient or a surface treatment is needed to reach the 0.42 threshold when wet.

Can traction strips and anti-slip mats be used together?

Yes, and combining them addresses different parts of the wet route. Traction strips handle transitions where a single foot contact changes surfaces (tub edge, shower threshold, step nosing). Mats cover the full exit zone where a wet bare foot stands and turns. Each approach targets a different risk location and neither substitutes for the other in its zone.

Limitations and Edge Cases

  • The friction data referenced here is from U.S. and international research on indoor ceramic and porcelain tile; outdoor tile, natural stone with variable porosity, and specialty surfaces (epoxy coatings, resin floors) may respond differently to the same treatments.
  • Heated tile floors (radiant in-floor systems) require verifying that any chemical etching or coating product is rated for the operating temperature range before application.
  • For a specific person with documented balance, gait, or mobility changes, the approaches here provide a starting framework; a licensed occupational therapist assessing the specific home and person produces a more accurate priority sequence than any general guide.

References

Methodology: every figure below comes from an independently published source verified live before publication; research was gathered and cross-checked before drafting following Home Age Fit’s engineering-informed editorial methodology.

  1. CDC MMWR – Nonfatal Bathroom Injuries Among Persons Aged 15 Years – United States, 2008. Morbidity and Mortality Weekly Report, Vol. 60, No. 22, June 2011.
  2. CDC – Centers for Disease Control and Prevention – Facts About Older Adult Falls. National Center for Injury Prevention and Control, 2025.
  3. NCOA – National Council on Aging – Get the Facts on Falls Prevention. 2024, citing Injury Prevention study.
  4. PLOS ONE – Development and Validation of the TexCoMP Model: A Nonlinear Framework for Optimising Slip-Resistant Walkway Coatings in Diverse Environments. In-Ju Kim. 2026.
  5. Crossville, Inc. – Slip Resistance of Porcelain Tile Floors and DCOF Explained. Referencing ANSI A326.3 Dynamic Coefficient of Friction standard. 2022.

Conclusion

Making tile floors less slippery starts with removing the contamination layer causing most of the friction loss. Deep cleaning, secured mats, traction strips, and surface treatments address different parts of the problem at different costs and durability levels. Using more than one approach is appropriate for floors serving high-frequency wet zones. Replacement enters the picture when the tile’s own texture, not the contamination, is the limiting factor.

For the full picture of how flooring material choices affect wet-zone safety, see the overview in slip-resistant flooring for how this fits the wider topic of safer home surfaces.
Home Safety for the Elderly: High-Risk Areas First

Author: Oded Feigin · Created On: September 16, 2026 · Last Updated: September 16, 2026

Falls send about 4.5 million older adults to emergency departments every year in the United States.1 Most happen at home, in places used many times each day. The central question in home safety for the elderly is not about which room looks risky but which zone carries the highest combination of fall frequency and injury severity. This guide is part of the broader overview in fall-prevention priorities guide, and its task is to help you identify and rank those zones before spending time or money on any specific fix.

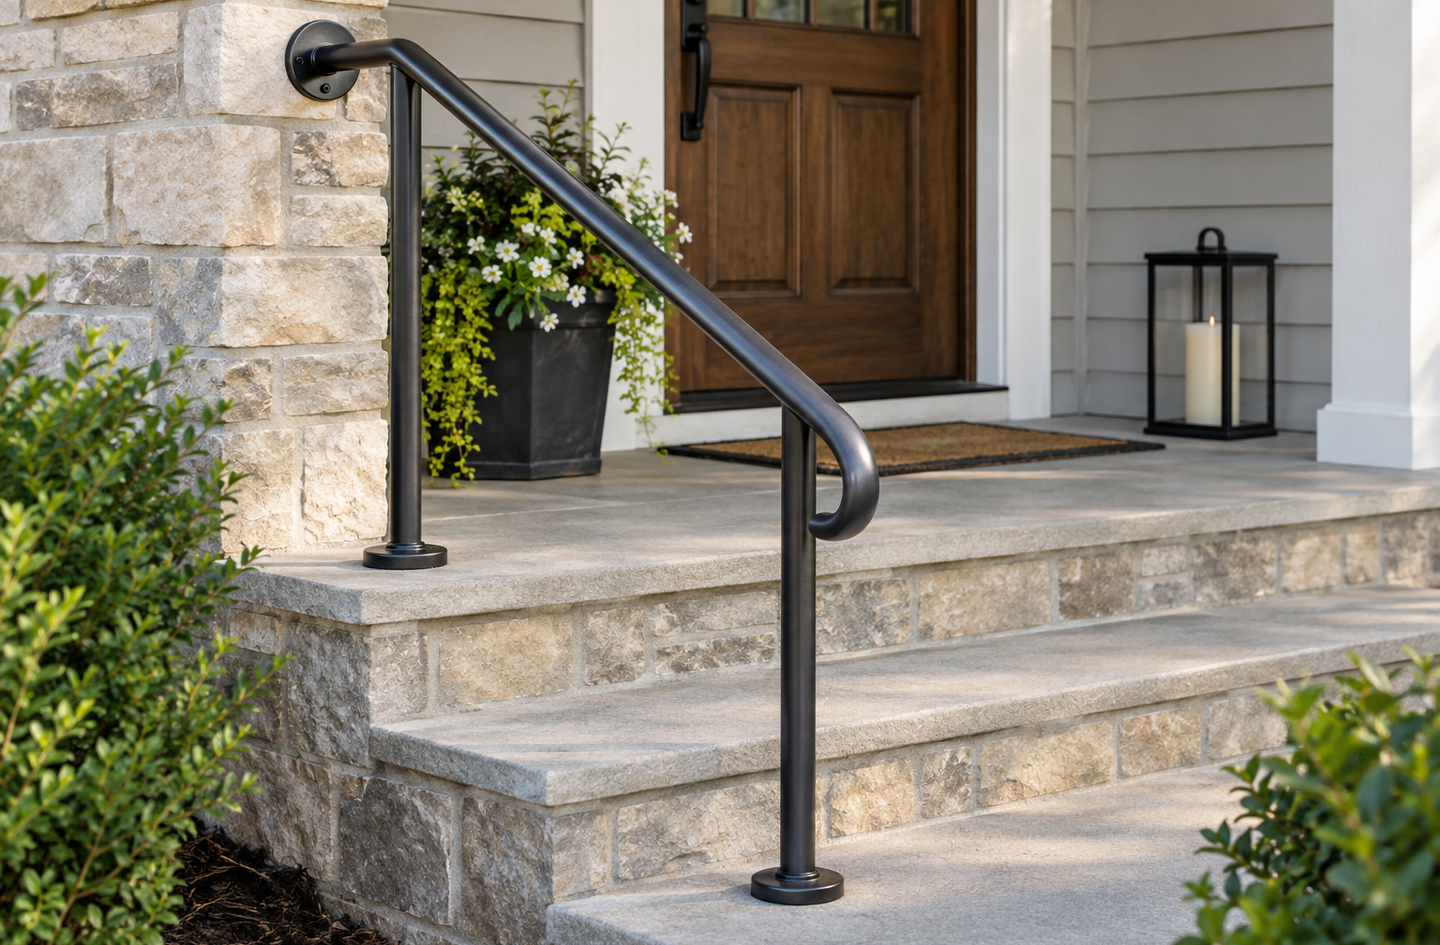
Home safety for the elderly: a black metal wall-mounted handrail alongside concrete front porch steps at a residential entrance
A wall-mounted handrail at a residential entrance provides grip at one of the home’s most common fall-risk transition points for seniors navigating outdoor steps in varying weather and light conditions.

Quick Answer

Which areas of the home create the greatest fall risk for seniors?

Bedrooms (25%), stairs (22.9%), and bathrooms (22.7%) together account for roughly 70% of at-home fall-related emergency department visits in adults 65 and older.2 Bathrooms and stairs produce more serious injuries per fall than other rooms, which places them at a higher priority than raw frequency alone suggests. Identifying which of those zones applies to your specific home, and in what order, is the first step in any practical fall-prevention plan.

Key Takeaways

  • Bedrooms, stairs, and bathrooms together account for roughly 70% of at-home fall-related emergency department visits in adults 65 and older, based on nationally representative data.2
  • Bathrooms and stairs carry higher injury severity per fall than bedrooms; an assessment that weights consequence, not just frequency, produces a different and more protective repair order.
  • Environmental hazards are implicated in 30% to 47% of all falls.7 Many of the highest-value changes involve no construction and cost very little.

Before You Begin: Home Safety for the Elderly Starts with Observation

This guide walks through six steps: mapping your daily routes, then assessing the bathroom, stairs, entrances, bedroom, and finally scoring each zone to produce a ranked repair list. You do not need tools or a contractor to complete the observation. You need a notebook, roughly 30 to 45 minutes, and ideally a second person who can watch while you or your parent moves through the home normally.

Difficulty: Observation only, no installation required
Time: 30 to 45 minutes for the walk-through, additional time to document findings
What you will have at the end: A ranked list of your home’s highest-risk zones, ordered by the combination of fall frequency, injury consequence, and how often each area is used

A few things this guide does not cover: structural modifications, wet-area waterproofing, or any change specific to a person’s balance, vision, or mobility profile. Those decisions belong with a licensed contractor, an occupational therapist, or an accessibility specialist. The goal here is to help you understand the home’s risk landscape so you arrive at those professional conversations with the right questions. If you want to connect this assessment to a broader learning foundation, fall prevention education at home is a good starting point.

A structured observation walk produces better repair priorities than any checklist designed for a generic home, because it reflects the routes and habits of the person who actually lives there.

Step 1: Walk the Routes Before Checking Any Room

Most fall-prevention assessments start with rooms. This one starts with routes, because the rooms matter in the order they are used. A bedroom that leads to a dark hallway and a high-threshold bathroom at 2 a.m. is a different risk than a bedroom two steps from a well-lit, level bathroom entrance.

Walk the three most-used paths in the home:

  • Bedroom to bathroom: the path used most often at night and in early morning
  • Kitchen to main seating area: the path used when carrying food, drinks, or other objects
  • Entrance to main living space: the path used on arrival and departure, often in variable weather and footwear

As you walk each path, mark every point where you grip something for support, step onto a different surface, change direction sharply, or notice a drop in light. Friction points are any locations in the home where movement requires more grip, balance adjustment, or physical effort than the surroundings suggest. Those friction points, not a general room checklist, define the home’s real risk map.

Pay close attention to what happens at the beginning and end of each route. The transitions between areas, stepping from carpet onto tile, crossing a doorway threshold, or reaching for a light before moving, are where a large proportion of falls occur. A route that looks clear at eye height often has a raised threshold, a loose mat, or a table leg in the path that only shows up when you walk it slowly and deliberately.

The Bedroom-to-Bathroom Path

This path is walked in low light, often after a period of stillness or sleep, when blood pressure regulation and balance are temporarily reduced. Note whether a light is reachable before the first step out of bed. Note whether the floor surface changes within the first few feet. Note whether there is anything to hold between the bed and the bathroom door. A path with no grip points and a level-change or threshold within the first three steps is a high-priority finding, regardless of how the bathroom itself looks in full daylight.

The Main Living Route

Falls on this path tend to happen while carrying something, which means both hands are occupied and attention is on the object rather than the floor. Identify any point on this route where a person needs to turn, step up or down, or navigate around furniture. Those points carry higher risk whenever hands are full. A clear, straight path from kitchen to seating area is worth more to fall prevention than a grab bar in a room visited twice a day.

Walking routes in the sequence they are actually used reveals friction accumulation that a room-by-room review misses, because the hazards that matter most are often the ones that cluster on the same path.

Step 2: Assess the Bathroom

The bathroom is where falls cause the most harm per incident. A CDC surveillance study found that injury rates near toilets reached 266.6 per 100,000 among adults 85 and older, compared with 4.1 per 100,000 among adults in their early twenties.5 The three most common triggers for bathroom falls are bathing or showering (27.5%), slipping (17.3%), and toilet-related activity (14.1%).5

A transfer is the act of moving from one position or surface to another, such as sitting to standing at a toilet or stepping into a shower enclosure. Transfers are the highest-risk moments in the bathroom because they require the most balance and muscle load, and they frequently happen on wet or damp surfaces.

When you assess the bathroom, look for these conditions:

Tub and Shower Zone

Does the shower have a threshold step? If so, how high is it? Is the floor inside the shower wet after use, and does it stay wet for more than a few seconds? Is there a fixed or adjustable-height seat available? Is there a grab bar within reach at the point of entry and exit? A shower with a high curb, no seat, and no grip point at entry is one of the higher-risk configurations in any home used by someone with reduced balance or strength. Slip-resistant flooring reduces friction during the wet transition, but it does not replace grip support at the entry and exit points themselves.

Toilet Transfer Area

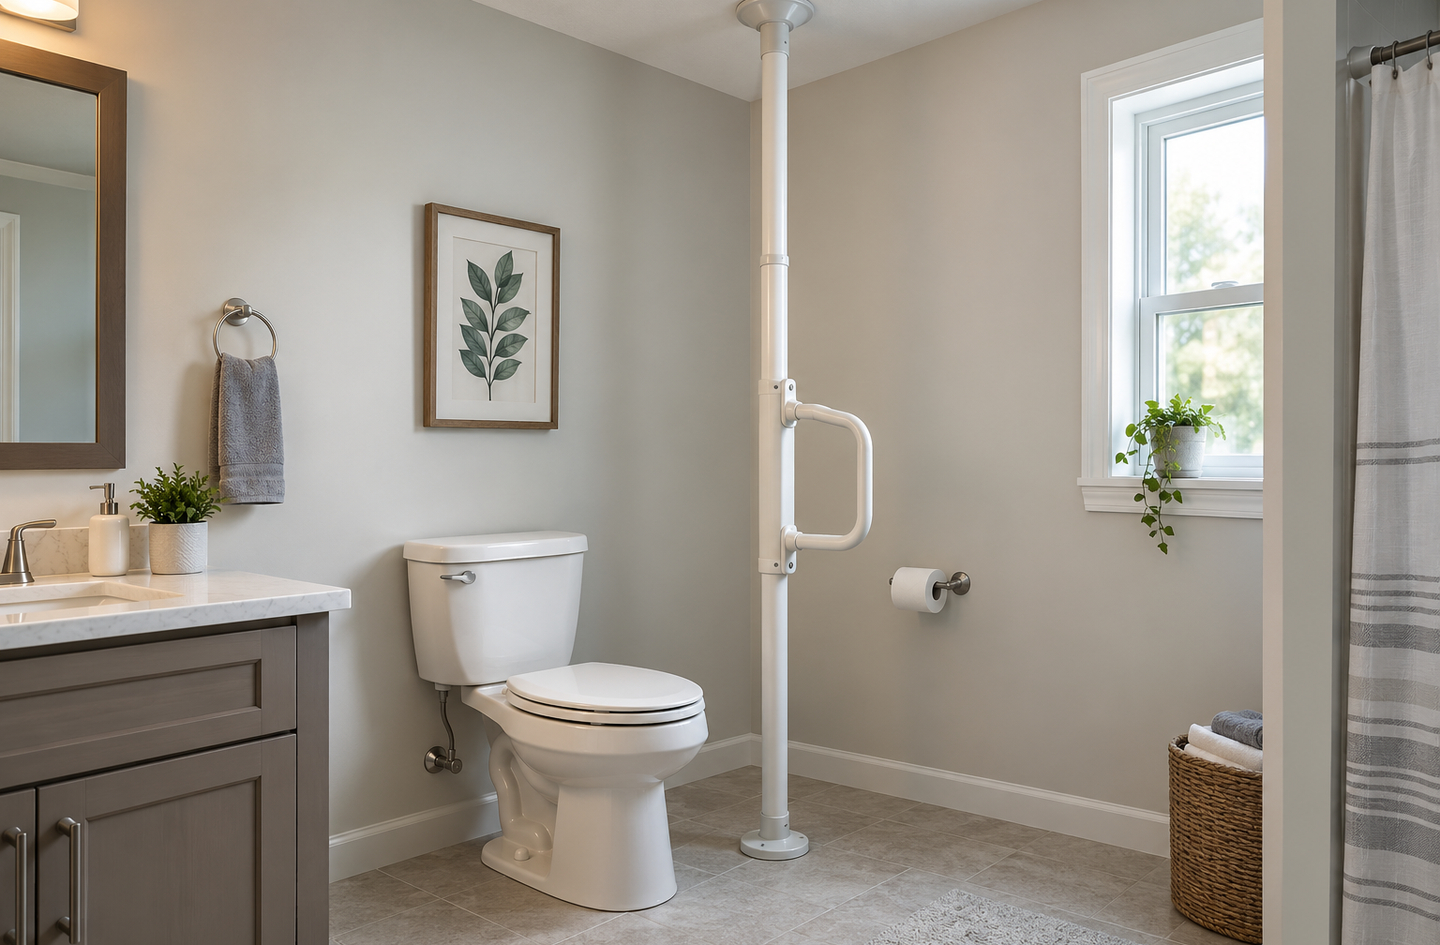
Can the person lower to and rise from the toilet seat without holding a wall, a towel bar, or the sink counter? If yes, this area is lower priority. If no, or if the approach involves gripping an unsecured surface, this is an urgent finding. Note the toilet seat height, the available grip points on each side, and whether there is enough clear floor space to approach from either direction. A standard toilet seat sits roughly 15 to 17 inches from the floor. For many seniors, a raised seat or a fixed safety frame converts a near-failure transfer into a controlled movement.

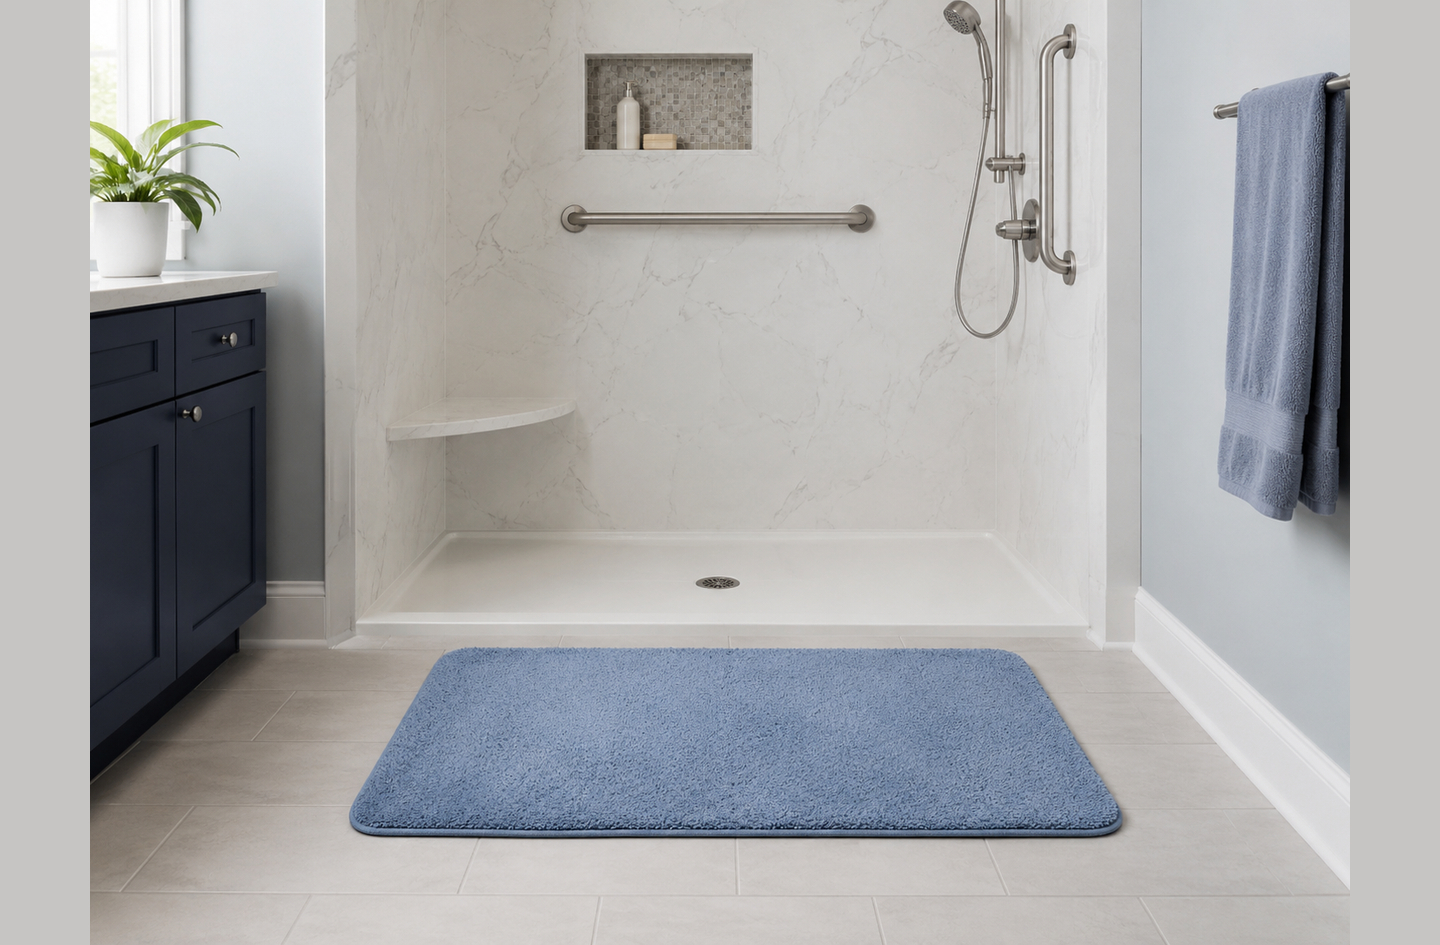
A walk-in shower with slip-resistant flooring, a mounted grab bar, a built-in corner seat, and a handheld shower head illustrating bathroom home safety features for seniors
A walk-in shower with slip-resistant flooring, a mounted grab bar, and a built-in corner seat addresses three of the bathroom’s primary fall risks: wet surfaces, unsteady entry, and the absence of support during bathing.

The bathroom’s combination of wet surfaces, confined space, and physically demanding transfers makes it the zone where corrective investments produce the most measurable reduction in injury risk, even when the raw fall-frequency count for bedrooms is slightly higher.

Step 3: Evaluate Stairs and Level Changes

Stairs are the second most common location for at-home falls in adults 65 and older, accounting for 22.9% of emergency department visits from falls at home.2 Among adults in the 65 to 74 age group specifically, stairs account for 30% of at-home falls, making them the dominant zone for this cohort.2 Stair-related upper-extremity fractures in older adults rose 56% between 2012 and 2021, and 89% of those injuries occurred in homes.4

“Indoor and outdoor stairs and bathrooms are locations of particular concern, because they are associated with a substantially higher proportion of injurious falls than those that occur in other locations.”

Edwards N et al., researchers in environmental fall epidemiology, International Journal of Environmental Research and Public Health7

Environmental hazards are physical conditions in the home that increase the likelihood of a fall, including uneven surfaces, absent handrails, poor lighting, and loose mats. On stairs, those hazards tend to cluster: a flight may have a handrail that ends before the bottom step, tread surfaces that are difficult to see in low light, and a landing with no overhead fixture. Each issue alone adds modest risk. Together they create a compounding problem that is harder to escape once a person is mid-descent.

Handrail Coverage

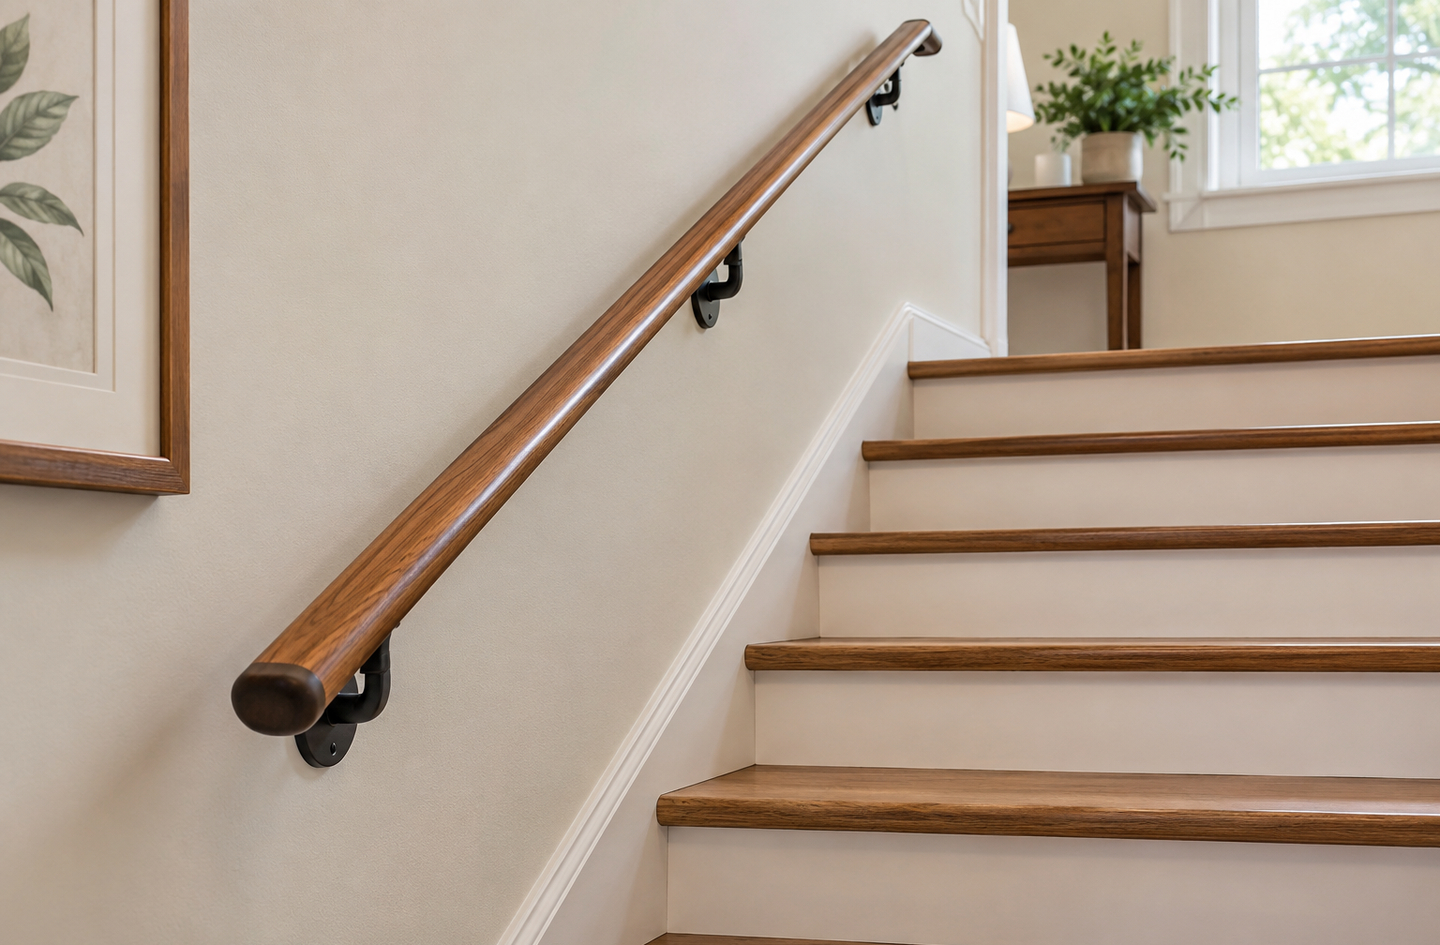
Is there a handrail on at least one side of every stair flight? Does it run the full length of the flight, from the top step to the bottom? Is it firmly mounted, and does it have a diameter that allows a full grip, roughly 1.25 to 1.5 inches? A handrail that ends two steps from the bottom, or that wobbles when gripped, provides significantly less protection than a properly mounted continuous rail. If a second rail on the opposite wall is practical, it doubles grip coverage and meaningfully reduces risk on the descent, which is riskier than the ascent for most adults.

Tread Surfaces and Step Lighting

Can the edge of each step be clearly seen from the top of the flight? Contrast between the tread surface and the riser, the vertical face of the step, is the primary visual cue for step depth and height. Carpet covering both the tread and riser without a contrasting edge strip reduces that cue substantially. Step lighting should illuminate the tread surface itself, not just the surrounding wall. If the flight is dark at night and handrail coverage is incomplete, it is a two-factor finding that belongs at the top of the stair assessment list.

For a room-by-room look that covers stair and hallway risks in more detail, the senior home safety room-by-room checklist is a useful companion to this zone-ranking guide.

On stairs, the priority is not to add a single grab bar but to confirm that handrail coverage is complete, continuous, and grippable for the full length of the flight, because a partial rail creates a false sense of support at the exact point where it disappears.

Step 4: Check Entrances and Outdoor Transitions

Entrances combine several risk factors that rarely appear together inside the home: steps without adequate handrails, threshold height differences, weather-related surface changes, and the additional burden of carrying bags, mail, or keys while negotiating the transition. The entrance is often used quickly, without the deliberate attention a person might bring to the bathroom or stairs.

Outdoor Steps and Approach Paths

Walk the approach from the street, driveway, or parking area to the main entry. Note the number of steps, whether each step has a consistent rise height (irregular heights are a known trip hazard), whether a handrail is present, and whether the surface is level and non-slip when wet. Pavers that have shifted, cracked concrete, or leaf-covered surfaces increase fall risk for someone navigating the approach in variable weather or footwear. If there is a garage-to-house interior connection, assess that path too: it is often a single step down onto a concrete floor in low light, which is a high-exposure friction point for daily use.

Door Hardware and Interior Threshold

The threshold strip at the bottom of an exterior door can vary from a few millimeters to over an inch in height. For someone using a walker or cane, even a modest threshold creates a trip hazard on the return path. Check whether the threshold is beveled and whether the door hardware can be operated with one hand while the other is occupied. Round knobs that require grip and twist are harder to use than lever handles, particularly for anyone with reduced hand strength. A lever-style handle removes a daily friction point without altering the home’s appearance or requiring any structural work.

Entrances earn a higher priority than their frequency share alone suggests because the conditions there combine in ways that reduce the margin for error: variable weather, hands-full carrying, and the habit of moving quickly through a space that feels familiar.

Step 5: Audit the Bedroom and the Nighttime Path

The bedroom is the most common location for at-home falls in adults 65 and older, accounting for 25% of emergency department visits from falls at home, rising to 31.6% in adults 85 and older.2 Most bedroom falls happen during the transition from sleep to standing, during nighttime bathroom trips, or during dressing. Falls are the leading cause of injury-related death in older adults, with about 100 older adults dying from fall-related injuries every day in 2021.3 Many of those incidents begin with a routine movement on a familiar path.

Bed Height and Bedside Support

Sit on the edge of the bed. Your feet should reach the floor with your hips at roughly a 90-degree angle. If the bed is too high (feet dangling) or too low (requiring a deep squat to rise), the transfer from sitting to standing places additional load on the knees, hips, and lower back. A bed that is too high creates a drop on exit; one that is too low makes it harder to rise under control. Note whether there is a stable surface within arm’s reach of the exit point: a sturdy nightstand, a bed rail, or a transfer pole. A chair back, a wall lamp, or a side table that can tip is not stable support.

Lighting the Nighttime Path

Mornings and afternoons account for 69% of fall-related emergency medical service activations combined, but nighttime trips remain a distinct risk category because of low light, recent stillness, and reduced alertness.6 Can a light be reached before the first step out of bed? Is the path from the bedroom to the bathroom lit by at least a night light, or does it pass through a completely dark corridor? A motion-activated plug-in light costs under $20 and removes one of the most consistent risk factors on the nighttime route without changing the bedroom’s character during the day.

At-Home Falls by Location: Adults 65 and Older Horizontal bar chart showing percentage of at-home fall-related emergency department visits by location for adults 65 and older. Bedroom: 25.0%, Stairs: 22.9%, Bathroom: 22.7%, Kitchen: 6.9%, Living Room: 4.8%. Data from Moreland B et al., American Journal of Lifestyle Medicine, 2021, using 2015 NEISS nationally representative emergency-department data. At-Home Falls by Location: Adults 65 and Older Bedroom Stairs Bathroom Kitchen Living Room 25.0% 22.9% 22.7% 6.9% 4.8% Source: Home Age Fit analysis, 2026
Bedrooms account for the highest raw share of at-home falls (25%), but bathrooms and stairs produce more serious injuries per fall, which shifts their practical priority above bedrooms when consequence is weighted alongside frequency. Data: Moreland B et al., American Journal of Lifestyle Medicine, 2021.

The bedroom leads on raw fall frequency, but because bedroom falls often occur at lower force and onto softer surfaces than stair or bathroom falls, the injury severity weighting is lower, which is why the scoring step below places bathrooms and stairs ahead of bedrooms in the priority tier.

Step 6: Score Each Zone and Set Your Senior Home Safety Priorities

After the observation walk, you have a list of friction points organized by zone. Now convert that list into a repair order. Rate each zone on three dimensions, then read across them to set the sequence.

  • Frequency: How many times per day is this zone or path used? (occasional, several times a day, or constant)
  • Consequence: How severe is a fall likely to be in this zone, given the surface, height, and confined space? (low, moderate, or high)
  • Ease: How quickly and cheaply can the main hazard be corrected? (needs a professional, takes an afternoon, or takes under an hour)

A zone with a high frequency score, a high consequence score, and a high ease score is your first priority. Zones that score high on frequency and consequence but require professional involvement are still urgent; they go on a professional-referral track rather than a weekend-project list. One in five falls leads to a fracture or head injury,8 which is why consequence weighting matters more than frequency alone.

Home Zone At-Home Fall Share2 Typical Injury Severity Priority Tier
Bathroom 22.7% High (wet surfaces, confined transfers) 1
Stairs 22.9% High (fracture risk, drop height, speed) 1
Bedroom 25.0% Moderate (floor-level, softer surroundings) 2
Entrance / Exterior varies by home High outdoors (weather, uneven surface) 1 to 2, assess in context
Kitchen ~7% Moderate (standing, wet floors, reaching) 3
Living Room / Hallway ~5% Lower (more space, usually dry surfaces) 4

Once you have your zones ranked, use the ease score to decide what to tackle first within each tier. A non-slip mat in the shower, a lever handle at the entrance, and a motion-activated night light on the bedroom-to-bathroom path are Tier 1 changes that take an hour each. A grab bar installation or stair handrail extension may need a contractor but belongs on the same urgent timeline, not deferred in favor of easier Tier 3 improvements that feel more satisfying to complete.

For guidance on connecting these findings to a whole-home action plan, a priority-based fall prevention plan for seniors covers the sequencing from observation to implementation.

The most common error in this step is treating all Tier 1 items as equal: bathroom and stair hazards that require professional involvement should still be scheduled first, not displaced by easier Tier 3 tasks.

Common Home Safety Mistakes for Older Adults

Several consistent errors appear when seniors or caregivers assess a home without a structured method. Each one reduces the effectiveness of whatever changes are eventually made.

Starting with Products Instead of Routes

Grab bars, raised toilet seats, and stair handrails are the right tools for specific friction points. Buying them before observing the actual friction points often results in bars installed in the wrong position, seats that do not match the toilet height, and handrails that end two steps from where they are needed. The walk comes first. The product follows the finding.

Treating All Rooms as Equal Risk

A home has limited time and budget. Spending it on a new bath mat in a bathroom that is already well-configured, while ignoring a stair flight with an incomplete handrail, is a predictable outcome of an unranked assessment. The scoring step exists specifically to prevent this. Environmental hazards account for 30% to 47% of all falls,7 and that exposure is not distributed evenly across zones.

Underestimating the Nighttime Route

The bedroom-to-bathroom path at night is walked in low light, after a period of lying still, often without the footwear worn during the day. It is one of the highest-exposure routes in the home, and it is frequently overlooked because it feels familiar. Assessing it during the day, in full light, gives an inaccurate picture of the risk. Walk it under the conditions it is actually used: low light, first thing in the morning, and treat any stretch with no grip point and no visible light as a priority finding.

Postponing Action After the Observation Walk

An assessment that identifies specific friction points and then waits for a better time does not reduce risk. Many of the highest-value initial changes, clearer paths, a night light, secured mats, take under an hour and cost very little. For seniors managing this alongside a caregiver, knowing what to address first in fall prevention is a useful guide for assigning the right tasks to the right people quickly.

The structural finding from route-first, consequence-weighted assessments is that the highest-priority changes are usually modest in cost and effort, while the changes most commonly deferred are the ones involving professional installation that carry the highest injury consequence if left unaddressed.

Frequently Asked Questions

Which room in the home has the highest fall risk for seniors?

The bedroom accounts for the highest raw share of at-home fall-related emergency department visits at 25%, but bathrooms and stairs produce more serious injuries per fall.2 If you are prioritizing one zone first, the bathroom is the stronger starting point because of its combination of wet surfaces, demanding transfers, and confined space. Stairs follow at essentially the same frequency with similarly high injury consequence.

How do you start a home safety walk-through without professional help?

Walk the three most-used daily routes first: bedroom to bathroom, kitchen to main seating area, and entrance to living space. Mark every point where you grip something for support, step onto a different surface, or notice a drop in light. Those friction points produce a more useful starting list than any room-by-room product scan, because they reflect the paths actually used every day.

What home safety changes can be made without a contractor?

Securing loose rugs with non-slip backing, adding a motion-activated night light on the nighttime route, replacing a round door knob with a lever handle, rearranging furniture to clear walking paths, and moving frequently used items into easier reach are all changes that take under an hour and require no tools beyond a screwdriver. They address the friction points that environmental hazards create in 30% to 47% of falls.7

When should an occupational therapist be involved in a home assessment?

An occupational therapist evaluates how a specific person’s balance, vision, strength, and daily habits interact with the specific home. Bring one in when any finding from the observation walk involves structural modification, or when the resident has a known mobility or balance condition. The walk in this guide identifies which zones to prioritize; the therapist evaluates how the person’s specific situation interacts with those zones.

Does fixing one high-risk zone reduce overall fall risk at home?

Partially. A bathroom fix reduces avoidable risk during that part of the daily routine. But risks accumulate across connected zones: a well-configured bathroom matters less if the path to it is dark and uneven. One in 5 falls leads to a fracture or head injury,8 so a zone-ranking approach that targets the full sequence produces better outcomes than a single-room fix.

Limitations and Edge Cases

  • This guide uses aggregated national data. Individual risk depends on the specific person’s mobility, balance, vision, and medical history, which only a qualified occupational therapist or clinician can evaluate for a specific home and resident.
  • The room-frequency percentages (Moreland et al. 2021) reflect adults 65 and older as a group. Stairs dominate risk for adults aged 65 to 74 (30% of at-home falls); bedrooms dominate for adults 85 and older (31.6%). Starting priorities may differ depending on the resident’s age and condition.2
  • The entrance and exterior fall share is not broken out separately in the Moreland et al. data set. The “varies by home” notation in the scoring table reflects this gap; assess exterior paths as part of your observation walk rather than assigning them a fixed frequency rank.

References

Methodology: all figures cited below come from independently published research and government surveillance data, and each reference links directly to the page that carries the statistic.

  1. CDC – Facts About Older Adult Falls, Centers for Disease Control and Prevention, current.
  2. PMC / American Journal of Lifestyle Medicine – Moreland B et al., A Descriptive Analysis of Location of Older Adult Falls That Resulted in Emergency Department Visits in the United States, 2021.
  3. CDC MMWR – Nonfatal and Fatal Falls Among Adults Aged 65 Years and Older, United States, 2020-2021, Vol. 72 No. 35, 2023.
  4. PMC / Osteoporosis International – Solaiman RH et al., Rising incidence of stair-related upper extremity fractures among older adults in the United States, 2023.
  5. CDC MMWR – Nonfatal Bathroom Injuries Among Persons Aged 15 Years and Older, United States, 2008, Vol. 60 No. 22, 2011.
  6. PMC / Archives of Gerontology and Geriatrics Plus – Sheridan E et al., Timing of Emergency Medical Services Activations for Falls, 2024.
  7. PMC / International Journal of Environmental Research and Public Health – Edwards N et al., A Scoping Review Examining the Links between Stair and Bathroom Falls and the Built Environment, 2019.
  8. PMC / JAMA – Colon-Emeric CS et al., Risk Assessment and Prevention of Falls in Older Adults, JAMA, 2024.

Conclusion

The highest-risk zones in most homes are the bathroom, stairs, and the nighttime route from bedroom to bathroom. An observation walk that maps those areas and scores them by frequency and consequence produces a more useful repair sequence than any room-by-room checklist, because it reflects the paths and habits of the person who actually lives in the home.

For a broader view of how this zone ranking connects to a whole-home fall-prevention approach, see the overview in Fall-Prevention Priorities: A Practical Guide.

Residential Stair Handrail Code: What to Check Before You Build or Replace

Author: Oded Feigin · Created On: September 14, 2026 · Last Updated: September 14, 2026

Stairs account for more than 2.6 million emergency-department visits each year in the United States.1 Before ordering materials or hiring a contractor, verify what the locally adopted residential code actually requires. The checks cover height, grip shape, wall clearance, continuity, and where a rail is required. For broader planning context, see Senior Safety Handrails. The sections below organize the stair handrail code questions to answer before any project begins.

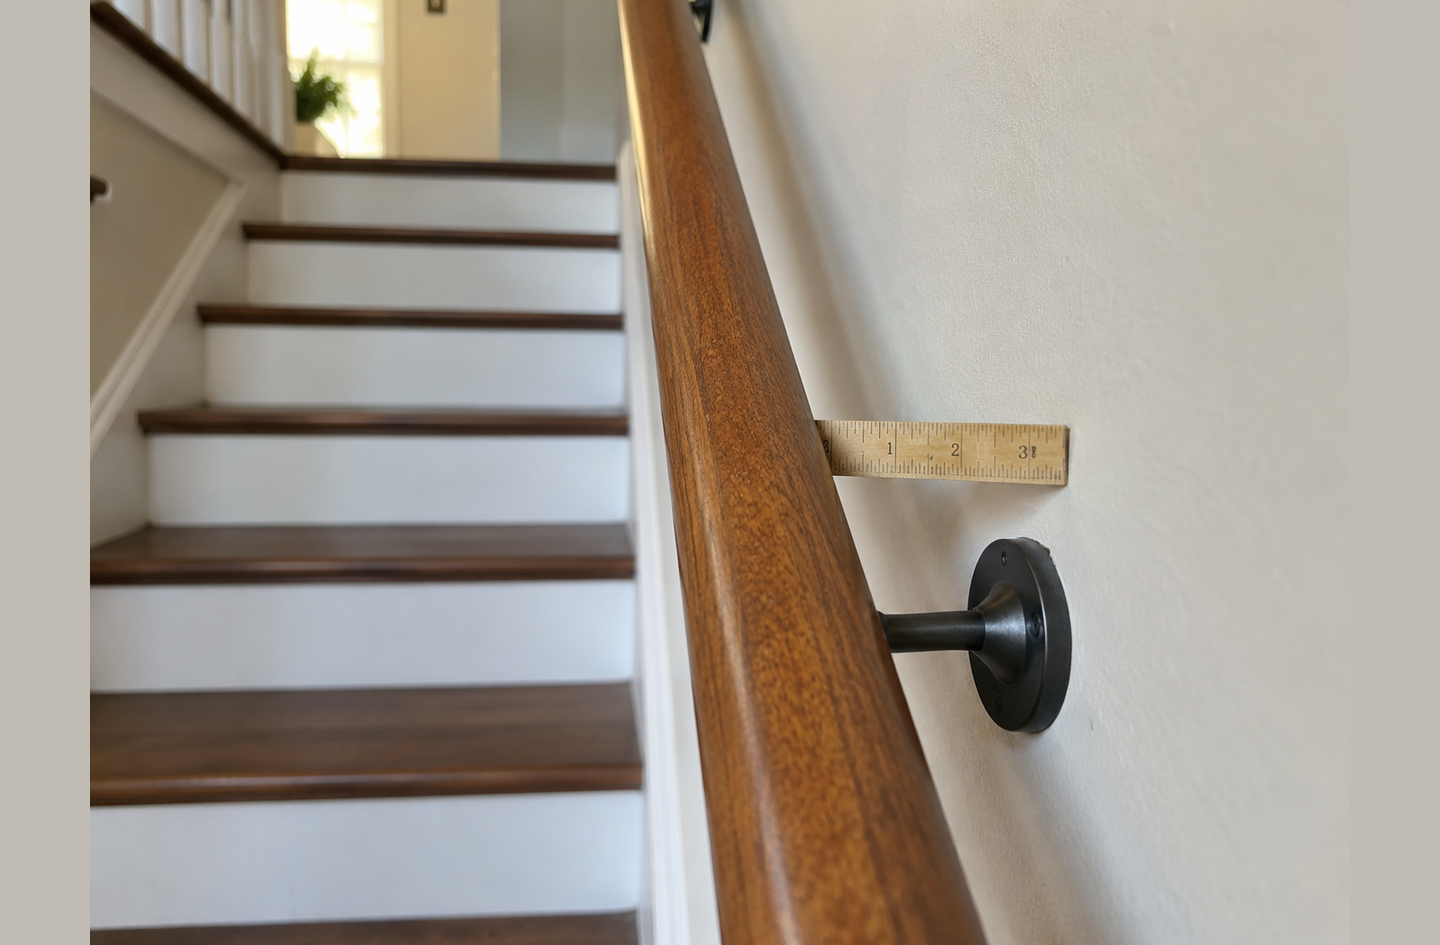
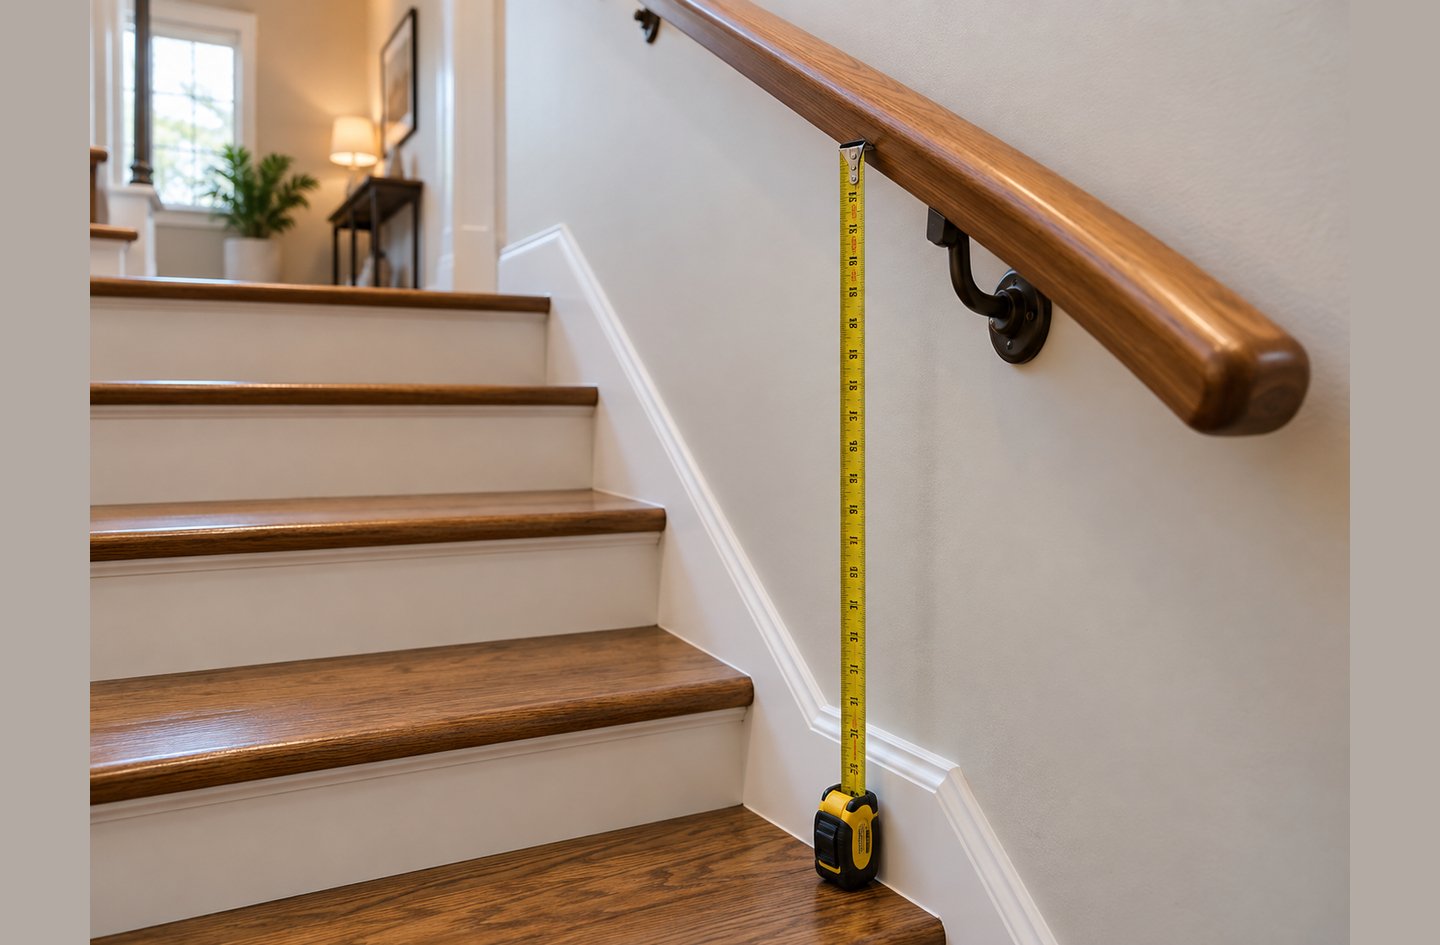
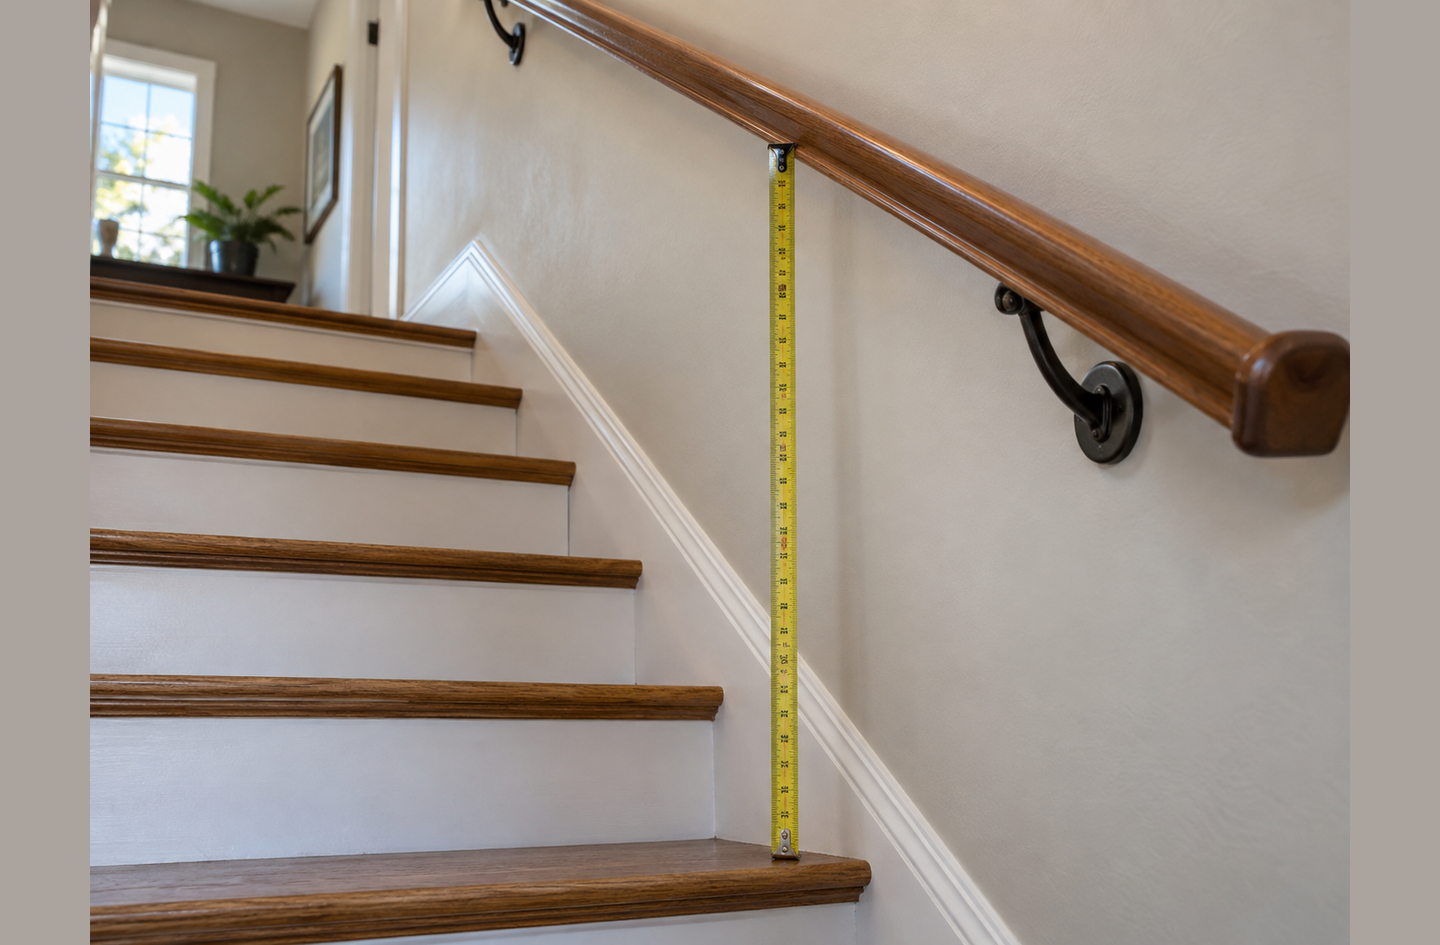
A tape measure hanging from a wooden stair handrail to the step nosing below, showing a measurement of 28 inches and demonstrating how residential stair handrail code height verification works
Measuring height from the tread nosing to the top of the handrail is the correct method for confirming whether an installation meets the residential stair handrail code height range of 34 to 38 inches.

Quick Answer

What does residential stair handrail code require?

Under IRC R311.7.8, a residential stair flight with four or more risers requires a handrail on at least one side.4 Height runs 34 to 38 inches, measured from the sloped plane at the tread nosing.4 The grip cross section must fall within defined size limits, and a minimum clearance of 1.5 inches is required between the handrail and any adjacent wall.4 The exact requirements depend on which code edition your jurisdiction has adopted and any local amendments in effect.

Key Takeaways

  • IRC R311.7.8 requires a handrail on at least one side of any stair flight with four or more risers, but locally adopted editions and local amendments may differ from the base IRC text.
  • Height is measured from the sloped plane at the tread nosing, not from the floor below the stair. The valid range under current IRC is 34 to 38 inches.
  • A handrail can look structurally solid and still fail the graspability requirement if its cross section is too large or does not allow full finger wrap under load.

Why Stair Handrail Code Verification Matters

Stair handrail code is the set of provisions in the locally adopted residential building code specifying where a graspable rail is required, how high it must sit, what grip shape it must have, and how far it must stand from adjacent walls. The code sets a legal minimum for permitted construction. It does not define what works best for a specific person or a specific home.

Falls are the leading cause of fatal and nonfatal injuries among older adults.2 Stairs are a significant contributor. CPSC data show stairs, ramps, and landings as a top product category for emergency-department-treated injuries, with more than 2.6 million visits recorded in a single year.1 The age-adjusted fall death rate among older adults rose 21 percent between 2018 and 2024, from 64.7 to 78.4 per 100,000.2

“Falls are the leading cause of fatal and nonfatal injuries among older adults.”

Centers for Disease Control and Prevention, Older Adult Fall Prevention Data2

Verifying code requirements before a project starts has three purposes. It identifies whether a permit is needed and what an inspector will check. It prevents ordering materials to wrong dimensions. Most importantly, it surfaces where a code-compliant installation still leaves functional questions specific to a household’s needs.

Code compliance is the starting point for a stair handrail project, not the finishing point. The five checks below cover what the IRC requires. Where individual needs, existing framing, or local amendments point toward different decisions, those are questions for a licensed contractor or accessibility specialist familiar with your project.

Check 1: Is a Handrail Required on This Stair Run?

The handrail requirement under current IRC is tied to riser count, not to the height of the stair or the total length of the run. Riser count is the number of vertical rises between two landings or floors. A stair run with four or more risers requires a handrail on at least one side under IRC R311.7.8.4

“Handrails shall be provided on not less than one side of each flight of stairs with four or more risers.”

International Code Council, International Residential Code, Section R311.7.84

Counting risers is straightforward in most cases. Each vertical surface between treads is one riser. A stair run with three treads has three risers. A run with four treads has four risers. When a landing interrupts the run, the two flights are counted separately, and each flight is evaluated on its own riser count.

Interior stairs

Most interior residential stairs have more than four risers. The handrail requirement applies to the full run on each side it is installed, not just the portion above the fourth riser.

Exterior stairs

The same four-riser trigger applies to exterior stairs, including porch steps, deck stairs, and entry steps. A three-step entry (three risers) falls below the IRC trigger. A four-step entry requires a handrail on at least one side. Locally adopted amendments may set a lower trigger. Check with your local building department before assuming a short exterior run is exempt.

When fewer risers still benefit from a rail

The IRC trigger is a code floor. A two- or three-riser run can still present a stumble point in low light, on wet steps, or when someone is carrying items. That decision belongs to the homeowner or an occupational therapist familiar with the person and route.

The four-riser rule tells you what the permit requires. It does not tell you what the home needs. Those are separate questions, and answering the second one often requires observing the route in real use.

Check 2: Verify the Height Measurement

IRC R311.7.8.1 sets the handrail height range at 34 inches minimum and 38 inches maximum, measured vertically from the sloped plane adjoining the tread nosings.4 The measurement is perpendicular to the slope of the stair, taken from the nose of the tread, not from the floor below the stair and not from the tread surface measured horizontally.

How to take the measurement

Tread nosing is the leading edge of each stair tread. IRC R311.7.8.1 defines handrail height as the vertical distance from the sloped plane at the nosing to the top of the gripping surface. To measure: hold a level against two tread nosings to establish the slope line, then measure vertically from a point on that slope line to the top of the handrail directly above it. A reading between 34 and 38 inches confirms code compliance for height.

The most common measurement error is placing the tape measure on the tread surface and running it straight up to the wall. This underestimates the height because it ignores the slope. The nosing-based method gives the actual code-required dimension.

Why the height window matters

A handrail below 34 inches sits too low for effective leverage during descent. The arm angle changes, reducing the force you apply when arresting a stumble. A handrail above 38 inches requires raising the shoulder, which reduces grip strength and reflex speed on a load-bearing grab.

For a deeper look at how height interacts with reach, posture, and daily use, see handrail height guide. That article covers the person-specific side of the height question alongside the code measurement method.

Height and handrail use

Behavior research adds context. A 2023 study found 65 percent of young adults did not use the handrail on a longer staircase, and none used it on a shorter one.3 Height alone does not guarantee use, but a rail outside the 34-to-38-inch window adds a physical barrier before anyone decides whether to reach for it.

IRC R311.7.8: Four Key Specification Ranges Four specification ranges from IRC R311.7.8 (independently confirmed by ADA Section 505): handrail height 34 to 38 inches (IRC R311.7.8.1, ADA 505.4); wall clearance 1.5 inches minimum (IRC R311.7.8.3, ADA 505.5); Type I circular outside diameter 1.25 to 2.0 inches (IRC R311.7.8.5, ADA 505.7.1); Type I non-circular perimeter 4.0 to 6.25 inches (IRC R311.7.8.5, ADA 505.7.2). IRC 2021 data via up.codes and Engineering Express; ADA data from 2010 ADA Standards, Section 505. IRC R311.7.8: Four Key Specification Ranges Acceptable zone per IRC R311.7.8 Height 34 in. 38 in. Wall clearance ≥1.5 in. Type I diameter 1.25 in. 2.0 in. Type I perimeter 4.0 in. 6.25 in. Source: Home Age Fit analysis of IRC R311.7.8 and ADA Section 505, 2026
IRC R311.7.8 and ADA Section 505 share identical height and clearance minimums. All four checks shown here must be satisfied independently. (Compiled by Home Age Fit from IRC R311.7.8 via up.codes5 and 2010 ADA Standards, Section 505.6)

Get the height measurement right before the first bracket goes into the wall. A rail set an inch too low or too high still looks fine and still passes a visual check. But it sits outside the code window, and adjusting height after installation means pulling the brackets and redrilling the framing.

Check 3: Assess the Grip Profile

The IRC requires a graspable handrail, not simply a structural rail. The distinction matters because many decorative and DIY installations use profiles code classifies as non-graspable: flat boards, wide newel posts, and thick decorative rails look like handrails but do not allow the finger wrap code requires.

IRC R311.7.8.5 defines two graspability types based on cross-section dimensions.5 A Type I handrail is a graspable profile whose circular cross section falls between 1.25 and 2 inches in outside diameter, or whose non-circular cross section carries a perimeter between 4 and 6.25 inches. Type I is the standard residential profile and covers most round and oval rails.

Type I: the standard residential profile

A round steel tube or wooden dowel at 1.5 inches in diameter is a classic Type I profile. At 1.25 inches it is at the lower window edge; at 2 inches, the upper edge. The fingers close around the rail and the grip is complete. Below 1.25 inches the rail is too small for a secure hold; above 2 inches the fingers cannot complete the wrap.

Non-circular Type I profiles (oval, D-shaped, some architectural rails) achieve compliance through perimeter measurement rather than diameter. A perimeter under 4 inches is too small. A perimeter above 6.25 inches crosses into Type II territory and requires a different test.

Type II: wide decorative profiles with a required recess

A Type II profile has a perimeter greater than 6.25 inches, which covers wide architectural handrails, thick timber rails, and some decorative profiles. The IRC allows Type II profiles only when they include a graspable finger recess on both sides of the rail. The recess depth must be at least 5/16 inch, and the recess width must fall between 1.25 and 2.75 inches.5 The recesses give the fingers something to hook around on a wide profile where a full wrap is not possible.

IRC R311.7.8.5 Handrail Graspability: Type I vs. Type II
Specification Type I Type II
Circular outside diameter 1.25 to 2.0 in. N/A (perimeter >6.25 in.)
Non-circular perimeter 4.0 to 6.25 in. Greater than 6.25 in.
Finger recess required No Yes, on both sides
Finger recess depth (min) N/A 5/16 in. (8 mm)
Recess width range N/A 1.25 to 2.75 in.
Typical profiles Round wood, round steel, oval Wide timber, wide architectural profiles

How to check your existing or planned profile

Wrap your hand around the rail. Your thumb and fingers should be able to close around it or hook into a defined recess. Measure the outside diameter with calipers or a diameter tape for circular profiles. For non-circular profiles, wrap a flexible tape measure around the full perimeter once and read the value. A standard wooden dowel rail sold as 1.5-inch nominal is typically between 1.5 and 1.625 inches in actual diameter, well within the Type I window.

A visual check is not enough. A common contractor-grade wood rail with a 2-by-2-inch square profile has a perimeter of 8 inches. It does not qualify as Type I. It qualifies as Type II only if machined recesses are cut on both sides. If your existing rail has a non-graspable profile, replacement or modification is the only path to compliance.

The graspability check catches the most common DIY and cosmetic installation failure. Many homeowners install a rail for the look and the code sticker, then find it fails on a dimension no one thought to measure.

Check 4: Confirm Wall Clearance

IRC R311.7.8.3 requires a space of at least 1.5 inches between the handrail and any adjacent wall.4 Clearance in this context is the gap between the gripping surface of the handrail and the nearest surface next to it, whether a wall face, a baseboard, or a bracket face. The requirement exists because a grip interrupts when the hand runs into an obstacle during descent. If the gap is too narrow, the knuckles contact the wall before the fingers close around the rail.

A ruler placed between a wall and a wooden stair handrail bracket showing the clearance gap of approximately 3.5 inches to confirm the 1.5-inch minimum residential stair handrail code requirement
Measuring the gap between the wall face and the nearest edge of the handrail at each bracket confirms the 1.5-inch minimum clearance required under IRC R311.7.8.3. A reading of 3.5 inches here exceeds the minimum and gives the hand full grip clearance throughout the run.

How to measure clearance correctly

Measure from the wall surface to the nearest edge of the handrail at each bracket location. The bracket is almost always the tightest point, since the bracket arm pulls the rail toward the wall. A reading of 1.5 inches or more at every bracket confirms compliance. A reading below 1.5 inches requires repositioning the rail outward, which may mean different bracket arms or anchoring locations.

Clearance and knuckle clearance in practice

The 1.5-inch minimum gives most adult hands enough room to slide without knuckle contact. A gap in the 2-to-3-inch range is more comfortable for people with hand stiffness or wider hands. There is no maximum clearance in the IRC for standard wall-mounted residential handrails.

Clearance at baseboard and trim

Baseboards, chair rails, and decorative trim can reduce the effective clearance even when the brackets are set correctly. Measure from the outermost face of any wall trim to the nearest face of the handrail. A 1.5-inch gap between a smooth painted wall and the rail can shrink to 0.75 inches if a thick baseboard continues up the stair wall. Trim the baseboard on the wall face, or increase the bracket arm length to compensate.

Wall clearance is the check most often skipped at the planning stage because the rail looks well-separated from the wall in most catalog photos. In the actual staircase, brackets close that gap at each mounting point. Measure at every bracket, not at the midspan.

Check 5: Review Continuity from Top to Bottom

A handrail provides its greatest value as a continuous gripping surface. A code-compliant rail runs the full length of the stair flight, from the top riser to the bottom. Any gap in the gripping surface, even a momentary one at a post or a landing transition, forces the user to release and regrasp. Under load or loss of balance, that transition is where falls happen.

Where continuity breaks most often

Newel posts at the top and bottom of a run are the most common continuity interruption. A traditional newel design places a large, non-graspable post precisely where the hand transitions off the stair. At the top, the post terminates the run before the last riser is cleared. At the bottom, the user releases the graspable section before their weight is fully transferred to the flat floor. Both are high-risk transition points. The IRC addresses this by requiring handrail returns and extensions at specific stair configurations.

Extensions and returns

An extension carries the gripping surface past the last step at the top or bottom of the flight. A return curves the end of the handrail back toward the wall or the post, eliminating a projecting end a sleeve or cane tip could catch. IRC requirements for extensions vary by edition and stair configuration. The general principle: the graspable surface should extend far enough that someone in motion from the last step still has something to hold before their full weight is on the floor.

For detail on how extensions and returns affect reach before and after each step, see how handrails differ from guardrails – that article explains the graspability distinction and how it changes what the rail is actually doing at the transitions.

Landings and multi-flight stairs

On stairs with an intermediate landing, each flight is evaluated separately. Most code interpretations require continuous or closely connected handrails through the landing. Plan for the landing connection before ordering materials; the geometry depends on landing width and the angle of each flight.

Continuity is a system property, not a component property. A single rail section with perfect dimensions fails if it does not connect continuously to the next section. Check the full route from top to bottom before the project scope is set.

Interior vs. Exterior: Where the Conditions Differ

The IRC handrail requirement triggers (riser count, height, graspability, clearance, continuity) apply to both interior and exterior residential stairs. The code does not write a separate section for exterior handrails in most editions. The same R311.7.8 provisions govern a porch stair, a deck stair, and an interior flight.

What changes outdoors

The verification checks are the same, but exterior conditions add practical considerations the code addresses indirectly. Weather exposure affects material selection. A wooden rail sealed adequately for interior use may not survive freeze-thaw cycles, sustained moisture, or UV exposure without periodic maintenance. A clearance reading taken when the wall is dry may shrink when the framing absorbs moisture and the wall covering swells. Steel and aluminum rails oxidize or corrode at bracket connections unless the metal is protected at the attachment point.

Substrate and attachment

Interior handrails attach to wood-framed walls where stud location is predictable. Exterior handrails attach to masonry, fiber cement, vinyl siding, or composite decking, each with different anchor requirements and load paths. A licensed contractor familiar with the substrate and weather zone is the right resource for attachment decisions.

Run the same five checks regardless of whether the stair is inside or outside. Where the exterior project involves masonry, unfamiliar cladding, or uncertain framing, bring in a licensed contractor before the brackets go in.

When Your Local Code Differs from the IRC

The IRC is a model code published by the International Code Council. It does not have the force of law in any jurisdiction until a state, county, or municipality formally adopts it. Adoption is followed, in many places, by local amendments. Two projects in adjacent counties can be governed by different editions with different local modifications.

How to find the edition in effect

Your local building department is the authoritative source. Most jurisdictions post their adopted code edition online or confirm it by phone. Ask which IRC edition is in effect and whether any local amendments apply to handrail or stair sections.

Common edition variations

Many jurisdictions still operate under 2015 or 2018 IRC editions. The core provisions (height, clearance, grip dimensions) have been stable across those editions. What varies are extension and return requirements and landing-connection provisions. A replacement on a pre-2000 home may face geometry that does not meet current code, requiring a full replacement to reach compliance.

When to involve a professional

For any project requiring a permit, a licensed contractor or permit professional is the right resource for confirming local code compliance. This article covers the IRC framework for orientation. It does not constitute a code compliance review for a specific project. The specific home, the locally adopted edition, any amendments, and the inspector’s interpretation of edge cases are all outside the scope of an educational planning resource. Bring the five checks listed above to that conversation. You will ask better questions and understand the answers more clearly.

Know which code edition governs your project before you plan the dimensions. The core requirements have been stable for over a decade, but local amendments and older-home conditions create project-specific variation. Verify locally.

Common Mistakes Before a Stair Handrail Project

Measuring height from the wrong reference point

Height measured from the floor below the stair, or from the flat surface of a tread, produces a different number from height measured from the sloped plane at the nosing. The IRC method is the nosing measurement. A rail set to 36 inches from the floor can sit below 34 inches at the nosing, falling below the code floor. Measure from the nosing. Measure at multiple points along the run, not just at the top or bottom.

Assuming the existing installation defines the requirement

Replacing a handrail by copying the dimensions of the old one is a common shortcut. Older handrails were often installed to earlier code editions or without a permit at all. A replacement project requires the new rail to meet the currently adopted code, not the standard in effect when the original was installed. Document the existing dimensions, then verify each one against the current code before ordering replacement materials.

Choosing a profile on appearance alone

A profile selected from a catalog may look correct but still fail the graspability requirement if its perimeter exceeds 6.25 inches without a code-compliant finger recess. Profiles marketed as “handrails” are not automatically code-compliant. Measure the outside diameter or perimeter before purchase and confirm recess dimensions for Type II profiles.

Ordering materials without checking framing

Bracket location is constrained by stud, blocking, or solid framing position. Required bracket spacing may not align with available stud positions, especially in older homes with irregular framing. Locate the framing before planning bracket positions. If standard spacing is not achievable, a contractor familiar with stair framing should review the attachment plan.

The most expensive mistake in a handrail project is the one discovered after the rail is set. Check all five dimensions before ordering, and verify framing before drilling the first pilot hole.

Frequently Asked Questions

How many steps require a handrail in a residential home?

Under IRC R311.7.8, a stair flight with four or more risers requires a handrail on at least one side.4 A flight with three risers does not meet the IRC trigger, though local amendments may set a lower threshold. Whether a short run benefits from a rail for daily use is a separate question from the code trigger.

What is the correct height for a residential stair handrail?

IRC R311.7.8.1 sets the acceptable range at 34 to 38 inches, measured vertically from the sloped plane at the tread nosings.4 The measurement is taken from the nosing of the tread, not from the horizontal tread surface or the floor below the stair. Both the minimum and the maximum are enforced limits. A rail set at 33 inches or 39 inches falls outside the code window even if it feels comfortable.

Does a residential handrail need to be on both sides of the stair?

The IRC requires a handrail on at least one side of a stair flight with four or more risers.4 A second rail on the other side is not mandated by the base IRC for most residential configurations. ADA Section 505 requires rails on both sides for stairs on accessible routes, but ADA applies to public accommodations and facilities, not private residences.6 Adding a second rail is a separate planning decision from the code minimum.

What makes a handrail graspable under the IRC?

IRC R311.7.8.5 defines graspability through cross-section dimensions.5 A Type I profile requires a circular outside diameter of 1.25 to 2.0 inches, or a non-circular perimeter of 4.0 to 6.25 inches. A Type II profile, with a perimeter over 6.25 inches, requires a defined finger recess at least 5/16 inch deep on both sides of the profile. A flat board, a wide timber, or a thick decorative post does not qualify unless its dimensions fall within these windows or it carries the required recesses.

Do ADA handrail requirements apply to private homes?

ADA Title III covers public accommodations and commercial facilities; it does not govern private residential homes under standard conditions.6 The notable point for homeowners is that IRC and ADA share identical core dimensions for height (34 to 38 inches) and clearance (1.5 inches minimum). Healthcare costs for nonfatal falls among older adults in the United States reached $80 billion annually as of 2020.8 Some homeowners reference ADA standards voluntarily as a planning baseline, particularly when the home will serve a household member who uses a mobility device. A licensed occupational therapist is the right resource for accessibility planning specific to a person and home.

Limitations and Edge Cases

  • This article covers the IRC 2021 framework and figures confirmed in ADA Section 505. Locally adopted editions (2015, 2018) may contain different extension, return, or landing-connection provisions. Verify with your building department before submitting a permit application.
  • Figures are based on United States code and injury data. Building codes and applicable standards differ by country, region, and jurisdiction outside the US.
  • The graspability and height checks covered here apply to the rail itself. Load path, bracket spacing, and substrate adequacy for a specific installation require a licensed contractor or structural professional familiar with your project conditions.

References

Every figure links to its source and was verified against the source text before inclusion.

  1. U.S. Consumer Product Safety Commission – Consumer Product-Related Injuries and Deaths in the United States: Estimated Injuries Occurring in 2020 and Deaths in 2019, CPSC, 2022. NEISS data for stairs, ramps, landings and floors.
  2. Centers for Disease Control and Prevention – Older Adult Fall Prevention: Data and Statistics, CDC, updated 2024.
  3. PubMed Central / PLOS ONE – Cho et al., “Risky behavior during stair descent among young adults,” PLOS ONE, Vol. 18(7), July 2023.
  4. Engineering Express – Handrail Design Guidelines, IRC R311.7.8 reference, Engineering Express Wiki, 2022 (citing IRC 2021).
  5. UpCodes – IRC R311.7.8.5 Grip Size, International Residential Code 2021, via UpCodes.
  6. Corada / ADA Standards – 2010 ADA Standards for Accessible Design, Section 505 Handrails, U.S. Department of Justice, 2010.
  7. ScienceDirect / American Journal of Emergency Medicine – Blazewick et al., “Stair-related injuries treated in United States emergency departments,” American Journal of Emergency Medicine, 2017.
  8. National Council on Aging – Get the Facts on Falls Prevention, NCOA, updated 2024 (citing Haddad YK et al., 2024; CDC data).

Conclusion

Five checks cover the core of residential stair handrail code: riser count, height range, grip profile, wall clearance, and continuous grip from top to bottom. Each check is independent. A rail can pass four and fail one, and that one failure is the one an inspector or a stumble will find.

The IRC framework gives you the questions to ask before a contractor starts work. For a broader look at planning support throughout the home, see Senior Safety Handrails.

Non-Slip Bathroom Flooring: How to Compare Tile, Vinyl, and Other Options

Author: Oded Feigin · Created On: September 13, 2026 · Last Updated: September 13, 2026

Most non-slip bathroom flooring decisions start with the wrong question. Asking whether a material is “slippery” misses what actually controls wet grip: the finish, surface texture, and care history of a specific floor. The overview in Slip-Resistant Flooring maps this topic across surface types. This article compares tile, vinyl, and other options by the traits that determine traction when wet. More than 80 percent of the estimated 234,000 nonfatal bathroom injuries treated in U.S. emergency departments each year involve slips and falls,1 and the material name is rarely the most important variable.

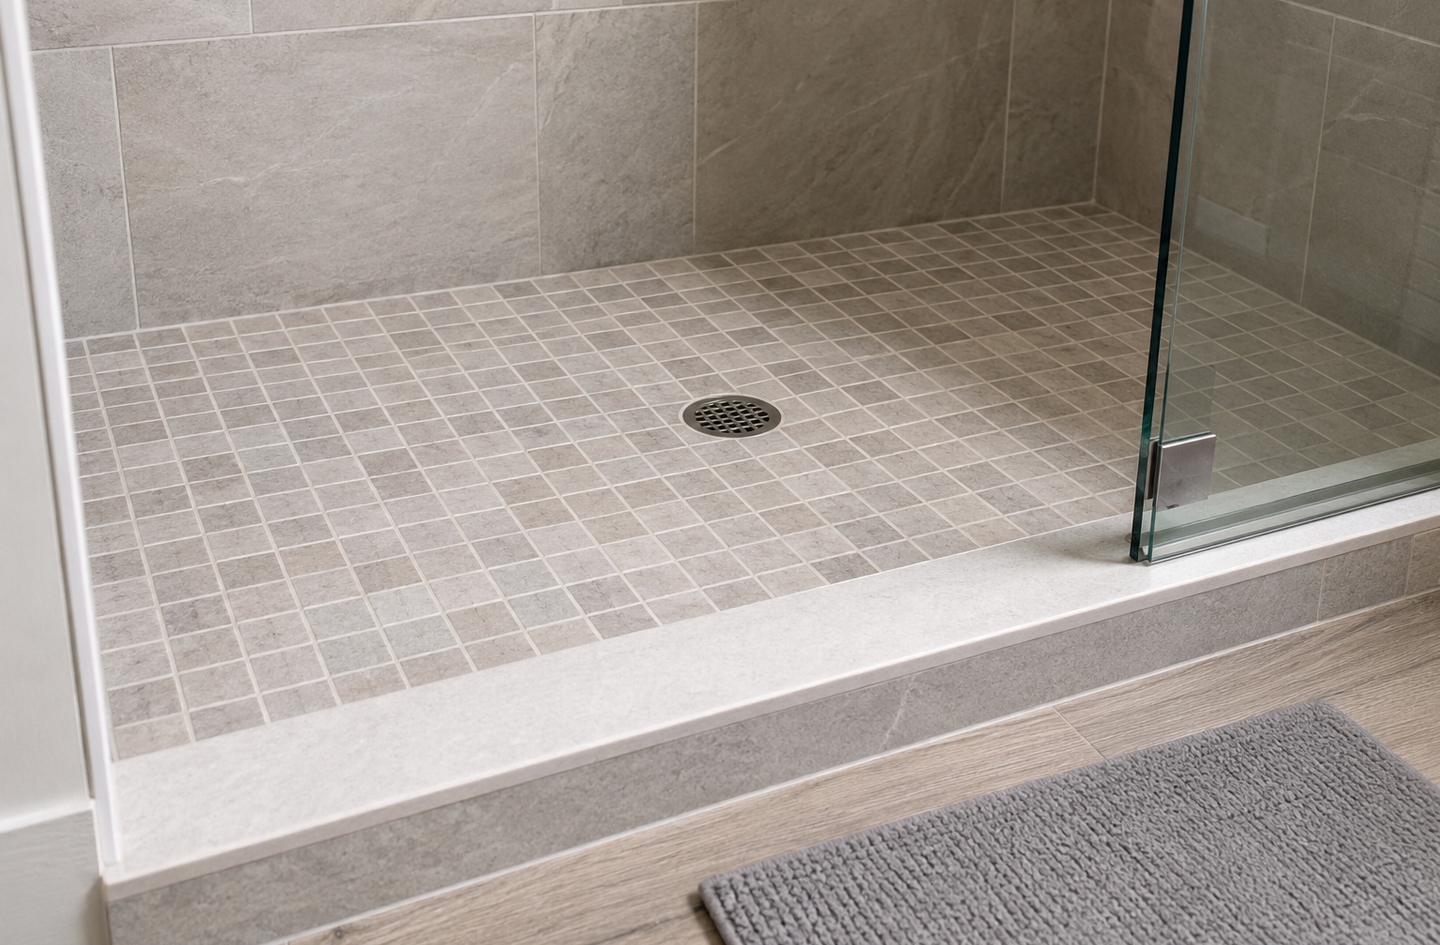
Non-slip bathroom flooring: 1-inch slip-resistant mosaic tiles surround a central drain with a low-profile threshold transition for aging in place
1-inch mosaic tile creates frequent grout lines around a central drain, providing a textured non-slip bathroom flooring surface with a low threshold at the room transition.

Quick Answer

Which bathroom flooring is safest when wet?

The option most likely to feel safer in wet conditions is any floor whose installed finish meets ANSI A326.3’s wet DCOF minimum: 0.42 for general bathroom areas and 0.50 for shower floors and other barefoot zones.3 Unglazed and matte tile finishes typically meet both. Polished porcelain tile measured a wet COF of 0.15 in a peer-reviewed study, well below either threshold.4 Textured luxury vinyl typically meets the 0.42 standard. The material name tells you very little. The finish and the verified DCOF figure tell you almost everything.

Key Takeaways

  • ANSI A326.3-2021 sets the minimum wet DCOF at 0.42 for general bathroom areas and 0.50 for shower floors and other barefoot wet zones.3
  • Polished porcelain tile measured a wet COF of 0.15 in controlled testing, an 84 percent drop from its dry value of 0.95.4
  • ANSI A326.3 states explicitly that its test does not predict whether a person will or will not slip, so the number is a spec tool, not a safety guarantee.3
  • Surface continuity, seam height, and threshold transitions matter for walkers and wheelchairs as much as wet traction does for barefoot use.
  • More grout lines from small-format tile probably add some grip, but no controlled study has quantified the amount.8

Quick Comparison: Non-Slip Bathroom Flooring Options

This table summarizes how tile, vinyl, and rubber flooring compare across the properties that matter most for a wet bathroom environment. Keep in mind that material categories overlap: polished porcelain and unglazed matte tile perform very differently from each other even though both are “tile.” Read the sections that follow before treating these summaries as final decisions.

Property Ceramic / Porcelain Tile Vinyl (LVP / LVT) Rubber
Wet DCOF range 0.15 (polished) to 0.70+ (unglazed textured) 0.42-0.55 (texture-dependent) Typically above 0.60 wet SCOF
Meets Interior Wet Plus (0.50) threshold Yes, with unglazed or matte finish Product-dependent; verify spec sheet Typically yes
Surface texture mechanism Grit, relief, or grout-line edges Embossed pattern depth Inherent elastomeric grip
Grout joints / seams Yes (mosaic: 15-25 per sq ft; large format: 1-2 per sq ft) Minimal seams, no grout Minimal seams or sheet format
Soap residue accumulation In grout channels and on tile face In embossed texture pockets On surface only
Walker / wheelchair rolling Slight resistance from grout lines Low rolling resistance Moderate resistance from grip
Renovation complexity High (mortar bed, grout, curing time) Moderate (click-lock or glue-down) Moderate (adhesive or interlocking)
Best suited for Shower floors (unglazed or matte finish) Main bathroom floor (continuous surface) Utility areas and secondary baths

Wet Traction: How Finish Determines the Numbers

Wet traction is what most people focus on when choosing non-slip bathroom flooring. The answer is almost never about the material name. It is almost always about the finish and surface texture. Dynamic Coefficient of Friction (DCOF) is the measure of resistance to sliding between a foot, or a test sensor, and a wet floor. It is measured under ANSI A326.3-2021,3 and the result falls between 0 and 1. Higher means more grip.

ANSI A326.3-2021 is the U.S. standard that sets the minimum wet DCOF for each floor type. For bathrooms, the minimum is 0.42. For shower floors and barefoot wet zones, the minimum rises to 0.50 under the use class called Interior Wet Plus.3 A floor that meets 0.42 is fine for the main bath but too low for the shower. The standard states directly that a DCOF result does not predict whether a person will slip. It is a product rating, not a safety promise. It reflects surface traits but ignores soap buildup, wear, and foot angle at each step.

Finish type is the most decisive variable for tile. A peer-reviewed study published in Materials in 2021 tested five tile finishes under wet and dry conditions.4 A polished pre-levigato porcelain tile measured a dry COF of 0.95 and a wet COF of 0.15, an 84 percent reduction. An unglazed semi-polished tile measured 0.60 dry and 0.58 wet. A glazed unpolished tile measured 0.58 dry and 0.58 wet. These are not marginal differences. A polished and an unglazed matte tile of similar visual appearance produce numbers that differ by a factor of nearly four under wet conditions. The polished tile fails the 0.42 minimum by a wide margin. The unglazed and matte options exceed both thresholds with near-zero wet degradation.

The most actionable step before buying any bathroom tile is requesting the manufacturer’s wet DCOF certificate for the specific product SKU, not for the material category in general.

Wet vs. Dry COF by Tile Finish Type Grouped bar chart comparing dry and wet Coefficient of Friction for four tile finish types based on Sudol et al. 2021. Polished (dry 0.95, wet 0.15); Semi-polished lapatto (dry 0.60, wet 0.58); Glazed matte (dry 0.58, wet 0.58); Unglazed lapatto (dry 0.31, wet 0.28). A dashed red line marks the ANSI A326.3-2021 Interior Wet minimum of 0.42. Sources: Sudol et al., Materials (2021), PMC8624764; ANSI A326.3-2021 via Safety Direct America. Wet vs. Dry COF by Tile Finish Type 1.0 0.75 0.50 0.25 0.0 0.95 0.15 0.60 0.58 0.58 0.58 0.31 0.28 Polished Semi- polished Glazed matte Unglazed Dry Wet ANSI min. (0.42) Source: HomeAgeFit synthesis, Sudol et al. Materials 2021 + ANSI A326.3-2021
Polished tile loses 84 percent of its dry-condition grip when wet, dropping from 0.95 to 0.15 COF, while unglazed and matte finishes hold near-identical friction across both conditions. The dashed line marks the ANSI A326.3-2021 Interior Wet minimum of 0.42. Data from Sudol et al., Materials (2021)4 synthesized with ANSI A326.3-2021 thresholds.3

Vinyl and rubber: what the texture variables mean

For vinyl, the key variable is surface embossing depth. Smooth sheet vinyl can score well when dry but may fall short when wet with soap. Deep-embossed or stone-textured luxury vinyl plank typically meets the 0.42 threshold. NFSI B101.1 rates wet surfaces above 0.60 SCOF as High-Traction and those between 0.40 and 0.59 as Moderate Traction.5 No public database lists wet DCOF by LVP brand or product. Getting the rating requires the maker’s spec sheet for the exact product. Ask for it before you commit to a choice.

Rubber flooring has grip built into its rubber material. It typically meets or beats the NFSI High-Traction threshold of 0.60 wet SCOF, placing it above both ANSI minimums.5 The tradeoff is rolling friction for wheelchairs and walkers, which rises with the same material trait that creates grip underfoot.

Surface Continuity and Transitions

Walk-in shower with slip-resistant mosaic tile flooring next to a wood-look vinyl floor with a bath mat showing two different surface types meeting at a low threshold
A walk-in shower with mosaic tile sits beside a wood-look vinyl floor, illustrating how two surface types meet at a low threshold and how a bath mat covers the step-out zone.

For someone using a walker or wheelchair, surface continuity matters as much as slip resistance. Frequent grout lines interrupt the floor surface. A 1-inch hexagon mosaic tile produces between 15 and 25 grout joints per square foot.7 A 12×12 tile creates one or two. Those micro-edges help bare feet contact the surface when wet. They also add small resistance increments as a walker tip or wheelchair wheel crosses each one across a full route.

Grout joint density is the number of grout lines per square foot of floor area, determined by tile format and layout. High grout joint density means more textural interruptions per stride, which matters differently depending on whether the primary concern is barefoot grip or rolling mobility. The two objectives pull in opposite directions when the bathroom serves both uses.

“It is assumed that small tiles with lots of grout joints will be more slip resistant, which is likely to some degree, but there is no data substantiating that opinion.”

Ceramic Tile and Stone Consultants (CTASC), expert answers on residential shower floor standards8

Threshold height at room transitions is often the more significant safety variable than the floor traction number, particularly for anyone whose gait is affected by balance or strength changes.

Vinyl’s advantage in continuity is real. A properly installed luxury vinyl plank with tight seams presents a near-flat surface with minimal gaps. Walker tips and wheelchair wheels cross it without the small resistance steps that grout lines add to tile. Floor rigidity also matters. A rigid or semi-rigid plank provides a stable push-off base. A thin, flexible sheet vinyl can flex slightly under a walker tip. That flex creates a small instability at push-off. Over a full day of bathroom trips, the effect adds up more than a single test step suggests.

Threshold transitions at room edges

DCOF measures grip at the foot contact zone. It says nothing about where two floor types meet. A raised transition strip breaks walking stride and forces the foot to clear a real edge. A standard home threshold height creates a real tripping risk for someone with reduced foot lift or balance changes. Flush or low-profile transitions remove this risk regardless of the materials on either side. The threshold is a separate choice from the floor, but both belong in the same review. For walkers, the strip between the bedroom and the shower is often the riskiest point on the whole path.

For wheelchair users, a raised threshold requires additional forward force to cross and creates a tipping risk at the front casters. A zero-threshold or flush transition at the bathroom entry is one of the highest-leverage modifications a bathroom renovation addresses. The floor’s traction rating becomes a secondary concern when the entry transition prevents safe access in the first place.

Maintenance and Contamination Risk

Traction ratings are measured on clean surfaces under standardized lab conditions. Real bathroom floors accumulate soap film, mineral deposits, body oils, cleaning product residue, and mildew. Each changes friction. A floor that meets the ANSI threshold when new may not maintain it after two weeks of normal use without the right cleaning routine.

Tile: grout channels and surface care

Tile presents two surfaces to maintain: the tile face and the grout channels. Grout traps soap scum and grows mildew in areas with poor air flow. Both cut traction over time. Epoxy grout is denser and less porous than cement grout and resists staining and mildew better in wet areas. The cleaning needed to keep grip depends on water hardness, products used, and room air flow. Hard water leaves mineral deposits that need acidic cleaners to clear. Acidic cleaners degrade cement grout over time, which creates a conflict. Knowing this before you pick a grout type is part of a full floor plan.

Vinyl: surface film and embossing depth

Vinyl has no grout channels, but embossed texture creates microscopic pockets that collect soap film. The depth of those pockets affects how much residue accumulates and how thoroughly it rinses with normal cleaning. A shallower embossed pattern is easier to clean but provides less mechanical texture for barefoot grip. That tradeoff between cleanability and texture is real, and it is worth raising when comparing vinyl products rather than assuming that all embossed vinyl performs identically across wet conditions.

A polished tile floor cleaned weekly is less safe when wet than an unglazed matte tile floor cleaned monthly, because finish type dominates wet traction more than cleaning frequency does.

Rubber: chemical compatibility

Rubber flooring cleans easily with mild soap and water and has no grout channels. Its primary maintenance concern is chemical compatibility. Bleach-heavy cleaners and strong solvents degrade rubber’s surface elasticity over time, reducing the material property that contributes most to grip. Checking the flooring manufacturer’s cleaning specifications before choosing a bathroom cleaning product matters more for rubber than it does for tile or vinyl. This is a simple check that is often skipped until damage is visible.

Water Management and Wet Zone Exposure

Not every part of a bathroom floor gets equally wet. The shower floor lives in direct water flow throughout use. The step-out zone just outside the shower receives wet feet. The main bathroom floor beyond that sees splashing and tracked moisture but not sustained exposure. These different exposure zones need different traction thresholds and, in some cases, different materials or installation methods.

ANSI’s Interior Wet Plus category (minimum 0.50 DCOF) applies to the shower floor. The general Interior Wet category (minimum 0.42) covers the main bathroom floor outside the shower.3 Using the higher threshold throughout the whole bathroom is safe but not required outside the shower. The key decision is whether the shower floor meets 0.50, not whether every surface does.

Shower floor slope and tile format

A shower floor must slope toward the drain at about one-quarter inch per foot of run. Large-format tile creates a fitting problem on a sloped pan. The tile must bridge the slope across a long span, which produces high and low spots, causes water to pool near the drain, and risks cracking at unsupported points. Small mosaic tile conforms to a sloped surface more easily. Each piece spans a short distance and follows the slope in small steps. This is one of the strongest arguments for small-format tile on a shower floor, separate from its traction traits. Both the drainage case and the traction case point to the same format choice.

Vinyl and waterproofing in wet zones

Sheet vinyl and rubber follow the floor profile continuously and do not create the conformity problem that large-format tile does on a sloped pan. Vinyl in a shower requires sealed seams and proper waterproofing at the perimeter and all penetrations. An unsealed seam or perimeter allows water to migrate beneath the flooring into the subfloor, causing damage over months before it becomes visible. This is not a reason to avoid vinyl in wet zones, but it is a reason to specify waterproofing explicitly in the installation scope rather than assuming the installer includes it. The floor material alone is not sufficient; the installation system matters equally.

Compatibility With Walkers and Wheelchairs

One in four adults over age 65 falls each year, and home modifications to reduce slip risk rank among the primary prevention strategies the National Council on Aging identifies for this population.2 For residents who use a walker or wheelchair, the floor’s effect on daily mobility extends beyond slip risk. Rolling resistance, surface firmness, and seam height all affect how much effort a floor adds to every bathroom trip.

Walker compatibility

Walker tips need a firm, continuous surface for stable push-off. A highly compliant surface, such as thick foam-backed vinyl, allows the rubber tip to sink slightly before pushing off, which introduces a small instability at each step. Rigid or semi-rigid luxury vinyl plank and tile are both firm enough to avoid this issue. Grout lines add small resistance increments with each crossing. For a person making 20 to 40 bathroom trips per day, that cumulative friction matters more than it appears in a single test step. Mosaic tile on a main bathroom floor creates perceptibly more rolling resistance than a smooth vinyl surface over a full daily route.

Bath rugs and mats in the step-out zone complement, but do not replace, the floor beneath them. The anti-slip bathroom rug selection guide covers how backing type and placement interact with different floor surface types.

Wheelchair compatibility

Wheelchair rolling effort increases with surface texture. A highly textured tile that earns high marks for barefoot traction creates resistance for wheels and makes self-propulsion harder across a full day. For a resident who uses both a walker and a wheelchair at different times, the floor optimized for one mode adds friction for the other. Smooth vinyl with flush seams is the better choice for the main bathroom travel route when wheelchair access is a priority. Textured tile performs better for barefoot shower use. When the bathroom serves both needs, a smooth continuous vinyl main floor with a separate small-format textured tile shower floor addresses both. The two surfaces are separated by the shower threshold, which should itself be flush or as close to flush as the shower waterproofing system allows.

The Decision Framework

Framing the choice as tile versus vinyl misses the real question. The more useful structure is: which combination of finish, format, seam treatment, and maintenance matches the specific bathroom, the daily route, and the mobility context of the person using it? The National Institutes of Health specifically recommends nonslip floor surfaces and nonskid mats for bathroom wet areas as a fall prevention measure in home environments.6

For a shower floor, unglazed or matte tile is the more durable long-term choice. The finish meets the 0.50 Interior Wet Plus threshold,3 smaller formats conform to drainage slopes, and the material has a long track record in wet-area use. The mortar bed and grout install adds time and cost, and the grout needs regular care to prevent soap scum from cutting grip over time.

For the main bathroom floor outside the shower, vinyl offers adequate wet traction when properly specified, near-flat surface continuity for rolling mobility, and lower remodel complexity. A full-bathroom vinyl install avoids the threshold created where two different materials meet at the shower edge. A true curbless shower design requires waterproofing to a higher standard than many standard vinyl installs address. If the remodel includes a curbless design, waterproofing details belong in the scope, not in an assumption.

Rubber works best in utility areas, laundry rooms, and secondary bathrooms where maximum grip and low maintenance are priorities and wheelchair rolling distance is short.

Full bathroom renovation

Combining an unglazed porcelain shower floor (verified 0.50 DCOF from the maker’s spec sheet) with continuous luxury vinyl plank or large-format matte tile on the main floor removes extra transitions and gives a safer-feeling surface for both barefoot and rolling use.3 Waterproofing at the shower perimeter, under the floor, and at all pipe openings is the detail most often missed in remodel documents. That gap is worth closing before work begins, not after a leak appears.

Existing tile bathroom

Identify the finish before deciding on an intervention. A polished tile floor in the shower area calls for a specific response: surface treatment, tile replacement, or a well-secured mat sized to cover the standing zone. A matte or unglazed tile floor already performs in the right traction range. The more useful intervention there is grout maintenance: removing soap film and mineral deposits that reduce grip over time, and checking grout condition for cracking or loosening that creates uneven edges underfoot. Choosing a non-slip bath mat suited to the floor’s texture is a meaningful supplement to a matte tile floor, not a substitute for assessing the floor first.

Walker or wheelchair user

Specify vinyl with flat seams and flush thresholds at every transition for the main bathroom travel route. Highly textured vinyl adds rolling friction without the trip-hazard profile of grout lines; the floor does not need to meet the shower threshold in the travel area outside the shower. An occupational therapist can review the bathroom layout, mobility aids, and daily movement pattern before a remodel is done. That review often reveals limits not visible from a floor spec alone, such as turning radius at the toilet or grab bar placement relative to where the person’s feet land.

Category Verdict

No single floor material wins every comparison category. The table below summarizes where each option performs best across the dimensions that matter for bathroom safety and daily movement.

Category Best Option Notes
Wet traction: shower floor Unglazed or matte tile Textured vinyl is a viable second if spec sheet confirms 0.50 DCOF
Wet traction: main bathroom floor Tie (tile or vinyl) Both meet 0.42 when properly specified; finish determines outcome
Surface continuity Vinyl No grout lines, flat seams, lower rolling resistance
Maintenance Tie Tile requires grout care; vinyl requires surface film management
Water management Tile Small-format tile conforms to sloped shower pans; established waterproofing methods
Walker and wheelchair rolling Vinyl Continuous flat surface, no grout-line resistance increments
Renovation complexity Vinyl Click-lock installation, no curing period, no grout
Overall: shower floors Unglazed or matte tile Verified 0.50 DCOF spec; small format for sloped pans
Overall: main bathroom floor Textured vinyl Verified DCOF, flat seams, flush thresholds throughout

The configuration most likely to support a safer-feeling bathroom route is a matte or unglazed tile shower floor combined with a continuous vinyl or large-format matte tile main floor and flush transitions throughout. An occupational therapist can evaluate the specific bathroom layout, mobility aids, and daily movement pattern before a renovation is finalized, which is especially useful when the existing layout and flooring present competing constraints.

Frequently Asked Questions

What is the minimum DCOF for a bathroom floor?

ANSI A326.3-2021 sets a minimum wet DCOF of 0.42 for general bathroom areas and 0.50 for shower floors and barefoot wet zones.3 These are classification minimums, not safety guarantees. The standard states that DCOF does not predict whether a person will slip. Request the manufacturer’s wet test certificate for the specific product SKU, not just the material category.

Is vinyl flooring slippery in a bathroom?

Deep-embossed or stone-textured luxury vinyl typically meets the 0.42 wet DCOF minimum.3 Smooth vinyl does not reliably meet this threshold when wet with soap present. The key factor is embossing depth, not the material name. No public database lists wet DCOF by LVP product, so you need the maker’s spec sheet for the actual SKU.

Why does polished tile get slippery when wet?

Polished tile has very low surface roughness, which allows water to form a continuous film between foot and tile face rather than breaking into pockets. A peer-reviewed study measured a wet COF of 0.15 for polished porcelain, an 84 percent drop from its dry value of 0.95.4 Unglazed and matte finishes hold near-identical friction whether wet or dry.

Do tiles with more grout lines provide better traction?

Probably to some degree, but no controlled study has measured how much. The Ceramic Tile and Stone Consultants note that more grout joints are assumed to improve grip but no data supports that assumption.8 Grout lines add texture breaks for bare feet. A verified wet DCOF certificate is more reliable evidence than tile format alone.

What floor features matter most for a walker or wheelchair user?

Surface continuity and flush thresholds at every room transition matter most. Textured tile adds rolling resistance for wheels even when it provides excellent barefoot grip. Continuous vinyl with flat seams suits wheelchair users better. When the bathroom serves both uses, a textured tile shower floor combined with a smooth vinyl main floor addresses both needs in one layout.

Limitations

  • This article addresses hard floor surfaces only. For mats, coatings, and adhesive traction strips on existing floors, see the related guides on anti-slip bathroom rugs and non-slip bath mat selection.
  • All DCOF figures cited here come from standardized lab tests under controlled conditions. Real-world traction varies with soap residue, cleaning product buildup, surface wear, and temperature at the time of measurement.
  • No publicly available product-level DCOF database exists for residential vinyl or rubber flooring. Verification requires the manufacturer’s specification sheet for the specific product SKU, not the product line or material category.

References

Methodology: every figure cited below links to the specific page where it appears, drawn from peer-reviewed research, government guidance, ANSI standards documentation, and industry credentialing-body statements compiled for this article in September 2026.

  1. Centers for Disease Control and Prevention – Nonfatal Bathroom Injuries Among Persons Aged >=15 Years, United States, 2008, MMWR, 2011.
  2. National Council on Aging – Get the Facts on Falls Prevention, updated May 2025.
  3. Safety Direct America – 2022 Revised ANSI A326.3 Has Five Situation-Specific DCOF Minimums and Crucial Caveats, 2022. (Summarizing the ANSI A326.3-2021 standard.)
  4. PubMed Central – Sudol et al., “What Makes a Floor Slippery? A Brief Experimental Study of Ceramic Tiles Slip Resistance Depending on Their Properties and Surface Conditions,” Materials, November 2021. DOI: 10.3390/ma14227064.
  5. National Floor Safety Institute – NFSI Testing Standards overview, including B101.1, B101.3-2022, and B101.4 traction classifications, 2022.
  6. National Institute on Aging (NIH) – Preventing Falls at Home: Room by Room, last updated January 2026.
  7. Tile Choices – Mosaic vs. Large Format Tile for Shower Floors, Bruno Mendolini, April 2026.
  8. Ceramic Tile and Stone Consultants (CTASC) – Expert answers on standards for residential shower floors.

Conclusion

The safest-feeling bathroom floor for wet conditions is not a specific material but a specific specification: the right finish, verified by DCOF data, installed with flat transitions and maintained to remove traction-reducing residue. Polished tile fails the most basic wet threshold. Unglazed matte tile and textured vinyl both meet it. The decision between them turns on renovation scope, budget, mobility priorities, and whether the bathroom includes a shower that needs a sloped drainage surface.

For a broader look at surface selection across the home, see the overview in Slip-Resistant Flooring.

Handrail vs Guardrail: The Difference Between Support and Edge Protection

Author: Oded Feigin · Created On: September 12, 2026 · Last Updated: September 12, 2026

Handrail vs guardrail: these two terms describe components with different physical requirements, different code triggers, and different jobs in a home. Treating one as a substitute for the other can leave gaps in protection that are not always visible until someone needs the support that is not there. The overview in senior safety handrails planning covers both components in the context of a full stair plan. This article goes deeper on the functional distinction. The CDC reports about 4.5 million emergency department visits from older adult falls each year,1 and stairs and open elevated edges are among the locations where support and containment both matter.

Indoor staircase illustrating handrail vs guardrail: a wall-mounted graspable handrail alongside traditional white balusters forming an open-side guard
An indoor staircase showing both components together: a wall-mounted graspable handrail for support during movement, and a baluster system at the open edge serving as the guard.

Quick Answer

What is the actual difference between a handrail and a guardrail?

A handrail is a graspable rail you hold while moving up or down a stair or ramp. A guard (the residential code term for what is often called a guardrail) is a barrier at an open edge, such as a deck or elevated landing, that prevents an accidental fall to a lower level. The 2021 IRC requires a handrail on any stair with 4 or more risers5 and a guard wherever a walking surface is more than 30 inches above the floor or grade below.6 Neither component does the other’s job.

Key Takeaways

  • A handrail is defined by graspability: the IRC specifies a circular profile of 1-1/4 to 2 inches in diameter, because the rail must be held and loaded during movement.4
  • A residential guard requires a minimum height of 36 inches measured from the walking surface, triggered whenever a surface is more than 30 inches above the floor or grade below.6
  • The top rail of a guard system is not automatically a handrail: it may have the wrong profile, the wrong height relative to the stair nosing, or simply no requirement to be graspable at all.

Handrail vs Guardrail: What Each Component Is Designed to Do

A handrail guides movement. A guard stops an unintended fall from an elevated edge. Those are genuinely different physical tasks, and the building codes have always treated them as separate systems with separate requirements.

Code consultant and educator Glenn Mathewson, writing in Fine Homebuilding Issue #289, draws the line precisely: a guard serves as a barrier at the edge of raised walking surfaces to reduce the possibility of an accidental fall, while a handrail is meant for purposeful use by an occupant while traversing a stairway or ramp.7

The distinction matters in a practical way: a handrail works because you grip it, pull against it, and transfer load through your hand and arm as you move. A guard works because it fills space, forms a barrier, and resists the body pressing or falling against it. Neither role can be performed by a component designed only for the other.

Note that residential building codes use the word “guard,” not “guardrail,” in the IRC. The IRC replaced the older term “guardrail” with “guard” starting in the 2015 edition, specifically to reflect that the barrier function can be served by features like planters or glass panels, not only by a traditional rail system. The word “guardrail” remains common in everyday use, OSHA industrial contexts, and highway safety, but in residential code the correct term is “guard.”

Handrail vs. Guard: Key Dimensions Compared
Dimension Handrail Guard (Residential)
Primary function Grip support during movement on stairs or ramps Barrier at open edges to prevent a fall to a lower level
IRC section R311.7.8 (stairs) R312
Trigger condition Stair flight with 4 or more risers Walking surface more than 30 inches above floor or grade
Height measurement From the stair nosing (sloped reference point) From the walking surface (flat reference point)
Height range 34 to 38 inches (IRC minimum and maximum) 36 inches minimum residential; 42 inches minimum commercial
Profile requirement Graspable: 1-1/4 to 2 inches diameter (circular Type I) No graspability requirement for the top rail
Infill spacing N/A (the handrail is the rail itself) Openings must not allow a 4-inch sphere to pass through
Continuity Required; ends must return to wall or post Required along the full open edge
Common forms Round or shaped rail on wall brackets Balusters, cable, glass, mesh, or solid panel

The handrail’s job

A handrail gives you something to grip before the first step and through the full stair run. You pull against it on the ascent, push against it on the descent, and grab it reflexively if you lose footing. That role demands a specific profile because grip requires finger closure around the rail. A flat 2×4 on brackets is a rail; it is not a handrail. A decorative wooden banister post that tapers or flares at the ends may be labeled a “banister” in everyday language, but whether it functions as a handrail depends on its graspable section. The code cares about the section you actually hold, not the post or the end cap.

The guard’s job

A guard keeps a person from walking off or falling over an open edge. On a deck, at a landing above a lower level, or along an interior overlook, the guard is the physical boundary between a walking surface and open air. The top rail of the guard system is part of the barrier structure, but it carries no requirement to be graspable. It can be wide, flat, angled, or rough as long as the system meets the height, infill spacing, and load requirements. That is a different design brief entirely from the handrail hanging on wall brackets at the stair run beside it.

Code Triggers: When Each Is Required

The conditions that require a handrail and a guard are independent. A given location in a home can trigger one without the other, or both at the same time.

When a handrail is required

Under IRC Section R311.7.8, any stair flight with 4 or more risers requires a handrail on at least one side.5 That means a 3-riser step up to a landing does not trigger the IRC handrail requirement, while a 4-riser stair does. A home with a single step down to the garage, two steps to a sunken living room, or three steps at the front entry technically falls below the threshold for a required handrail under this section. That does not mean a rail is a bad idea at those locations; it means the code does not require one. Many homeowners add handrails at short runs precisely because a shorter distance often creates a false sense of safety. Reach and grip matter even on a two-step descent, especially when carrying items or moving in poor light. The trigger is a code minimum, not a ceiling on what is useful.

When a guard is required

IRC Section R312.1.1 requires a guard wherever a walking surface is located more than 30 inches above the floor or grade below, measured at any point within 36 inches of the open edge.6 This applies to decks, porches, elevated landings, interior balconies, and any open-sided walking surface above that threshold. The 30-inch trigger is lower than many homeowners expect. A deck that sits two and a half feet above grade at any corner triggers the guard requirement even if it appears to be just a modest step up. The relevant measurement is not the average height but the maximum height at any point within 36 inches of the edge. A sloped yard can push a deck into guard territory even if the deck itself feels low.

One location that requires both simultaneously: an open-sided stair. If the stair has 4 or more risers and the side of the stair is open (not enclosed by a wall or knee wall), then a guard is required at the open side AND a graspable handrail must be provided. These are not interchangeable at that location; they serve two separate functions side by side.

Height Requirements: How Each Is Measured

Handrail and guard heights use different reference points, which is why the numbers overlap without meaning the same thing. A 36-inch guard height measured from a flat walking surface describes a much taller barrier on a stair than a 36-inch handrail height measured from the stair nosing, because the nosing reference follows the slope of the stair.

Handrail height

IRC Section R311.7.8.1 requires handrail height between 34 and 38 inches, measured vertically from the nosing of the stair treads.5 The nosing is the front edge of each tread, and the measurement is taken perpendicular to the stair slope, not plumb from the floor. This means the handrail runs parallel to the stair pitch and rises with it. A handrail that measures correctly at the bottom of the run should measure correctly at the top, because both points use the same nosing-to-rail measurement. The 34-38 inch band is set to a range, not a single target, because reach geometry and leverage vary by person. For a deeper examination of how stair handrail height interacts with reach and posture, see stair handrail height measurement for practical measurement guidance.

Guard height

IRC Section R312.1.2 requires a minimum guard height of 36 inches for residential applications, measured vertically from the walking surface (the floor, deck surface, or landing).6 That measurement is plumb, taken straight up from where you stand. The IBC, which applies to commercial buildings, multi-family buildings with more than two units, and public structures, requires a minimum of 42 inches.8 The 6-inch difference reflects higher occupancy loads and more varied user populations in non-residential settings. For a residential home, 36 inches is the IRC floor, but locally adopted amendments and specific conditions may raise it. Checking with the local building department is the only way to confirm what applies to a specific project.

Graspability: Required for One, Not the Other

The single most practical difference between a handrail and a guard is this: a handrail must be graspable by code, and a guard’s top rail has no such requirement. That distinction determines whether a given rail can actually serve as a handrail on a stair run, regardless of where it is positioned or what it looks like.

Handrail vs Guard: Required Heights (IRC 2021 / IBC) Three horizontal bars: Handrail under IRC 2021 at a maximum of 38 inches measured from the stair nosing; residential guard under IRC 2021 at a minimum of 36 inches measured from the walking surface; commercial guard under IBC at a minimum of 42 inches measured from the walking surface. Data from IRC 2021 Sections R311.7.8.1 and R312.1.2, and IBC. Handrail vs Guard: Required Heights, IRC 2021 and IBC Handrail 38 in. max Resid. guard 36 in. min Comm. guard 42 in. min Handrail (IRC): measured from stair nosing Guard (IRC/IBC): measured from walking surface Source: Home Age Fit analysis, IRC 2021 / IBC
The handrail’s 34-38 inch range (IRC) and the residential guard’s 36-inch minimum use different measurement reference points; a handrail measured from the sloped stair nosing and a guard measured from the flat walking surface are not interchangeable specifications even when the numbers appear close.

What the IRC requires for handrail profile

IRC Section R311.7.8.5 sets the graspability criteria for handrails.4 For a Type I handrail (the circular cross-section), the outside diameter must be not less than 1-1/4 inches and not greater than 2 inches. A diameter smaller than 1-1/4 inches does not allow full finger closure; a diameter greater than 2 inches prevents it. The sweet spot is intentional: it is where the hand can close around the rail and bear load during a slip or stumble. Non-circular Type II handrails are allowed with a perimeter of 4 to 6-1/4 inches and a maximum cross-section dimension of 2-1/4 inches, provided the grip surface meets specific criteria. The point is not the shape itself but the mechanical reality of gripping under load. A rail that cannot be gripped under load is not a handrail, no matter what it is called.

What guard top rails are not required to do

The top rail of a guard system is part of a barrier structure. It resists lateral loads, it caps the baluster or infill system, and it defines the height of the guard. It is not required to be graspable. A flat 4-inch wide top rail on a deck guard meets all residential guard requirements. It cannot be gripped by most hands under load. If that deck guard sits alongside a stair that requires a handrail, the top rail of the guard is not a substitute for a graspable handrail on the stair run, even if the height and location look similar. The “banister vs handrail” confusion in common language arises here: a decorative banister or a heavy newel-to-newel rail may look like a handrail and be in roughly the right location, but if the cross-section is too wide, too flat, or otherwise not graspable per the code criteria, it functions as a guard element, not as a graspable handrail.

When Both Are Required in the Same Location

A polished wooden wall-mounted handrail with matte black brackets, showing the graspable round profile that distinguishes a dedicated handrail from a guard system top rail
A wall-mounted graspable handrail with its characteristic round profile and bracket spacing: the form is defined by the need to be held under load, not just to occupy a position at a stair edge.

The most common location where a handrail and a guard are both required is an open-sided stair. When a stair has 4 or more risers and one or both sides are open (not enclosed by a wall), the IRC triggers both requirements independently. The open side needs a guard to contain the fall. The stair run needs a graspable handrail to support movement.

These can be combined in one system or provided as separate elements. A post-and-rail guard system at the open side of a stair, with a graspable round rail at 34-38 inches from the nosing mounted on the top of the posts, satisfies both requirements in a single installation. The guard infill (balusters or cable) handles edge containment below; the graspable rail handles the handrail function above. For this to work, the rail at the top must be graspable in cross-section, not just positioned at the right height. A 4-inch flat top rail on those same posts would satisfy the guard requirement but not the handrail requirement.

The distinction at interior balconies and elevated landings

At an interior balcony, elevated hallway, or landing that overlooks a lower level, the guard requirement is triggered by the 30-inch height rule. These locations often have no stair, so no handrail is required. But if the landing connects to a stair and is itself more than 30 inches above the floor below, the landing needs a guard at the open edge even though the handrail requirement only governs the stair run itself. The guard stops at the stair opening; the handrail begins there. Where one ends and the other begins is a detail that a qualified contractor should confirm for the specific layout, since the transition point depends on the stair configuration, the railing system geometry, and local code adoption.

The stair rail vs handrail distinction on open-sided stairs

The phrase “stair rail vs handrail” often appears when homeowners are evaluating systems for an open staircase. The outer rail of an open stair system (the one facing the room) functions as part of the guard. The rail mounted on the wall side, or the graspable section of the outer system, is the handrail. When both are part of the same open-stair railing assembly, the assembly has to satisfy both sets of requirements. The guard provisions govern the infill spacing, the minimum height, and the structural attachment. The handrail provisions govern the graspable profile, the height range from the nosing, and the continuity from the starting newel to the ending return. A railing manufacturer or qualified contractor who understands both sets of requirements can design a compliant system. A homeowner who selects a system based on appearance alone may end up with a beautiful guard that does not serve as a compliant handrail on the stair run it is sitting next to.

The Gaps That Appear When One Fills the Other’s Role

The confusion between these two components creates specific, predictable problems. Each one tends to appear in a particular type of project: a renovation that removes guard elements, or an installation that adds a rail without thinking about edge containment.

When a handrail is expected to contain an edge fall

A wall-mounted graspable handrail is attached to the wall by brackets, typically 2-4 inches away from the wall surface. It runs parallel to the stair. It does not form a barrier at the open side of a stair or the open edge of a landing. If a homeowner installs a graspable handrail on a deck stair and stops there, assuming it addresses the need for edge protection on the elevated deck above, that assumption is incorrect. The handrail handles the stair run. The open edge of the deck above still has no guard. A person walking toward the unguarded edge at night, or a child running across the deck, has no barrier. The handrail is not in the wrong place; it is simply the wrong tool for the deck edge problem.

When a guard is modified to serve as a handrail

The reverse error is removing baluster infill from a guard system and assuming the remaining top rail still provides adequate protection. This happens during renovations where homeowners want a more open look, or where infill panels are removed for cleaning or repair and not reinstalled. Without infill, the top rail is an isolated horizontal element with open gaps below. It is neither a compliant guard (which requires the infill to meet the 4-inch sphere rule) nor a graspable handrail in the proper sense, because it is positioned for guard height from the deck surface, not for handrail height from the stair nosing. The top rail is now serving as neither component correctly.

A second version of this problem: the decorative flat-cap rail that spans from newel to newel across an open stair side. It is positioned where a handrail should be, it is at roughly the right height, and it looks like a rail. But if its cross-section is 4 inches wide and flat, a hand under load cannot grip it. A person who grabs that rail during a stumble on the stair will push against it, not hold it. The difference between a supported stumble and a fall at that moment depends on whether the rail is graspable.

Decorative banisters and the “difference between handrail and railing” question

Much of the everyday confusion around the “difference between handrail and railing” comes from the word “railing” being used for everything from a graspable wall-mounted bracket rail to a decorative newel-and-panel system to a guard system on a deck. In strict code terms, a railing is not a defined component. The code defines handrails and guards. A “railing” in common speech can be either, or a system that combines both. When evaluating whether any given railing actually functions as a handrail, the question is: can it be fully gripped with one hand, does its profile meet the diameter or perimeter criteria, and is it at the correct height measured from the stair nosing? If the answer to any of those questions is no, it is functioning as something other than a compliant handrail, regardless of what the retailer calls it.

Planning for Your Specific Home

Falls among adults 65 and older result in 1 in 4 falling each year, according to the NCOA.2 The consequences at the more serious end of that spectrum reflect why the physical design of support and containment components both matter:

“In 2023, the unintentional fall death rate for adults age 65 and older was 69.9 per 100,000 population.”3

CDC/NCHS, Unintentional Fall Deaths Among Adults Aged 65 and Older, Data Brief No. 532, 2024

These figures span all fall types, not just stair and edge falls, but they reflect why the physical requirements for handrails and guards are worth understanding before a project begins rather than after.

Planning starts with identifying which component a specific location needs. Walk the routes in the home and mark each of the following: any stair with 4 or more risers (handrail check), any elevated surface or open edge more than 30 inches above the floor or grade below (guard check), and any location where both conditions apply simultaneously. For each location, note whether the existing component, if any, actually meets the physical requirements for its role: graspability and height from nosing for a handrail, height from surface and infill spacing for a guard.

Several decisions at the intersection of handrail and guard requirements involve structural attachment, load path adequacy, code compliance confirmation, and sometimes local amendment review. A licensed contractor who works with residential railings, a structural engineer for load-path questions, or an accessibility specialist for person-specific support assessment can evaluate a specific home in ways that general educational content cannot. The goal of understanding the distinction between a handrail and a guard is to arrive at those professional conversations better prepared, not to substitute for them. For context on how these components fit the broader stair-safety picture, the senior safety handrails overview on this site covers route planning, support points, and the full stair route.

Frequently Asked Questions

Is a guardrail the same as a handrail?

No. A guardrail (called a “guard” in the IRC) is a barrier at an open edge that prevents a fall from an elevated surface. A handrail is a graspable rail that supports movement on stairs or ramps. The IRC governs each under a separate section: R311.7.8 for handrails and R312 for guards.56 A single railing system can satisfy both requirements simultaneously, but only if it meets the profile, height, and structural criteria for each component independently.

Can the top rail of a deck guard serve as a stair handrail?

Only if its cross-section meets the graspability criteria in IRC Section R311.7.8.5 and its height falls within 34-38 inches measured from the stair nosing.45 A flat or wide top rail on a deck guard typically does not meet the circular diameter requirement of 1-1/4 to 2 inches for a Type I handrail. Height alone is not sufficient; the profile must allow full grip under load.

What is the difference between a handrail and a railing?

“Railing” is an everyday term, not a code definition. Building codes define “handrail” (a graspable support for movement) and “guard” (a barrier at an open edge) separately. A “railing” in conversation can refer to either, or to a system that combines both. Whether a specific railing functions as a handrail depends on its graspable profile, height from the stair nosing, and continuity requirements per the IRC.

How high does a residential guard need to be?

The IRC requires a minimum guard height of 36 inches for residential applications, measured from the walking surface.6 The IBC requires 42 inches for commercial and multi-family buildings with more than two units.8 Local amendments may raise the residential requirement. The guard is also triggered at any location where the walking surface is more than 30 inches above the floor or grade below.

Does every stair in a home need a handrail?

Under IRC Section R311.7.8, a handrail is required on at least one side of any stair flight with 4 or more risers.5 A 3-riser or shorter stair does not trigger the IRC handrail requirement. However, the absence of a code requirement does not determine whether added support is useful for a specific person or daily route. Short step runs are a common location for added rails, especially on exterior entries and garage-to-house transitions.

Limitations and Edge Cases

  • This article covers the IRC 2021 framework as the widely referenced baseline. Local jurisdictions adopt and amend codes independently, so the applicable requirement for a specific home may differ. Confirming with the local building department is the only way to verify what applies to a given project.
  • The comparison focuses on residential applications. OSHA standards for workplace fall protection, the ADA Accessibility Guidelines for public facilities, and IBC commercial requirements each carry different thresholds and sometimes different terminology.
  • Questions about whether a specific existing system meets current requirements, how to evaluate a load path for a new guard attachment, or what profile changes are needed to bring a rail into compliance as a handrail belong with a licensed contractor or structural engineer who can review the actual installation.

References

  1. CDC – Facts About Falls, Older Adult Fall Prevention, 2024. Centers for Disease Control and Prevention.
  2. NCOA – Get the Facts on Falls Prevention, National Council on Aging, 2024.
  3. CDC / NCHS – Data Brief No. 532: Unintentional Fall Deaths Among Adults Aged 65 and Older, 2024. Reporting on 2023 data.
  4. up.codes – IRC 2021 Section R311.7.8.5, Grip Size (handrail profile requirements). International Residential Code, 2021 edition.
  5. Building Code Trainer – Residential Stair Code, covering IRC Sections R311.7.8 and R311.7.8.1 (handrail trigger and height requirements). 2021 IRC basis.
  6. Building Code Trainer – Residential Guardrail Height Requirements, covering IRC Sections R312.1.1, R312.1.2, and R312.1.3 (guard trigger height, minimum height, and infill spacing). 2021 IRC basis.
  7. Fine Homebuilding – Guardrails vs. Handrails: Where Do You Need Them? Glenn Mathewson, Code Consultant and Educator. Issue 289, 2020.
  8. Viewrail – IBC vs. IRC Railing Code Requirements (guard height comparison: 42 inches IBC vs. 36 inches IRC). Viewrail Code Compliance Resource, 2021 edition basis.

Conclusion

A handrail and a guard serve different physical functions, follow different code triggers, use different measurement reference points, and carry different profile requirements. A compliant installation at a stair with an open side needs both. Neither component does the other’s job, and a system that looks right from across the room may be missing one of the two when you examine it against the code criteria that govern each.

For planning guidance on how handrails and guards fit a broader stair safety picture, the overview on senior safety handrails covers route planning, support points, and the full stair route.

Stair Handrail Height: How to Measure for Reach and Leverage

Author: Oded Feigin · Created On: September 10, 2026 · Last Updated: September 10, 2026

Stair handrail height is measured from a specific point on the stair surface: the nosing. That leading edge of each tread is the reference both the International Residential Code and the ADA accessibility standard use, and both independently specify the same 4-inch compliant window: 34 to 38 inches above the stair nosing.12 For a broader overview of how handrail planning fits a complete stair route, see the planning guide for Senior Safety Handrails. Within that 4-inch window, the exact height you choose shapes how your arm reaches the rail, how your elbow angle distributes load, and how much effort the grip asks of you on every trip up or down.

Tape measure standing upright on a wooden stair tread to measure stair handrail height on a wall-mounted wooden rail
Measuring stair handrail height from the stair nosing: the tape goes plumb from the leading tread edge to the top of the gripping surface.

Quick Answer

How is stair handrail height measured?

Stair handrail height is measured vertically from the nosing (the leading edge of the stair tread) to the top of the handrail gripping surface. The standard residential range is 34 to 38 inches, per IRC Section R311.7.81 and ADA Section 505.4.2 Within that range, the specific height affects grip angle, the force your arm transmits to the rail, and how much elbow bend the reaching motion requires during ascent and descent.

Key Takeaways

  • Measure from the stair nosing (the leading tread edge), not from the flat tread surface behind it and not from the floor below.
  • The 34-to-38-inch range is specified by both IRC R311.7.8 and ADA Section 505.4, two independent standards that arrived at the same 4-inch window.12
  • Heights near the 34-inch minimum suit a more bent-elbow reach; heights near 38 inches suit a more upright posture but require faster hand movement to catch the rail during a stumble.
  • Locally adopted codes govern the actual requirement; verify the applicable version with your building department or a licensed contractor before any modification.
  • Measurement tells you where the rail sits. Whether the rail serves a specific person on a specific stair requires an individual assessment by a qualified professional.

Before You Begin

You need a tape measure that reaches at least 5 feet. A standard contractor tape works well; a 6-foot folding rule works in tight spots. Bring a notepad or phone to record readings. If the stair has a carpet runner covering the nosings, a small flashlight helps you find the leading tread edge clearly.

This process covers planning and documentation, not installation. Any change to the rail’s height, mounting brackets, or wall attachment belongs with a licensed contractor who knows the local code and can assess the wall framing behind the mount. Stair-related injuries account for roughly one million U.S. emergency department visits each year,8 and stairs rank as the top-rated injury location in the United States for adults 65 and older.5 Getting the measurement right is the first step in a larger conversation, not a substitute for it.

Expect 10 to 15 minutes for a standard residential stair with one straight run and no landings. A stair with a landing or a turn takes slightly longer because each run section deserves its own readings.

Step 1: Locate the Stair Nosing

The stair nosing is the leading edge of each tread, the front edge of the horizontal surface you step on. On most residential stairs, the nosing projects slightly beyond the riser (the vertical face connecting one tread to the next). Look at a step from the side: the nosing is the small horizontal overhang at the tread front, where the step surface meets open air.

Finding the nosing on your stair:

  • Stand beside the stair and look along the slope from the side. The nosings form a sloped line running from the bottom tread to the top of the run.
  • On a carpeted stair, the nosing is where the carpet wraps around to the front face of the riser. Slide your finger along the front of a tread until you feel the edge transition.
  • On an open-tread stair with no riser, the nosing is simply the front edge of each tread board.
  • On a stone or tile stair, look for the finished leading edge of the tread surface, which often has a different texture or a bullnose profile to reduce slip.

Why the nosing is the reference point: handrail height is measured from the sloped plane connecting all the nosings, not from the floor below and not from the flat tread surface back from the nose. The International Residential Code specifies handrail height “measured vertically from the sloped plane adjoining the tread nosing.”1 The ADA uses the same reference: “vertically above walking surfaces, stair nosings, and ramp surfaces.”2 Both standards trace back to the same physical reference point.

The practical implication: a tread with a 10-inch run depth has 10 inches of horizontal distance between the nosing and the back of the tread. Starting the tape at the wrong edge introduces up to 10 inches of horizontal error. That error translates to a significant vertical difference when you read up to the rail along a sloped surface. A rail at 36 inches above the nosing reads as 46 inches if your tape begins at the tread back. The reference matters.

One more point about nosing condition: on older residential stairs, individual treads sometimes cup, sag, or wear unevenly. Measure from a nosing in good condition. Any tread whose nosing is damaged, soft, or structurally suspect is a separate item for the contractor to assess before the broader rail question gets resolved.

After locating the nosing on two or three treads near the top, middle, and bottom of the run, you’re ready to measure. A consistent nosing line confirms the stair geometry is predictable. A line where some treads noticeably vary in nosing position suggests the stair itself may need attention beyond the rail.

Step 2: Take the Vertical Measurement

With the nosing located, take a plumb measurement from the nosing to the top of the handrail gripping surface. “Vertical” means plumb (straight up), not perpendicular to the stair slope.

This distinction matters for accuracy. A handrail runs at the stair’s slope angle, typically somewhere between 30 and 38 degrees from horizontal on a standard residential stair. If you hold the tape measure perpendicular to the rail (following the stair’s angle), you get a shorter reading than the actual plumb height. On a stair at 35 degrees, a rail at 36 inches plumb reads as roughly 29.5 inches when measured perpendicular to the slope. The IRC and ADA both specify the height in the plumb direction.12 Measuring perpendicular produces an undercount that can make an out-of-range rail appear compliant.

Measurement steps:

  1. Rest the end of the tape at the tip of the stair nosing on a mid-run tread. Hold the tape end firmly at the nosing edge.
  2. Extend the tape straight up, keeping the tape plumb. A level held against the tape confirms vertical alignment. On most stairs, holding the tape steady by hand and sighting it against a vertical wall surface works well enough for a planning measurement.
  3. Read where the tape meets the top of the gripping surface of the handrail. On a round or oval rail, this is the topmost point of the profile where the palm rests. On a flat-top rail with a rounded lower section, this is the highest point of the area your hand contacts.
  4. Note the reading, the tread number, and the location on the run.

What counts as the gripping surface: the gripping surface is the part of the rail your hand wraps around, not decorative elements above it. Some rails have a finish cap or a post extension that sits above the gripping profile. Measuring to the top of the decorative cap inflates the reading and can make a below-range rail appear compliant. Always measure to the part the hand actually contacts.

How many measurements to take: one mid-run reading gives a representative number for a straight run. Three readings at the top, middle, and bottom of the run show whether the height is consistent along the installation. On a well-installed rail parallel to the stair slope, all three readings agree to within about 1 inch. A spread of more than 2 to 3 inches across the run suggests the rail is not installed parallel to the slope, which is a separate question for the contractor.

On a stair with a landing or turn, measure each straight run section independently. The handrail height refers to each section’s nosing line. If the slope angle changes between sections (uncommon but not rare in split-level homes), each section has its own effective height relationship. Measure each at its own mid-run tread and record them separately.

Step 3: Check Your Reading Against the 34-to-38-Inch Range

Tape measure on a stair tread showing 38 inches to a wooden handrail, the upper limit of the stair handrail height compliant range
A reading at 38 inches sits at the top of the IRC and ADA compliant range for handrail height above the stair nosing.

Once you have a number, compare it to the 34-to-38-inch window. The International Residential Code, Section R311.7.8, states that handrail height “shall be not less than 34 inches (864 mm) and not more than 38 inches (965 mm),” measured from the nosing plane.1 The 2010 ADA Standards for Accessible Design, Section 505.4, specify the same window: “Top of gripping surfaces of handrails shall be 34 inches (865 mm) minimum and 38 inches (965 mm) maximum vertically above walking surfaces, stair nosings, and ramp surfaces.”2 Two independent standards bodies arrived at precisely the same 4-inch zone.

Handrail Height: Where IRC and ADA Standards Agree Horizontal range bar chart. Row 1: IRC R311.7.8 (Residential) shows a compliant bar from 34 inches to 38 inches above the stair nosing. Row 2: ADA Section 505.4 (Accessible Design) shows an identical bar from 34 inches to 38 inches. Both bars occupy the same position on the shared axis from 28 to 44 inches. Sources: International Residential Code 2021, Section R311.7.8 (ICC); 2010 ADA Standards for Accessible Design, Section 505.4 (U.S. Access Board). Handrail Height: Where IRC and ADA Standards Agree Compliant zone measured vertically from stair nosing (in.) IRC R311.7.8 Residential 34 to 38 in. ADA 505.4 Accessible Design 34 to 38 in. 28 30 32 34 36 38 40 42 44 inches above stair nosing IRC R311.7.8 Residential ADA 505.4 Accessible Both standards independently specify the same 4-inch compliant zone. Source: Home Age Fit analysis, 2026
The IRC residential standard and ADA accessibility standard independently specify the same 4-inch zone: 34 to 38 inches above the stair nosing. Compiled by Home Age Fit from IRC R311.7.8 (ICC, 2021) and ADA Section 505.4 (U.S. Access Board, 2010).
Standard Gripping Surface Height Reference Point Scope
IRC Section R311.7.81 34 to 38 in. Stair nosing (sloped plane) U.S. residential construction
ADA Section 505.42 34 to 38 in. Stair nosings and walking surfaces U.S. accessible design

A reading below 34 inches means the rail sits below both minimums. Reaching down to a low rail changes the mechanics of the grip: most adults bending the wrist downward to reach a rail well below elbow height transmit load less efficiently through the arm during a stumble recovery. The grip feels less secure because the arm’s leverage geometry works against the braking direction.

A reading above 38 inches places the rail above both maximums. At that height, reaching up raises the shoulder above its natural resting position, which shifts the posture of the trunk and changes where force concentrates during a recovery. For shorter individuals, a rail above 38 inches can require a near-straight-arm reach that transfers load primarily through the shoulder joint rather than distributing through the elbow and wrist as well.

Within the 34-to-38-inch range, neither the IRC nor the ADA specifies a single “ideal” height. The range exists because body dimensions vary. A person who stands 5 feet 2 inches and a person who stands 6 feet 2 inches feel a different grip angle at the same rail height. Person-specific preferences within the compliant range are decisions best made in conversation with a qualified professional who observes actual grip and posture on the specific stair.

A note on locally adopted codes: the IRC is a model code. Individual jurisdictions adopt it, often with local amendments or on a delayed edition cycle. The 34-to-38-inch range is widely adopted across the U.S., but your specific municipality may have accepted an amended version. Before any installation or modification, verify the locally adopted requirement with your building department or a licensed contractor familiar with local code. A measurement within the IRC range that does not match a locally amended requirement still has a compliance issue.

Step 4: How Height Affects Reach, Posture, and Leverage

Height is not only a compliance number. Within and outside the compliant range, where the rail sits changes how your body reaches the gripping surface, how your elbow angle distributes the load, and how the grip transmits force during ascent and descent.

Elbow angle and the mechanics of grip

When a handrail sits near the 34-inch minimum, most adults reach it with the elbow bent at roughly 90 degrees or less while standing upright on a mid-run tread. A moderately bent elbow distributes load across the elbow and shoulder joints during a pulling motion going up, and brakes the descent by transmitting downward pressure efficiently through the bent-arm geometry.

At 38 inches, the arm extends higher before gripping. For individuals with shorter arm spans, this means a straighter arm with the shoulder raised slightly. For taller individuals, 38 inches remains a comfortable, natural-reach height. The mechanical difference matters most in a stumble: a more extended arm pressing down on a high rail concentrates more force at the shoulder joint. A moderately bent arm shares the braking load more broadly. Neither geometry is universally superior; the relevant question is which height matches the person’s natural arm position when standing on that specific stair.

Research on reaching speed during balance recovery

A 2019 study by Komisar, Maki, and Novak in Applied Ergonomics examined how handrail height affects the timing and speed of reach-to-grasp balance reactions during slope descent. The researchers found that participants compensated for the increased hand-to-rail distance with higher rails by increasing peak upward hand speed, and decreasing vertical overshoot after contact.7 The reaching time to contact the rail did not change significantly with height. In practical terms, users adapt to a higher rail by moving the hand faster. The adaptation requires physical effort and changes the contact dynamics. The takeaway for planning: a rail within the 34-to-38-inch range does not eliminate the adaptation cost, but staying in the range keeps the compensation manageable for most adults.

“A handrail is pivotal for stair safety, providing a sense of security and stability.”

Mulliner, O’Brien, Maliene, Maganaris, and Mason, Healthcare (MDPI), 20256

Posture, trunk load, and center of gravity

Most people lean slightly forward during stair descent. A rail near the bottom of the compliant range keeps the reaching arm closer to the body’s center of gravity, which many people find more stable when relying heavily on the rail. A rail near the top of the range suits a more upright descending posture, where the arm reaches forward and slightly upward rather than primarily upward.

Neither posture is inherently safer for everyone. The relevant variable is the individual’s balance, strength, and habitual descent posture on that specific stair. An occupational therapist observing actual stair use brings information no measurement alone supplies. That observation becomes particularly important when the person using the stair has a condition affecting balance, grip strength, or joint range of motion.

Horizontal reach distance from the user’s body to the rail

Handrail height standards address the vertical dimension. The horizontal distance from the user’s body to the gripping surface (how far they must reach sideways to hold the rail) depends on where the rail is mounted relative to the stair’s walking path. A rail mounted too far from the stair center forces a lateral lean to grip it, which shifts the center of gravity in a different direction than the person is trying to stabilize. IRC specifies that handrails must have a clearance of at least 1.5 inches between the gripping surface and the wall, to allow the hand to wrap fully around the rail.1 That clearance affects grip quality as much as height does. Document both the vertical height and the wall clearance when preparing notes for a professional review.

Step 5: Document What Needs a Professional’s Input

After measuring, you have a height number. The number tells you where the rail sits relative to the 34-to-38-inch standard. Here is what the number alone does not tell you:

  • Whether the rail is properly anchored to the wall framing. The IRC requires handrails to resist a single concentrated load of 200 pounds applied in any direction at any point.1 Bracket spacing and the type of wall substrate determine whether that requirement is met. This is a structural question for a licensed contractor or engineer.
  • Whether the rail’s profile is graspable. Round or oval profiles between 1.25 and 2 inches in diameter generally allow the fingers to close around the rail. Decorative rails with wide flat tops or sharp corners change the grip mechanics regardless of height.
  • Whether the height works for the specific person using the stair. A measurement in the compliant range does not confirm the rail serves the individual’s actual reach, grip, or balance needs.
  • Whether locally adopted code differs from the IRC/ADA 34-to-38-inch range. Verify the current local requirement with the building department.
  • Whether the stair configuration triggers a requirement for a rail at all under local code. The trigger condition (number of risers, total rise height) varies by jurisdiction and code edition.

What to record and bring to a professional conversation:

  • Height reading at the top tread, mid-run, and bottom tread (in inches)
  • Horizontal clearance between the gripping surface and the wall (in inches)
  • Whether the rail runs continuously from the full top to the full bottom of the stair run, or has breaks at posts, landings, or transitions
  • The rail profile type (round, oval, flat-top, decorative)
  • Any signs of movement or looseness in the brackets when the rail is loaded
  • The wall material behind the mount (drywall over studs, masonry, plaster)

Stair-related upper extremity fractures among U.S. older adults increased 56% between 2012 and 2021, with 89% of those injuries occurring in the home.4 Documentation prepared before the contractor or occupational therapist visit shortens the time needed to assess the stair and helps the professional focus on the decisions only they can make. Measurement is the beginning of the conversation, not the end.

Common Stair Handrail Height Measurement Mistakes to Avoid

Five errors come up often enough in handrail measurement to name specifically.

Measuring from the tread flat instead of the nosing

The nosing is the leading edge of the tread, not the flat tread surface behind it. A tread with a 10-inch run depth has 10 inches of horizontal distance between the nosing and the tread back. Starting the tape from the wrong point introduces that horizontal distance as error, which translates to a measurable vertical difference along a sloped surface. On a stair at 35 degrees, a 10-inch horizontal error at the base produces roughly a 7-inch vertical error in the reading. A rail at 36 inches above the nosing reads as 43 inches if the tape starts from the back of the tread.

Measuring perpendicular to the slope instead of plumb

The IRC and ADA both specify height in the vertical (plumb) direction.12 A tape held perpendicular to the stair surface measures the shorter dimension along the slope face, not the plumb height. On a stair at 35 degrees, the perpendicular reading is about 18% shorter than the plumb reading. A rail at 36 inches plumb reads as approximately 29.5 inches when measured perpendicular. This makes a compliant rail appear out of range, or a slightly above-range rail appear compliant, depending on which direction the error runs.

Measuring to the wrong part of the rail

Decorative cap rails, newel post extensions, and finish pieces sit above the gripping surface on many residential installations. Measuring to the top of a decorative element inflates the reading and gives a false pass for a rail whose gripping surface is actually below the minimum. The measurement goes to the top of the part the hand contacts during normal use. On a round profile, this is the topmost point of the circular cross-section. On a profile with a decorative element above, measure to where the hand naturally closes around the rail, not the element’s top.

Taking only one measurement and treating it as the whole run

A single mid-run reading gives a useful representative number for a straight, uniformly built stair. On an older or custom-built stair where the bracket heights were not all set consistently, the reading varies from the top to the bottom of the run. A spread of more than 2 to 3 inches between the top-tread and bottom-tread readings indicates the rail is not parallel to the stair slope. That condition is worth flagging for the contractor. Three readings take less than two additional minutes and give a much clearer picture of the installation.

Treating a compliant reading as a complete answer

A reading within the 34-to-38-inch range confirms the rail sits in the code-specified zone. The reading does not confirm the rail is structurally secure, does not confirm the profile is graspable, and does not confirm the height works for the specific person using the stair. In 2021, falls caused 38,742 older adult deaths in the United States.3 A measurement within the compliant range is a necessary starting point for a safe-feeling handrail installation. On its own, the number is incomplete information. Bring the measurement to a contractor for a structural check and, when individual mobility or balance is a factor, to an occupational therapist for a personal assessment.

Frequently Asked Questions

What is the standard stair handrail height for residential stairs?

The standard residential stair handrail height is 34 to 38 inches, measured vertically from the stair nosing to the top of the gripping surface, per IRC Section R311.7.8.1 The ADA Standards for Accessible Design specify the same 34-to-38-inch range.2 Your locally adopted code governs the actual requirement; verify with your building department before any installation or modification.

How do I measure handrail height from the stair nosing correctly?

Place the tape end at the stair nosing (the leading edge of the tread) and extend the tape straight up, plumb, to the top of the handrail gripping surface. Do not measure perpendicular to the stair slope. Both the IRC and ADA specify height in the plumb (vertical) direction,12 and measuring along the slope produces an undercount of several inches on a typical residential stair.

Does the same height range apply to ramp handrails?

Yes. ADA Section 505.4 applies the 34-to-38-inch gripping height requirement to ramp surfaces as well as stair nosings.2 Residential codes address ramp handrails in separate sections; verify the locally adopted requirement with your building department or a licensed contractor before any ramp installation or modification.

What should I do if my handrail reading falls outside the 34-to-38-inch range?

A reading below 34 inches or above 38 inches places the rail outside both the IRC minimum and maximum.1 Adjusting the height requires moving the mounting brackets, which involves the wall framing behind the mount. Bring your reading to a licensed contractor who can assess the attachment conditions and verify the locally adopted code requirement before making any change.

Do I need a professional to adjust my handrail height?

Yes, for any change to the mounting hardware. The IRC requires handrails to resist a 200-pound concentrated load applied in any direction at any point,1 and bracket placement relative to wall framing determines whether that requirement is met. Any adjustment to height, brackets, or wall attachment belongs with a licensed contractor familiar with local code.

Limitations and Edge Cases

  • The standards referenced here (IRC R311.7.8 and ADA Section 505.4) apply to U.S. residential and accessible-design contexts; international building codes specify different ranges for handrail height.
  • The measurement process described here addresses geometry only. Structural adequacy of the current mounting (bracket type, fastener load path, substrate condition) requires an in-person assessment by a licensed contractor or structural engineer.
  • Person-specific reach, grip, and balance decisions require individual evaluation by a qualified occupational therapist or accessibility specialist, not a code measurement alone.

References

  1. International Code Council (ICC) – International Residential Code 2021, Section R311.7.8 Handrails. ICC, 2021.
  2. U.S. Access Board – ADA Standards for Accessible Design, Chapter 5, Section 505.4 Height. U.S. Access Board / U.S. Department of Justice, 2010 (effective 2012).
  3. Centers for Disease Control and Prevention (CDC) – Nonfatal and Fatal Falls Among Adults Aged 65 Years, United States. MMWR, Vol. 72, No. 35, September 2023.
  4. BMC Geriatrics (PubMed Central) – Solaiman, M.A., et al. Rising incidence of stair-related upper extremity fractures among older adults in the United States: a 10-year nationwide analysis. BMC Geriatrics, 2023.
  5. BMC Geriatrics (PubMed Central) – Blanchet, R., and Edwards, N. A need to improve the assessment of environmental hazards for falls on stairs and in bathrooms. BMC Geriatrics, 2018.
  6. Healthcare – MDPI (PubMed Central) – Mulliner, E., O’Brien, T.D., Maliene, V., Maganaris, C.N., and Mason, R. Older Adults’ and Professionals’ Attitudes Towards Stair-Fall Prevention Interventions. Healthcare, Vol. 13, No. 11, 2025.
  7. Applied Ergonomics (PubMed) – Komisar, V., Maki, B.E., and Novak, A.C. Effect of handrail height and age on the timing and speed of reach-to-grasp balance reactions during slope descent. Applied Ergonomics, Vol. 81, 2019.
  8. CED Technologies – Stair-Related Falls: A Forensic Engineering Analysis (citing Gould, C.V., Metzger, R., Werner, B.C., et al. Stair-related injuries treated in United States emergency departments. American Journal of Emergency Medicine, 2018).

Conclusion

The measurement takes less than 15 minutes and produces a number worth knowing before any conversation with a contractor. Whether the rail sits at 34 inches or 38 inches matters less than whether those numbers put the gripping surface in a zone that works for the person using the stair every day. Measurement starts the planning conversation. See the broader picture in Senior Safety Handrails for how handrail height fits into a complete stair route review.

Toilet Safety Poles: When a Floor-to-Ceiling Support Can Fit Better

Author: Oded Feigin · Created On: September 08, 2026 · Last Updated: September 08, 2026

Bathrooms account for a disproportionate share of home fall injuries. A CDC analysis of emergency department visits found that 81.1% of nonfatal bathroom injuries were caused by falls, and the proportion tied to getting on or off the toilet rises sharply with age.1 For most bathrooms, a wall-mounted grab bar positioned close to the toilet is the most mechanically direct fix. When the wall layout does not cooperate, a toilet safety pole offers a different contact point. See the support-option overview in Toilet Transfer Safety: Everything You Need to Know. This article works through five geometry checks: wall anchor availability, reach arc, transfer path, floor and ceiling fit, and base plate clearance.

A floor-to-ceiling toilet safety pole with an adjustable horizontal grab bar installed beside a toilet in a light-toned bathroom
A floor-to-ceiling toilet safety pole mounted beside a toilet, with an adjustable grab bar positioned at transfer height to support sit-to-stand movement.

Quick Answer

When does a toilet safety pole fit better than a wall-mounted grab bar?

A floor-to-ceiling toilet safety pole offers a practical alternative when no wall surface sits close enough to the toilet for a conventional grab bar, or when the available wall lacks the structural backing for safe anchoring. The pole mounts by compression between floor and ceiling, so wall stud placement is not a constraint. Whether it fits safely depends on five things: reach arc, hand position at transfer height, clearance around the transfer path, floor surface quality, and ceiling type and height.

Key Takeaways

  • A toilet safety pole uses compression between floor and ceiling, so wall stud location does not constrain its placement, but floor and ceiling surfaces must be solid and level for the mount to hold.
  • The grab bar’s position relative to your hand at transfer height matters more than where the pole stands in the room; a bar that forces sideways reaching provides little useful push-off force.
  • Uncertain floor or ceiling structure, a wheelchair transfer, or a changing mobility situation belongs with an occupational therapist or a licensed contractor before any installation.

What Makes a Toilet Safety Pole a Different Kind of Solution

A wall-mounted grab bar anchors directly into wall studs or solid backing, transmitting the force of a transfer sideways into the wall structure. That load path is reliable when the wall sits close enough to the toilet and when the studs or blocking are positioned where a bar of adequate length can span them. The problem is that neither condition holds in many residential bathrooms.

A 2022 Canadian national survey published in Frontiers in Public Health found that 65.4% of respondents did not have a grab bar in their bathroom, and the study cited “the absence of appropriate backing materials to support grab bar installation” as one of the primary structural barriers.5 Separately, a nationally representative cohort study published in JAMA Internal Medicine estimated that 44% of the approximately 7.4 million older US adults who needed toileting equipment had none at all.2

A floor-to-ceiling toilet safety pole routes the load differently. The telescoping pole presses against the floor below and the ceiling above, using compression and friction rather than wall anchors. Its position in the room is not dictated by stud spacing. You place it where the transfer geometry works, tighten the mechanism to create tension, and the pole holds through that compression.

That structural independence is the toilet safety pole’s main advantage over a wall bar in a poorly configured bathroom. It is also the source of its main constraint: the integrity of the mount depends entirely on the quality of the contact surfaces at the top and bottom, and on whether the floor and ceiling are genuinely solid enough to resist that compression load without flexing. A pole that slips at the floor or ceiling mid-transfer is a worse outcome than no support at all.

The five checks below work through whether a pole’s geometry and structural requirements actually fit your bathroom and your transfer.

Check 1: Confirm There Is No Usable Wall Anchor Near the Toilet

A toilet safety pole is worth considering when a wall-mounted solution is not feasible. Before committing to a pole, confirm that the wall limitation is real rather than assumed. This check looks at two things: whether the wall is close enough, and whether it has the structural backing a bar requires.

Wall distance from the toilet

The ADA’s accessibility standards for toilet side grab bars set a useful reference point: the bar must have a gripping surface 33 to 36 inches above the finished floor, run at least 42 inches in length, start no more than 12 inches from the rear wall, and extend at least 54 inches from that rear wall.4 For those dimensions to be met, the side wall must be within arm’s reach of the toilet seat – roughly 12 to 18 inches from the toilet’s centerline in most configurations. If the nearest wall is a full arm’s length away or further, a bar on that wall will not give you the close-in leverage that a toilet transfer requires. The pole can be positioned closer.

Wall backing and stud access

Tile walls without blocking behind the backer board are not suitable for grab bar installation without structural work first. Plaster-over-lath walls in older homes also lack predictable stud spacing. When a wall exists at the right distance but lacks usable backing, a licensed contractor or accessibility specialist needs to evaluate whether adding blocking is feasible before any bar goes in. If that structural work is not practical, a floor-to-ceiling pole bypasses the backing requirement entirely.

If the wall is close enough and does have accessible studs or solid blocking, a wall bar is the more direct solution for most transfers. See toilet safety rails for a comparison of toilet-mounted and floor-standing frame options when wall conditions allow more than one approach.

What this check confirms

By the end of this check, you should know whether you’re solving a genuine wall-access problem or simply unfamiliar with what a wall installation requires. A pole is the right tool for the first situation. For the second, it is worth understanding both options before deciding.

Check 2: Map the Reach Arc and Hand Position During the Transfer

A toilet safety pole’s grab bar must sit at the right height and distance for the transfer motion to work. The pole’s structural independence from the wall is only useful if the bar ends up where your hand naturally goes during the sit-to-stand or stand-to-sit movement.

The transfer motion

In a controlled sit-to-stand from a toilet, the movement begins with leaning forward to shift weight over the feet, then pressing down through the hands to rise. The hand contact during that press-off phase should be close to the body and roughly at seated elbow height, not extended outward or across the midline. A grab bar that requires reaching sideways to grip provides very little useful leverage for that downward press. It also shifts your center of mass toward the bar rather than over your feet, which reduces stability during the standing phase.

Research on toilet transfer support has found that bilateral grab bar configurations, with support accessible on both sides of the toilet, are significantly more effective than the single-side configurations that ADA-compliant installations typically provide.7 A floor-to-ceiling pole placed directly beside one side of the toilet, at the right height, addresses that one side without wall anchoring. Combined with a wall bar on the other side (where wall conditions allow), it creates the bilateral geometry the research supports.

Bar height relative to seated elbow

The ADA standard height range for grab bars near the toilet is 33 to 36 inches above the finished floor.4 This is a planning reference, not a prescription for an individual. Taller or shorter people, and people with different joint mobility, will have different optimal heights. The floor-to-ceiling pole’s grab bar is typically adjustable along the pole’s length, which means you do not have to commit to a fixed height the way a wall bar installation requires. This adjustability is a practical advantage: a person who uses a raised toilet seat, for example, sits higher than standard toilet seat height, so the bar needs to shift upward to match.

A useful self-check: sit on the toilet and extend one hand naturally toward where support would feel most useful. Note the height from the floor to your hand and the distance from your body to that point. The pole’s bar should be settable to that approximate height and should be reachable without leaning.

Reach distance from toilet centerline

The pole itself occupies a footprint beside the toilet. The grab bar extends horizontally from the pole at whatever height you set. For the bar to be within effective reach, the pole’s center should sit no more than 10 to 12 inches from the toilet’s outer edge on the support side. A pole placed further away forces arm extension during the press-off phase, which reduces leverage and increases the risk of an uncontrolled shift in balance.

Toilet Injury Share Rises With Age vs. General Fall Rate Benchmark Lollipop chart with reference line. Share of bathroom injuries from toilet transfers by age group (CDC MMWR, 2011): ages 65-74: 19.3%; ages 75-84: 26.9%; ages 85 and older: 36.9%. Dashed reference line at 25% shows the annual fall rate among adults 65 and older from NCOA (2025). The toilet injury share exceeds the general fall benchmark by age 85. Toilet Injury Share Rises With Age 0% 10% 20% 30% 40% 50% Annual fall rate, adults 65+ NCOA, 2025 19.3% 26.9% 36.9% Ages 65-74 Ages 75-84 Ages 85+ Toilet injury share by age (CDC MMWR, 2011) Annual fall rate, adults 65+ (NCOA, 2025) Source: Home Age Fit analysis, 2026
The share of bathroom injuries involving toilet transfers climbs from 19.3% among adults 65-74 to 36.9% at age 85 and older (CDC MMWR, 2011).1 The dashed line marks the general annual fall rate among adults 65 and older (1 in 4, NCOA, 2025).6 These are distinct measures from independent studies: MMWR figures are shares within bathroom injuries; the NCOA figure is a general fall incidence rate. Compiled by Home Age Fit from both sources.

Check 3: Assess the Transfer Path Around the Pole

The pole’s physical presence in the bathroom changes the geometry of the transfer path. It occupies a footprint at floor level, creates a vertical obstruction beside the toilet, and positions its grab bar at a fixed horizontal location. All three of those spatial facts need to fit the way you actually approach and leave the toilet.

Side transfer versus forward pivot

A side transfer, common for wheelchair users moving laterally onto the toilet from an adjacent seat, requires unobstructed access to the transfer side. A pole positioned on the transfer approach side blocks that lateral movement entirely. For a side transfer, the pole belongs on the opposite side only: providing post-transfer push-off support while the transfer approach side remains clear. If you transfer from a wheelchair, the pole’s position needs to be confirmed against the wheelchair’s footrest and armrest path as well as the seated landing position.

A forward pivot, where you back toward the toilet, turn, and lower yourself, is more tolerant of a pole beside either side of the toilet because the approach comes from the front. Here, the pole placement is governed primarily by which hand you press off with at the start of the stand and which hand you reach for on the way down.

Transfer-path scenarios at a glance

Transfer type Pole on right side Pole on left side Key constraint
Stand/sit forward pivot, right hand dominant Preferred: right bar within pressing reach Usable if reach arc allows Bar must be within 10-12 in. of toilet edge
Stand/sit forward pivot, left hand dominant Usable if reach arc allows Preferred: left bar within pressing reach Bar must be within 10-12 in. of toilet edge
Wheelchair side transfer from left Usable post-transfer for push-off Blocks transfer approach; not suitable Transfer side must stay fully clear
Wheelchair side transfer from right Blocks transfer approach; not suitable Usable post-transfer for push-off Transfer side must stay fully clear
Walker-assisted approach Usable if base plate clears walker legs Usable if base plate clears walker legs Walker must clear base plate on approach and exit

Door swing and bathroom layout

In a small bathroom, the pole’s position also needs to account for the door swing, the vanity location, and whether a caregiver needs to stand beside the toilet. A pole placed on the only open side of the toilet in a tight bathroom leaves no room for an assisting person during a difficult transfer. Where caregiver access is part of the picture, that spatial requirement shapes pole placement as much as the transfer geometry does.

A floor-to-ceiling toilet safety pole with an attached horizontal grab bar installed beside a toilet in a bathroom with sage green walls
A floor-to-ceiling toilet safety pole positioned beside a toilet, with a horizontal grab bar adjustable in height along the pole’s length. The base plate contacts the floor and the top cap contacts the ceiling, creating the compression that holds the pole in place.

Check 4: Evaluate Floor and Ceiling Suitability for a Tension Mount

A floor-to-ceiling pole holds through compression and friction. That mechanism is reliable when the contact surfaces at the top and bottom of the pole are hard, flat, and structurally capable of resisting the compressive load without deflecting. When the surfaces flex, compress, or allow the rubber pad to slide, the pole loses its holding tension and becomes unstable. This check is the most structurally consequential of the five.

Floor surface suitability

The ADA structural standard for grab bars requires the supporting structure to withstand 250 pounds of force applied in any direction, at any point on the bar or its attachment.3 A floor-to-ceiling pole transmits its load vertically rather than horizontally, but the principle of adequate structural capacity applies regardless of direction. Hard, level floors, including ceramic tile over solid subfloor, concrete slab, and solid hardwood, provide reliable compression resistance. Vinyl plank or luxury vinyl tile over a subfloor with hollow sections is more variable: the visible surface feels stable, but a hollow void beneath it allows micro-deflection under load, which can reduce the pole’s holding friction over time. Vinyl over concrete is generally better than vinyl over a wood subfloor with any span.

Uneven or sloped floors are a red flag. The rubber base pad requires full, flat contact to distribute the compression load without rocking. A pole base that rocks even slightly under load is not stable enough for transfer use.

Ceiling surface suitability

At the ceiling end, the contact surface needs to be flat and firm enough to resist the upward compression force without the pad penetrating or slipping. Flat drywall ceiling over properly spaced joists within the product’s height range handles this well for most residential configurations. Popcorn or heavy textured ceilings create uneven contact and are not suitable without a wide adapter plate that distributes the pressure. Sloped or cathedral ceilings prevent flat contact entirely, so a standard tension pole does not mount safely on an angled ceiling surface without specialized hardware designed for that configuration.

Ceiling height is also a hard constraint. Most residential toilet safety poles are engineered for ceilings between approximately 7 feet 6 inches and 10 feet. A standard 8-foot bathroom ceiling falls comfortably within that range. Bathrooms with ceilings below 7’6″ or above 10′ require a product specified for that height, and not all are. Measure the ceiling height at the intended pole location, not at a different point in the room where the ceiling may be higher.

Floor and ceiling type reference

Surface type Suitability Key consideration
Ceramic tile (solid subfloor) Good Hard, flat; rubber pad grips reliably
Concrete slab (floor or ceiling) Good Ideal compression surface
Solid hardwood over joists Generally good Check for flex at contact point under load
Vinyl plank over concrete Generally good Better base than vinyl over wood subfloor
Vinyl plank over wood subfloor Variable Inspect for hollow areas; some flex is normal
Flat drywall ceiling (standard 8 ft) Good Within standard product height range
Popcorn or heavy textured ceiling Poor without adapter Uneven contact reduces compression reliability
Sloped or cathedral ceiling Not suitable (standard pole) Angled surface prevents flat contact
Ceiling height above 10 ft Check product specs Many products max at 10 ft; measure first

When the floor or ceiling is uncertain

If you are unsure whether your floor or ceiling surface is structurally adequate, the right step is a conversation with a licensed contractor before purchasing a pole. The cost of that assessment is small relative to the risk of a pole that fails mid-transfer. This is not a judgment call the product’s instructions or a general article can make for a specific floor or ceiling.

Check 5: Verify Base Plate Clearance for Your Mobility Aid

Floor-to-ceiling poles have a base plate that contacts the floor and distributes the compression load. That base plate sits at floor level, creates a raised perimeter edge, and occupies a footprint that varies by product but typically spans six to nine inches across. For most standing users without a mobility aid, this is a minor detail. For someone using a walker, rollator, or wheelchair, the base plate location relative to the toilet and the approach path matters considerably.

Walker and rollator clearance

A standard walker or rollator has two rear legs and two front legs. On approach to the toilet, the walker is pulled close, the user turns, and the walker is then parked beside the toilet during the transfer. If the pole’s base plate sits in the path the walker’s legs need to travel during that turn and park sequence, the walker snags on the base edge. This creates an unsteady moment during a transfer where stability is already reduced.

Confirm that the base plate position, relative to the toilet’s front edge and side, leaves a clear corridor for the walker’s legs. This often means the pole belongs further toward the toilet’s rear wall rather than centered beside the toilet seat. The grab bar attached to the pole can be positioned slightly forward to compensate, but only within the bar’s adjustment range.

Wheelchair footrest and armrest path

For wheelchair transfers, the base plate sits in a zone that the chair’s footrests sweep through during approach. Most rigid footrests extend well in front of the chair and require clearance below the toilet seat height. The base plate, which sits directly on the floor, falls within that footrest path. Confirm exact clearance dimensions for the specific wheelchair and footrest configuration in use; this is not a generic estimate but a measurement of the actual equipment in the actual room.

When Professional Assessment Is the Right Next Step

The five checks above identify the geometry and surface questions that determine whether a toilet safety pole fits a given bathroom. They are planning questions, not installation certification or a transfer assessment for a specific person. Several situations reliably benefit from a qualified professional’s evaluation before any hardware is installed.

Uncertain floor or ceiling structure

If Check 4 raises any doubt about the floor or ceiling, a licensed contractor is the appropriate next call. The contractor can probe the subfloor for hollow sections, confirm ceiling joist locations, and assess whether the compression load the pole places on those surfaces is within safe range. This is not a task for visual inspection alone. A floor that looks and feels solid may have voids beneath the finish layer that become apparent only under sustained load.

Wheelchair transfers and complex movement patterns

An occupational therapist evaluates the transfer as a whole, not just the hardware. For a wheelchair user, the OT considers the chair model, the transfer technique, the strength and balance available for the movement, and the room geometry all at once. Product placement that seems correct from a floor-plan perspective may not match the actual body mechanics involved. Hands-on assessment by an OT is the appropriate standard for wheelchair or assisted transfers.

Kenneth Lam, MD, the lead author of the 2021 JAMA Internal Medicine study on unmet equipment access for bathing and toileting, addressed the value of professional intervention in Healio’s coverage of the research:2

“In an older population, the evidence for non-pharmacological interventions like home modification, occupational therapy and physical therapy is robust.”

Kenneth Lam, MD, lead author of the 2021 JAMA Internal Medicine study on unmet need for bathing and toileting equipment among older US adults, as reported by Healio2

Changing mobility and evolving equipment needs

A support arrangement that fits one mobility phase may not fit another. Someone who manages a forward pivot transfer independently today may need a side transfer with caregiver assistance later. The pole’s position and the bathroom’s geometry both need to accommodate the current and anticipated transfer method. An OT is well-positioned to anticipate that transition and factor it into the placement recommendation.

For the broader question of which support configuration fits your specific transfer, an occupational therapist is the right starting point. Home Age Fit provides engineering-informed planning context for these decisions, not a substitute for clinical evaluation of a specific person’s mobility.

If the toilet height itself is also in question, the comparison at comfort height toilet covers how toilet height interacts with the sit-to-stand transfer before any support hardware is considered.

Frequently Asked Questions

How high should the grab bar be set on a floor-to-ceiling toilet safety pole?

The ADA places toilet grab bars between 33 and 36 inches above the finished floor as a planning reference.4 For a floor-to-ceiling pole, that range is a reasonable starting point. The right height is where you press downward comfortably to rise and lower in control without reaching sideways. A raised toilet seat increases seated height, so the bar position needs to shift upward to match.

Will a floor-to-ceiling toilet safety pole fit a standard 8-foot bathroom ceiling?

Yes. Most residential floor-to-ceiling transfer poles accommodate ceilings from approximately 7 feet 6 inches to 10 feet, so a standard 8-foot ceiling falls within that range. Before purchasing, verify the specific product’s listed height window, because some models have a narrower fit band. Measure at the actual installation point, not at a different part of the room where the ceiling height may differ.

How is a floor-to-ceiling pole structurally different from a wall-mounted grab bar?

A wall grab bar anchors into studs or solid backing and transfers force horizontally into the wall framing. The ADA structural standard requires that supporting structure withstand 250 pounds of force applied in any direction.3 A floor-to-ceiling pole distributes load vertically through compression between floor and ceiling. The key question shifts from stud location to whether the floor and ceiling surfaces resist that compressive load without flexing.

Can a floor-to-ceiling pole be combined with a wall bar on the other side of the toilet?

Yes, and for many transfer situations this combination provides more balanced push-off than a single-side arrangement. Research has found bilateral configurations significantly more effective than single-side ADA-standard placement.7 Where one wall has adequate backing for a bar and the other does not, combining a wall bar and a floor-to-ceiling pole addresses both sides without structural work on the difficult wall side.

Who should assess whether a toilet safety pole is right for a specific person?

An occupational therapist is the appropriate professional for a person-specific transfer assessment. The OT evaluates strength, balance, technique, the mobility aid in use, and the room geometry together. A licensed contractor or structural engineer is the right resource when floor or ceiling condition is uncertain. Home Age Fit provides educational planning context, not a substitute for clinical or structural evaluation.

References

  1. CDC Morbidity and Mortality Weekly Report – Nonfatal Bathroom Injuries Among Persons Aged 15 Years and Older: United States, 2008. Stevens JA, Haas EN, Haileyesus T. MMWR 2011;60(22):729-733. Data accessed via JAMA 2011;306(3):258-260.
  2. JAMA Internal Medicine – Unmet Need for Equipment to Help With Bathing and Toileting Among Older US Adults. Lam K, Shi Y, Boscardin J, Covinsky KE. 2021;181(5):609-617. Published March 22, 2021.
  3. U.S. Access Board – ADA Standards for Accessible Design, Chapter 6: Plumbing Elements and Facilities, Section 609.8 (Structural Strength). 2010.
  4. U.S. Access Board – Guide to the ADA Accessibility Standards: Chapter 6 Toilet Rooms. Grab bar height and placement dimensions (Section 604.5). Continuously maintained.
  5. Frontiers in Public Health – Consumer perspectives on grab bars: A Canadian national survey of grab bar acceptability in homes. Levine IC, Lau ST, King EC, Novak AC. 2022;10:915100. Published October 17, 2022.
  6. National Council on Aging – Get the Facts on Falls Prevention. Updated May 30, 2025.
  7. HERD: Health Environments Research and Design Journal – Beyond ADA Accessibility Requirements: Meeting Seniors’ Needs for Toilet Transfers. Lee SJ, Sanford J, Calkins M, et al. 2018;11(1):83-98.

Conclusion

A toilet safety pole solves a specific problem: it creates a stable support point when the wall layout near the toilet will not accommodate a conventional grab bar. The five checks in this article, from wall anchor availability through base plate clearance, identify whether the pole’s geometry and structural requirements fit the actual bathroom and transfer. When any check raises uncertainty about the floor, the ceiling, or the transfer itself, an occupational therapist or a licensed contractor is the right next step before purchasing or installing anything.

For the broader picture of toilet support options, see the overview at Toilet Transfer Safety: Everything You Need to Know.

How to Choose a Non Slip Bath Mat by Grip, Fit, Drainage, and Backing

Author: Oded Feigin · Created On: September 06, 2026 · Last Updated: September 06, 2026

Falls are the primary cause of 81.1% of all bathroom injuries treated in U.S. emergency departments,1 and 68.3% of those injuries happen in or around the bathtub and shower. Most non slip bath mats are sold on surface texture alone, not on whether the mat will hold its position on your specific floor. Our slip-resistant flooring overview covers the broader wet-zone picture. This guide focuses on the specific decisions that determine whether a bath mat is actually stable: surface compatibility, grip mechanism, coverage area, drainage design, drying time, and edge behavior.

A gray textured non slip bath mat on light tile floor positioned between a glass-enclosed shower and a white bathtub
A gray, textured bath mat placed between a glass shower enclosure and a freestanding bathtub, showing a placement that spans both the shower exit and the tub side.

Quick Answer

How do you choose a non-slip bath mat that actually stays put?

Check your floor surface first. Suction cups require a smooth, non-porous base to seal properly. Textured tile, pebble floors, and refinished surfaces break that seal, so the mat shifts regardless of how it was marketed. Once you confirm your surface supports the grip mechanism, match the mat’s footprint to the full zone where you stand and turn, verify it has drainage holes that allow water to pass through rather than pool under the mat, and confirm the edges lie flat without curling. A mat that meets all four conditions reduces the risk of a moving surface underfoot in the wettest part of the bathroom.

Key Takeaways

  • Falls cause 81.1% of bathroom injuries in the U.S., and 68.3% of those occur in or around the bathtub or shower.1
  • Suction cups cannot seal on textured tile, grout lines, or refinished surfaces. Surface compatibility is the first criterion, not the last.
  • No current voluntary federal standard governs slip-resistance performance for bath mats or bathing surfaces. The label “non-slip” describes surface texture only, not grip strength under load.4
  • The EPA recommends drying wet materials within 24 to 48 hours to prevent mold growth. A bath mat that stays wet between uses loses grip performance and becomes a hygiene problem.5
  • Adults aged 85 and older face a bathroom injury rate of 515 per 100,000, compared to 59 per 100,000 for adults under 25. Placement decisions matter more as the consequence of a slip increases.1

Before You Start: Know Your Surface

Knowing the surface type before purchasing separates a reasoned choice from a guess. Three things to identify on your specific tub or shower floor before you look at any product listing:

  • Surface texture: smooth, lightly textured, deeply textured, or pebble or mosaic composite
  • Surface material: acrylic tub shell, ceramic tile, porcelain tile, natural stone, or a refinished or recoated surface
  • Grout joint frequency and width: a surface with tight grout joints (1/16 inch or narrower) behaves differently than one with wide joints (1/4 inch or more)

These three factors determine which grip mechanisms are physically possible on your floor. Once identified, the rest of the selection criteria follow from them. Do this check before reading any product specifications.

What counts as smooth enough for suction cups

Run your palm flat across the surface. A smooth surface offers no noticeable texture catch against a moving hand. If your palm drags slightly on peaks or grout edges, the surface will interrupt suction cup seals. A smooth acrylic tub shell or a smooth-glazed ceramic tile floor without deep grout channels is typically compatible. Lightly sanded matte tile, even tile rated for wet-area use, is usually not.

How to identify a refinished surface

A refinished tub or shower has been spray-coated with a new finish layer over the original material. The surface often looks glossy or slightly thicker than a standard tile glaze. If the bathroom has been renovated in the past five to ten years and the tub color does not match the original porcelain, assume a refinished surface. Ask the previous owner or a building manager if unsure, because suction cups on a refinished surface carry a risk of coating damage that is not present on the original material.

Step 1: Confirm Surface Compatibility With the Mat’s Grip

The grip mechanism listed on the packaging only works when the surface allows it. The most common mismatch is suction cups on textured tile, and the problem is geometry, not product quality.

A suction cup forms a partial vacuum against a smooth, continuous, non-porous surface. Pressing one onto a surface with grout lines, texture ridges, or drainage channels breaks that vacuum at every interruption. The mat appears to hold during initial placement, but shifts underfoot when loaded with body weight because the vacuum has already failed at the contact breaks.

Tile surfaces where suction cups reliably fail to hold:

  • Matte and textured ceramic or porcelain designed for wet-area slip resistance
  • Natural stone with a honed, brushed, or tumbled finish
  • Pebble and mosaic shower floors where grout lines occupy more surface area than the tile faces
  • Any surface with grout joints wider than approximately 1/16 inch

On refinished surfaces, the issue is different. Suction cups bond mechanically to the refinishing coating and lift or scratch it on removal. Before placing any suction mat on a refinished tub, consult the refinishing company’s guidance. Replacing a refinished surface is expensive; replacing a bath mat is not.

The Consumer Product Safety Commission, which referenced ASTM F462 as the prior voluntary standard for bathing surface slip resistance, acknowledged the standards gap directly after ASTM withdrew that standard in 2016 without a replacement:4

“[CPSC’s objective is] to work with ASTM to re-establish F462, or develop a new voluntary standard to address fall hazards associated with adult bath tubs and shower facilities.”

U.S. Consumer Product Safety Commission, Voluntary Standards Program4

This means there is no independent benchmark against which a mat manufacturer’s “non-slip” claim is tested. The label is self-certified, and its meaning varies by manufacturer.

Step 2: Match the Grip Mechanism to Your Specific Floor

Once the surface type is clear, the choice of grip mechanism narrows considerably. The table below maps each backing type to the surfaces where it performs reliably, and the conditions where it does not.

Grip Type Smooth Acrylic or Porcelain Textured or Matte Tile Pebble or Stone Floor Refinished Surface
Suction cups Seals on contact; holds under weight Breaks at grout joints; mat shifts under load Will not seal; mat moves freely Risk of coating damage; consult refinisher first
Natural rubber backing Grips under mat weight; degrades with bleach Partial grip on tile peaks; moves on ridges Sits unevenly on pebbles; unstable May bond to coating; test a corner before committing
PVC or foam backing Light resistance; not sufficient as sole grip in a wet tub Minimal friction; not recommended for wet use Not recommended for wet zones Test compatibility on a small area first
Weighted mat (no adhesive) Stays by mass; no adhesion required Stays by mass; edges may catch on texture Stays by mass; works on uneven surfaces Safe for most finishes; no suction to lift coating

Natural rubber backing

Rubber-backed mats grip through friction between the backing material and the floor surface, not through vacuum. This makes them more tolerant of slight surface texture than suction cups, because the rubber conforms partially to the surface rather than requiring an unbroken seal. The trade-off is that natural rubber degrades with chlorine-based cleaners and hot-water washing. A bathroom where bleach is used regularly will shorten rubber backing life noticeably.

Weighted or heavy mats

A weighted mat stays in place by mass and material stiffness alone. No active grip mechanism is needed, so these mats work on textured tile, pebble floors, and surfaces where suction is not viable. The weight prevents casual shifting, but a weighted mat still moves if a foot catches a raised edge. These mats retain water longer than thinner alternatives because the dense material absorbs and holds moisture.

Step-out mats and bathroom rugs

Microfiber and terry-backed mats are designed for step-out use on a damp bathroom floor, not for wet submersion inside a tub or shower. The backing provides light resistance against a damp surface but no meaningful grip in a fully wet environment. Placing a microfiber mat inside the tub or shower is a misapplication of the product’s design. For step-out rugs and the selection criteria specific to that surface and placement, the anti-slip bathroom rugs guide covers backing type, weight, and edge profile in detail.

Step 3: Cover the Full Zone Where You Stand and Turn

Coverage matters as much as grip. A mat sized to the center of a tub floor leaves the entry zone on bare wet surface. That gap is where a foot lands during the most vulnerable moment: stepping in and stepping out.

Map the standing zone before ordering a mat. For a standard bathtub (typically 60 inches long, 30 to 32 inches wide), identify three areas: the entry point where the first foot lands, the central standing area where most of the shower or bath occurs, and the turning zone where direction changes happen. A mat covering the center but missing the entry zone leaves unprotected wet surface at the highest-risk transition.

Sizing for a standard tub

A 17 by 28-inch mat covers the central standing area of most standard tubs. A 17 by 36-inch mat, or a large non-slip bath mat in the 17 by 40-inch range, extends coverage toward the drain or tap end. The longer mat also catches more of the turning zone if the entry and central standing positions are at opposite ends of the tub.

Sizing for a shower floor

Measure the flat portion of the shower floor separately from the sloped drain channel. The mat should cover the zone where you stand, not just where the drain is. Placing a mat over a floor slope means the mat sits on an angled surface, which reduces suction effectiveness and allows water to pool on the uphill side. An extra long non-slip bath mat (40 inches or more in length) suits walk-in showers where the standing zone extends from the entry threshold to the fixture.

The threshold gap problem

A gap of 6 to 8 inches between the mat edge and the shower threshold leaves wet, unprotected tile at exactly the point where weight transfers from the mat to the floor. Foot placement during exit is not always precise, especially when the body is warm, the floor is wet, and attention is split. The transition point at the mat edge is where slips concentrate in wet zones. A mat positioned to leave less than 2 inches between its edge and the threshold eliminates this gap. If the mat’s dimensions do not reach that close, two mats in sequence (one inside the threshold, one at the exit) are preferable to one mat centered in the standing zone.

Coverage for seated and transfer use

For anyone using a shower seat or shower chair, the turning zone extends across a wider area than the standing zone alone. The transfer pivot point, where the body rotates from seated to standing, often sits at the edge of where a mat sized only to the central standing zone reaches. Confirm the mat covers the rotation point, not just the standing position.

Step 4: Check Drainage Design for Your Floor Type

Water pooling under a bath mat reduces suction performance and creates conditions for mold growth. The EPA recommends cleaning and drying wet materials within 24 to 48 hours to prevent mold growth.5 A mat without drainage holes cannot meet that standard under normal daily use.

Drainage hole placement

Each hole punched through the mat body allows water to pass to the drain below rather than collecting in the space between the mat and the floor. Distribution matters more than total hole count. Holes concentrated at the center allow pooling at the mat’s edges; holes distributed evenly across the full surface prevent pooling across the entire footprint. Look for hole diameter wide enough to pass hair and soap debris without clogging in normal bathroom conditions.

Elevated ribbed backing

Some mats substitute drainage holes with a ribbed or latticed underside. The ribs create channels between the mat surface and the floor, allowing water to move laterally toward the drain. On a properly sloped floor with a centered drain, this design performs comparably to drainage holes. On flat floors or floors with off-center drains, water moves slowly or pools at the edges because gravity does not assist the flow.

When drainage design is not enough

If the tub or shower floor does not drain adequately (a slow or partially blocked drain, or a floor without sufficient slope toward the drain), water pools regardless of the mat’s drainage design. A drainage-hole mat on a flat, slow-draining floor still sits in standing water between uses. Clearing the drain condition is the upstream fix. The mat design cannot substitute for adequate floor drainage.

Step 5: Plan for Cleaning and Full Drying Between Uses

A bath mat that stays wet between uses is not functioning as a safety surface. Wet rubber backing grips less than dry rubber backing, and wet textured surfaces allow foot movement that a dry surface resists more firmly.

A white rectangular slip-resistant mat positioned inside a porcelain bathtub, showing in-tub suction cup mat placement
A white rectangular mat inside a porcelain bathtub, showing the smooth acrylic or porcelain surface where suction cups seal reliably, and the placement that covers the full standing zone.

The drying protocol

Remove the mat after each use. Shake off standing water. Hang it over the shower rod, a towel rack, or the tub rim with the textured surface facing out so air reaches both sides. A mat left flat on the tub floor after use, or folded damp, creates a moisture-trapping condition on both the mat underside and the tub surface beneath it. The floor beneath the mat also needs to dry between uses; a mat left permanently in place prevents that.

Machine washing

Most rubber-backed mats tolerate a cold or lukewarm machine wash on a gentle cycle. Hot water softens and deforms rubber over repeated cycles. High heat in the dryer accelerates the hardening and cracking of rubber and PVC backing that causes suction cups to lose elasticity. The useful approach is cold wash, line or rack dry. Wringing a rubber-backed mat after washing can deform the suction cups; lay it flat or hang it without twisting.

Bleach and harsh cleaners

Chlorine bleach degrades natural rubber rapidly. A bathroom where the regular cleaning routine uses bleach will shorten rubber backing life to months rather than years. PVC and synthetic backings tolerate brief bleach contact better than natural rubber, but prolonged exposure still accelerates material breakdown. If bleach cleaning is routine in the household, a PVC-backed or weighted mat is more durable than a rubber-backed one.

What washing does not restore

A mat whose backing has hardened, cracked, or permanently curled does not recover grip function from washing. The suction cups look intact but no longer flex enough to create a seal. Cleaning extends appearance, not performance. The indicator for replacement is when the mat shifts underfoot during use despite being clean and correctly placed: at that point, the grip mechanism has failed and the mat adds a moving surface to the wet zone rather than a stable one.

Step 6: Inspect Edge Behavior Before You Rely on the Mat

A mat with curling or raised edges is a trip hazard at the exact location it was placed to prevent one. Edge behavior is most critical at the point where a foot crosses from the bathroom floor onto the mat, or from the mat surface back to the shower floor.

Edge thickness

Mats thicker than approximately half an inch create a raised step that the foot must clear during shower entry or exit. For anyone with a shortened gait swing, a raised mat edge at the shower threshold presents a catch point. Thin-profile mats (under 3/8 inch) reduce this risk. Thickness is usually listed in product specifications in millimeters; 6 mm is approximately 1/4 inch, 13 mm is approximately 1/2 inch.

Edge curl

Natural rubber and PVC mats tend to curl upward at the edges when stored folded, when exposed to repeated heat cycles, or when the backing hardens with age. A curled edge at the entry zone of a shower is a specific fall risk during exit, when one foot is still on the shower floor and the other is contacting the mat edge. This is a common failure mode in mats older than one to two years.

To test before relying on a mat: press a corner flat to a hard surface and release it. If the corner springs back, the material has memory that will worsen over time. A mat that lies flat under its own weight during this test is more likely to lie flat on the shower floor under body weight.

Beveled edges

Some mats are manufactured with a tapered underside that angles the mat body toward the floor surface at the perimeter rather than presenting a vertical cut edge. This creates a lower transition height where the foot crosses from floor to mat. Not all products describe their edge geometry explicitly. Looking at a product’s side-profile image or reading reviews specifically for “edge curling” or “trip hazard” language provides more reliable information than the product name or marketing description alone.

Common Mistakes When Buying a Non Slip Bath Mat

The most common error is treating the “non-slip” label as a performance specification. It is not. The label describes the surface texture of the top layer or the backing material. It does not state how strongly the mat holds position on a given floor type, how long that hold lasts, or under what load conditions the grip fails.

Bathroom injury data puts the stakes clearly:

“Falls were the most common primary cause of injury (81.1%), and the most frequent diagnosis was contusions or abrasions (29.3%).”1

Stevens JA, Haas EN, and Haileyesus T, CDC Morbidity and Mortality Weekly Report

Understanding where mats are most likely to fail helps avoid the most common selection errors.

Mistake 1: Choosing based on appearance rather than surface match

A mat selected for color or pattern without checking whether the grip mechanism suits the floor will shift. The visual match to towels is irrelevant if the mat moves underfoot during use. Surface type determines the grip mechanism; everything else follows from there.

Mistake 2: Sizing to the center of the tub

Covering the central standing area while leaving the entry zone on bare wet tub surface places unprotected tile at the highest-risk transition point. Entry and exit are the movements that concentrate slip risk in a bathtub or shower. A mat sized only to the center misses both transition moments.

Mistake 3: Leaving the mat in place permanently

A mat left flat on the tub floor between uses traps moisture underneath, promotes mold and mildew growth on both surfaces within the EPA’s 24 to 48-hour window, and degrades suction cup performance as soap and water accumulate in the cups. Removing the mat after each use and hanging it to dry is not an optional maintenance task; it is what keeps the mat functional.

Mistake 4: Using the same mat inside and outside the tub

In-tub mats and step-out mats serve different functions. An in-tub mat is designed for wet submersion, water drainage, and suction or weighted grip against a wet tub surface. A step-out mat is designed for absorbency and light grip on a damp bathroom floor. Using a drainage-hole in-tub mat outside the tub places a heavy non-absorbent mat where absorbency is needed. Using a microfiber step-out mat inside the tub provides no meaningful grip against the wet tub surface.

Mistake 5: Expecting suction cups to work on a textured shower floor

A shower floor textured for barefoot traction is designed to increase friction between the bare foot and the tile surface. That same texture prevents suction cups from sealing. Choosing a different mat with suction cups does not resolve this: the surface is the barrier, not the specific product. Textured shower floors require a grip mechanism that does not depend on an unbroken surface seal, such as a weighted mat or a rubber-backed mat rated for textured surfaces.

Bathroom Injury Rate by Age Group (per 100,000 persons) Nonfatal bathroom injury rates per 100,000 persons by age group, U.S. 2008, from CDC MMWR Stevens et al. 2011. Ages 15-24: 58.8; 25-34: 73.1; 35-44: 76.0; 45-54: 70.5; 55-64: 84.8; 65-74: 112.1; 75-84: 241.0; 85 and older: 515.3. The CDC separately reports the age-adjusted fall death rate for adults 65 and older rose from 64.7 to 78.4 per 100,000 between 2018 and 2024, a 21 percent increase (CDC Older Adult Falls Data, 2024). Bathroom Injury Rate by Age Group (per 100,000) 85+ 515 75-84 241 65-74 112 55-64 85 45-54 71 35-44 76 25-34 73 15-24 59 Adults 65 and older Adults under 65 Source: CDC MMWR (2011) and CDC Falls Data (2024)
Bathroom injury rates rise ninefold between adults under 25 and adults 85 and older, while the fall death rate for adults 65 and older also rose 21% between 2018 and 2024,12 making the overlap between age group and wet-zone placement the core context for bath mat selection.

Frequently Asked Questions

Will a non-slip bath mat prevent falls?

No mat prevents falls absolutely, and no product claim to that effect is supportable. The right mat reduces the risk of a moving surface underfoot in a wet zone. Non-fatal falls among adults 65 and older already cost the healthcare system $80 billion per year,3 and the bathtub and shower zone accounts for the majority of bathroom injuries. A properly matched and maintained mat removes one specific friction point. It does not address lighting, grab bar placement, floor slope, or footwear, all of which affect wet-zone safety independently.

How often should I replace a non-slip bath mat?

Replace the mat when the grip mechanism fails, not on a fixed schedule. The indicators are: suction cups no longer seal on first press, the mat shifts underfoot during use despite being clean and correctly placed, the backing has cracked or hardened, or the edges curl persistently. A mat that passes all four checks is still functional regardless of age. One that shifts during use has failed as a safety surface regardless of how new it is.

What type of bath mat works on a textured shower floor?

A weighted mat or a natural rubber-backed mat rated for textured surfaces is the starting point. Suction cups will not seal on textured tile, matte tile, pebble, or stone floors. The U.S. Consumer Product Safety Commission is currently sponsoring research into bathing surface slip resistance testing methodology to better characterize friction demand across surface types,6 but no current labeling standard distinguishes mat performance by surface texture. Checking the surface type first narrows the choice before reviewing any product specifications.

Why does my bath mat keep sliding even though it has suction cups?

Three conditions break suction cup adhesion: soap film or debris blocking the cup face, a surface with grout lines or texture preventing a full seal, or suction cups that have hardened or cracked with age. Clean both the mat cups and the tub surface with a non-bleach cleaner and test again. If the mat still shifts after cleaning, the surface is likely incompatible with suction cup grip, or the backing material has deteriorated past the point where cleaning restores function.

Is a rubber non-slip bath mat better than a PVC bath mat?

Natural rubber grips a smooth surface more firmly than most PVC alternatives, conforms slightly better to minor surface variation, and tends to hold its shape longer before edge curling begins. PVC tolerates chlorine-based cleaners better than natural rubber and is generally less expensive. The more important distinction is backing thickness and suction cup quality relative to your specific surface type. Neither material outperforms the other on a surface where suction cups cannot seal.

Limitations and Edge Cases

  • This guide addresses fixed residential tub and shower floors. Portable tubs, foldable shower pans, and travel shower setups have different surface properties and drainage conditions that affect which grip mechanisms apply.
  • Anti-slip surface treatments applied to an existing tile floor after installation change the surface texture in ways that affect both barefoot traction and suction cup compatibility. A treated surface should be evaluated in its post-treatment condition, not by its original tile specification.
  • For broader wet-zone surface decisions beyond mat placement, including tile selection, grout joint sizing, and floor slope, see the slip-resistant flooring overview on homeagefit.com.

References

  1. CDC Morbidity and Mortality Weekly Report – Stevens JA, Haas EN, Haileyesus T. Nonfatal Bathroom Injuries Among Persons Aged 15 Years or Older – United States, 2008. MMWR Morb Mortal Wkly Rep. 2011;60(22):729-733. June 10, 2011.
  2. CDC, Older Adult Falls Data – “Older Adult Falls Data.” Centers for Disease Control and Prevention. Page last reviewed 2024.
  3. National Council on Aging – “Get the Facts on Falls Prevention.” NCOA. Updated 2021.
  4. U.S. Consumer Product Safety Commission – “Voluntary Standards – Bath Tubs (Adult).” CPSC. Accessed 2025. (ASTM F462 withdrawn 2016; no current replacement standard.)
  5. U.S. Environmental Protection Agency – “Ten Things You Should Know About Mold.” EPA. Evergreen standing guidance.
  6. Federal Register – “Agency Information Collection Activities: Bathtub Slip Resistance Study.” CPSC and Arizona State University. Federal Register Notice, April 16, 2025.

Conclusion

A non-slip bath mat’s effectiveness depends on matching four variables to your specific situation: the surface type that determines which grip mechanism works, the coverage area that spans the full standing and transition zone, the drainage design that allows the floor beneath to dry, and the edge profile that does not introduce a new trip point at the mat’s perimeter. No label substitutes for that check. See the slip-resistant flooring overview for the broader context of wet-zone surface decisions in a bathroom designed to work reliably over time.

Anti Slip Bathroom Rugs: Backing, Weight, Edge Profile, and Fit Compared

Author: Oded Feigin · Created On: September 04, 2026 · Last Updated: September 04, 2026

Anti slip bathroom rugs often carry a “non-slip” label that tells you almost nothing about whether the rug will stay flat. What determines stability is backing material, pile weight, edge profile, and how well the rug contacts the specific floor under it. The CDC reports an estimated 234,094 nonfatal bathroom injuries treated in U.S. emergency departments each year among people aged 15 and older, with falls accounting for 81.1 percent of those incidents.1 For context on how surface traction fits into home safety planning, see the overview in slip-resistant flooring overview. This article compares the physical properties that separate a rug that grips from one that slides.

Gray shaggy anti slip bathroom rugs on light-colored tile in front of a dark wood vanity, showing a typical bathroom rug installation with backing in full floor contact.
A gray shaggy bathroom rug on light tile in front of a dark wood vanity. Backing type, pile weight, and edge profile determine whether it stays flat under daily foot traffic.

Quick Answer

What actually keeps an anti-slip bathroom rug in place?

Backing material and floor contact decide stability, not the label. Natural rubber and nitrile rubber grip more consistently on wet ceramic and vinyl than latex foam. Pile weight above 2,200 grams per square meter reduces sliding better than lighter construction. A beveled edge keeps the rug flat as the backing ages. Size the rug to cover the full exit zone, not just a decorative patch of floor.

Key Takeaways

  • The National Floor Safety Institute defines high traction as a wet TCOF of 0.6 or above; backing materials reaching that threshold can reduce wet-slip risk by 50 to 90 percent.4
  • Approximately 37,991 adults aged 65 and older are treated in U.S. emergency departments each year for falls associated with rugs and carpets, with bathrooms accounting for 35.7 percent of home locations.3
  • Natural rubber, nitrile rubber, and PVC grid backings outperform latex foam on smooth ceramic and luxury vinyl tile because they maintain surface contact under damp conditions.
  • A beveled or tapered edge profile keeps the rug flat against the floor; a thick squared edge becomes a trip hazard when the corner curls or the backing softens over time.
  • Loose throw rugs without nonslip backing were found in nearly 78 percent of older adult homes surveyed; an average of more than 11 rugs per home lacked any grip backing at all.3

Backing Compared: What Each Type Delivers at a Glance

The table below compares the four most common bathroom rug backing types across key stability properties. Values reflect typical performance on smooth ceramic tile and luxury vinyl tile under damp conditions. Individual products vary; manufacturer test data takes precedence.

Property Natural Rubber Latex Foam PVC Grid / Coated Mesh Woven / Tufted (No Coating)
Wet grip on ceramic tile Strong Moderate Strong Weak to none
Wet grip on luxury vinyl tile Strong Moderate Good-to-strong Weak to none
Washability Good (cold or warm cycle) Moderate (degrades with heat) Good Varies by pile material
Edge flatness over time Good Poor (corners curl as foam compresses) Moderate Varies
Drying speed after washing Moderate Slow Fast Quick
Latex allergy risk None Yes None Latex-free
Typical usable lifespan 3-5 years 1-3 years 3-5 years Varies; pad-dependent
Best setting Wet bathroom exit zone Dry areas or short-term use Wet bathroom exit zone Dry areas with separate non-slip pad

Anti Slip Bathroom Rugs: How Each Backing Type Grips Your Floor

The backing is the only part of the rug touching the floor. Its material and stiffness determine whether friction is strong enough to resist movement. A “non-slip” or “non-skid” label on the packaging does not specify backing type, floor compatibility, or whether grip holds after repeated washings. Understanding what each backing type actually does removes that uncertainty.

Natural Rubber Backing

Natural rubber provides high surface friction because its molecular structure conforms slightly to the micro-texture of a floor surface under the weight of the rug. On wet ceramic tile or porcelain, rubber maintains that contact even when the floor beneath it is damp. This is the primary reason rubber outperforms foam backings in bathrooms: water on the tile surface does not break the friction bond the way it does with less conforming materials.

One practical limitation is color transfer. Natural rubber can deposit yellow or brown staining onto light-colored luxury vinyl or vinyl plank flooring over time, particularly in bathrooms where moisture increases adhesion between the backing and the floor. Manufacturers sometimes treat rubber to reduce this, but checking the product’s floor-compatibility guidance before installing on light vinyl is worth doing. On ceramic, porcelain, and darker vinyl, color transfer is rarely a problem.

Washing matters too. Machine-washing in cold or warm water is fine for most rubber-backed rugs. Hot water and tumble drying on high heat degrade rubber faster, hardening it and reducing the flexibility that makes it grip. A rubber backing that has stiffened is no longer conforming to the floor surface and is losing its advantage over time.

Latex Foam Backing

Latex foam is the most common budget bathroom rug backing because it is inexpensive to manufacture and feels soft underfoot. It provides acceptable initial grip on dry or lightly damp tile. The problem is durability. Latex foam is an open-cell structure that traps moisture and takes longer to dry between uses. In a bathroom where the rug gets wet daily, the foam gradually breaks down, losing density and grip. Most latex-backed rugs show meaningful grip loss within 12-18 months under regular bathroom use.

A second concern is latex allergy. Latex sensitization affects a meaningful portion of the population, and prolonged skin contact with a latex backing in a warm, humid environment can trigger reactions in sensitized individuals. For households with a known latex sensitivity, rubber or PVC alternatives are the practical choice.

Latex foam also performs poorly on edge flatness over time. As the foam compresses in the center under body weight but retains its thickness at the edges, corners lift. A lifted corner on a bathroom rug is a trip hazard, not a minor aesthetic issue. This is one of the most common failure modes in bathroom rugs: the rug grips adequately underfoot but the edge catches a toe on the way out of the shower.

PVC Grid and Coated Mesh Backing

PVC grid backings use a rigid or semi-rigid lattice structure rather than a solid sheet. The open grid allows water and air to pass through, which keeps the backing drier than foam and reduces the adhesion failure that happens when moisture accumulates between the rug and the floor. On ceramic tile and most vinyl surfaces, a PVC grid backing provides grip comparable to natural rubber and often outlasts latex foam by a wide margin in terms of both grip retention and physical integrity.

The trade-off is flexibility. A firmer PVC grid does not conform as tightly to floor micro-texture as rubber does. On floors with slight surface irregularities, such as handmade tile or stone with variable texture depth, rubber tends to grip more consistently. On smooth, flat factory tile or vinyl, PVC grid performs well.

One note for luxury vinyl plank and sheet vinyl owners: some PVC backings can react chemically with vinyl flooring plasticizers over time, causing the flooring surface to soften or discolor. This is not universal, but verifying the manufacturer’s floor-compatibility statement before using a PVC-backed rug on luxury vinyl is the right precaution.

Woven, Tufted, and Memory-Foam Backings

Woven or tufted rugs with no backing treatment (jute, cotton canvas, or bare fabric backing) offer essentially no grip on smooth bathroom floors. The textured weave does not create meaningful friction against slick tile or vinyl. These rugs belong in dry areas with low-risk placement, or under a separate non-slip rug pad sized to match the rug’s footprint.

Memory-foam-backed rugs are comfortable underfoot but do not function as an anti-slip surface. Memory foam conforms to your foot, not to the floor. The backing is typically smooth and provides minimal friction against tile or vinyl. Again, a correctly sized non-slip pad under the rug is what creates stability, not the foam itself.

If you want to keep a woven or memory-foam rug in the bathroom, a correctly sized non-slip pad makes it functional. The pad must match the rug footprint; a pad wider than the rug creates its own raised edge and trip risk at the perimeter.

“Falls are the leading cause of fatal and nonfatal injuries for older Americans.”

National Council on Aging (NCOA), Falls Prevention Facts2

That pattern shows up clearly in bathroom data. A peer-reviewed study from 2013 found that annually, an estimated 37,991 adults aged 65 and older were treated in U.S. emergency departments for falls associated with rugs and carpets, with bathrooms accounting for 35.7 percent of home locations in that group.3 A rug that grips well is one friction point removed from a daily routine that involves wet floors and rapid direction changes.

NFSI Wet-Traction Zones: Backing Performance on Wet Bathroom Floors Zone scale showing three NFSI traction levels for floor backing materials. Low traction: TCOF below 0.4, high slip risk. Moderate traction: TCOF 0.4 to 0.6, reduced risk. High traction: TCOF 0.6 and above, 50 to 90 percent lower wet-slip risk per NFSI 101-C standard (2023). Annual rug and carpet-associated falls in adults 65 and older: 37,991 ED visits per year, with bathrooms accounting for 35.7 percent of home fall locations. Sources: NFSI 101-C (2023) and Rosen, Mack and Noonan, Journal of Injury and Violence Research, 2013. NFSI Wet-Traction Zones: Bathroom Rug Backing Performance LOW TCOF below 0.4 MODERATE TCOF 0.4 to 0.6 HIGH TCOF 0.6 and above 0.0 0.4 0.6 1.0+ High slip risk Reduced risk 50-90% lower wet-slip risk 37,991 adults 65+ treated annually for rug and carpet falls Bathroom: 35.7% of home rug-fall locations in that age group Rosen, Mack and Noonan, Journal of Injury and Violence Research, 2013 Source: Home Age Fit analysis, 2026
Backing materials reaching TCOF 0.6 or above (NFSI high-traction zone) reduce wet-slip risk by 50 to 90 percent; bathrooms account for 35.7 percent of rug-related fall locations for adults 65 and older. Compiled by Home Age Fit from NFSI 101-C standard (2023)4 and Rosen, Mack, and Noonan, Journal of Injury and Violence Research, 2013.3

Weight, Pile Density, and Edge Profile: Physical Properties That Resist Movement

Backing material gets most of the attention, but a rug’s pile construction and its edge geometry shape how well the backing actually functions day to day. A heavy, dense pile holds the backing flat against the floor more consistently than a thin or loosely woven pile does. And the edge profile determines whether the rug trips someone six months from now, after the backing has softened and the corners have started to lift.

Weight and Pile Density

Pile weight is typically expressed as grams per square meter, or GSM. A higher GSM means more fiber packed into the same surface area, which translates to a denser, heavier rug. In practice, a denser pile distributes the rug’s weight more evenly across the backing, keeping the backing in consistent, flat contact with the floor rather than allowing portions of it to lift between footsteps.

Bath rugs commonly range from about 700 GSM on the lighter end to 1,400 GSM or above for heavier chenille and microfiber constructions. Rugs in the 1,000-1,400 GSM range sit noticeably flatter than thinner counterparts. This matters most at the edges: a heavier pile resists the edge lift that develops in lighter rugs when the center is compressed repeatedly by foot traffic but the border retains its original thickness and curls upward.

There is no authoritative government or industry standard specifying a minimum GSM for bathroom rug stability. The GSM guidance in retail product descriptions reflects manufacturer and retail convention rather than a tested safety threshold. What you can do: lift a rug at a corner before buying and check how readily it holds a curl. A rug that stays flat when you release it has enough body to resist edge lift in use. One that curls immediately at the corner is likely to do the same thing on the floor within weeks.

Pile height, separate from density, also plays a role. A very high pile (above about 30mm) can reduce the effective contact area of the backing with the floor, because the rug’s mass is distributed higher and the backing area directly under the foot is smaller relative to the pile mass. For bathroom use where stability is the priority, a shorter to medium pile (10-25mm) with high GSM performs better than a thick shag at the same weight.

A light blue textured anti-slip bath mat placed flat on tiled bathroom flooring in front of a glass shower enclosure, next to a wicker hamper and wooden shelving.
A light blue textured bath mat in the exit zone in front of a glass shower. A mat sized to cover the full stepping area from the shower door to the open floor keeps wet feet on the rug, not on bare tile.

Edge Profile and Trip Risk

The edge is where most bathroom rug failures announce themselves. A rug that grips well underfoot can still become a hazard if its border curls upward and catches a foot on the way out of the shower. The profile of the rug’s edge, specifically how the pile thickness tapers at the border, determines how the rug behaves as the backing softens over time.

A beveled or tapered edge is thinner at the outer border than at the center, so the transition from rug surface to bare floor is gradual rather than abrupt. When the backing softens and loses some stiffness, a beveled edge remains relatively flat because there is less pile height at the border to lift. A squared, thick edge keeps its full pile height all the way to the border, which means any backing deformation at the corner creates a raised lip that sits above the floor surface at an angle.

The trip hazard threshold for a raised floor surface in residential settings is often cited around 6mm (roughly a quarter inch) for abrupt changes. A curled rug corner frequently creates a raised edge of 8-15mm, well above that range, in a high-frequency traffic zone. The risk is compounded by the movement pattern involved: stepping out of a shower or tub typically involves a forward-and-down motion with limited visibility of the floor, especially in low lighting. A person does not look down at the rug edge while stepping out. They assume it is flat.

When evaluating a rug in person or from a product image, look at whether the edge profile tapers visibly toward the border. If the pile appears to end at a uniform height all the way to the edge, the rug relies on the backing staying stiff and flat to prevent curling. For a bathroom, that is a condition that degrades with every washing and every month of humidity exposure.

The combination of latex foam backing and a squared edge profile creates compounding failure risk. The foam softens through washing, reducing grip; simultaneously, corners lift as the foam loses stiffness at the perimeter while the center compresses under foot traffic. Choosing a rubber or PVC backing with a beveled edge avoids both failure modes independently.

Absorbency, Drying, and Surface Compatibility: How Moisture and Floor Type Change the Equation

Absorbency and grip are related but separate properties. A highly absorbent rug does not automatically stay in place, and the trade-offs between how quickly a rug dries and how well it grips under damp conditions shape which materials work best in the bathroom exit zone.

Absorbency and Moisture Management

High-absorbency pile materials, microfiber and looped chenille in particular, pull water off wet feet quickly and hold it in the pile fibers rather than letting it pool on the surface underfoot. This is a genuine comfort and safety benefit: less water on the standing surface means less water between your feet and the rug, which maintains traction between foot and rug pile.

The problem shows up at the backing level. When a thick, highly absorbent rug becomes fully saturated, its total weight increases significantly. This additional mass can reduce the effective friction between the backing and the floor, particularly if the backing material has softened or if the floor surface is smooth and the backing is already working at the lower end of its friction range. A very heavy, wet rug on a smooth ceramic floor with a latex foam backing is at greater risk of shifting than a moderately absorbent rug with rubber backing on the same floor.

Drying speed is the related variable. A rug that dries slowly between uses stays damp for hours. A damp backing on a smooth floor does not grip as well as a dry one. If your bathroom rug stays wet until the next morning, it is spending significant time in a reduced-grip state. Thinner rugs and those with open-weave or mesh-like pile structures dry faster. Hanging a rug over the shower rod or a towel bar between uses, while impractical for many households, allows both sides to dry evenly and extends the effective life of any backing material.

Surface Compatibility by Floor Type

Not all backing materials grip equally well on all floor surfaces. Smooth ceramic and porcelain tile gives rubber and PVC backings a reliable surface to grip because the tile surface is flat, consistent, and relatively uniform. On this surface type, both rubber and PVC grid backings perform well, and the selection comes down to other factors (washing preferences, latex sensitivity, color transfer concerns).

Luxury vinyl tile (LVT) and luxury vinyl plank (LVP) introduce two variables. First, some LVT products have a surface coating that is slightly softer than ceramic. Natural rubber conforms to this surface well and grips firmly. PVC grid backings also work on most LVT, but certain formulations of PVC can react chemically with the plasticizers in vinyl flooring over months of contact, causing surface softening or discoloration of the floor. This is not universal, but it is worth checking the flooring manufacturer’s guidance before placing a PVC-backed rug permanently on LVT. The safest approach on LVT for long-term installation is natural rubber or a rug pad specifically rated for vinyl compatibility.

How to Size a Bathroom Rug for the Exit Zone

Most bathroom rugs are sized for appearance. The result is a rug that sits in roughly the right area but does not actually cover the zone where wet feet land when stepping out of the shower or tub. Sizing for the exit zone is a different calculation, and getting it right means fewer wet bare-tile steps between the shower and the towel.

The exit zone is the floor area your feet contact immediately after you step over the threshold of the shower or tub. For a standard tub-shower combination, this zone is typically 18-24 inches in front of the tub edge and 24-30 inches wide. For a walk-in shower with a door, the zone extends from the door threshold forward to where you stand to towel off, which is often 30-36 inches of depth depending on how far you step before stopping.

Standard bathroom rug sizes run 17×24 inches (most common) and 21×34 inches. The 17×24 covers the step-out area for a standard tub but falls short for walk-in showers, where the exit step carries you further from the wall. The 21×34 or 24×36 covers the exit zone for most shower configurations. For elongated or double-door showers, a 24×60 runner or two rugs end-to-end may be necessary.

Sizing too small creates a specific problem: the rug’s far edge sits in the area where you stand while drying, which means one or both feet are on bare tile during the toweling routine. This is a different risk from the exit step itself. Standing on one foot while drying the other on an unsupported surface, with wet tile around the rug’s perimeter, is exactly the instability scenario a well-sized bathroom rug is meant to prevent.

When measuring, do not size to the room. Size to the movement. Stand in front of your shower or tub and note where both feet land after you step out, how far forward you step before stopping, and how far to each side your feet move during toweling. That rectangle is your rug’s minimum coverage area. If the largest standard rug size does not cover it, two adjacent rugs with non-slip backing on both, positioned so their edges meet without a gap, is preferable to one undersized rug with bare tile at the edges.

Which Rug Fits Your Situation

The right bathroom rug depends on floor surface and whether household members have specific allergy considerations. These profiles cover the most common combinations.

Smooth Ceramic or Porcelain Tile Floor

Natural rubber or PVC grid backing works well here. Either provides strong wet grip on the consistent, flat surface of factory-finished ceramic tile. If the bathroom is used by someone who steps out slowly or transfers weight carefully on exit, a heavier rubber-backed rug (1,000 GSM and above) with a beveled edge gives the most stable and durable combination. For households concerned about color transfer from rubber onto grout or lighter tile, a PVC grid backing avoids that issue entirely.

Luxury Vinyl Tile or Vinyl Plank Floor

Natural rubber is the safest long-term choice on LVT and LVP. It grips reliably, does not typically damage vinyl surfaces, and does not introduce the plasticizer-compatibility question that some PVC backings raise. Before installing any rug permanently, confirm the flooring manufacturer does not restrict rubber-backed accessories, as this guidance varies by product line. If the vinyl is relatively new or expensive, placing a thin rubber rug pad rated for vinyl use between the rug and floor, rather than relying on the rug’s own backing alone, gives an extra layer of surface protection while maintaining grip.

Household with a Latex Sensitivity

Latex foam backing is the concern here. Natural rubber, nitrile rubber, and PVC grid backings carry no processed latex allergens. For severe latex sensitivities, verify with a physician before selecting any backing type, since individual responses vary. Natural rubber and PVC options deliver equivalent or better grip than latex foam on wet tile.

Large Walk-In Shower or Wide Exit Zone

A single 21×34 or 24×36 rug may not cover the full exit footprint of a wider shower. A 24×60 runner with rubber or PVC backing is the cleanest solution when the shower threshold is wider than about 30 inches. Runners in this size range are available in both rubber-backed and PVC-backed construction. Confirm the runner lies completely flat before use; a long rug with any lateral bow or buckle in the middle is a trip hazard longer than a small bath mat with curled edges.

Frequently Asked Questions

What is the difference between a non-slip and an anti-slip bathroom rug?

The terms are interchangeable in retail marketing and carry no standardized technical definition. Neither label specifies backing material, floor compatibility, or grip force under wet conditions. Falls account for 81.1 percent of nonfatal bathroom injuries in U.S. emergency departments.1 What matters is backing type, floor surface match, and whether the edge profile stays flat as the backing ages, not what the label says.

Does a heavier bathroom rug stay in place better?

Within the same backing type, yes. A denser, heavier pile (higher GSM) holds the backing flat against the floor more consistently and resists edge lift better than a lighter construction does. The effect is most visible at the corners. Backing material still decides the base level of grip; weight helps maintain that grip uniformly across the rug’s surface and edges over time.

How often should I replace an anti-slip bathroom rug?

Replace it when the backing shows signs of failure, not on a fixed schedule. Warning signs include corners that curl back after you press them flat, backing that feels hard or cracked rather than grippy, and a rug that slides on a surface where it previously held. Latex foam backings typically show these signs within 12-24 months of regular bathroom use. Rubber backings last longer under the same conditions.

Can I use a non-skid bathroom rug on luxury vinyl plank flooring?

Natural rubber-backed rugs generally work well on luxury vinyl plank. Some PVC grid backings can react with vinyl plasticizers over extended contact, potentially softening the flooring surface. Check the LVP manufacturer’s accessory guidance before committing to a PVC-backed rug on new or expensive flooring. A rug pad specifically rated for vinyl compatibility provides an additional protective layer under any rug type.

How do I wash a non-slip bath mat without damaging the backing?

Machine wash in cold or warm water on a gentle cycle. Avoid hot water and tumble drying on high heat; both accelerate backing degradation in latex foam and harden natural rubber faster than cool washing does. Air drying over a shower rod or towel bar lets both sides of the mat dry fully before it returns to the floor, which extends backing life and prevents moisture accumulation under the rug.

Limitations and Edge Cases

  • This article covers rugs and mats placed in the bathroom exit zone, outside the shower or tub. For traction surfaces placed inside the shower or tub (suction-cup mats, adhesive anti-slip strips, pebble inserts), surface compatibility and installation criteria differ significantly.
  • GSM values come from manufacturer labeling and retail convention, not from an independent standardized test for stability. Treat GSM comparisons as directional, not as certified stability ratings.
  • NFSI certification is a U.S.-based program. Equivalent traction standards and testing bodies exist in other countries; verify your regional standard before selecting a rug based on a U.S. traction classification.

References

  1. CDC / Morbidity and Mortality Weekly Report – Nonfatal Bathroom Injuries Among Persons Aged >=15 Years, United States, 2008. Judy Stevens et al. Vol. 60, No. 22, June 10, 2011.
  2. National Council on Aging (NCOA) – Get the Facts on Falls Prevention. Updated 2024-2025. Cites 2021 surveillance data from CDC and related federal sources.
  3. PubMed Central / Journal of Injury and Violence Research – Rosen T, Mack KA, Noonan RK. Slipping and tripping: fall injuries in adults associated with rugs and carpets. Journal of Injury and Violence Research. 2013 Jan;5(1):61-69. Loose-rug prevalence data (78% of homes) cites Gill TM et al., American Journal of Public Health, 1999;89(4):553-6.
  4. National Floor Safety Institute (NFSI) via AcroMat – NFSI 101-C Test Method for Measuring Dry TCOF of Floor Mat Backing Materials; traction zone thresholds and slip-risk reduction data confirmed November 13, 2023 by Russell Kendzior, NFSI President. Published November 27, 2023.

Conclusion

An anti-slip bathroom rug stays put or it doesn’t based on the interaction between backing material, floor surface, pile weight, and edge geometry. A “non-slip” label on the package does not tell you which of those properties the rug actually delivers, or whether it will still deliver them after six months of washing and humidity exposure. Selecting by backing type first, then verifying floor compatibility and sizing to cover the full exit zone, is a more reliable approach than trusting the label.

For a broader look at how bathroom rug selection fits into surface traction decisions across the home, see the slip-resistant flooring overview for how this fits the wider topic of safer home surfaces.
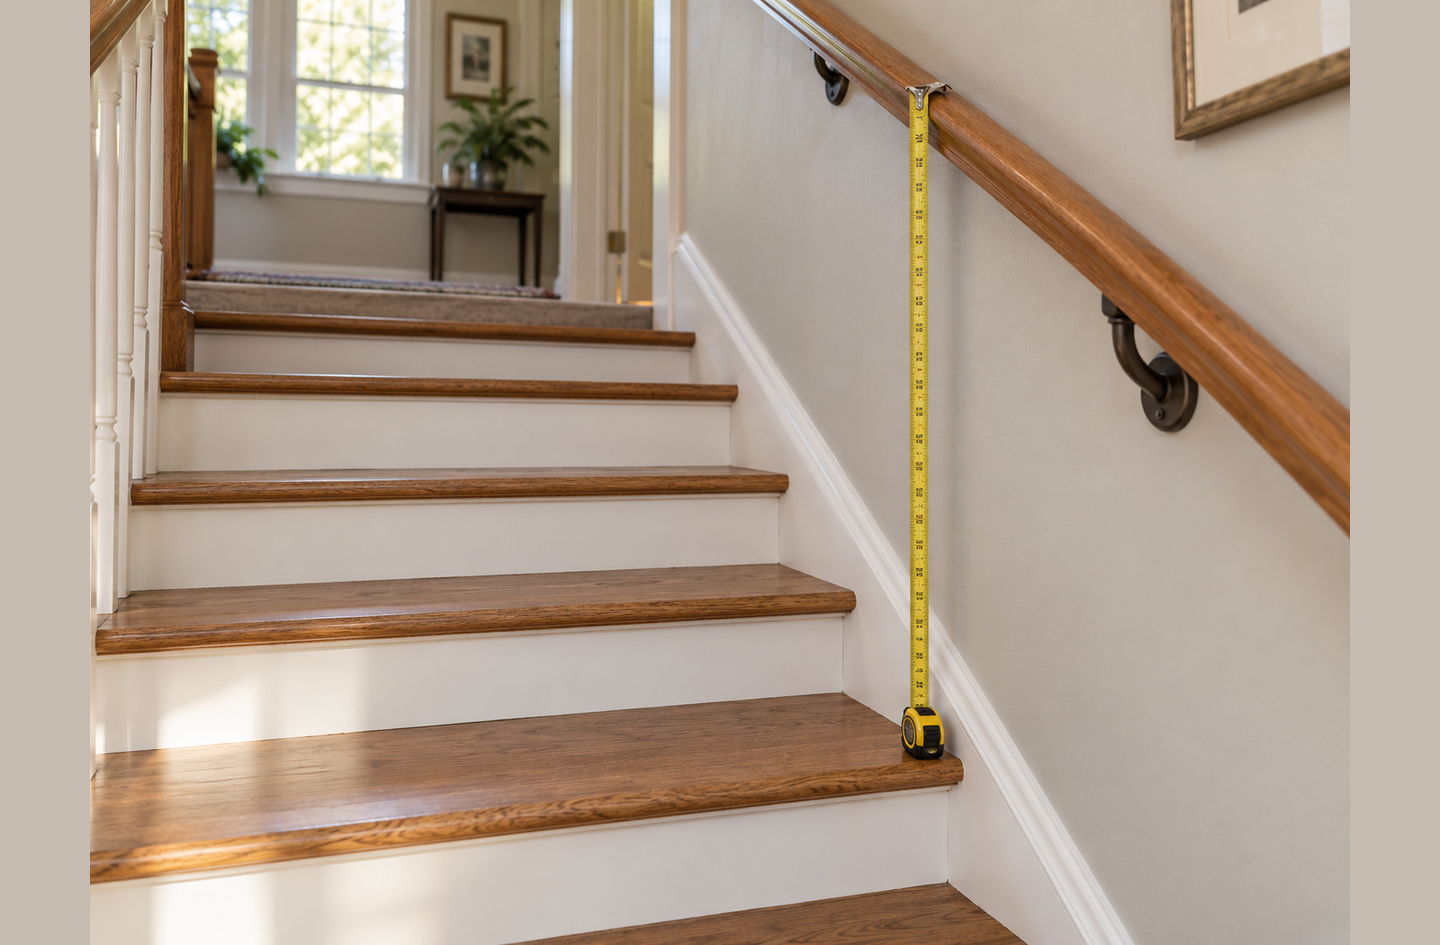
Bed Steps for Elderly Adults: When They Help and When They Add Trip Risk

Author: Oded Feigin · Created On: September 01, 2026 · Last Updated: September 01, 2026

Bed steps for elderly adults appear on a lot of shopping lists when a mattress sits too high for a safe transfer. The reasoning is direct: add a step, reduce the height the foot must clear, make getting in and out easier. But bed steps also place a raised object on the bedroom floor, often in a route used in low light at night. The bedroom is already the single most common indoor fall location for older adults, accounting for 25 percent of at-home falls that result in emergency visits.3 Our Bedroom Safety Planning overview explains how transfers and nighttime routes fit into a full room-by-room review. This article focuses on the specific decision: when do bed steps help, and when is the floor safer without them?

Two-tier bedroom safety step stool with a support handle and textured treads beside a bed
The handle extending above the step platform gives a bracing point at the highest-risk moment in the sequence, when body weight shifts fully onto one leg during the step-up. A step without a handle places the entire balance demand on the user.

Quick Answer

When do bed steps for seniors actually help, and when do they increase risk?

Bed steps help when a mattress is genuinely outside the safe transfer height range (roughly 20 to 23 inches from the floor to the top of the mattress) and the user has steady balance, enough lower-body strength to step reliably, and a placement that keeps the step out of the nighttime walking path.5 They add risk when they sit in a dim path, when the user has balance or vision problems, or when a simpler fix such as lowering the bed frame would solve the height problem without placing anything on the floor.

Key Takeaways

  • The bedroom is the single most common indoor fall location for older adults. For adults 85 and older, it accounts for 31.6 percent of at-home emergency visits for falls.3
  • About 34.4 percent of bed-related falls occur during transfers into and out of bed – exactly when a bed step is in use.2
  • A safe transfer height generally means the mattress top sits 20 to 23 inches from the floor, with both feet flat and knees at roughly 90 degrees when seated on the edge.5
  • Alternatives such as lowering the frame, removing the box spring, or adding a transfer rail often correct the height problem without leaving an obstacle on the floor.

Quick Comparison: Bed Steps vs. Common Alternatives

Before examining each factor in depth, this table shows how bed steps compare to the most practical height-correction alternatives on the criteria that matter most for bedroom safety.

FactorBed StepsLower the FrameLow-Profile Base or MattressBed Rail or Transfer Pole
Adds an object to the walking pathYes, placed at bedsideNoNoRail can fold flat; pole stands at bedside
Reduces overall bed heightNo (user still descends the same distance)Yes, permanentlyLowers sleep surface heightNo
Requires balance on a raised surfaceYes, during each useNoNoNo
Provides a handhold during transferSome models onlyNoNoYes, purpose-built for grip
Typical cost range$30 to $150Often $0 to $60 for leg swap on adjustable frames$100 to $600 and up$30 to $200
Fully reversible without a new purchaseYesUsuallyNo (new component required)Yes
Best fitSteady-footed user, frame not adjustable, step fits away from the nighttime routeAdjustable or platform frames with removable legsFull mattress or base replacement cycleTransfer support needed regardless of height

When a Bed Is Too High: The Problem Bed Steps Are Meant to Solve

A bed outside the safe transfer height range creates real physical difficulty. When the seat is too high, the knees start less flexed, which reduces the mechanical advantage of the quadriceps during the push-up phase. When it is too low, the knees flex past 90 degrees, demanding more quad force. A bed that is significantly too high is the problem that bed steps are built to address.

How to check your mattress height for transfer safety

Sit on the edge of the mattress with shoes off and feet resting flat on the floor. If your knees are at roughly 90 degrees and both feet make full contact without reaching or dangling, the height is near optimal. The NCOA recommends the top of the mattress sit 20 to 23 inches from the floor for most adults, describing the target as a position where feet are flat with knees bent at about 90 degrees.5 Clinical research puts the optimal transfer height at approximately 120 percent of the user’s lower-leg length, measured from the floor to the back of the knee while seated.6 A bed consistently above that threshold creates a longer, less controlled descent on exit and demands more eccentric quad work on every transfer.

Measure from the floor to the sleeping surface, not to the frame rail. Mattress heights vary more than most people expect. A queen-size memory foam mattress with a thick euro-top can sit three to five inches higher than a basic innerspring at the same label thickness, because dense foam compresses slowly and the nominal measurement reflects the uncompressed state. When stacked on a standard box spring and frame, the total height can reach 28 to 32 inches, well above the NCOA-recommended range for most adults.

Signs the height is actually the problem

Height is the issue when the user reaches for a wall, doorframe, or piece of furniture to get up from the mattress edge, or when lowering from sitting to lying requires a controlled drop rather than a gradual descent. Feet that dangle when seated on the mattress edge are a clear height signal: solid floor contact is necessary to generate the push-up force safely.

If the user can sit with feet flat but still struggles during the push-up or lowering phase, a different problem may be the primary one. Reduced upper-body strength, hip pain, or proprioceptive changes can make transfers difficult even at a correctly matched bed height. In that case, height correction alone – whether by steps or by lowering the bed – will not resolve the issue. An occupational therapist can assess transfer mechanics for a specific person and mobility history, which is worth arranging before committing to a product-based fix.

What to Look for in Bed Steps for Elderly Adults

Bed steps are genuinely useful in a specific situation: a bed that is too high, a frame that cannot be lowered, and a user with stable balance and enough lower-body strength to step reliably. Within that situation, the product’s individual features determine whether it works safely or creates a new set of friction points.

Step height and the number of tiers

The most common designs use one or two tiers. A single-tier model raises the user’s foot six to eight inches; a two-tier model breaks that same total height into two smaller increments of four to five inches each. The right number of tiers depends on how far above safe transfer height the bed sits. If the bed is only four to six inches too high, a single step may cover the gap. If the height difference is larger, two tiers distribute the transition into smaller, more manageable lifts.

The distance from the floor to the first step platform is the measurement that matters most. A first step that is itself too high recreates the original problem in miniature – the user must still lift the foot a significant distance before reaching the benefit. Evaluate the first-step height against the user’s comfortable step-up ability. A standard interior stair step is typically seven inches; a bed step that matches or falls below that range is more accessible for most adults. Steps marketed at eight or nine inches for the first tier can be challenging for someone with hip or knee limitations.

Platform depth matters as well. A step that is too shallow front-to-back forces the user onto a partial footfall, shifting their center of mass and reducing stability during the transition. Accessible stair design guidance generally calls for a tread depth of at least 11 inches. Bed step products vary widely on this dimension, and it is rarely featured prominently in product listings. Measure before purchasing.

Platform size and nonslip surface

A useful platform supports the full foot, not just the forefoot. When the platform is too narrow front-to-back, the heel may hang off during the mid-step pause, which shifts the user’s weight rearward and increases the chance of a backward loss of balance. A platform that accommodates the user’s full foot length – typically at least 11 to 12 inches for most adults – reduces that risk.

Nonslip surfaces matter most in the footwear most likely to be worn during a bedside transfer: socks or soft-soled slippers. Look for textured rubber or rubberized foam treads rather than smooth plastic. Some models apply grip tape to a smooth surface; that tape can peel at the edges over time, creating a curled edge that is itself a trip hazard, so inspect it periodically. On hard floors, rubber feet provide adequate grip when the surface is dry. On carpet, a wider base footprint holds position better than narrow rubber tips. Test lateral stability before finalizing placement by pressing gently to the side under load.

Handholds and grip support

Some bed step models include a vertical handle that extends above the platform, typically rising to around waist or chest height when standing. A handle changes the safety calculus considerably. Without one, the user relies entirely on their own balance and lower-body strength through the step transition. With a well-positioned handle, they have a bracing reference at the moment of maximum instability: the single-leg stance mid-step.

Handle position matters as much as handle presence. A grip placed too low offers little during the upward phase. A grip too high requires shoulder elevation and can shift the user’s center of mass before the step is complete. For most adults, a handle at roughly hip-to-waist height while standing on the first step provides the most useful bracing geometry. Models that include an adjustable-height handle are preferable when multiple household members use the step.

A floor-to-ceiling transfer pole provides a sturdier and more versatile handhold at the bedside without the step platform itself. See the guide on transfer poles beside the bed for how pole placement and load requirements differ from a step-mounted handle.

A three-step bedside staircase with an integrated handrail positioned beside a bed, showing gray-textured step treads and a black frame resting on a bedroom rug.
A three-step configuration with an integrated handrail; taller beds with a larger height gap may benefit from this additional tier, though a larger footprint increases the floor area occupied in the bedroom.

Where Bed Steps Add Risk

The same features that make bed steps useful during a planned, daytime transfer become liabilities in the context most likely to cause a fall: a nighttime trip to the bathroom, in low light, in a half-awake state. An estimated 320,751 bed-related injuries reach U.S. emergency departments each year, with 34.4 percent occurring during transfers.2 Among older adults who fell from beds in one clinical study, 87 percent required hospital admission and 41 percent were discharged to a skilled nursing facility rather than home.9 Hip fractures, one of the most serious consequences of a fall, affect approximately 319,000 older adults annually in the United States, and 88 percent of those cases stem from falls.7

“It’s a fact that older adults are far more likely to experience a significant injury, or fatality, from the hidden hazards associated with consumer products in their homes than other age groups.”

Alex Hoehn-Saric, Chair, U.S. Consumer Product Safety Commission8

The nighttime floor obstacle problem

A bed step occupies floor space that is part of the nighttime route from the bed to the bathroom. Waking to use the bathroom is common, and frequency increases with age. Nocturia three or more times per night is associated with a 28 percent higher risk of a fall within three years, based on a prospective cohort study of 692 community-dwelling older adults followed over 36 months.4 Adding a raised obstacle to that path – even a small, well-intentioned one – increases the risk during the highest-frequency, lowest-alertness moments of the day.

The problem compounds when the step drifts even a few inches away from the bed frame. Steps not anchored to the bed or floor can shift during use, making their position unpredictable for the next trip. Folding or removable designs partially address this: the step can be stored after the morning transfer. In practice, that requires a consistent routine that may not hold when fatigue or an unplanned nighttime waking interrupts the habit.

Balance demand on the step

Stepping up and stepping down both require at least one moment of single-leg stance: the foot lifts to the platform while the other foot remains on the floor, or the stepping foot lands on the floor while the other foot is still on the platform. During that transition, the entire body weight is on one leg. For a person with reduced proprioception, lower-limb weakness, or any degree of vestibular impairment, that single-leg phase is the highest-risk point of the sequence.

The physical demand differs from walking on flat ground. A misstep on a level floor triggers a reactive correction. A misstep on a step in the downward direction means a fall from an elevated surface. A bed rail designed for transfer support can provide grip during the same transition without requiring the user to navigate a raised platform. The bed rail selection guide explains the compatibility considerations that determine whether a given rail works with a specific bed and mattress.

Visibility and placement in low light

A bed step is most useful when the user can see it clearly and approach it deliberately. At 2 a.m., in a dark room, after waking from sleep, the step transitions from a purposeful aid to an object in the path. Standard step colors – black, white, or dark brown frames – have low contrast against most bedroom flooring in low light. A user who is not thinking specifically about the step may contact it unexpectedly and lose their footing.

Night lighting at bed level reduces this risk but introduces a dependency. If the light fails or the bulb burns out, the step reverts to an invisible obstacle. A well-placed, motion-activated night light at floor level is better than a fixed plug-in that leaves shadows at the step edge. Our article on bedside commode placement addresses similar nighttime-route tradeoffs for users who also have a commode in the room – a setup that compounds the number of floor obstacles to navigate at night.

Where Older Adults Fall Indoors, by Age Group Grouped column chart showing percentage of home falls by indoor location for three age groups. Ages 65-74: Bedroom 19.8%, Stairs 30.0%, Bathroom 19.8%. Ages 75-84: Bedroom 24.2%, Stairs 22.2%, Bathroom 22.5%. Ages 85 and older: Bedroom 31.6%, Stairs 16.0%, Bathroom 26.1%. Data: American Journal of Lifestyle Medicine, 2020, based on 2015 US National Hospital Ambulatory Medical Care Survey, n=38,654 emergency department records. Home Age Fit analysis, 2026. Where Older Adults Fall Indoors, by Age Group 0% 10% 20% 30% 19.8% 30.0% 19.8% Ages 65-74 24.2% 22.2% 22.5% Ages 75-84 31.6% 16.0% 26.1% Ages 85+ Bedroom Stairs Bathroom Source: Home Age Fit analysis, 2026
Bedroom falls grow from 19.8 percent of indoor falls at ages 65-74 to 31.6 percent at 85 and older, surpassing stairs and becoming the dominant indoor fall location with age; data from a 2015 nationally representative U.S. sample of 38,654 emergency department records, compiled by Home Age Fit from the American Journal of Lifestyle Medicine, 2020,3 and National Center for Injury Prevention data.

Safer Alternatives to Consider First

Before placing a step on the bedroom floor, it is worth asking whether the bed height problem can be solved without adding any new floor obstacle. Several alternatives address the same root cause while leaving the walking path clear.

“Taking a few minutes to identify areas to increase support can help prevent accidents.”

Emily Nabors, Associate Director of Innovation, NCOA Center for Healthy Aging5

Lower the bed frame

Many platform and adjustable bed frames have legs that unscrew or slot into height-adjustable inserts. A bed that is two to four inches too high for a safe transfer can sometimes be brought into range by shortening or swapping the legs without purchasing anything else. Check whether the legs detach, whether the bed sits on a height-adjustable rail, or whether the slat system is bolted to an adjustable-height bracket. This is the lowest-cost, lowest-risk correction for frames that allow it.

For frames with fixed-height legs, shorter replacement legs are available for most standard thread patterns and typically cost less than a quality bed step. Measure leg diameter and thread pitch carefully before ordering. If the frame uses a solid welded base, the frame itself may need to be replaced, at which point a low-profile platform frame is worth pricing.

Remove the box spring or change to a low-profile base

A traditional box spring adds eight to nine inches to the overall mattress height. Replacing it with a low-profile box spring (three to four inches) or a solid wood platform eliminates that extra height entirely. This is one of the single most effective height corrections for beds with a conventional mattress-and-box-spring setup. It costs less than a quality bed step and leaves nothing on the floor.

If the frame requires a box spring for structural support, a bunkie board or solid platform insert substitutes while providing the necessary base. A thick memory foam mattress can sit three to five inches higher than a standard innerspring at the same nominal height, because dense foam compresses slowly and the label reflects the uncompressed measurement. Replacing a worn mattress with a lower-profile model addresses both the mattress and the height problem at the same time.

Use a transfer aid rather than a step

If the difficulty during transfer is not height but rather the effort of the push-to-stand motion, a transfer aid may solve the issue more directly. A bed rail with a solid handhold reduces the upper-body effort required to push up from the mattress edge. A floor-to-ceiling transfer pole provides a vertical grip for pulling and steadying without requiring the user to step onto a raised platform. Neither of these places an elevated surface in the walking path, and both provide continuous grip access throughout the transfer – not just at the step moment.

The transfer pole guide covers placement, grip height, and load requirements in detail. The guide on bed rails for transfer support explains the difference between a rail used as a handhold and one used as a repositioning barrier, and works through compatibility considerations by bed and mattress type. Both aids address the grip deficit that makes transfers difficult without adding a step to the floor.

Who Should and Should Not Use Bed Steps

Bed steps are not universally helpful or universally harmful. The decision comes down to four conditions that should all be true at the same time: the bed is genuinely outside the safe height range, the user has the balance and strength to use a step reliably, no simpler correction is available for this specific bed, and the step can be placed without entering the nighttime walking path.

Each year, more than 14 million older adults aged 65 and older report falling at least once.1 The bedroom accounts for a disproportionate share of those falls, and the transfer moment is the highest-risk point in the room. That context argues for the most obstacle-free solution available. When a simpler fix exists, it is generally worth pursuing first.

Bed steps are a reasonable option when all of the following apply:

  • The mattress top sits above 23 to 24 inches from the floor, and the frame cannot be meaningfully lowered.
  • The user has stable bilateral balance on flat ground, no significant lower-extremity weakness, and no diagnosed vestibular disorder or severe visual impairment.
  • The step can be placed flush against the bed frame, outside the direct nighttime path to the door or bathroom.
  • The step unit includes a handle at a useful grip height, or a separate transfer rail or pole provides the handhold at that same bedside position.
  • The floor beneath the step is flat and stable, with no rug edge, carpet-to-hard-floor transition, or loose mat in the immediate area.

Bed steps are likely to add more risk than they resolve when any of the following apply:

  • The user wakes frequently at night and navigates the bedroom in dim or no light.
  • Balance, coordination, or lower-limb strength has changed to the point where single-leg stance on a raised surface is not reliable.
  • A simpler correction – shorter frame legs, a thinner base, or a transfer rail – would address the height or push-up problem without a floor object.
  • The bedroom layout leaves no placement for the step that is both accessible for transfer and clear of the nighttime route.
  • The user already uses a walker or rollator, which may catch the step edge or require a repositioning stop before the transfer.

When a bed step is the selected approach, it works best alongside adequate nighttime lighting along the route, a clear floor from the bed to the door, and a grab surface – a rail, a pole, or a stable nightstand edge – to assist the final push to standing. The step solves the height gap. The other elements address the nighttime-route and transfer-strength issues that exist alongside it.

Frequently Asked Questions

How high should a bed be for safe transfers for older adults?

The NCOA recommends the top of the mattress sit 20 to 23 inches from the floor, with both feet resting flat and knees at roughly 90 degrees when seated on the edge.5 Clinical research places the optimal transfer height at approximately 120 percent of the user’s lower-leg length.6 Measure from the floor to the sleeping surface rather than to the frame rail, since mattress thickness and base height vary significantly by product.

Are bed steps safe for seniors with balance problems?

Not generally. Bed steps require single-leg stance during the step-up and step-down, which is the highest-risk moment in the sequence. A person with reduced balance, vestibular impairment, or lower-limb weakness is more likely to benefit from a transfer rail or floor-to-ceiling pole that provides continuous grip support, rather than a raised platform that adds a balance challenge on top of the height challenge. An occupational therapist can evaluate which aid fits a specific person’s situation.

What is the difference between a bed step and a bed rail?

A bed step raises the user’s foot toward the mattress level and is used as a platform during entry and exit. A bed rail attaches to the bed frame and provides a handhold grip but does not change the approach height. Many users need grip support but not a height bridge; for them, a rail addresses the actual problem without adding a raised surface to the floor. Some bed step models include a built-in handle that functions similarly to a rail grip during the step movement, but the rail itself sits beside the bed rather than on the floor.

When is lowering the bed better than adding steps?

Lowering the bed is better whenever it is structurally possible. It solves the height problem permanently without placing a new object on the floor or requiring the user to develop a new balance skill. On platform and adjustable frames with removable legs, the correction often costs nothing or very little. On beds with a conventional mattress and box spring, replacing the box spring with a low-profile version (three to four inches rather than eight to nine) is usually the highest-value, lowest-disruption correction available.

What floor surfaces are safest under a bed step?

Hard floors with a clean, dry surface are generally the most stable for bed steps with rubber feet. On carpet, a step with a wider base footprint holds position better than narrow rubber tips, which can sink or pivot in pile. Never place a bed step on a loose rug or over a rug edge: the step base can catch the edge and tip, or the rug can slide under the step. If the available floor surface is carpeted and the pile is thick, test lateral stability before each use by pressing gently to the side under load before committing weight.

Limitations and Edge Cases

  • This article covers standard freestanding bed step units. It does not address motorized adjustable bed bases that change height electronically, which resolve the height problem through a different mechanism entirely.
  • The 20 to 23 inch height range is a general guideline for typical adult proportions. Taller or shorter individuals may have a different optimal transfer height based on lower-leg length, and an occupational therapist can measure this precisely for a specific person.
  • Users who transfer laterally into a wheelchair rather than standing vertically face a different set of requirements. For that scenario, the spoke on bed rails for transfer support covers compatible rail types for lateral sliding transfers.

References

  1. NCOA – Get the Facts on Falls Prevention. National Council on Aging, May 2025.
  2. PMC / National Institutes of Health – Trends and Risk Factors for the Hospitalization of Older Adults Presenting to Emergency Departments After a Bed-Related Fall. 2025; NEISS data 2014-2023.
  3. PMC / American Journal of Lifestyle Medicine – A Descriptive Analysis of Location of Older Adult Falls That Resulted in Emergency Department Visits in the United States, 2015. Published August 2020; n=38,654.
  4. PMC / National Institutes of Health – The Association of Nocturia with Incident Falls in an Elderly Community-Dwelling Cohort. PMC3222329; prospective cohort, n=692, 36-month follow-up. 2011.
  5. NCOA – Bedroom Safety for Older Adults: How to Prevent Falls at Home. National Council on Aging, updated August 2026.
  6. PubMed / National Library of Medicine – Bed and Toilet Height as Potential Environmental Risk Factors for Falls in Older Adults. Journal of Nursing Scholarship, 2008. PMID 18184978.
  7. CDC – Preventing Falls and Hip Fractures. Centers for Disease Control and Prevention, 2024.
  8. CPSC – Older Americans Are More Likely to Suffer Fatalities from Falls and Fire. U.S. Consumer Product Safety Commission, March 2022.
  9. PMC / Cureus – Falls From Beds Among Elderly Outpatients: Injuries and Outcomes. Nugent, McCague, Henken-Siefken. April 2024.

Conclusion

Bed steps for seniors solve a real problem when the bed is too high and no simpler height correction is available. They add risk when they sit in a nighttime walking path, when the user’s balance or vision makes a stepped surface unreliable, or when a lower-cost fix – shorter frame legs, a thinner base, or a transfer rail – would address the height or push-up problem without leaving anything on the floor. The bedroom already carries the highest fall risk of any indoor room for older adults, and that context makes the tradeoff worth examining carefully before choosing a product-based fix.

For a broader view of how bed height, transfer position, and nighttime routes fit together, see the overview in Bedroom Safety Planning for how each bedroom element connects to the others.