Comfort Height Toilet vs Standard Height: Which Better Supports Transfers?

Author: Oded Feigin · Created On: August 27, 2026 · Last Updated: August 27, 2026

The height difference between a standard and a comfort height toilet runs 2 to 4 inches. That gap matters more than it first sounds. This article compares both heights on the specific demands of a toilet transfer. For context on bathroom transfer safety as a whole, see the toilet transfer safety overview. For anyone using a grab bar, walker, or wheelchair, those inches shift the angle at the hip, the load on the knee, and the effort of the push-up. Among all nonfatal bathroom injuries treated in U.S. emergency departments, an estimated 14.1% involve the toilet specifically, covering sitting, standing, and using it3.
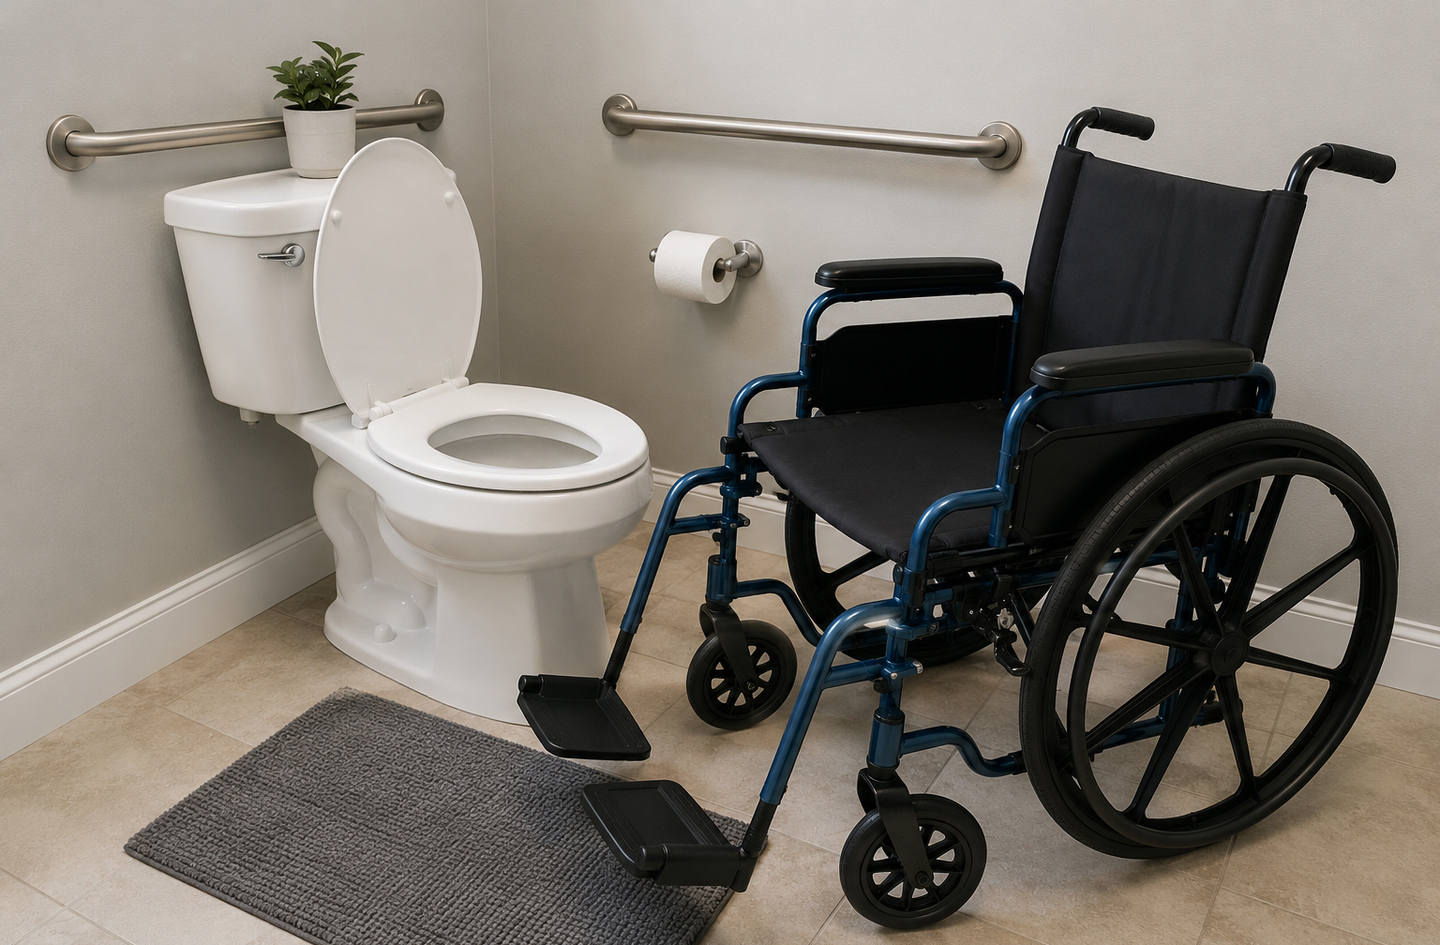
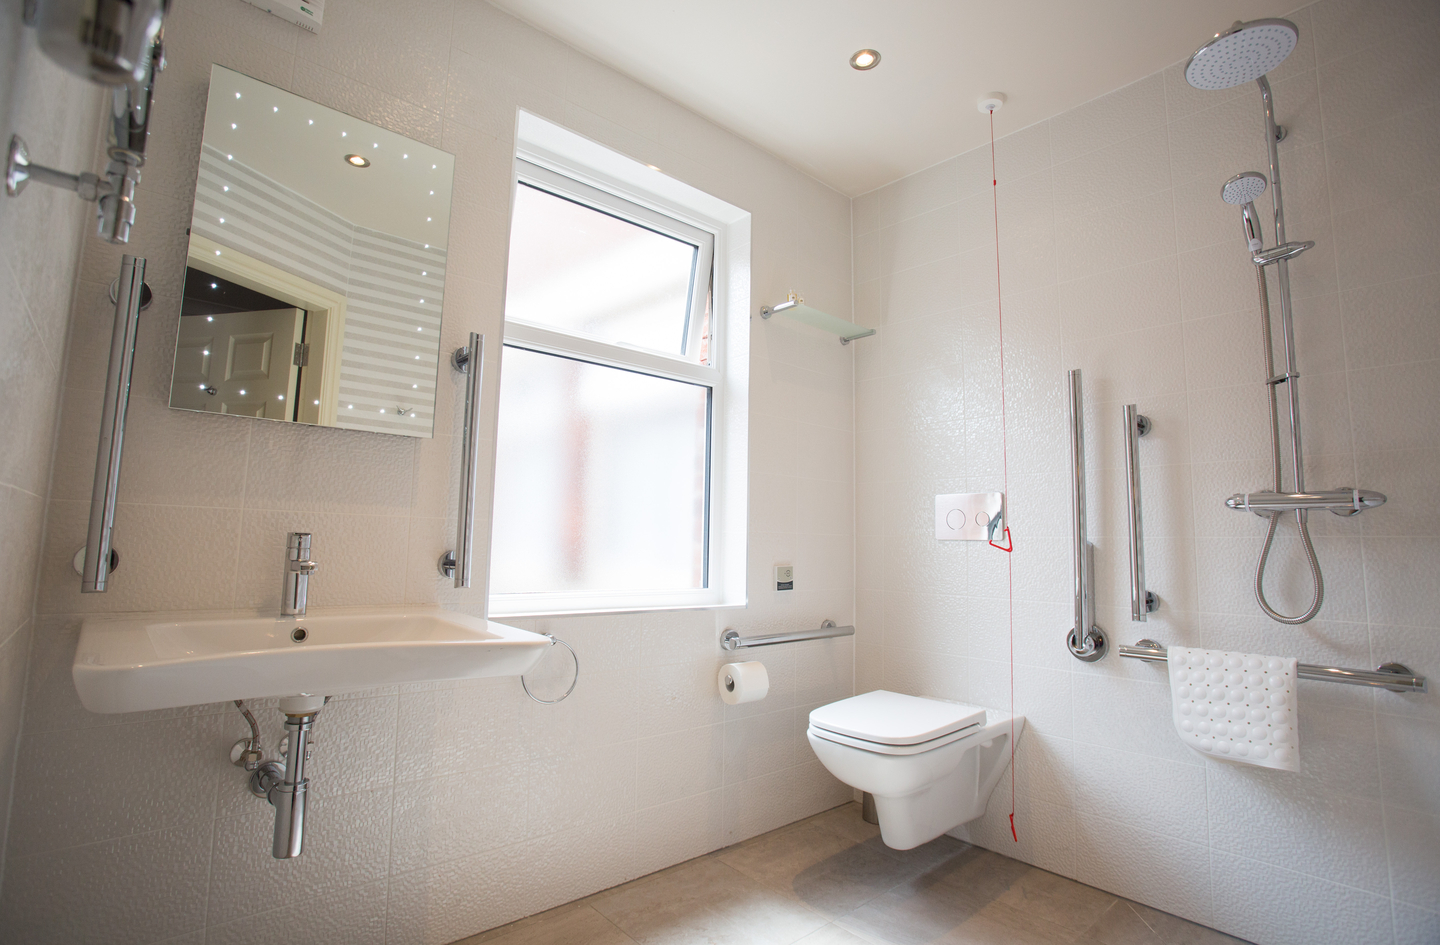
Accessible bathroom showing comfort height toilet vs standard height setup with wheelchair positioned for safe lateral transfer and grab bars on the wall
An accessible bathroom with a toilet at an appropriate seat height and a wheelchair positioned for a lateral transfer. Grab bars on both walls provide support at the critical moment of standing.

Quick Answer

Which toilet height better supports transfers?

For most adults who rely on a grab bar, walker, or wheelchair for part of the transfer, comfort height (17-19 inches) reduces the depth of the sit-to-stand movement, lowers hip and knee joint loading compared to standard height, and aligns with the ADA’s 17-19 inch range for typical wheelchair seat height12. Standard height (15-16 inches) is a better fit for shorter adults and provides a seated position where both feet rest fully flat on the floor. The right choice depends on the person’s height, transfer method, and whether a wheelchair is part of the setup.

Key Takeaways

  • ADA-compliant comfort height toilets measure 17-19 inches from floor to seat top. Standard residential models measure 15-16 inches1.
  • Comfort height aligns with the ADA’s 17-19 inch characterization of typical wheelchair seat height, which reduces the height drop during lateral transfers2.
  • A 2014 biomechanics study found peak hip and knee joint moments are 1.7 times higher at 40 cm (15.7 in) seat height than at 60 cm (23.6 in), confirming a measurable mechanical benefit of added height4.
  • For adults roughly under 5’4″, a comfort height seat may hold the knees above hip level when seated, making the push-up harder rather than easier.
  • A raised toilet seat riser (2-6 inches) fitted to a standard toilet can reach the same effective height without replacing the fixture.

Comfort Height vs Standard: Quick Comparison

The table below compares the two heights across the categories that matter most for a toilet transfer. Values are based on ADA standards and peer-reviewed biomechanics research.

Category Standard Height (15-16 in) Comfort Height (17-19 in)
Seat Height from Floor 15-16 inches (38-41 cm) 17-19 inches (43-48 cm)
ADA Compliance No Yes (when 17-19 in)
Wheelchair Seat Alignment 1-4 in below typical wheelchair Level or near-level with typical wheelchair
Hip and Knee Joint Load (rising) Higher Lower
Foot Contact (average adult, 5’4″-5’10”) Both feet fully flat Both feet fully flat
Foot Contact (under 5’3″) Both feet flat, solid grounding Toes or ball of foot only (partial contact)
Seated Knee/Hip Angle Knees near hip level or below (deeper sit) Knees near hip level (shallower sit)
Lateral Transfer Direction Downhill onto seat, uphill to return Level or near-level both ways
Best For Shorter adults, strong sit-to-stand ability Ambulatory adults with limited knee/hip range, wheelchair users

Height Dimensions and What They Mean

Standard residential toilets typically measure 15 to 16 inches from the finished floor to the top of the seat. This figure is an industry manufacturing convention, not a code-mandated minimum for non-accessible installations. Comfort height toilets, sold under names like “chair height” or “ADA height,” measure 17 to 19 inches, as required by Section 604.4 of the 2010 ADA Standards for Accessible Design1. The practical gap between the two ranges is 1 to 4 inches, depending on which models you compare.

What the seat height number actually measures

Manufacturers quote toilet rim height, which is the distance from the floor to the top of the porcelain bowl before the seat is installed. The seat itself adds roughly 1 to 1.5 inches. A comfort height toilet advertised at 16.5 inches of rim height will sit at approximately 17.5 to 18 inches once the seat is on. Always measure the full seated height in place, not just the bowl dimension on the packaging.

The bowl shape affects sitting position but not seat height. Elongated bowls add 1 to 2 inches of front-to-back length compared to round bowls, which changes how far forward the user sits. That is a separate dimension from height and does not affect the sit-to-stand mechanics covered in this article.

Why the ADA chose 17-19 inches

The ADA did not arrive at 17-19 inches arbitrarily. The standards team modeled seat height against the typical seated height of a wheelchair user during transfer and against the force demands of the sit-to-stand transition for people with limited hip, knee, and ankle range of motion. The result was a floor of 17 inches (enough to reduce transfer strain for most wheelchair users) and a ceiling of 19 inches (past which shorter ambulatory users begin losing foot contact).

Standard height toilets at 15-16 inches were designed for the average ambulatory user with no particular mobility constraint. They serve that use case well. They were not designed with wheelchair transfers or limited joint range in mind, and the height difference shows up clearly in biomechanics research.

Measuring your actual toilet before deciding

If you are weighing a toilet replacement against a riser accessory, measure the seated height of your current toilet with its seat installed. Place a level board across the seat and measure from the floor to the board. That number is your baseline. If it is 15 inches and you want to reach 17 inches, a 2-inch riser does the job without a renovation. If the current height is 13 inches (some older low-profile models), you need at least a 4-inch riser or a replacement to reach the ADA floor.

Sit-to-Stand Mechanics and Joint Load

A toilet transfer involves two phases with different demands on the body. Lowering to sit requires controlled deceleration against gravity. Rising to stand requires generating enough force at the hip and knee to push the body weight upward and forward. The rising phase is where seat height matters most for people with limited joint capacity.

What the biomechanics research shows

A 2014 study published in BioMedical Engineering OnLine by Yoshioka and colleagues directly measured peak hip and knee joint moments across multiple seat heights. At 40 cm (roughly 15.7 inches, close to standard height), peak joint moments were 1.7 times higher than at 60 cm (roughly 23.6 inches, a high seat)4. The study also found that within the range of standard to low height (10 to 40 cm), moment differences were not statistically significant, meaning the main mechanical advantage appears in the transition from standard height upward toward higher seating.

This places the comfort height range (17-19 inches, roughly 43-48 cm) in the zone where each added inch delivers a measurable reduction in the joint work required to stand. The benefit is not large in absolute terms for a healthy adult. For a person managing limited knee flexion, hip replacement recovery, or reduced lower-limb strength, it changes the difficulty level of every single transfer.

Muscle activation at raised seat height

A 2025 study in Medicine (Baltimore) by Noroozi and colleagues measured surface electromyography (EMG) during toilet sit-to-stand transfers in older adults. They compared standard seat height against a raised seat condition and a bar-assisted condition. The results showed a clear pattern:

“Raising the seat reduced EMG activity in VM, TA, and calf muscles.”

Noroozi S et al., Medicine (Baltimore), 20255

VM refers to the vastus medialis (part of the quadriceps). TA is the tibialis anterior (the shin muscle that stabilizes the ankle and foot during the push-up). Lower activation in these groups means the body is working measurably less hard. For a person who also grips a grab bar or walker arm for partial support, this reduced muscle demand can represent the gap between a controlled transfer and one that requires full upper-body compensation for a depth the legs cannot manage on their own.

The lowering phase: a different demand

Rising from a comfort height toilet requires less joint force. Lowering to a comfort height toilet, however, means controlling the body over a greater vertical distance than lowering to standard height. For a person with poor balance or asymmetric leg strength, the longer controlled-lowering distance from comfort height can feel less stable, not more.

This is where grab bars serve a role the toilet height itself cannot. A well-positioned bar lets the person use upper-body support to control the descent while the lower body handles less of the eccentric load. Seat height reduces the load at the bottom of the transfer. A grab bar manages the controlled descent from the top. Both matter and they work together.

Toilet Seat Height vs ADA Wheelchair Seat Standard Horizontal range bar chart. Standard toilet: 15-16 inches (ochre bar). Comfort height toilet: 17-19 inches (teal bar). ADA wheelchair seat standard: 17-19 inches (teal bar). Sources: U.S. Access Board, 2010 ADA Standards Section 604.4 and Advisory Section 803.1. Toilet Seat Height vs ADA Wheelchair Seat Standard (floor-to-seat, inches) Standard Toilet Comfort Height ADA Wheelchair ADA min (17 in) 15-16 in 17-19 in 17-19 in 14 in 16 in 18 in 20 in Standard toilet Comfort height / ADA standard Source: Home Age Fit analysis, 2026
Comfort height toilets (17-19 in) occupy the same height range as the ADA’s characterization of typical wheelchair seat height (17-19 in), while standard toilets (15-16 in) sit 1-4 inches below. Data compiled by Home Age Fit from U.S. Access Board, ADA Standards Section 604.4 and Advisory 803.1.

Foot Contact, Seated Angle, and Body Position

The ability to push up from a toilet seat depends partly on where the feet are when the push begins. Full-foot contact with the floor gives the body a stable platform to push from. Partial contact (toes only, or ball of foot) reduces that platform and shifts more of the work to the upper body and grab bar.

Who keeps full-foot contact on comfort height

For adults of average height (roughly 5’4″ and taller), a comfort height seat of 17 to 19 inches allows both feet to rest fully flat on the floor. The knees sit close to or at hip level, which is a mechanically favorable starting position for standing. The push-up angle is direct, and no excessive hip flexion needs to be cleared before the body can move forward and upward.

For adults around 5’0″ to 5’2″, the picture changes. On a 19-inch comfort height seat, only the toes or ball of the foot may reach the floor. The heel is suspended. This reduces the push-off base and can make rising feel less controlled, not more. A shorter person on a comfort height toilet may actually find it harder to stand than on a standard height seat, even though the standard height requires more joint range of motion at the hip and knee.

Standard height and the deeper seated angle

Standard height (15-16 inches) places most adults with both feet flat and knees bent past 90 degrees. The thighs slope downward toward the floor. This deeper seated angle demands more hip and knee extension to stand from, which is why it is harder for people with limited joint range or reduced lower-limb strength.

The advantage of the deeper angle: it provides a stronger pre-load position for people with intact strength. Some people find they push up more powerfully from a lower seat because the leg muscles begin in a more stretched, force-generating position. For an ambulatory adult with good strength and no mobility limitation, standard height often feels perfectly natural and may even feel more stable due to the deeper foot-to-floor contact.

The step stool fix for shared setups

When a household installs a comfort height toilet for someone who needs it, shorter household members can use a small step stool to restore full-foot contact. A 2-inch stool under the feet on a 19-inch seat brings the effective seated angle closer to standard height while keeping the toilet at comfort height for the person who benefits from it. This is one of the cleaner solutions for mixed-height households, though the stool must be positioned reliably and not create a trip hazard during the transfer itself.

Wheelchair-to-Toilet Lateral Transfers

For a wheelchair user, the toilet transfer is typically a lateral slide rather than a seated-to-standing movement. The mechanics of a lateral transfer depend heavily on the height difference between the two surfaces being transferred between.

Why height alignment matters for lateral transfers

The U.S. Access Board describes the typical wheelchair seat height as 17 to 19 inches from the floor, the same range it uses to set the ADA toilet seat height requirement2. This alignment is deliberate. When both surfaces sit at roughly the same height, a lateral transfer can proceed along a near-level plane. The person slides sideways with minimal uphill or downhill component to the movement.

A standard toilet at 15-16 inches sits 1 to 4 inches below a typical wheelchair seat. Transferring onto a lower surface means sliding downhill and then pushing back uphill on the return. The uphill return is the harder direction. It requires sustained arm and shoulder strength against gravity, and it increases the window of instability during the move. A comfort height toilet at 17-19 inches closes or eliminates that height gap for most standard manual wheelchair users.

Other factors that determine a safe wheelchair transfer

Seat height is one factor in a working transfer setup. Three others matter equally: floor clearance on the transfer side (roughly 18 inches for the wheelchair to pull alongside), the grab bar configuration (a fold-down bar on the transfer side gives a grip point after removing the wheelchair arm), and the toilet’s position relative to the wall. A comfort height toilet in a bathroom with inadequate clearance is less useful than a well-configured standard height toilet. An occupational therapist can assess your specific bathroom and wheelchair combination.

Power wheelchairs and non-standard seat heights

Standard manual wheelchairs typically land within or near the 17-19 inch range. Power wheelchairs, tilt-in-space chairs, and custom seating systems can sit above that range, sometimes at 21 inches or higher. When the wheelchair seat is above 19 inches, the toilet is now the lower surface and the return transfer goes uphill. In those cases, a riser set to match the wheelchair seat height is more useful than a fixed comfort height toilet. A certified seating specialist who measures both surfaces can identify the most level configuration.
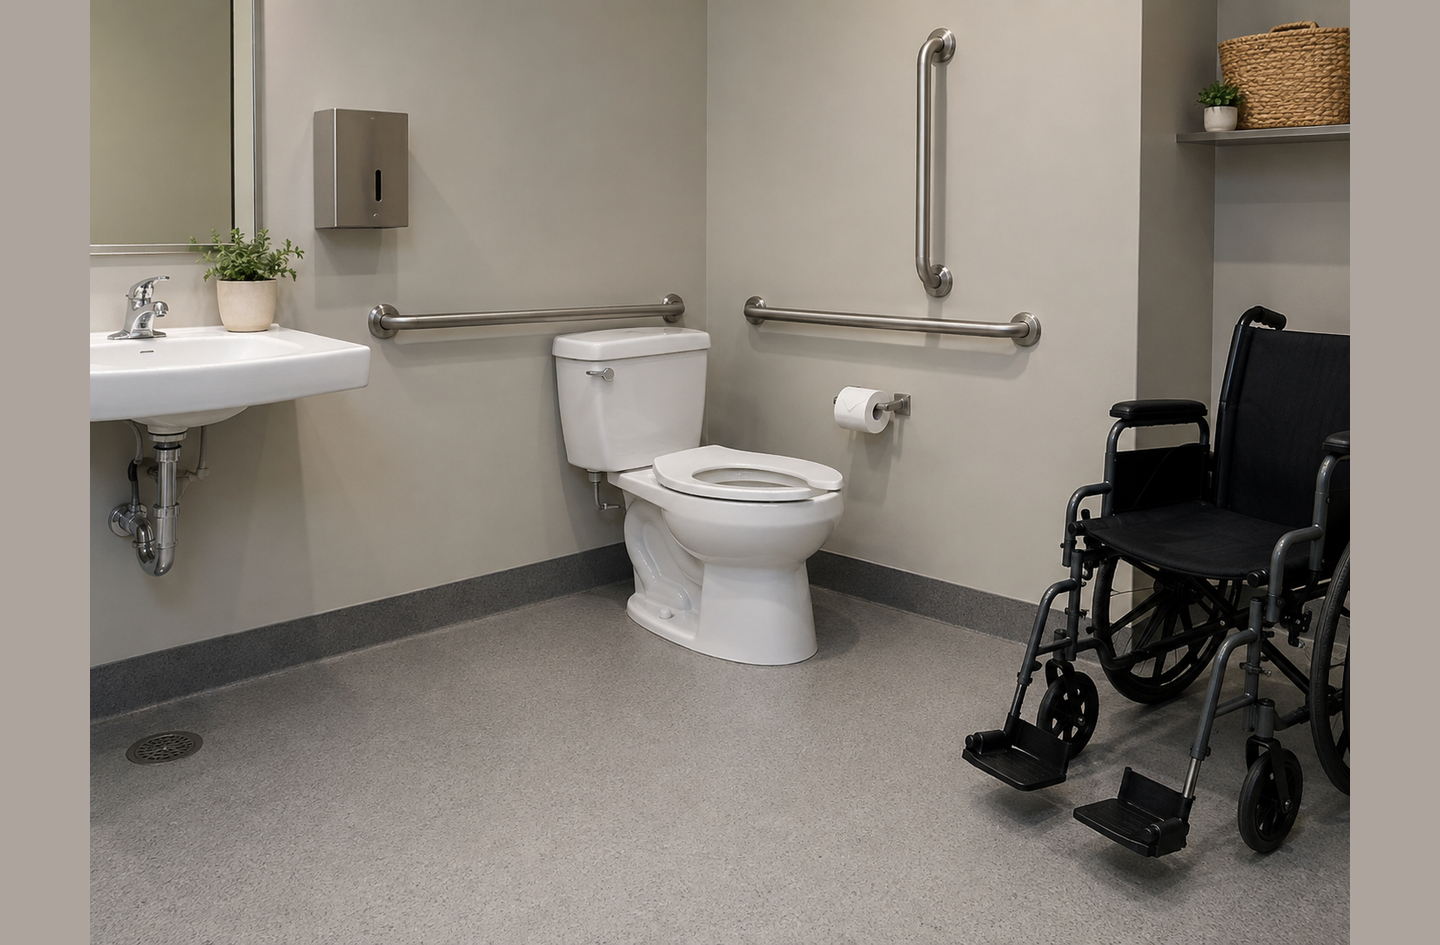
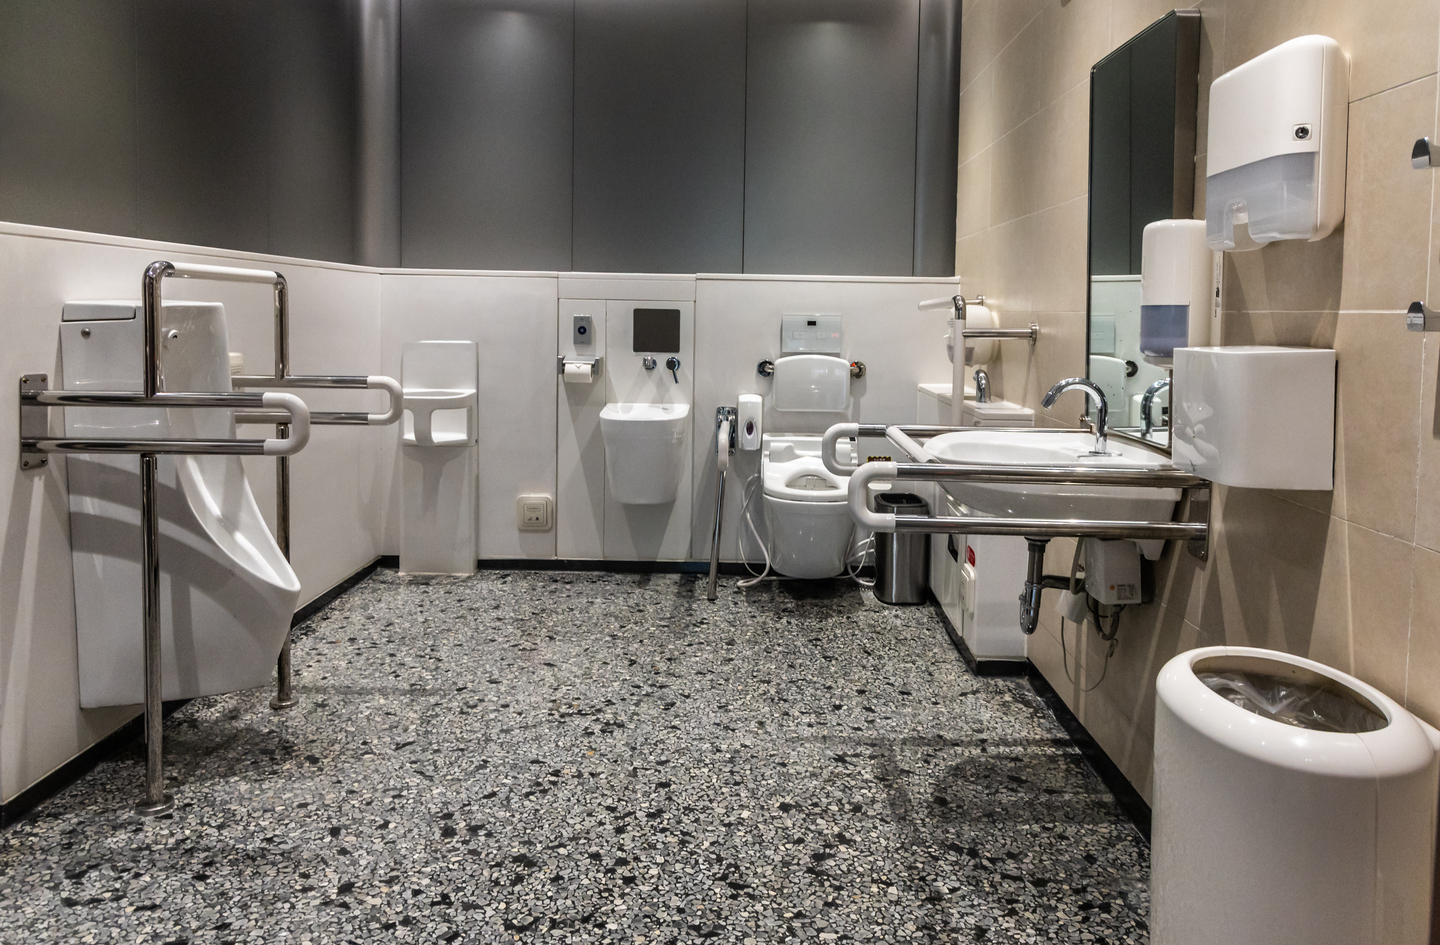
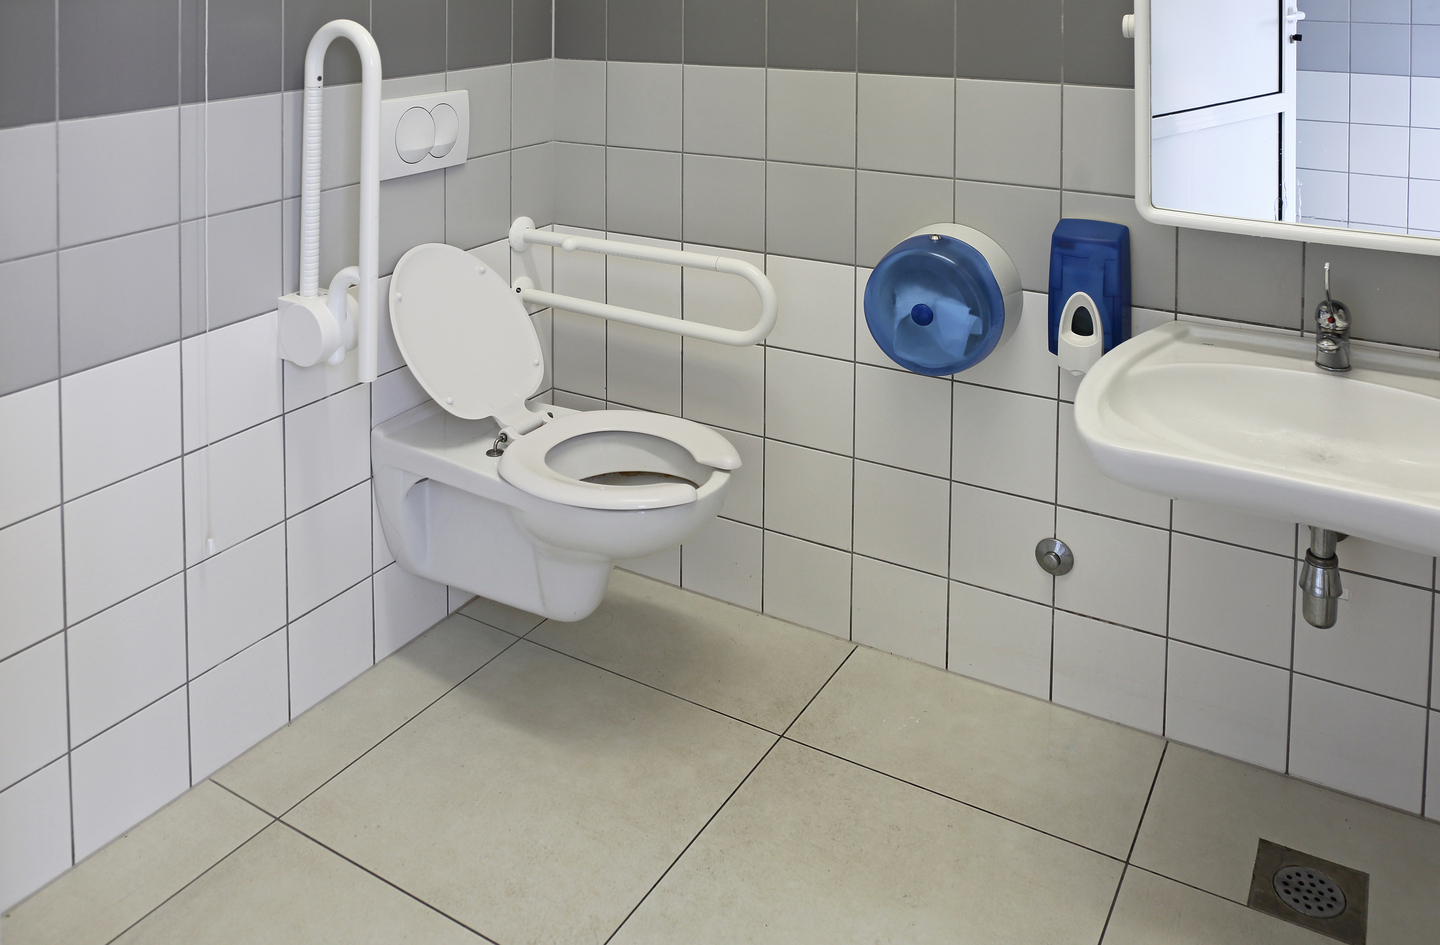
ADA-compliant toilet with horizontal and vertical stainless steel grab bars and wheelchair nearby showing wheelchair lateral transfer setup
An ADA-compliant toilet equipped with horizontal and vertical grab bars, with a wheelchair positioned alongside for a lateral transfer. The toilet height, grab bar placement, and floor clearance all contribute to transfer safety.

Shared Household Use

Most homes have one toilet per bathroom. When that toilet must serve multiple people with different heights and mobility needs, height becomes a trade-off rather than a clean optimization. The question is which user’s need is greater.

When the needs point in opposite directions

A common household scenario: one adult needs supported transfers and benefits from comfort height; another adult is shorter (say, 5’2″) and has no mobility limitation. The shorter person can use a comfort height toilet without difficulty. They will not fall or be unable to use it. But foot contact may be partial, and the seated angle may feel slightly unnatural.

The reverse is a harder problem. A standard height toilet that works well for the shorter adult forces the person with limited mobility into the more demanding seated depth every time they use it. The cost of standard height falls entirely on the person with the greater physical challenge.

For households where one person has a genuine transfer need, the practical direction is: install comfort height, add a step stool for shorter household members who want full-foot contact, and confirm the grab bar configuration supports the person who needs it. The step stool is a minor adjustment. The transfer difficulty is not.

When everyone is shorter

If all household members are roughly under 5’3″ and none has a wheelchair or limited joint range, standard height may serve the household better. The deeper seated angle is easier from that height for people with good leg strength. Adding a raised toilet seat or frame as a specific person’s needs change is a reasonable incremental step, and it is reversible without any renovation.

The chair-stand impairment rate among U.S. adults aged 65-69 is 42.4%, based on nationally representative data from the 2024 National Health and Aging Trends Study6. Chair stand impairment is not unique to people who currently use wheelchairs or walkers. It is common in the general older adult population, which means the question of toilet height often becomes more relevant for people who do not yet think of themselves as needing it.

Adjustable Alternatives to a Permanent Replacement

Replacing a toilet is a permanent decision, a real renovation cost, and a physical change that affects everyone in the household. Two accessory options can approximate the comfort height effect without replacing the fixture, and both are worth understanding before committing to a new toilet.

Raised toilet seat risers

Raised toilet seat risers clamp to or sit on top of the existing toilet and add 2 to 6 inches of height. A 2-inch riser on a 15-inch standard toilet brings the total to 17 inches, the ADA floor. A 3-inch riser on a 16-inch standard toilet reaches 19 inches, the ADA ceiling. Most risers are tool-free and removable, which makes them reversible and transferable between bathrooms.

The limitations of a riser: it adds height without changing the toilet’s other dimensions, so the seat may feel narrower or the front edge may shift slightly. Some risers fit loosely on the bowl and can shift under load if not tightened properly. Models with integrated padded armrests on either side add a gripping surface during the push-up, which is useful when wall-mounted grab bars are not yet installed. When choosing a riser, confirm it is compatible with the bowl shape (round versus elongated) and that the attachment mechanism locks securely for the user’s weight.

Toilet safety frames

A toilet safety frame is a freestanding structure that wraps around the toilet and provides gripping arms at roughly armrest height. It does not change the seat height but gives the user a push-off surface during sit-to-stand. For a person whose main challenge is gripping something solid during the push-up, a safety frame on a standard height toilet can be more useful than a comfort height toilet with no gripping surface nearby.

Floor-based safety frames with four legs are more stable than models that attach only to the toilet bolts. Height concern: use a riser. Gripping concern: use a frame. Both: use a riser with integrated arms. Contractor labor for a toilet replacement typically runs $150 to $400, so the accessory route is worth testing first when the underlying fixture is otherwise sound.

When replacement is the better answer

A full replacement makes sense when the existing fixture is nearing end of life, when the riser height needed exceeds 5-6 inches (past which most risers feel less stable), or when the bathroom is being renovated and setting the correct permanent height costs no extra work.

Who Should Choose Which Height

If you are managing limited knee or hip range of motion, comfort height reduces the depth of the seated position and the joint load of the push-up. If you are shorter than 5’3″ and live alone with good mobility, standard height likely serves you better.

Below are four profiles that cover most of the common scenarios.

Ambulatory adult with limited knee or hip range

Choose comfort height. The shallower seated position reduces the range of motion demanded at the hip and knee, and the shorter travel distance to standing lowers peak joint load on every transfer. Without grab bars yet installed, pair the comfort height toilet with a riser that has integrated arms.

Wheelchair user doing lateral transfers

Comfort height is the starting point, but the exact height depends on the wheelchair’s actual seat height, not on the ADA range alone. Measure the wheelchair seat height from the floor to the top of the cushion. Set the toilet (or riser) to match that number as closely as possible. A level surface in both directions is the goal. If the wheelchair seat is above 19 inches, a riser or adjustable toilet is more useful than a fixed comfort height fixture. Have an occupational therapist or certified seating specialist confirm the configuration before finalizing.

Shorter adult (under 5’3″) living alone, no mobility limitation

Standard height is likely the better fit. Full-foot contact on the floor gives you a more solid push-off base, and the deeper seated angle is manageable for someone with good lower-limb strength. When your needs change, a 2-4 inch riser brings a standard toilet to comfort height territory without a renovation. Plan for that adjustment before you need it; adding a riser later is easy, and removing one is just as easy.

Mixed-height household where one person has a transfer need

Install comfort height and add a step stool for shorter household members. The person with the transfer need benefits from the higher seat on every use. The shorter household member manages fine on comfort height and can use a 2-inch stool to restore full-foot contact if the angle feels awkward. Prioritize the setup that reduces risk for the person with the greater physical challenge; the inconvenience cost for a non-impaired user adjusting to comfort height is minor.

Frequently Asked Questions

Is a comfort height toilet better for seniors?

For most adults with limited knee or hip range of motion, yes. Comfort height (17-19 inches) reduces the depth of the seated position and lowers joint load on the push-up4. For shorter seniors (under 5’3″ or so), standard height may produce a more natural angle with better foot contact. The right choice depends on the person’s height, mobility status, and whether a wheelchair is involved.

What is the ideal toilet height for wheelchair users?

The ADA Standards set 17-19 inches as the accessible toilet seat height range, based in part on the typical wheelchair seat height of 17-19 inches described in ADA advisory guidance12. The ideal is a toilet seat that matches the specific wheelchair seat height as closely as possible so the lateral transfer can proceed on a level plane. Measure the actual wheelchair seat height from the floor to the top of the cushion before choosing a toilet height.

Can a shorter adult use a comfort height toilet comfortably?

Yes, with an adjustment. Adults under 5’3″ may have only partial foot contact on a 19-inch seat. A 2-inch step stool restores full-foot contact and brings the seated angle closer to standard height. Most shorter adults adapt without difficulty. The position is slightly less deep, and the reduced joint range required makes the push-up mechanically easier.

Does a raised toilet seat achieve the same effect as a comfort height toilet?

For height, yes. A 2-inch riser on a 15-inch toilet reaches 17 inches (ADA minimum). A 3-inch riser on a 16-inch toilet reaches 19 inches (ADA ceiling). A riser adds height but not seat width, and some models shift slightly under load. For a long-term installation, a comfort height toilet is more stable. For a reversible interim, a quality riser with a locking clamp works well.

How much does toilet height affect hip and knee strain during transfers?

The difference is measurable. Research published in BioMedical Engineering OnLine found peak hip and knee joint moments at standard seat height (roughly 40 cm / 15.7 in) were 1.7 times higher than at an elevated seat height of 60 cm (23.6 in)4. The comfort height range (17-19 in / 43-48 cm) sits between those two reference points, in a zone where each added inch reduces joint loading. For people with already-stressed knees or hips, that reduction is meaningful across the dozens of transfers that happen each week.

Limitations and Edge Cases

  • The biomechanics data in this article comes from laboratory sit-to-stand studies using chairs or simulated toilet conditions, conducted with specific age and weight ranges. Individual results vary based on lower-limb strength, balance, and assistive device use. An occupational therapist can evaluate the specific transfer for a specific person.
  • Wheelchair seat heights vary widely. The 17-19 inch ADA advisory range covers standard manual wheelchairs. Power chairs, tilt chairs, and custom seating systems can sit above or below that range, changing the height math for lateral transfers entirely.
  • This article covers seat height only. Grab bar placement, floor clearance for wheelchair approach, and toilet position relative to the wall are equally important transfer factors and are addressed in the toilet transfer safety overview.

References

  1. U.S. Access Board – 2010 ADA Standards for Accessible Design, Section 604.4: Seats. Water closet seat height shall be 17 inches (430 mm) minimum and 19 inches (485 mm) maximum above the finished floor, measured to the top of the seat. Effective March 15, 2012.
  2. U.S. Access Board – ADA Guide, Chapter 8: Special Rooms, Spaces, and Elements. Advisory Section 803.1 characterizes typical wheelchair seat height as 17 inches (430 mm) to 19 inches (485 mm). Current edition.
  3. Centers for Disease Control and Prevention (CDC) – Morbidity and Mortality Weekly Report, Vol. 60, No. 22, June 10, 2011. “Nonfatal Bathroom Injuries Among Persons Aged 15 Years – United States, 2008.” Reports 14.1% of bathroom injuries involved standing up from, sitting down on, or using the toilet.
  4. BioMed Central – BioMedical Engineering OnLine – Yoshioka S, Nagano A, Hay DC, Fukashiro S. “Peak hip and knee joint moments during a sit-to-stand movement are invariant to the change of seat height within the range of low to normal seat height.” BioMedical Engineering OnLine. 2014;13:27.
  5. Wolters Kluwer – Medicine (Baltimore) – Noroozi S, Weyand S, Smart R, Jakobi JM. “Impact of seat height and grab bars on postural stability and muscle activity of older females standing from a toilet.” Medicine (Baltimore). 2025 Mar 14. DOI: 10.1097/MD.0000000000041856.
  6. PubMed Central – “Population Prevalence of Motor Function Impairments in US Older Adults.” National Health and Aging Trends Study, Round 12, 2024. Reports chair stand impairment in 42.4% of adults aged 65-69 years. PMC11690251.

Conclusion

Comfort height (17-19 inches) and standard height (15-16 inches) are not universally interchangeable. For a person with limited knee or hip range of motion, comfort height reduces joint load on every transfer and aligns the seat with the typical wheelchair height for lateral slides. For a shorter adult with full mobility and good leg strength, standard height may produce a more natural seated angle with better foot contact. Neither height is the correct choice for all users, which is why measuring the person and the wheelchair (when relevant) before deciding matters more than choosing a category.

For the full picture of what makes a toilet transfer safer, including grab bar placement, floor clearance, and approach angles, see the toilet transfer safety overview for the full picture.
Toilet Safety Rails: How to Choose a Stable Frame for Sit-to-Stand Support

Author: Oded Feigin · Created On: August 27, 2026 · Last Updated: August 27, 2026

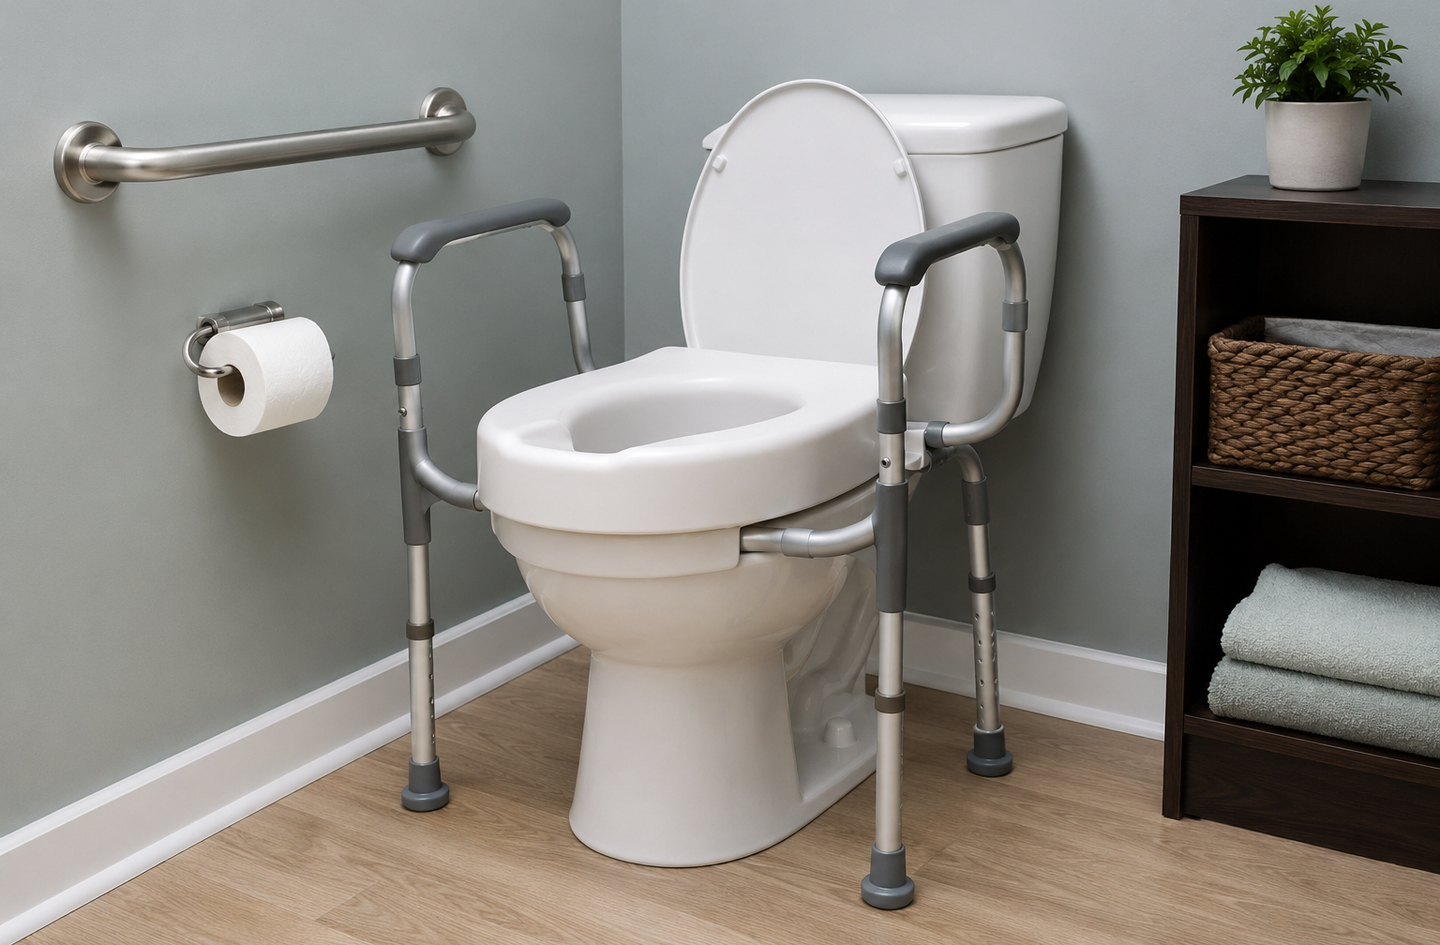
The geometry of a toilet transfer matters more than most people expect. Each time someone lowers onto or rises from a toilet, the body shifts its center of mass forward, loads the knees and hips, and depends on arm push-off to complete the movement. A toilet safety rail, placed well, reduces that load significantly. Our overview on Toilet Transfer Safety covers the full transfer picture; this article focuses specifically on how toilet-mounted and floor-standing rail designs compare across the dimensions that determine whether a frame actually supports you. In 2008, an estimated 234,094 Americans received emergency care for nonfatal bathroom injuries1.

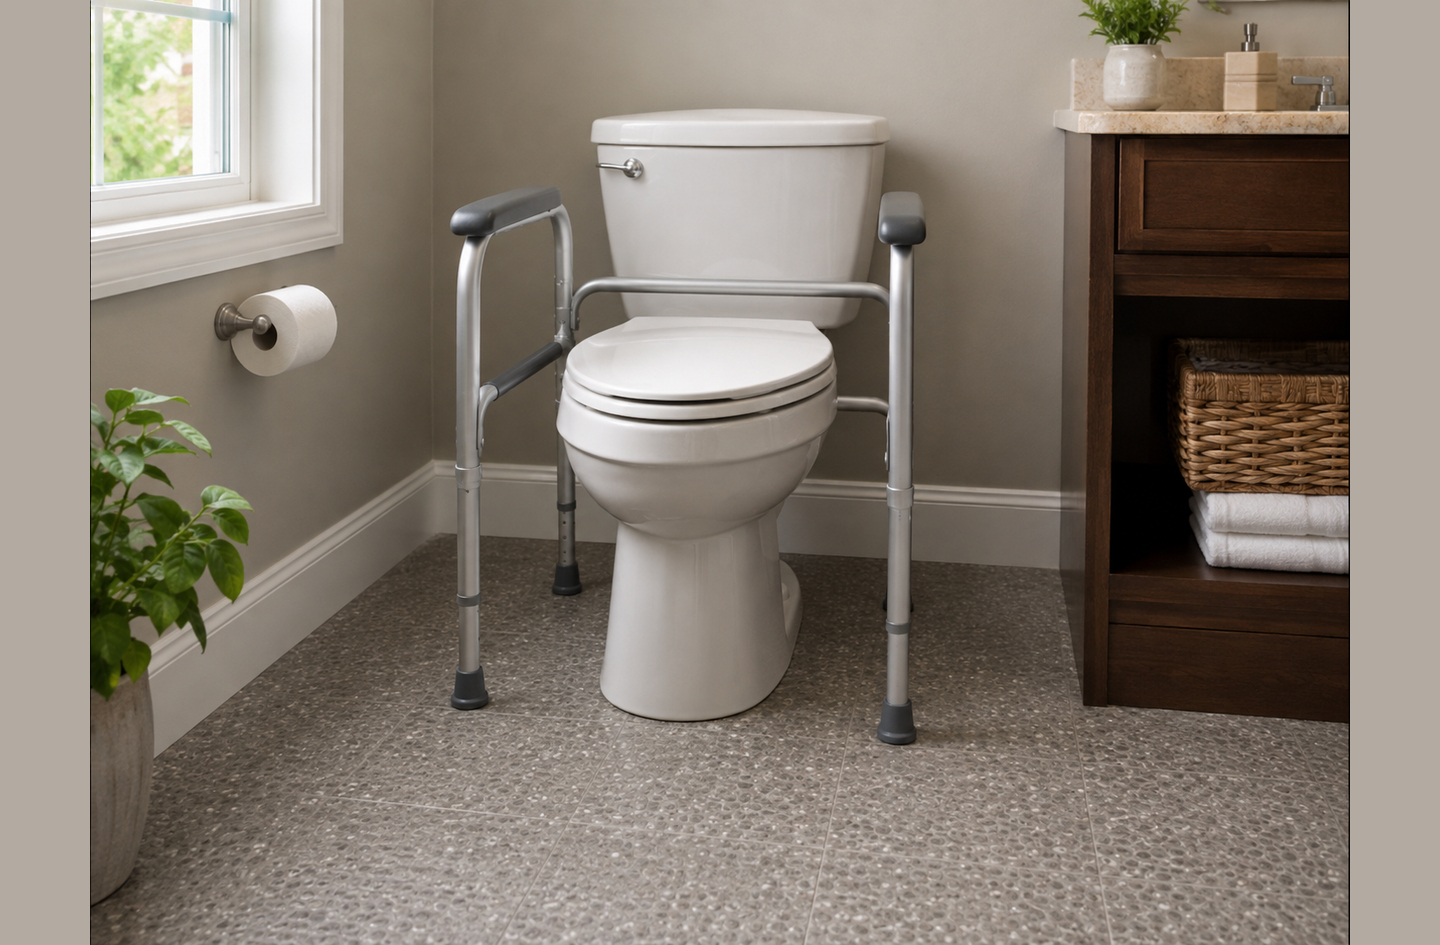
Toilet safety rails floor-standing frame with grey padded armrests installed around a standard white toilet to assist with sit-to-stand transfers
A floor-standing toilet safety rail with grey padded armrests surrounds the toilet on both sides, providing bilateral push-off support without relying on the toilet’s own mounting hardware.

Quick Answer

What matters most when choosing between toilet-mounted and floor-standing toilet safety rails?

Floor-standing frames are structurally independent from the toilet, anchoring their load directly to the bathroom floor. That makes them more stable laterally and less sensitive to variations in bowl shape or mounting hardware. Toilet-mounted frames are easier to install and remove but transfer their load through the toilet’s bolt points. For sit-to-stand support with meaningful weight bearing, the floor-standing geometry is more reliable. Among adults 85 and older, toilet transfers account for nearly 37% of all bathroom emergency department visits1, which makes the structural choice worth getting right.

Key Takeaways

  • Toilet-mounted frames clamp to the toilet’s mounting bolts and may flex on oval bowls or worn hardware; floor-standing frames anchor to the bathroom floor and are structurally independent from the toilet fixture.
  • Floor-standing frames typically span 18 to 22 inches between armrests and adjust from 28 to 34 inches in height; toilet-mounted frames cover a similar height range but draw their stability from the toilet’s own anchor points, which limits how much lateral force they absorb.
  • Adding a raised toilet seat to a toilet-mounted frame changes the effective arm height by 2 to 4 inches and can conflict with the riser’s own mounting hardware; a floor-standing frame maintains its calibrated arm position regardless of what sits on the toilet bowl.

Toilet Safety Rails: Mounted vs Floor-Standing Frame Compared

These two designs share the same goal: give you something firm to push against when sitting down and standing up from the toilet. They differ in where that structural load goes, how much each tolerates variation in body size and toilet shape, and what trade-offs they ask you to accept in exchange for their respective strengths.

Factor Toilet-Mounted Frame Floor-Standing Frame
Structural anchor Toilet mounting bolts Bathroom floor (4 to 6 legs)
Lateral stability Moderate; depends on bowl fit Higher; floor-independent
Width between armrests 17 to 20 inches (typical) 18 to 22 inches (typical)
Height adjustment range 28 to 34 inches above floor 28 to 34 inches above floor
Effect of raised seat Raises arms relative to frame; may conflict with riser hardware No effect; frame stays calibrated to its own leg setting
Typical weight rating 250 to 300 lb 250 to 400 lb
Oval bowl compatibility Variable; confirm bowl dimensions before purchase Generally compatible; legs adjust to floor position
Floor clearance needed Minimal; clamps directly to toilet Legs extend 4 to 8 inches beyond bowl edge on each side
Installation Low effort; tool-free on most models Low to moderate; legs require leveling on uneven floors
Best suited for Space-limited bathrooms, renters, lighter users Higher weight bearing, lateral instability, raised seat combinations

Lateral Stability: Which Design Holds Steadier?

Floor-standing frames hold steadier under lateral force because their load path reaches the floor directly, without passing through the toilet fixture. That distinction matters most when the force applied during a transfer is not purely vertical – which is most of the time.

When you push against a toilet safety rail to stand, the force is rarely straight down. It arcs forward and outward as you shift your weight from seated to standing. A toilet-mounted frame transmits that lateral component through the bowl’s mounting bolts, through the toilet base, and into the floor via the wax ring and subfloor connection. That is a longer, less direct structural path than a floor-standing frame’s legs, which contact the floor at multiple points surrounding the bowl.

Research on bilateral grab bars during toilet transfers found that properly positioned arm supports reduce peak extension moments at the hip, knee, and ankle – decreasing the muscle effort required to complete the movement4. The mechanism works regardless of frame type. The question is whether the frame holds its position while those forces are applied. A floor-standing frame with rubber-tipped legs on a non-slip surface moves less under lateral load. A toilet-mounted frame’s clamping mechanism performs best on round bowls where the clamp geometry fits flush; oval bowls introduce a small gap in the clamping contact that reduces rigidity under side force.

This does not make toilet-mounted frames structurally inadequate. Most perform well within their rated capacity. The point is that their stability depends on a confirmed fit between the frame’s clamping geometry and the specific bowl shape. Manufacturers list bowl dimension ranges for this reason. Confirming that match before purchase is not optional – it is the primary structural check for that frame type.

“Participants who had a grab bar were 75.8% more likely to recover their balance during the task than those who did not have a grab bar.”3

Levine, Montgomery, and Novak, researchers, Human Factors (Sage Journals, 2023)

The balance-recovery benefit of any support point is substantial. Frame type determines how reliably that support point stays in position under the exact forces a specific person applies in a specific bathroom.

Verdict: Floor-standing frames win on lateral stability because they anchor to the floor independently. Toilet-mounted frames are competitive when the bowl fit is confirmed and lateral transfer forces are moderate.

Rail Width and Transfer Clearance

Rail width determines whether you can place your hands close enough to your body to generate effective push-off leverage. The right width is the one that matches your shoulder width and transfer direction – wider is not inherently better.

Toilet-mounted frames typically position their armrests 17 to 20 inches apart. Floor-standing frames span 18 to 22 inches, and some models offer width adjustment between those bounds. For a standard sit-to-stand transfer – both feet on the floor, leaning slightly forward to shift weight, then pressing through both arms to rise – an armrest span of 18 to 20 inches serves most adults well. Arms set too far apart reduce the mechanical advantage of elbow extension. Arms set too close together leave insufficient space to complete a sideways transfer from a wheelchair or shower bench.

Transfer clearance is the related dimension: how much open space the frame leaves on either side of the toilet for foot positioning, for a caregiver’s stance, or for maneuvering a walker into place beside the bowl. Floor-standing frames extend their legs outward from the bowl, narrowing the floor area on two sides. That trade-off is real and is covered in more detail in the floor space section below.

Some floor-standing models offer swing-away armrests that fold down or to the side to open a lateral transfer path. This is useful for wheelchair-to-toilet transfers where one rail needs to clear completely. Toilet-mounted frames rarely offer this feature. If a lateral transfer is part of the daily routine, the floor-standing design’s configuration options make it the more practical starting point.

For walker users who approach the toilet at an angle, the arm on the approach side carries more load during the lowering phase. Some floor-standing frames allow independent height adjustment of left and right arms, which lets you compensate for an asymmetric approach or for differences in right-versus-left arm strength. That flexibility is not available on standard toilet-mounted models.

Verdict: Both design types cover a similar width range. Floor-standing frames offer more configuration options (swing-away arms, independent height adjustment) but require more floor clearance to achieve them.

Height Adjustability and Arm Position

Both frame types adjust within a similar range, typically 28 to 34 inches from the floor to the top of the armrest pad. The ADA standard for toilet seat height is 17 to 19 inches above the finished floor5. Effective push-off usually requires an armrest positioned 8 to 12 inches above the seated height, which places the target armrest range at roughly 25 to 31 inches for a standard-height toilet.

The mechanism for both types is the same in principle: pin-and-hole or twist-lock leg adjustment, moving in 1-inch increments on most consumer models. The critical difference is the reference plane each design uses.

A floor-standing frame adjusts its arm height relative to the bathroom floor. Whatever height you set the legs to, that is the arm height you get, regardless of what the toilet sits at. A toilet-mounted frame adjusts relative to the toilet’s mounting point. The toilet’s own height becomes part of the equation, and any deviation from standard toilet height shifts the frame’s arm position accordingly.

For a standard 15-inch toilet bowl with a seat bringing total seated height to 17 or 18 inches, this difference is small. It becomes more noticeable in older homes with non-standard toilet heights, in bathrooms where a comfort-height toilet (17 to 19 inches to the rim, before seat) changes the reference point, or when a raised seat is installed on top. The floor-standing frame’s clean floor-to-arm reference simplifies the setup in any of those situations.

ADA wall-mounted grab bar standards specify placement between 33 and 36 inches above the finished floor5. Home-use safety frames are not required to meet wall-bar ADA specifications, but this height range is worth noting for users who need a higher push-off point. People with limited hip mobility who cannot lean far forward at the start of a stand benefit from a higher arm position, which allows them to begin the push-off phase earlier in the movement arc.

Verdict: Adjustable height range is comparable. Floor-standing frames use the floor as their reference, which makes calibration more straightforward when toilet height varies or a raised seat is in the picture.

Compatibility With a Raised Toilet Seat

Adding a raised toilet seat to a toilet-mounted frame changes the arm height geometry and often conflicts with the riser’s mounting hardware. Adding one alongside a floor-standing frame requires only a simple height recalibration of the frame legs.

A raised toilet seat typically adds 2 to 4 inches to seated height. For users whose knees or hips resist deep flexion, that elevation meaningfully reduces the range of motion needed to stand. A 2016 study found that raising seat height reduced anterior-posterior sway during sit-to-stand from 235.93 mm to 181.63 mm6, a 23% reduction in postural instability. The researchers concluded that adjusting seat height and angle to suit each individual is likely to reduce fall risk during toilet transfers.

The mechanical complication arises when both a raised seat and a toilet-mounted frame are planned. Many toilet-mounted frames clamp to the toilet bowl’s bolt holes – the same mounting hardware that a locking raised seat also uses. In most configurations, only one of these devices occupies those bolt points at a time. You choose the frame or the raised seat, not both simultaneously, unless the raised seat is designed to sit inside the frame’s clamping area rather than sharing the same attachment points.

Combination units address this by integrating the raised seat and the armrests into one assembly. The riser and rails arrive as a single piece that clamps to the bowl together. These solve the mounting conflict, but they fix the arm height relative to the riser height. The geometry of the combined unit is determined by the manufacturer, not by the individual’s seated position. For users who need a specific arm height independent of how much the seat is raised, that constraint limits fit.

Floor-standing frames remove this conflict entirely. The frame stands on its own legs; the raised seat sits on the toilet bowl; the two pieces share no hardware. You raise the frame’s legs to match the new seated height that the riser creates. That is a single-step recalibration, not a product compatibility puzzle.

A 2025 study comparing interventions for older adults performing toilet sit-to-stand found that standard seat height combined with grab bar support reduced transfer difficulty and improved postural stability; raised seats with grab bars also performed well7. The geometry of pairing any raised seat with bilateral arm support consistently outperformed either intervention alone, across the study’s test conditions.

Toilet safety rails and raised seat paired on an adjustable aluminum frame showing combined height elevation and bilateral grip handles for sit-to-stand support
A raised seat and adjustable safety rail used together show how height elevation and bilateral support combine – a configuration that a floor-standing frame handles without hardware conflicts, since the frame and the riser attach independently.

Verdict: If a raised seat is part of the plan now or in the future, a floor-standing frame is the more flexible choice. Toilet-mounted frames create mounting conflicts with most raised seat hardware, and combination units trade those conflicts for reduced arm-height adjustability.

Weight Ratings and Structural Security

Most toilet safety frames carry rated capacities between 250 and 400 pounds. ADA grab bar standards require the supporting structure to withstand a force of 250 pounds applied at any point on the bar, fastener, mounting device, or supporting structure5. Consumer-grade safety frames generally meet or exceed that threshold, but the path that load takes from the frame to the floor differs significantly between the two designs.

A toilet-mounted frame transmits load through the bowl, through the toilet’s wax ring seal, and into the floor via the mounting bolt assembly. That connection was engineered to support a person sitting on the toilet under primarily vertical load. It was not designed with the expectation of repeated lateral force cycles from daily arm-assisted transfers over years of use. The weight rating on a toilet-mounted frame reflects the manufacturer’s tested static capacity under controlled conditions, not necessarily the long-term performance of the toilet’s own mounting hardware under multi-directional load.

A floor-standing frame distributes its load across four to six rubber-footed legs that press directly on the bathroom floor. That contact spreads the transfer force across a wider area and removes the toilet fixture as a structural intermediary. For users who bear substantial weight on the arms during transfers – particularly those with limited lower-body strength who rely heavily on arm push-off – the floor-standing load path is more direct and remains more consistent over time.

The weight rating number on the product label is the right starting point. The more useful question is: under the specific transfer pattern of the person who will use this frame daily, which design maintains its geometry more reliably over months of use? For moderate-weight users performing standard vertical sit-to-stand transfers with confirmed bowl fit, both designs operate well within their rated specs. For heavier users or anyone whose transfer involves significant lateral force, the floor-standing design’s direct load path is worth the additional floor footprint.

Verdict: Both designs meet the ADA grab bar force benchmark of 250 pounds at any point. Floor-standing frames offer a more direct structural path to the floor, which becomes more important for heavier users or transfers with a meaningful lateral component.

Floor Space, Footprint, and Foot Placement

A toilet-mounted frame adds no legs to the bathroom floor. The frame occupies only the sides of the toilet itself, leaving the floor around the bowl clear. That is a genuine advantage in small bathrooms where a walker or rollator needs to park beside the toilet, or where a caregiver needs to stand close to assist.

Floor-standing frames place four to six legs on the bathroom floor, typically positioned to the front and sides of the bowl. Those legs extend 4 to 8 inches outward from the bowl edge on each side and to the front. In a narrow bathroom where the toilet sits close to a wall or vanity, front legs can interfere with the approach path. In a bathroom where the toilet shares a side wall with the shower, a side leg on that wall side may obstruct the walker’s parking position.

Foot placement during the transfer approach is a related concern. When you move toward the toilet to sit, you need a clear path to position your feet roughly shoulder-width apart and slightly in front of the toilet centerline. Front legs on a floor-standing frame can interrupt this foot position if the frame is set with its front legs too far forward. Most frames allow some adjustment of the forward leg position. Testing this before the legs are fully tightened saves a second disassembly.

For users who approach the toilet forward-facing (the standard approach), the front clearance between the two front legs matters most. For users who approach from the side for a lateral transfer, the side clearance matters more. Neither frame type is universally better on floor footprint. The right choice depends on bathroom dimensions, approach direction, and whether a mobility aid needs to park beside the toilet during the transfer.

Toilet Transfers as Share of Bathroom Injuries, by Age Group Bar chart showing the proportion of bathroom emergency department injuries that occurred during toilet transfers, by age group. All adults 15 and older: 14.1%. Adults 75 to 84: 26.9%. Adults 85 and older: 36.9%. Source: CDC Morbidity and Mortality Weekly Report, Vol. 60, No. 22, June 2011, reporting 2008 bathroom injury data. Toilet Transfers as Share of Bathroom Injuries, by Age Group All adults (15+) Adults 75-84 Adults 85+ 14.1% 26.9% 36.9% General adult population Adults 85 and over Source: Home Age Fit analysis, CDC MMWR 2011 (2008 data)
Among adults 85 and older, toilet transfers account for nearly 37% of all bathroom emergency department injuries – nearly triple the rate across all adults 15 and over – underscoring why the stability of any toilet safety rail frame matters more, not less, as transfer difficulty increases with age. Data from CDC Morbidity and Mortality Weekly Report, Vol. 60, No. 22 (2011, reporting 2008 injury data).

Verdict: Toilet-mounted frames win on floor space by leaving the bathroom floor clear. Floor-standing frames need 4 to 8 inches of clearance on each side, which can interfere with approach paths and walker parking in smaller bathrooms.

Who Should Choose Which Frame?

The right frame is determined by the specific combination of transfer direction, body weight, bathroom layout, and whether a raised seat is part of the plan. Each scenario below points to one design based on the physics of the transfer, not on price or popularity. Falls remain a significant health concern for older adults, with an estimated 3 million emergency department visits among adults 65 and older in 2021 alone2.

You need bilateral support for a standard sit-to-stand transfer and your bathroom is large enough for a floor-standing frame

Choose a floor-standing frame. The direct load path to the floor gives you more consistent lateral stability, and the frame’s arm height remains calibrated regardless of toilet hardware or seat additions. If there is enough floor clearance for the legs – typically 8 inches on each side of the toilet, plus a clear front approach path – the floor-standing design addresses the sit-to-stand mechanics more cleanly.

Your bathroom is small and floor space is limited

Choose a toilet-mounted frame, with the bowl compatibility check done before purchase. In a narrow bathroom where the toilet shares a side wall or sits close to a vanity, the floor-standing frame’s legs will interfere with the approach path or block the walker’s parking position. A toilet-mounted frame that fits the bowl geometry well provides meaningful arm support while leaving the floor clear. Confirm the oval or round bowl designation on your toilet before ordering.

You plan to use a raised toilet seat at the same time

Choose a floor-standing frame. The mounting hardware conflict between a locking raised seat and a toilet-mounted frame makes the combination unreliable in most configurations. A floor-standing frame’s legs adjust independently of the toilet bowl. Set the arm height to match the seated height with the riser in place, and both pieces work without competing for the same hardware.

You or the person you are helping weighs more than 300 pounds, or the transfer involves significant lateral force

Choose a floor-standing frame. The higher weight ratings available on floor-standing models (often 350 to 400 lb) and the more direct load path to the floor make them the engineering-informed choice for higher-force transfers. Toilet-mounted frames at 250 to 300 lb may be within rated capacity, but the toilet fixture itself becomes a load-bearing element under lateral force, and that path is less robust over time for repeated high-force use.

The bathroom is a rental, or the installation needs to be reversible without any permanent change

Choose a toilet-mounted frame. Most models install without tools by clamping to the bowl’s existing bolts. They remove just as quickly. Floor-standing frames also require no permanent installation, but they are heavier and less practical to move frequently if the bathroom is shared or the arrangement changes.

For decisions about the specific home and specific person – particularly where medical history, balance conditions, or structural bathroom limitations are factors – consulting an occupational therapist is the most reliable path. These frames are planning tools and support devices; an OT can evaluate the full transfer routine in the actual space.

Frequently Asked Questions

How do I know if a toilet-mounted frame fits my toilet bowl?

Toilet bowls come in two primary shapes: round (about 16.5 inches from seat bolts to front rim) and elongated (about 18 to 18.5 inches). Most toilet-mounted frames list which shapes they accommodate. Measure from your toilet’s seat mounting bolts to the front rim and compare against the frame’s stated compatibility range. A frame that fits a round bowl will rock on an elongated one and vice versa, which reduces lateral stability significantly1.

What is the correct armrest height for toilet safety rails?

The ADA standard for toilet seat height is 17 to 19 inches above the finished floor5. For effective push-off, armrests typically sit 8 to 12 inches above your seated toilet height, placing them roughly at 25 to 31 inches from the floor for a standard toilet. Set the frame at a height where your elbows are at or slightly above 90 degrees when seated, so you can press straight down through your forearms to initiate the stand.

Are toilet safety frames effective at reducing fall risk?

Research supports the use of arm support during toilet transfers. A 2025 study found that toilet seat height combined with grab bar support reduced sit-to-stand difficulty and improved postural stability in older adults7. A 2023 study found that grab bar presence made participants 75.8% more likely to recover balance during a hazardous transfer task3. These findings are directionally consistent but come from small study samples, so they support the case for arm support rather than quantifying a specific risk reduction for a given individual.

Can a floor-standing toilet safety frame work with a bidet seat?

Yes, in most cases. A floor-standing frame’s legs stand independently of the toilet bowl hardware, so a bidet seat that clamps to the bowl’s bolt holes does not conflict with the frame. The arm height may need recalibration if the bidet seat adds thickness that raises the seated height. Toilet-mounted frames are less compatible with bidet seats because both compete for the same bowl mounting hardware.

Do adjustable toilet safety rails require professional installation?

Most consumer-grade toilet safety frames, both mounted and floor-standing types, are designed for tool-free or minimal-tool assembly and do not require professional installation. That said, verifying that the frame sits level, that legs are fully tightened, and that the bowl fit (for toilet-mounted types) is confirmed before full-weight use is the owner’s responsibility. An occupational therapist can assess whether the selected frame matches the specific person’s transfer pattern and bathroom layout.

Limitations and Edge Cases

  • This comparison covers the standard floor-standing and toilet-mounted safety frame designs. Wall-mounted fold-down grab bars (which require studs or blocking and are not portable) address a different structural scenario and are not evaluated here.
  • Biomechanical research cited draws from small sample populations, some healthy adults and some older women specifically. Findings are directionally consistent with the engineering reasoning but may not generalize equally to all body types, balance conditions, or transfer patterns.
  • Bathroom-specific injury data cited is from 2008 CDC analysis, the most granular government dataset available for bathroom injury by cause and age group. Overall fall trends through 2021 are drawn from a separate NCOA/CDC source for current scale context.

References

  1. CDC Morbidity and Mortality Weekly Report – Nonfatal Bathroom Injuries Among Persons Aged 15 Years, Vol. 60, No. 22, June 10, 2011 (reporting 2008 injury data).
  2. National Council on Aging (NCOA) – Get the Facts on Falls Prevention, citing CDC 2021 data, page current 2024.
  3. Human Factors (Sage Journals) – Levine, Montgomery, and Novak, “Grab Bar Use Influences Fall Hazard During Bathtub Exit,” 2023.
  4. Disability and Rehabilitation: Assistive Technology – Effects of bilateral swing-away grab bars on biomechanics of toilet transfers, PubMed PMID 29522366, published online February 2018.
  5. U.S. Access Board – Chapter 6: Toilet Rooms, 2010 ADA Standards for Accessible Design, Sections 604.4 and 604.5.
  6. Journal of Physical Therapy Science (PMC) – Effects of changing angle and height of toilet seat on sit-to-stand, PMC5091059, published 2016.
  7. Medicine (Wolters Kluwer) – Impact of seat height and grab bars on postural stability during toilet sit-to-stand in older females, PubMed PMID 40101044, published 2025.

Conclusion

The choice between a toilet-mounted frame and a floor-standing frame comes down to the geometry of the transfer, the bathroom’s dimensions, and whether a raised seat is part of the plan. Floor-standing frames offer a more direct structural load path and maintain their calibration independently of the toilet, making them the engineering-informed default for higher-weight users, lateral transfers, and raised seat combinations. Toilet-mounted frames earn their place in space-limited bathrooms and reversible installations where a confirmed bowl fit keeps the stability trade-off acceptable.

For the broader context of toilet transfer planning – seat height, approach clearance, floor surfaces, and lighting – see the overview in Toilet Transfer Safety for how each of these pieces fits the wider picture.

Floor to Ceiling Grab Bars Near the Bed: When a Transfer Pole Helps

Author: Oded Feigin · Created On: August 23, 2026 · Last Updated: August 24, 2026

The bedroom is the single most common fall location in U.S. homes for older adults, accounting for one in four fall-related emergency visits1. Much of that risk concentrates at one moment: getting in or out of bed. A floor to ceiling grab bar, more commonly called a transfer pole, positions a stable vertical handhold exactly where that moment happens. Our overview in bedroom safety planning covers the full range of bedside supports. This article focuses on one specific question: when does a transfer pole belong at the bedside, and how do you set it up to work reliably?

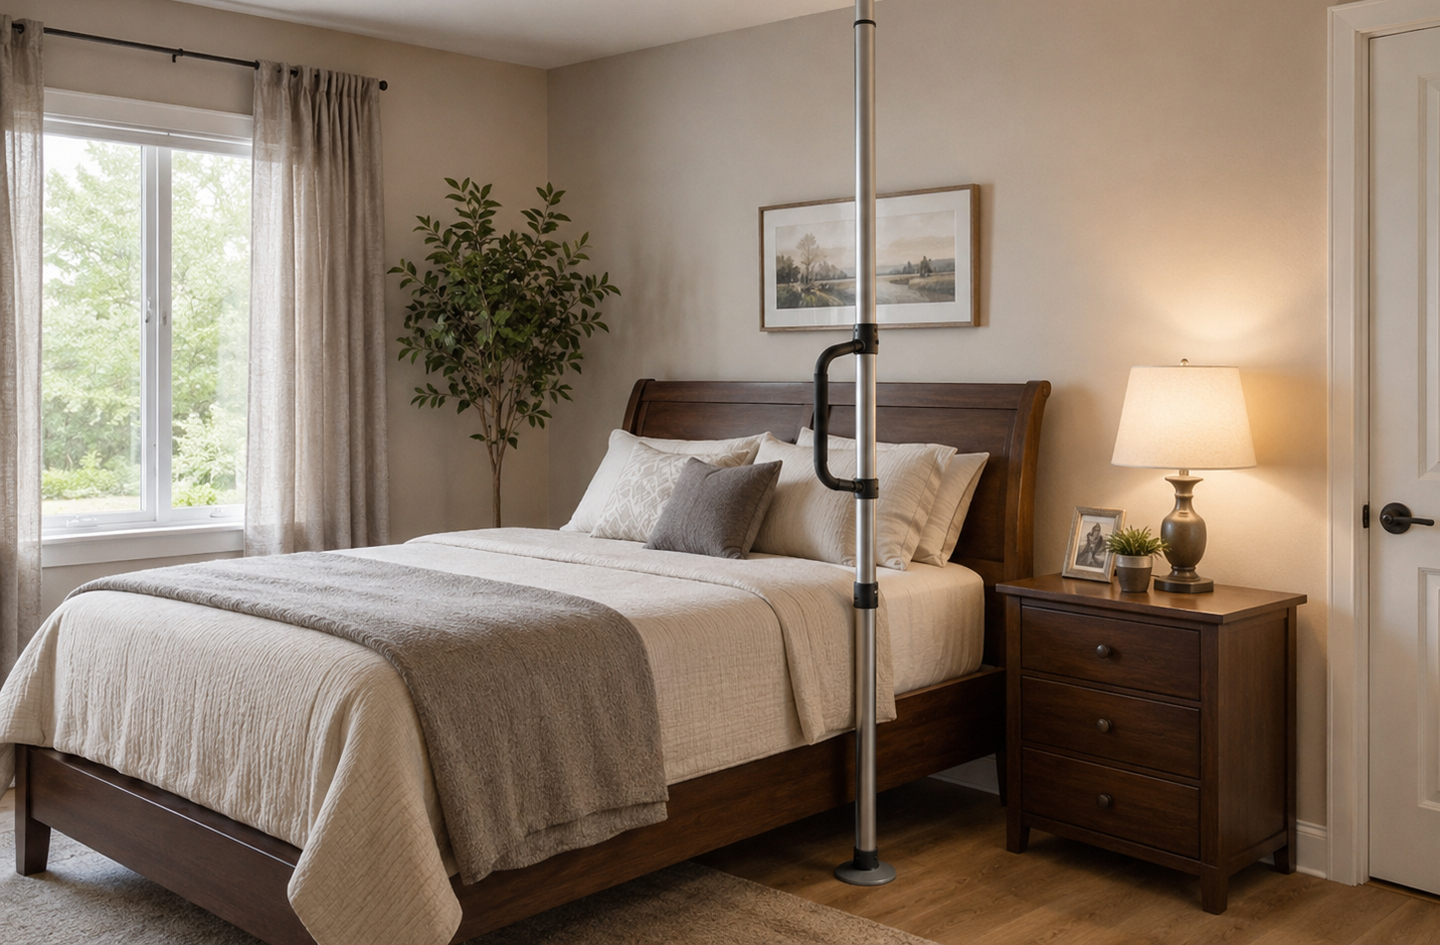
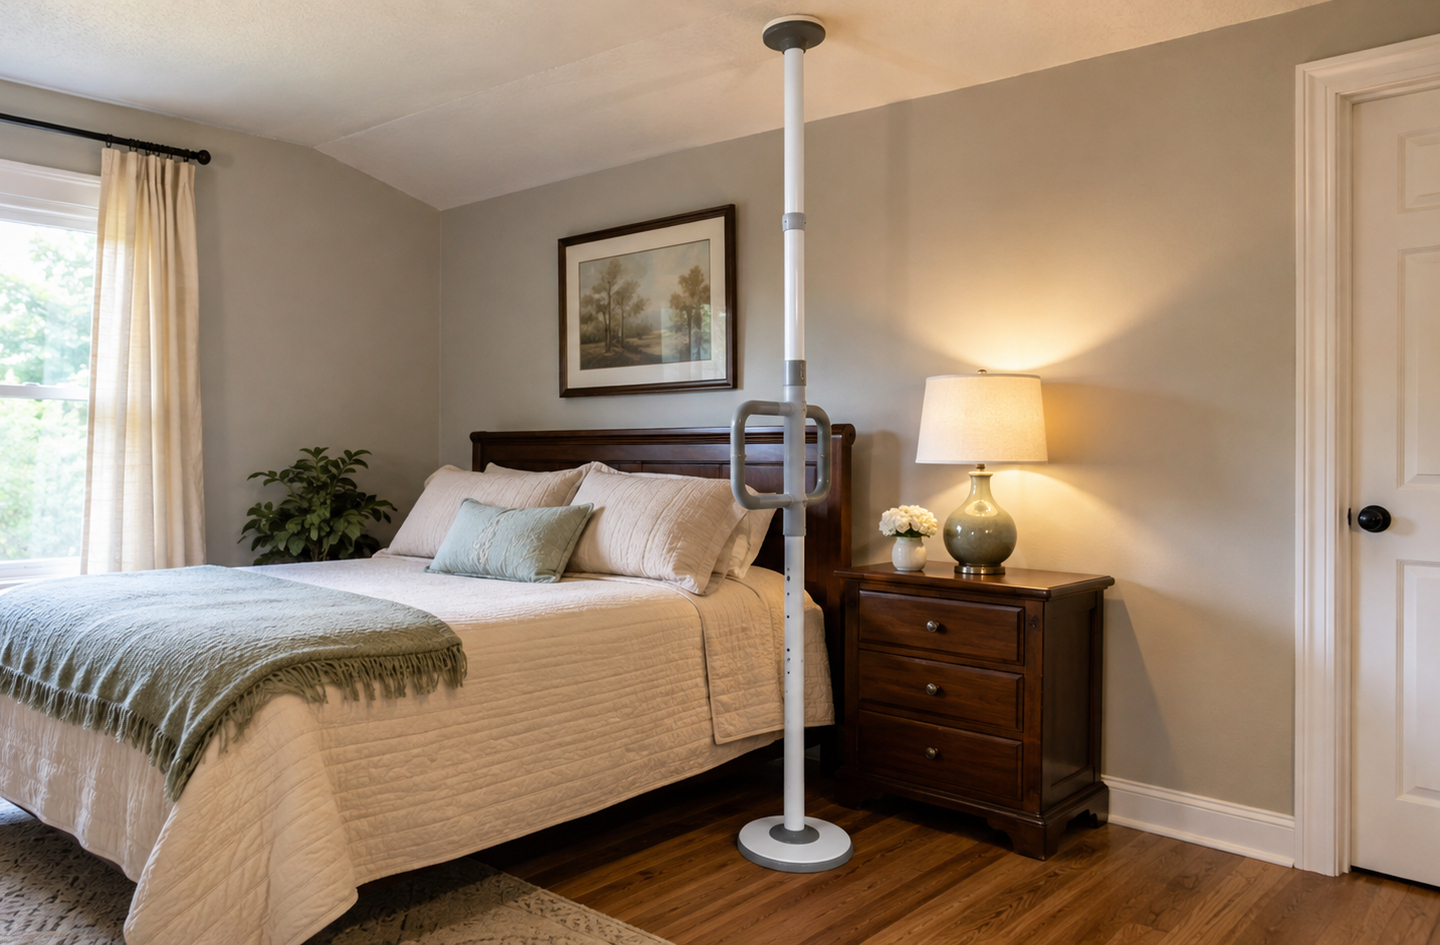
A floor to ceiling grab bar support pole installed beside a bed in a softly lit bedroom, showing a vertical pole with a horizontal grab handle
A tension-mounted floor-to-ceiling grab bar positioned beside the bed provides a stable pull point at the exact moment of rising, without drilling into walls.

Quick Answer

When does a floor-to-ceiling grab bar help beside the bed?

A transfer pole belongs beside the bed when someone needs a stable vertical handhold to push or pull themselves upright during the sit-to-stand transfer and a wall grab bar is not possible or preferred. Tension-mounted between floor and ceiling with no drilling, most models support 300 lbs and fit ceilings from 7 to 10 feet8. They are portable, repositionable, and reversible.

Key Takeaways

  • The bedroom accounts for 25.0% of all home fall-related emergency visits among older adults, ahead of stairs and bathrooms1.
  • A transfer pole is tension-mounted between floor and ceiling, requires no drilling, fits ceilings from 7 to 10 feet, and typically carries a 300-lb weight rating.
  • Transfer poles support a straight-up pulling motion during the sit-to-stand phase. Bed rails support a lateral push and edge boundary. Matching device to transfer direction is the core decision.
  • Set the grab handle at seated mattress height, roughly 18 to 20 inches from the floor for a standard bed, so the arm has mechanical advantage at the start of the rise.
  • An occupational therapist can assess which bedside support type fits a specific transfer pattern before anything is installed.

What Is a Floor to Ceiling Grab Bar?

A floor-to-ceiling grab bar is a vertical pole that spans the full room height, held in place by spring or screw tension between the floor surface and the ceiling. It does not attach to the wall. It does not bolt into the bed frame. The tension itself keeps it rigid, and most designs include a threaded adjustment nut that locks the pole at the precise ceiling height of the room.

The device is also called a transfer pole, a bed transfer pole, or a stand-assist pole. All refer to the same function: a fixed vertical surface the person grips and pulls against while rising from a seated position on the edge of the bed.

The horizontal grab handle is the working part

Most transfer poles include a removable horizontal grab handle, a short curved bar that mounts at a chosen height on the pole shaft. That handle is what the person actually grips during the transfer. Without it, the smooth vertical shaft offers a less secure contact point, especially for hands affected by reduced grip strength or arthritis. When evaluating any transfer pole, confirm the grab handle is included, that it can be oriented or locked in multiple directions, and that the pole diameter suits a comfortable grip. The category standard is a 1.5-inch pole diameter8.

How it differs from a decorative tension rod

A floor-to-ceiling transfer pole is built to be loaded laterally. Rated weight capacities in the category typically reach 250 to 300 lbs, and the engineering assumes that a person’s full body weight may be applied horizontally during the rising phase of a transfer. A tension closet organizer rod or a decorative pole lamp is not rated for that kind of force and should never substitute for a purpose-built transfer pole.

When a Transfer Pole Makes Sense at the Bedside

A transfer pole fits a specific pattern of need. Identifying that pattern before installation matters, because the wrong device for the wrong transfer type provides false confidence rather than real support.

Researchers analyzing an estimated 320,751 bed-related fall injuries presenting to U.S. emergency departments annually (2014 to 2023) found that 34.4% occurred during a transition into or out of bed2. The sit-to-stand phase carries disproportionate risk within that window: a 2022 study of 306 video-captured falls in long-term care found that falls during sit-to-stand transfers happened twice as often in the rising phase as in the stabilization phase that follows3. The rising phase, before the person has fully extended their hips and achieved standing balance, is exactly where a transfer pole provides its most direct mechanical advantage.

Where Older Adults Fall at Home Data from Moreland et al. (2020), NEISS-AIP, 38,654 ED records from 2015. Bedroom: 25.0 percent; Stairs: 22.9 percent; Bathroom: 22.7 percent of home falls reaching an emergency department. Source: Moreland BL et al., American Journal of Lifestyle Medicine, PMC8669898. Where Older Adults Fall at Home Share of home fall-related ED visits, by room Bedroom 25.0% Stairs 22.9% Bathroom 22.7% 0% 10% 20% 30% Bedroom Other rooms Source: Moreland et al. (2020)
The bedroom is the most common location for home fall-related emergency visits among older adults in the U.S. A separate 2025 study found that within bed-related falls specifically, 34.4% occurred during the moment of getting into or out of bed (Tom et al., Journal of Clinical Medicine, 2025). Compiled by Home Age Fit from Moreland et al. (2020) and Tom et al. (2025).

The transfer pattern where a pole excels

A transfer pole is best suited to a straight-up transfer: the person sits on the edge of the bed, grips the horizontal handle at a comfortable height, and pulls upward and slightly forward to reach standing. The mechanical advantage comes from the pole’s vertical rigidity. It does not swing, compress, or shift under load. For someone who still has enough arm and leg strength to rise but needs a stable reference point to organize the movement, a transfer pole reduces hesitation at the start of that push.

A pole is less suited to lateral transfers, such as moving from a bed to a wheelchair positioned alongside it, or situations where someone needs to bear sustained downward weight on the support for extended periods. In those cases, a different device may serve better. If the transfer pattern is complex or the person’s mobility has changed recently, an occupational therapist can assess which support type actually fits before installation. OT-led home safety assessments have been shown to reduce the rate of falls with a rate ratio of 0.69 in independent living settings6.

Nighttime transfers and nocturia

Nighttime trips from the bed to the bathroom carry specific and often underestimated risk. A 2025 study of 491 hip fracture patients found that 76.8% reported at least one nocturnal void, and nighttime falls occurred in 40.6% of those with severe nocturia (two or more voids per night) compared with 20.4% among those reporting none4. The combination of low lighting, reduced alertness on waking, and the physical effort of rising from a lying position creates compounding friction at the exact moment a transfer pole provides support. For anyone making multiple nighttime trips, the case for a reliable bedside handhold is particularly concrete.

Check Your Floor and Ceiling First

Before deciding on a position in the room, verify that installation conditions will hold the pole reliably under load. Two factors matter most.

Ceiling height and surface

Most transfer poles are designed for ceiling heights between 7 and 10 feet8. Measure from the floor to the ceiling at the intended installation point before ordering. Standard residential ceilings in the U.S. run 8 to 9 feet, comfortably within that range. Vaulted, angled, or sub-7-foot ceilings will not work with most tension-mount designs. Check the specific model’s height range against your measured gap, not against a general assumption about your home.

The ceiling surface also matters. Standard drywall or plaster ceilings accept the top pressure plate without preparation. A heavily textured or popcorn surface reduces plate grip and should be inspected carefully. Suspended drop ceilings (grid-tile systems) are not suitable without a rigid backing directly above the tile, because the tile will compress or dislodge under lateral load. If the room has a drop ceiling, a plywood panel spanning two grid rails provides the needed substrate.

Floor surface

Hardwood, tile, and laminate floors provide a solid base for the bottom pressure plate. Thick carpet or carpet over padding introduces compression under load and allows the base plate to shift slightly as weight is applied. On carpeted floors, some transfer pole models offer an extended base plate that distributes force over a wider area, reducing movement. Check whether the model you are considering has a carpet-compatible base option, especially if the bedroom has deep-pile carpet. A base plate that shifts even a few millimeters during a transfer is a stability problem.

Step 1: Position the Pole for Your Transfer Direction

The position determines whether the pole is reachable at the moment it is needed. Most people decide intuitively (place it next to the bed), but the exact lateral position relative to where you sit changes the ergonomics of the grip considerably.

Align with your seated position, not the headboard

Sit on the edge of the bed the way you would before rising: legs swung to the floor, weight on the mattress edge. Mark that position. The pole should sit so the horizontal grab handle falls within easy reach of your dominant hand without requiring you to lean or rotate your torso. For most people, that places the pole 6 to 12 inches from the mattress edge, roughly level with the hip when seated.

Placing the pole too far toward the headboard means you must lean forward and back during the rise, disrupting balance. Too far toward the foot of the bed and the pole is behind the body when it is needed. Neither placement uses the mechanical advantage the device is designed to provide.

Which side of the bed?

Install on the side of the stronger or more reliable arm. For someone recovering from a hip or knee procedure, the pole typically goes on the unaffected side, so the stronger leg and arm work together during the rise. If both sides are equally capable, install on the side closest to the bathroom door, since the same transfer pole supports both the get-up motion and the first steps toward the destination.

If the bed sits against a wall on one side, the accessible side decides the placement. A transfer pole on the wall side is only functional if there is enough clearance to stand fully beside it, generally at least 24 inches between the mattress edge and the wall.

A tension-mounted floor-to-ceiling transfer pole positioned 6 to 12 inches from the mattress edge, showing correct lateral placement for a bedside sit-to-stand transfer
The pole sits 6 to 12 inches from the mattress edge, aligned with the seated hip position rather than centered on the bed length.

Step 2: Set the Grip Height

Grip height is the most commonly adjusted variable and the most commonly set wrong. The goal is to position the horizontal handle so the arm is at mechanical advantage at the start of the transfer, not at the end of it.

Start at seated mattress height

Measure the height of the mattress surface from the floor (including any mattress topper). Set the center of the horizontal grab handle at that height. When seated on the edge of the bed, the handle is at approximately hip height. This puts the elbow at a slight bend and the shoulder in a loaded but not overloaded position for the upward pull at the start of the rise.

This is a starting position, not a fixed rule. If the mattress is unusually high (over 22 inches from the floor) or the person’s arm length is shorter than average, the handle may need to come up 2 to 3 inches. Conversely, if the person tends to slump toward the mattress edge before rising, a slightly higher handle gives more clearance during the initial lean-forward phase.

Test the height before locking it

Set the handle provisionally at the measured height. Have the person sit on the bed, reach for the handle, and run through a slow, deliberate practice rise without trusting full body weight to the pole. Look for two failure patterns: elbow fully straightened at the start of the pull (handle too high, arm cannot generate force through the movement), or shoulder rising above the ear to reach the handle (handle too low, forcing an uncomfortable stretch). Either pattern reduces control and places force on the shoulder in a position it cannot sustain reliably. Adjust, repeat, and lock the position once the grip feels natural at the start of the movement.

Step 3: Install the Pole Using the Tension Method

Tension-mount transfer poles require no tools for the basic installation. The process involves extending the pole sections to the room height, positioning it vertically, and tightening the threaded adjustment nut (located near the base or top cap, depending on the model) until the pole is rigidly held between floor and ceiling.

Extend, position, then tension

Fully collapse the pole sections. Hold the pole in the intended location and note the ceiling gap. Extend the sections until the pole is a few inches shorter than that gap. Insert the top cap against the ceiling, hold the base plate against the floor, and begin turning the adjustment nut clockwise to extend the pole into the ceiling. Apply firm tension. The top pressure plate should contact the ceiling with enough force that the pole does not rock when you push on it from either side with moderate hand pressure. If it moves, the tension is not yet sufficient.

Level before locking

A pole installed at even a slight angle to vertical will tend to walk toward plumb under lateral load, which means it shifts slightly during each transfer. Use a small level on the pole shaft after tensioning. If the pole is not plumb, adjust the base plate position before applying final tension. Most residential floors are close enough to level that this check takes under a minute, but it is worth doing deliberately rather than assuming.

Attach the grab handle last

Once the pole is tensioned and plumb, slide the horizontal grab handle onto the shaft at the target height from Step 2. Tighten the set screw or locking collar firmly so the handle cannot rotate or slide under load. Check the orientation: the curved end of the handle should face toward the person as they reach for it. If the model offers multiple handle orientations, choose the one that places the grip closest to the line of pull during the rise, not the one that looks most natural from across the room.

Step 4: Test the Pole Before Relying on It

The installation is complete when the pole passes a load test, not when the adjustment nut is tight. This step is not optional.

Apply lateral load manually

With both hands on the grab handle, apply a strong, sustained lateral push toward the nearest wall, then a push directly away from the bed. Hold each push for 3 to 5 seconds. The pole should not shift, rock, or lose contact with the ceiling or floor surface. If it shifts at all, increase the tension and repeat. On carpeted floors, also push straight down on the handle to check that the base plate does not sink into the pile under sustained vertical loading.

Conduct a supervised first transfer

Have a second person present for the first real transfer. The goal is not to catch a fall but to observe the movement: does the person grip naturally, does the pull direction match what the pole handles, and does the handle height feel correct under real loading? This is also the moment to check that the base plate has not shifted on the floor. On smooth hardwood or tile without grip pads, the base plate can migrate even with correct ceiling tension. The non-slip rubber feet included with most models address this on smooth surfaces; if they are absent, adhesive grip pads under the base work as a substitute.

“Home safety interventions appear to be more effective when delivered by an occupational therapist.”

Gillespie LD et al., Cochrane Database of Systematic Reviews6

An OT assessment before installing any bedside support is not a bureaucratic step. It changes the device selection, the position, and the grip height in ways a general guide cannot specify for a particular person’s transfer pattern, home layout, or medical history. Prepare those questions before the visit and let the assessment inform the installation decisions.

Common Mistakes That Reduce Stability

Placing the pole for aesthetics rather than transfer mechanics

The pole often ends up near the headboard because that position looks natural in the room. The person’s sitting position during a transfer is not at the headboard. Positioning the pole to look right rather than to be reachable at the moment of the rise reduces its value considerably. The correct position is determined by where the person actually sits when swinging their legs to the floor, not by how the room photographs.

Setting grip height at standing shoulder height

A common intuition is to position the handle at a comfortable standing height so it also works as a steadying point once upright. That height places the grip too high at the start of the rise, forcing the shoulder into a position with less mechanical advantage when the pull is actually needed. The handle should serve the beginning of the transfer. Once standing, most people do not need the pole at all for balance.

Skipping the monthly tension check on carpet

Deep-pile carpet compresses under the base plate, and as compression shifts with temperature and humidity over weeks, the ceiling tension changes too. A pole that was firm at installation may develop a small amount of give three months later. On carpeted floors, repeat the lateral load test from Step 4 monthly. On some carpet thicknesses, placing a rigid board under the base plate significantly improves long-term stability.

Using the pole for lateral bed-to-wheelchair transfers

A tension-mount transfer pole is a straight-up vertical pull point. It is not designed to support the sideways weight-bearing involved in a lateral transfer from bed to a wheelchair positioned beside it. A lateral transfer with full body weight on a tension-mount pole asks the base plate to resist a force direction that its geometry does not handle reliably. A purpose-built transfer board, a ceiling track lift, or a gait belt serves that need better.

How the Three Bedside Support Types Compare

Three distinct devices are commonly placed at the bedside for transfer support. Choosing by price or familiarity rather than by transfer type is the most common planning error. For a full look at how to match a bed rail to your specific bed and mattress, including adult entrapment considerations, see our guide to choosing a bed rail for bedside support.

Feature Transfer Pole (Floor-to-Ceiling) Portable Bed Rail Wall-Mounted Grab Bar
Mounting method Tension between floor and ceiling; no drilling Slides under mattress or clamps to bed frame Screwed into wall studs or with toggle anchors
Primary transfer direction Straight-up pull from seated position Lateral push; edge boundary; roll support Multi-directional; fixed to wall angle at installation
Portability Fully removable and repositionable Removable; moves with the mattress or frame Permanent; removal leaves wall damage
Weight capacity (typical category) 250 to 300 lbs 200 to 350 lbs (varies by model) 250 lbs minimum (ADA standard); more with proper anchoring
Height adjustability Grab handle slides to any position on the pole shaft Fixed or limited adjustment by model Fixed at installation height
Entrapment risk None identified in category Documented: 284 deaths 2003 to 2021 per CPSC data7 None identified in category
Rental or lease-friendly Reversible, no wall damage Yes, portable with bed No

The portable bed rail’s documented entrapment history is worth understanding clearly. The U.S. Consumer Product Safety Commission identified 284 entrapment deaths involving adult portable bed rails from January 2003 through December 2021, with 92% caused by the victim’s head or neck becoming trapped in a gap in the rail7. A mandatory federal safety standard took effect August 21, 2023. The risk is tied to specific gap dimensions and mattress combinations, which is why evaluating any bed rail against that 2023 CPSC standard matters. A transfer pole and a wall grab bar do not share this structural hazard. The full selection process for bed rails, including how to match rail type to mattress and frame, is covered in the guide to bed rail selection.

For seniors who use a bedside commode as part of their nighttime routine, the short transfer from bed to commode is another moment where a stable handhold reduces both effort and hesitation. Our guide to bedside commode placement for older adults covers how to position the commode along the transfer route and what support points help along that path.

Home hazard modification programs that include grab bars and handrails show a meaningful reduction in falls across the research: a 2023 meta-analysis of 10 randomized controlled trials and 1,960 participants found a pooled risk ratio of 0.935. A transfer pole belongs in that category of modifications when the specific need is a vertical handhold at the sit-to-stand moment, without permanent wall changes.

Frequently Asked Questions

How much weight does a floor-to-ceiling transfer pole need to support?

Category-standard transfer poles are rated to 300 lbs8. That covers body weight plus the dynamic force of pulling during the rise. Choose a model rated at or above the person’s body weight, and never substitute a decorative tension pole, which is not rated for lateral load.

Will a floor-to-ceiling transfer pole work on a standard 8-foot ceiling?

Yes. Most tension-mount transfer poles fit ceilings from 7 to 10 feet8, and standard U.S. residential ceilings of 8 to 9 feet fall within that range. Measure at the exact installation point before ordering, since settled floors or slightly angled ceilings can shift the actual gap by an inch or more compared to the nominal ceiling height.

Is a floor-to-ceiling transfer pole better than a wall-mounted grab bar for the bedroom?

Neither is universally better. A transfer pole requires no drilling, is repositionable, and fits a straight-up pull from a seated position. A wall grab bar is permanent, can be angled to the exact transfer direction, and is anchored directly to a stud. If drilling is possible and preferred, a wall bar often provides higher long-term stability. If the installation must be reversible (rented home, temporary need), the transfer pole is the functional alternative. An occupational therapist can assess which suits the specific transfer pattern.

Does the CPSC entrapment warning apply to transfer poles?

No. The 2023 CPSC mandatory standard applies specifically to adult portable bed rails, which are frame-mounted devices with gaps between the rail and the mattress7. A floor-to-ceiling transfer pole is a freestanding vertical pole with no frame gap that could entrap a head or neck. The two devices sit in different product categories with different risk profiles.

Can a floor-to-ceiling transfer pole be used on carpet?

Yes, with the right base plate and regular tension checks. Deep carpet compresses under the base over time, reducing ceiling tension and pole rigidity. Check the lateral firmness monthly by pushing on the pole from both directions. Some models include a wider base plate for carpet installation; adding a rigid board under the base on thick pile significantly improves long-term stability.

Limitations and Edge Cases

  • Ceiling heights under 7 feet or over 10 feet are outside the standard range for most tension-mount transfer poles. A wall-mounted grab bar or a ceiling track lift system may be the only options in those rooms.
  • Suspended drop ceilings require a rigid backing panel above the grid tile before a transfer pole tension system will hold safely. Without that backing, the tile compresses and the anchor point fails.
  • Transfer poles address the straight-up sit-to-stand moment at the bed. They do not provide fall-barrier protection during sleep, which requires a different device. A bed rail and a transfer pole serve different needs and one does not replace the other.

References

  1. PMC / American Journal of Lifestyle Medicine – Moreland BL, Kakara R, Haddad YK, et al. “A Descriptive Analysis of Location of Older Adult Falls That Resulted in Emergency Department Visits in the United States, 2015.” 2020.
  2. PMC / Journal of Clinical Medicine – Tom A, Navarro SM, et al. “Trends and Risk Factors for the Hospitalization of Older Adults Presenting to Emergency Departments After a Bed-Related Fall.” July 15, 2025.
  3. ScienceDirect / Archives of Physical Medicine and Rehabilitation – Komisar V, van Schooten KS, Aguiar OMG, Robinovitch SN, et al. “Circumstances of Falls During Sit-to-Stand Transfers in Older People: A Cohort Study of Video-Captured Falls in Long-Term Care.” November 2022.
  4. Sage Journals / Geriatric Orthopaedic Surgery and Rehabilitation – Yigit N, Nazligul AS, et al. “Nocturia and Nighttime Falls in Older Adults With Hip Fractures: A Retrospective Observational Study.” December 2025.
  5. PMC / PeerJ – Lektip C, Chaovalit S, Wattanapisit A, et al. “Home hazard modification programs for reducing falls in older adults: a systematic review and meta-analysis.” 2023.
  6. PMC / Cochrane Database of Systematic Reviews – Gillespie LD, Robertson MC, et al. “Interventions for preventing falls in older people living in the community.” 2012 (PMC-indexed 2021).
  7. National Council on Aging – “Deadly Adult Portable Bed Rail Hazards Target of New Mandatory Safety Standard.” Citing CPSC Federal Register Final Rule, July 2023. Published August 2023.
  8. Rehabmart – HealthCraft uPole Safety Transfer Pole product specifications: 300-lb capacity, 7 to 10 ft ceiling range, 1.5-inch pole diameter, tension-mount installation. Retrieved August 2026.

Conclusion

A floor-to-ceiling grab bar solves a specific problem: a stable, adjustable vertical handhold at the moment of rising from the bed, with no permanent changes to the wall. Matching it to the right transfer direction, the right lateral position relative to where the person sits, and the correct grip height makes the difference between a device that genuinely helps and one that gets bypassed because it does not fit the movement. The physical setup matters, and so does the broader picture: bed height, nighttime route, lighting, and what other supports the room does or does not provide. See the overview in bedroom safety planning for how the transfer pole fits within a room-wide approach to safer, lower-effort nighttime routines.

Handicap Bathroom Fixtures for Safer Daily Use

Author: Oded Feigin · Created On: August 20, 2026 · Last Updated: August 24, 2026

Handicap bathroom fixtures reduce the physical effort of the daily routines bathrooms demand most: getting on and off the toilet, reaching a faucet, and stepping into a shower. Falls account for 81.1% of nonfatal bathroom injuries treated in U.S. emergency departments each year, according to a CDC analysis of national emergency department data1. The toilet is the highest-risk location for older adults, and that risk rises sharply with age. For a broader view of the bathroom environment as a planning system, see the bathroom safety planning overview. This guide covers the fixture decisions that most directly affect reach, transfer support, and daily ease of operation.

A man in a wheelchair using handicap bathroom fixtures at a sink in a modern, well-lit accessible bathroom
A roll-under sink in a modern accessible bathroom demonstrates how fixture height and knee clearance affect daily use from a seated position.

Quick Answer

Which criteria matter most when choosing handicap bathroom fixtures?

Reach range, transfer height, and control operation are the three primary filters. ADA Standards specify a toilet seat height of 17 to 19 inches, grab bar mounting at 33 to 36 inches, and a forward reach limit of 48 inches for controls2. Fixtures that match these ranges lower the biomechanical load of transfers and reduce hesitation at the points where bathroom injuries are most likely to occur.

Key Takeaways

  • Falls cause 81.1% of bathroom injuries in the U.S.; the toilet transfer is the highest-risk moment for adults over 65, accounting for 36.9% of bathroom injuries among adults 85 and older1.
  • ADA Standards set toilet seat height at 17 to 19 inches, grab bar height at 33 to 36 inches, and lavatory rim height at a maximum of 34 inches with 27 inches of knee clearance underneath23.
  • Lever and single-handle controls reduce grip demand, which matters because more than half of adults 75 and older have doctor-diagnosed arthritis6.
  • Fewer than 1% of U.S. homes have five basic accessibility features installed5 – fixture selection is the most targeted way to close that gap one location at a time.
  • Layout compatibility (turning radius, door swing, transfer clearance) must be confirmed before a fixture is ordered, not after it is installed.

Before You Start: Observe the Bathroom Route First

Fixture selection that starts at a product catalog instead of the bathroom itself tends to produce installs that are physically correct but positioned poorly for the way the room is actually used. Before ordering anything, walk the route from the bedroom to the toilet and back. Note where a hand reaches for support, where a footfall requires extra attention, and where the body turns or changes direction. Those are the friction points, and they tell you what each fixture needs to do before you decide what it should look like.

Three things to confirm before selecting any fixture:

  • Who will use it. A person with reduced grip strength needs different faucet controls than someone with reduced leg strength. A wheelchair user needs different sink clearance than someone who stands with a walker. The fixture serves the person, not a generalized “accessible” category.
  • Which moments carry the most load. Toilet transfers, shower entries, and faucet reaches are the highest-effort moments in a typical bathroom routine. Fixtures near those moments have the most leverage on daily safety and fatigue.
  • What the existing layout allows. A wall-mounted sink requires structural backing. A roll-in shower needs a sloped drain and a waterproof subfloor. Confirm structural and spatial constraints before selecting a fixture. A licensed contractor should evaluate suitability for any wall-mounted or anchored installation.

This pre-selection check is the “observation, not renovation” principle applied to fixtures: understand the specific friction points before committing to a product. The bathroom reach and clearance standards guide covers the dimensional framework that should inform those observations.

Step 1: Match Fixtures to Reach and Height Standards

Height and reach are the first engineering filters for any accessible fixture. A fixture installed at the wrong height shifts load onto joints that may already be under stress, and a control placed outside a comfortable reach zone forces a lean or a stretch that introduces balance risk. The ADA Standards for Accessible Design provide the clearest published framework for these dimensions.

Toilet height

A toilet seat height of 17 to 19 inches above finish floor is the ADA-specified range for accessible toilet installations2. Standard residential toilets typically measure 15 inches to the seat, which requires a deeper knee bend and more eccentric load through the hip during the sit-to-stand transfer. “Comfort height” or “ADA height” toilets are manufactured to the 17-to-19-inch range and are widely available as a direct replacement. A raised toilet seat adapter can close the gap on an existing fixture without replacing the toilet, though the structural security of the adapter and the underlying toilet connection should be confirmed before relying on it for a loaded transfer.

Lavatory and sink height

ADA Standards specify a maximum lavatory rim height of 34 inches, with a minimum of 27 inches of knee clearance beneath the basin for a wheelchair approach3. For a standing user, 34 inches is lower than many residential vanity tops (which commonly reach 36 inches) and keeps the faucet within a comfortable forward reach. Wall-mounted sinks can be set at a height that serves both standing and seated users and can be positioned to provide the required knee clearance. Vanity-based sinks at the correct rim height can still provide chair access if the cabinet doors are removed and the drain and supply lines are insulated against contact burns.

Reach ranges for controls

ADA Standards set the maximum forward reach at 48 inches and the maximum side reach at 54 inches from finished floor2. Shower controls, faucet handles, and flush actuators should all fall within the 15-to-48-inch window for forward reach and the 9-to-54-inch window for side reach. Controls mounted too high require a raised arm with the elbow above shoulder level, which reduces grip strength and balance simultaneously. Controls mounted too low require a forward lean from a standing position or a reaching lean from a seated one.

The table below compares key fixture types against their ADA-specified dimensional targets. These figures apply to new accessible construction and renovation intended to meet ADA Standards; a licensed contractor or occupational therapist should confirm how they apply to a specific home.

Fixture ADA Height / Reach Target Typical Residential Standard Transfer or Reach Benefit
Toilet seat 17-19 inches above floor 15 inches (standard) Reduces hip and knee flexion during sit-to-stand
Grab bar (toilet, shower) 33-36 inches above floor Not installed in most homes Provides leverage at elbow height when seated
Lavatory rim 34 inches max; 27 in. knee clearance 32-36 inches (varies by vanity) Allows roll-under approach and reduces forward lean
Shower / faucet controls 15-48 inches (forward reach) Often 48-60 inches (varies by builder) Reachable without shoulder raise or balance shift
Shower floor threshold 0.5 inches maximum change in level 1-4 inches (curbed shower common) Eliminates step-over that interrupts stride

Sources: U.S. Access Board, ADA Standards for Accessible Design, Chapters 6 and 423. Typical residential standards reflect common builder practice; individual homes vary.

Step 2: Choose Controls That Work Without a Tight Grip

A senior woman using a bathroom sink in a bright, well-lit accessible bathroom - demonstrating daily fixture use
Daily sink routines rely on faucet controls that can be operated with reduced grip or a closed fist, not a pinch or twist.

Grip strength declines with age, and grip demand is the hidden variable in faucet, flush, and shower control selection. A round ball-style faucet knob requires a pinch-and-twist motion. A single-lever faucet can be operated with a closed fist, a palm, or even an elbow. That difference is not cosmetic: it determines whether a control can be used reliably in the presence of wet hands, arthritic joints, or early morning reduced coordination.

More than 53.9% of adults aged 75 and older have doctor-diagnosed arthritis, as do 42.3% of adults aged 65 to 74, according to CDC National Center for Health Statistics data from 20226. For a substantial share of the population the bathroom serves, round knob controls are a friction point, not a design choice.

Faucet controls

Single-lever faucets with a long handle are the most broadly accessible option. They allow water temperature and flow to be controlled with one motion from one hand, require no grip, and can be set to a safe pre-mixed temperature when combined with a thermostatic valve. Touch-sensitive and motion-activated faucets eliminate hand contact entirely but require a power source (battery or line) and may require an adjustment period for users unfamiliar with the activation zone. Pull-out or pull-down spout faucets allow water to be directed without repositioning the body, which reduces the lean-and-reach sequence common at fixed-spout sinks.

Shower controls

A thermostatic shower valve with separate volume and temperature controls provides the most accessible shower experience. The temperature is set once and held regardless of supply pressure fluctuations; the volume lever (not knob) starts and stops flow without a grip. Placement matters as much as control type: a shower control mounted 48 to 52 inches from the floor on the short wall (not the shower head wall) can be reached from outside the shower before entering, which eliminates the risk of a cold-water surprise on entry. A handheld showerhead on a slide bar allows height adjustment to seat level and gives the user directional control without moving under a fixed stream.

Flush mechanisms

Elongated toilet bowls with a large flush lever on the approach side are easier to reach than those with a button on the tank lid or a handle on the far side. Automatic flush sensors eliminate the reach entirely but may require a manual override for users who prefer control. Wall-mounted flush plates, common in European-style toilets, can be positioned lower on the wall than a tank-mounted lever and can be designed as large-format push pads rather than small buttons.

“The vast majority of Americans age 50-plus would like to live in their current home (75 percent) and community (73 percent) for as long as possible.”4

AARP Research, 2024 Home and Community Preferences Survey4

Among those planning home modifications in the same survey, 72% specifically identified the bathroom as a priority upgrade4. Controls are the most frequently used fixtures in that upgrade list – faucets and flush mechanisms are operated multiple times daily, making their grip demand a cumulative factor in bathroom fatigue. For guidance on evaluating the durability and quality of these fixtures, see the judging fixture quality guide.

Step 3: Select Fixtures That Support Transfers

A transfer is any move between two positions – sitting to standing, standing to seated, stepping into a shower, or lowering to a tub. Transfers are the highest-load moments in a bathroom routine because they require the body to move through an unstable intermediate position with no fixed support point. Fixtures that support transfers provide a stable, correctly positioned anchor at the exact moment when balance and strength are most demanded.

Toilet-Transfer Injuries as Share of All Bathroom Falls by Age Group Column chart showing that toilet-related injuries as a proportion of all bathroom injuries rise from 19.3% among adults aged 65-74, to 26.9% among adults aged 75-84, to 36.9% among adults aged 85 and older. Source: CDC Morbidity and Mortality Weekly Report, 2011 (2008 emergency department data). A companion finding from PMC analysis of the American Housing Survey (2019) shows that fewer than 1% of U.S. homes have five key accessibility features, creating a widening gap between injury risk and home preparation at older ages. Toilet-Transfer Injuries as Share of Bathroom Falls by Age 0% 10% 20% 30% 40% 19.3% Ages 65-74 26.9% Ages 75-84 36.9% Ages 85+ Source: Home Age Fit analysis, 2026
Toilet-related injuries account for nearly 37% of all bathroom injuries among adults 85 and older (CDC MMWR, 2011), yet fewer than 1% of U.S. homes have five basic accessibility features installed (PMC/NIH, 2019). Compiled by Home Age Fit from CDC MMWR (ref 1) and PMC analysis of the American Housing Survey (ref 5).

Grab bars: the primary transfer fixture

A grab bar is the highest-leverage transfer fixture in the bathroom. ADA Standards specify a circular cross-section diameter of 1-1/4 to 2 inches and a wall clearance of 1-1/2 inches to allow a full-hand grip2. At the toilet, the side wall bar should be 42 inches minimum in length, beginning no more than 12 inches from the rear wall and extending to at least 54 inches in front of the toilet, mounted at 33 to 36 inches from the floor2. A rear wall bar, 36 inches minimum in length, provides a push-back support point during the initial lowering phase. At the shower, a vertical bar at the entry and a horizontal bar on the back wall give the user distinct grip options for stepping in versus bracing during washing. Grab bars must be anchored to structural backing – typically a blocking board, a stud, or a solid substrate behind the tile. This is a structural question that belongs with a licensed contractor, not a product decision.

Shower entry fixtures

A curbless (barrier-free) shower eliminates the step-over curb that requires a single-leg balance moment on entry and exit. ADA Standards allow a maximum change in level of 0.5 inches at a shower threshold2. For a wheelchair user, the ADA minimum shower width is 36 inches for a transfer shower or 30 by 60 inches minimum for a roll-in configuration. A fold-down shower seat, installed at 17 to 19 inches from the floor, allows the shower to be used while seated, removing the sustained standing balance demand. For planning the layout dimensions that make these fixtures viable, the bathroom layout dimensions guide covers the spatial requirements in detail.

Tub-to-shower transition decisions

A bathtub requires a high step-over (typically 14 to 18 inches) and a seated-to-reclined transfer that demands significant shoulder and trunk strength to reverse on exit. For many adults with reduced balance or upper-body strength, a tub becomes the highest-risk fixture in the bathroom. Converting a tub enclosure to a curbless shower involves waterproofing, subfloor reinforcement, and drain repositioning, and warrants a contractor evaluation. A tub transfer bench can reduce step-over risk on an existing tub without a full conversion; an occupational therapist can evaluate suitability for a specific person’s strength and balance.

Step 4: Verify Clearance and Layout Fit

A fixture that meets every dimensional standard can still fail in a specific bathroom if the layout does not provide the clearance that makes it usable. Layout compatibility is a constraint that exists before a fixture is chosen, and confirming it before ordering is far less costly than reversing a decision after installation.

Turning radius and floor clearance

ADA Standards require a 60-inch turning diameter for a wheelchair to complete a 180-degree turn in a bathroom2. Even for users who do not use a wheelchair, this clearance standard is a useful planning floor: it ensures that a walker, a rollator, or a transfer aide can be positioned correctly at the toilet or shower without the door or a vanity blocking the approach. Before selecting a wall-mounted sink or a comfort-height toilet, measure the floor clearance between the toilet centerline and the nearest obstruction (vanity, door, tub wall) and between the sink and the toilet. For specific dimensions on doorway widths, turning space, and fixture-to-fixture clearance, the bathroom reach and clearance standards guide covers those numbers in detail.

Door swing and fixture placement

An inward-swinging door in a small bathroom can block access to the toilet or prevent a fallen person from being reached by a rescuer. ADA Standards allow outswing, sliding, or offset-pivot doors to solve this without enlarging the doorway. Before selecting a new vanity or toilet, check whether the existing door swing conflicts with the fixture’s approach clearance. A pocket door or a barn-style sliding door on an accessible track is a lower-disruption alternative to widening the rough opening.

For a full review of how accessible bathroom planning fits into a broader layout strategy, see the safer layout ideas guide.

Step 5: Plan for Maintenance and Long-Term Use

An accessible fixture that requires effort or dexterity to clean can partially undo its own safety contribution. Cleaning is a frequent, repeated bathroom task, and fixtures with complex geometry – deep grout lines around decorative grab bar flanges, recessed ledges in wall-mounted sinks, or intricate textured finishes on shower walls – accumulate biofilm and mineral deposits that require kneeling, reaching, or significant scrubbing to remove.

Surface and finish selection

Grab bars with a smooth or brushed finish and a simple cylindrical profile are easier to wipe clean than those with knurled textures or decorative flanges. Solid-surface or acrylic shower walls, installed without grout lines, reduce cleaning effort significantly compared to tiled wet areas. A toilet with a skirted base (where the trapway is enclosed by the base) eliminates the crevice between the trapway and the floor that collects residue and requires reaching low to clean. A single-hole faucet eliminates the gaps around a three-hole deck plate where mineral deposits accumulate.

Long-term durability and load ratings

Accessible fixtures are used differently from standard fixtures: grab bars receive body-weight loads during transfers, elevated toilet seats are subjected to eccentric lateral loads as the user stands, and shower seats carry sustained static loads during seated use. These are legitimate structural loads. A grab bar spec sheet should state a minimum load rating (typically 250 pounds for residential use); a wall-mounted toilet or shower seat should have a manufacturer-stated weight capacity that exceeds the user’s weight with a safety margin. This is not about worst-case scenarios – it is about confirming that the fixture was designed for the use it will actually see. For a broader framework on evaluating accessible bathroom products by load, fit, and daily use, see the judging fixture quality guide.

Future adaptability

Accessible fixtures work best as part of a bathroom that can be modified as needs change without full reconstruction. Blocking installed in walls during any renovation allows grab bars to be added later without opening the wall. A comfort-height toilet and a curbless shower are usable by anyone, at any mobility level. Specifying these during an active renovation, rather than after a fall or health event, is the lower-cost path. That is the “plan before the crisis” principle applied to fixture selection.

Common Selection Mistakes to Avoid

Most fixture selection errors fall into one of three categories: choosing by appearance before confirming function, specifying to code minimums without accounting for the actual user, or treating each fixture as an independent decision rather than as part of a shared layout.

Choosing a grab bar by finish instead of load path

A grab bar’s finish (chrome, oil-rubbed bronze, brushed nickel) matters for appearance. What matters for safety is its diameter (1-1/4 to 2 inches), its anchor method (into structural backing, not drywall anchors), and its placement relative to the transfer arc. A bar installed at the right height and position on solid backing will outlast and outperform a decorative bar anchored to hollow drywall at the wrong angle, regardless of finish. Confirm anchor points before selecting a bar style, not after.

Specifying ADA-minimum dimensions without accounting for the specific user

ADA Standards describe a minimum accessible envelope – the smallest space and the boundary heights that must be met to serve the broadest range of wheelchair and ambulatory users. They are not optimized for any specific person. A user who is taller will need grab bars at the upper end of the 33-to-36-inch range. A user who is shorter will need them at the lower end. A user who transfers from a specific side will need the grab bar on that side. ADA compliance is a floor, not a design target. An occupational therapist can evaluate the specific person’s transfer mechanics and recommend precise bar placement – a detail that code cannot supply.

Treating the toilet, sink, and shower as independent decisions

The toilet, sink, shower, and door form a shared floor plan. A comfort-height toilet installed without confirming adjacent clearance may block a wheelchair approach. A roll-in shower added to one end of the bathroom may reduce floor clearance at the toilet transfer zone. Selecting each fixture in isolation produces a bathroom that meets individual specs but fails as a system. Review the full layout with all fixtures on a dimensioned floor plan before ordering any of them.

Ordering before confirming the rough-in

Toilets are manufactured to different rough-in dimensions (most commonly 12 inches, but also 10 and 14 inches in older homes). A comfort-height toilet ordered to the wrong rough-in will not fit against the finished wall without plumbing work. Measure the rough-in from the finished wall to the floor drain center before ordering any toilet replacement.

What Well-Chosen Handicap Bathroom Fixtures Accomplish

A well-selected set of accessible bathroom fixtures produces a bathroom that is simply easier to use – not one that announces its purpose. The toilet transfers with less effort. The faucet opens without a grip. The shower entry requires no step-over. The grab bars are where the hand reaches naturally, not where the wall happened to have a stud.

Practically, this means:

  • The toilet seat is at 17 to 19 inches, and a bar on the approach-side wall is within arm’s reach at 33 to 36 inches from the floor.
  • The faucet operates with a lever or a single handle from the same position the user stands or sits to wash hands, with no forward lean required to reach it.
  • The shower entry is flush or has a maximum 0.5-inch transition, and the controls can be reached and adjusted before stepping under the water.
  • The layout provides at least 18 inches of clearance from the toilet centerline to the nearest fixed obstruction on the transfer side.
  • All fixtures were confirmed against the existing rough-in, door swing, and floor plan before ordering.

This outcome is achievable in most bathrooms without a full gut renovation. The path to it is the same in every case: observe the route, map the friction points, confirm the constraints, select the fixtures that fit, and install them to a structural standard. The home does not need to be rebuilt; it needs to be understood. For planning a wheelchair-specific bathroom configuration, the wheelchair accessible bathroom planning guide covers the additional layout and fixture requirements that apply.

Frequently Asked Questions

What is the correct height for a handicap toilet?

ADA Standards specify a toilet seat height of 17 to 19 inches above the finished floor, measured to the top of the seat2. Standard residential toilets typically measure 15 inches at the seat. “Comfort height” or “ADA height” toilets are manufactured to this range and are available as direct replacements in most residential configurations.

Where should grab bars be installed in an accessible bathroom?

At the toilet, the side wall bar should be 33 to 36 inches high, 42 inches minimum in length, starting no more than 12 inches from the rear wall and extending to at least 54 inches in front of the toilet2. At the shower, a vertical bar at the entry and a horizontal bar on the back wall cover the two main grip moments. All bars must anchor to structural backing, not drywall.

Do handicap bathroom fixtures need to look institutional?

No. Accessible fixtures are available in the same finishes and styles as standard residential fixtures. Lever faucets, comfort-height toilets, and grab bars in brushed nickel, matte black, or oil-rubbed bronze are widely available and visually indistinguishable from standard residential hardware at normal viewing distance. The accessible performance comes from the dimensions, not the appearance.

Can I install accessible fixtures in a rental apartment?

Some accessible modifications are reversible (raised toilet seat adapters, handheld showerhead conversions, lever-handle faucet replacements) and may be permitted in rentals without structural work. Grab bars require wall penetration into structural backing and typically need landlord approval. Under the Fair Housing Amendments Act, renters with disabilities generally have the right to make reasonable modifications at their own expense, with restoration required on vacancy. An attorney or disability rights organization can clarify the applicable rules for a specific tenancy.

What is the difference between ADA-compliant and accessible fixtures?

ADA compliance is a legal standard that applies to places of public accommodation and commercial facilities; it does not apply as a mandate to private residences. “Accessible” in a residential context generally means the fixture meets or approaches the dimensional standards the ADA describes – toilet height, reach range, grab bar diameter, and so on – which are the best available published framework for residential accessible design even when ADA enforcement does not legally apply. An occupational therapist can translate those standards into a specific recommendation for a specific person.

Limitations and Edge Cases

  • This guide covers fixture selection criteria for residential bathrooms; commercial and healthcare settings have additional code requirements beyond what is described here.
  • Dimensional standards (ADA toilet height, grab bar placement, reach ranges) apply to the general accessible population. An occupational therapist should confirm specific placement for a user with unusual height, reach limitations, or asymmetric strength.
  • Structural suitability for wall-mounted fixtures, grab bar anchors, and threshold modifications must be evaluated by a licensed contractor for each specific home before installation begins.

References

  1. CDC Morbidity and Mortality Weekly Report – Nonfatal Bathroom Injuries Among Persons Aged 15 Years and Older, United States, 2008. Centers for Disease Control and Prevention, June 10, 2011.
  2. U.S. Access Board – ADA Standards for Accessible Design, Chapter 6: Toilet Rooms. U.S. Architectural and Transportation Barriers Compliance Board, 2010 (continuously maintained).
  3. U.S. Access Board – ADA Standards for Accessible Design, Chapter 6: Lavatories and Sinks. U.S. Architectural and Transportation Barriers Compliance Board, 2010 (continuously maintained).
  4. AARP Research – 2024 Home and Community Preferences Survey. AARP Public Policy Institute, November 2025.
  5. PubMed Central / NIH – Innovations in Home Modification Research: The State of the Art. Sanford et al., Gerontologist, 2019. Cites American Housing Survey analysis showing only 1% of U.S. homes have five key accessibility features.
  6. CDC National Center for Health Statistics – Arthritis in Adults Age 18 and Older: United States, 2022. NCHS Data Brief No. 497, February 2024.

Conclusion

Handicap bathroom fixtures address the bathroom’s three highest-effort moments – toilet transfers, faucet operation, and shower entry – by matching fixture height, control design, and support placement to the body’s actual reach, grip, and balance demands. The gap between where bathroom injuries occur and how most homes are configured is wide: the toilet transfer accounts for 36.9% of bathroom injuries among adults 85 and older1, yet fewer than 1% of U.S. homes have basic accessibility features in place5. Fixture selection, confirmed against layout constraints and installed to a structural standard, is the most targeted way to close that gap.

For a broader view of how these fixtures fit into bathroom planning as a system, see the bathroom safety planning overview.

Accessible Bathroom Ideas for Seniors: Safer Layouts

Author: Oded Feigin · Created On: August 19, 2026 · Last Updated: August 24, 2026

The bathroom concentrates fall risk in a way no other room in the house does. In 2020, 14 million older adults (27.6%) reported falling in the past year1, and the shower entry, toilet transfer, and wet floor surface are where those incidents cluster. This guide covers the accessible bathroom ideas for seniors that reduce friction at each of those points: layout, grab bar placement, flooring, lighting, and mobility-aid clearance. For a broader overview of how these changes connect, see the bathroom safety planning overview.

An older man in a wheelchair brushes his teeth at a bathroom sink, illustrating accessible bathroom ideas for seniors who use mobility aids
A senior in a wheelchair completes a morning bathroom routine, showing why mobility-aid clearance and accessible layout matter in daily use.

Quick Answer

What are the most important accessible bathroom ideas for seniors?

The highest-leverage changes are a curbless shower entry, a comfort-height toilet (17 to 19 inches above the floor) with 60 inches of side clearance, grab bars at load-bearing points rated to 250 pounds, slip-resistant tile meeting a wet DCOF of at least 0.42 (0.50 for shower floors), and general illuminance scaled to at least 60 foot-candles for aging eyes1. Each targets a specific friction point rather than decorating around one.

Key Takeaways

  • In 2020, 14 million (27.6%) older adults reported falling in the previous year1; the shower entry, toilet transfer, and wet floor are the primary friction points.
  • An estimated 42% of seniors with difficulty bathing or toileting lacked grab bars or assistive seating2; the most common and most addressable gap.
  • In a controlled study, participants with a grab bar were 75.8% more likely to recover balance during a bathtub exit than those without one3.
  • Shower floors require a minimum wet DCOF of 0.50 (ANSI IW+), not the 0.42 minimum for general bathroom floors5; many retail tiles meet only the lower threshold.
  • A 60-year-old eye requires approximately three times more illuminance than a 20-year-old eye6; standard bathroom lighting is likely insufficient.

Why Accessible Bathroom Ideas for Seniors Start With Observation

The most common planning error is treating an accessible bathroom renovation as a product-selection exercise. Before anything is purchased or installed, the bathroom should be observed as a movement system. Walk the actual route a person takes from the bedroom door to the toilet, to the shower, to the sink, and back. Note every point where the body hesitates, grips a towel bar, changes direction, or steps over a threshold. Those hesitation points tell you what the bathroom is asking you to solve, and they are different in every home.

The friction points surfaced by that walk, not a product list, define what changes matter most. A licensed occupational therapist can formally assess multiple friction points and help sequence modifications when budget requires phasing.

Walk the Route, Not Just the Room

Stand at the bathroom doorway and trace the path to each fixture. Mark every grip point: the doorknob used for balance on entry, the towel bar grabbed during a pivot to the toilet, the wall edge steadied against during the shower step-over. Each borrowed support point is a signal that a designed support is missing. A towel bar used as a grab bar is a daily friction-point indicator. It is not rated for body-weight loads and can fail under them without warning.

If a walker or wheelchair is part of the household, trace the same route with that mobility aid. Note where it cannot complete a turn, where a door swings into the path, and where the floor surface changes underfoot. These observations define the clearance and threshold improvements the bathroom needs before any fixture work begins.

Match Each Modification to a Specific Friction Point

Once the walk is complete, list each hesitation point with a cause. Is the hesitation about grip? Balance during a height change? A threshold underfoot? Wet surface? Insufficient light? Each cause points to a different modification. A hesitation caused by insufficient light is not solved by a grab bar; a slippery threshold is not solved by a brighter bulb. Matching the modification to the cause prevents the common outcome of installing several products that collectively address none of the actual friction points.

Plan the Shower for Barrier-Free Entry

The shower or tub entry is the single highest-risk transition in the bathroom. The tub curb step requires standing on one leg on a wet surface while lifting the other leg over an edge that may be 14 to 22 inches tall. That movement demands hip flexion, balance, and lower-body strength simultaneously. Removing the threshold, or replacing the fixture with a curbless entry, changes the movement from a one-leg balance event to a walk-in.

A modern accessible restroom showing wall-mounted grab bars beside a toilet and urinal, key accessible bathroom features for layout planning
A purpose-designed accessible restroom with wall-mounted safety grab bars at ADA-compliant heights beside the toilet, illustrating how support point placement looks in a planned accessible layout.

Why the Threshold Is the First Hazard to Eliminate

A randomized feasibility trial examining home bathing adaptations (the BATH-OUT study) found that participants who received level-entry shower adaptations recorded 33 total falls during the follow-up period, compared with 65 in the waiting-list control group8. The trial was small and its results are directional rather than definitive, but the mechanism is straightforward: eliminating the balance-demanding step removes a daily friction point that compounds with other age-related changes in proprioception and lower-body strength.

A curbless (zero-threshold) shower can be created by converting an existing tub space or by building a new wet room with a linear drain flush to the floor. Both approaches require waterproofing work behind the tile, which is a structural modification that warrants a licensed contractor experienced with wet-area construction. For planning dimensions for the conversion itself, the bathroom layout dimensions guide covers threshold height, shower entry width, and the clearances needed for different mobility aid scenarios.

Shower Seat, Handheld Showerhead, and Controls Within Reach

A curbless entry works best when combined with three additional elements. A fold-down or fixed bench inside the shower reduces the need to stand for the full duration of showering. Standing on a wet surface for 10 to 15 minutes adds cumulative fatigue load on the ankles, knees, and hips; the seated option removes that load and keeps the user’s center of mass lower and more stable.

A handheld showerhead on an adjustable slide bar, extending from approximately 28 to 72 inches above the shower floor, allows the user to direct water while seated or standing without reaching across the wet zone. The slide bar doubles as a light vertical support point during the transition between standing and seated positions, though it is not rated as a load-bearing grab bar and should not be relied on for full-weight transfers.

Shower controls placed within 24 to 48 inches of the shower entry allow the user to set temperature before stepping in. Thermostatic mixing valves that hold a preset temperature reduce scald risk without requiring repeated hot-cold adjustment. The wheelchair accessible bathroom guide covers tub-versus-shower decisions for users with wheeled mobility aids.

Set the Toilet Height and Clearance for Easier Transfers

Toilet transfers are among the most physically demanding daily movements in the bathroom. A standard seat at approximately 15 inches above the finished floor requires deep knee and hip flexion on the way down and significant muscular effort to rise. Adding height reduces both the flexion demand and the effort of standing.

Seat Height and the Sit-to-Stand Equation

The ADA standard for accessible toilet seat height is 17 to 19 inches above the finished floor, compared with the standard fixture at approximately 15 inches4. That 2 to 4 inch difference changes the starting joint angle at the knee and hip, reducing the muscular force required to initiate the upward phase of the transfer. For a person with arthritis, reduced leg strength, or a joint replacement, that reduction can determine whether the transfer requires assistance.

A comfort-height toilet (typically sold at 17 to 17.5 inches for the rim, pre-seat) reaches ADA-range height with a standard seat added. For renters or households where fixture replacement is not currently practical, a raised toilet seat with locking attachment and integrated armrests adds 2 to 6 inches of height to an existing fixture without any installation. Evaluation criteria for those seats, including load rating, locking security, and armrest geometry, are covered in the senior bathroom safety products guide.

Lateral Clearance and Approach Space

The ADA standard for side clearance at a toilet requires a minimum of 60 inches from the side wall to the opposite wall4. This clearance accommodates a lateral transfer from a wheelchair, a caregiver assist, or the positioning of a safety frame on either side. In most residential bathrooms, this space is constrained by the vanity cabinet on one side and the wall on the other.

A minimum clear floor space of 30 by 48 inches in front of the toilet is required for forward approach with a walker or wheelchair4. If that space is currently occupied by a trash bin, a laundry hamper, or a magazine rack, clearing it is the first modification to make. Storage rearrangement has no cost and can resolve a clearance friction point within minutes.

Toilet Height and Clearance: Standard vs. ADA Accessible
Dimension Standard (typical) ADA Accessible
Seat height above finished floor ~15 inches 17 to 19 inches
Side wall clearance No standard 60 inches minimum
Forward approach space No standard 30 x 48 inches minimum
Side-wall grab bar length None typically 42 inches minimum
Rear-wall grab bar length None typically 36 inches minimum

Place Grab Bars Where the Body Actually Loads

Grab bars are the most cited accessible bathroom modification and the most frequently misplaced one. A bar at the wrong height, orientation, or location offers little benefit and can mislead a user into trusting a support that does not align with the actual transfer. Install them where the hand naturally lands, not where they look correct in a diagram. The ADA specifications below provide minimum standards; an occupational therapist can assess exact placement for a specific person.

“An estimated 42% of individuals who expressed or demonstrated diminished capability to bathe or toilet independently lacked grab bars or seats to help.”2

Lam et al., JAMA Internal Medicine

The research on grab bar effectiveness is more specific than the general expectation that bars help. A peer-reviewed study published in Human Factors measured balance recovery during bathtub exit, one of the highest-risk moments in any bathroom routine:

“Participants who had a grab bar were 75.8% more likely to recover their balance during the task than those who did not have a grab bar.”3

Levine, Montgomery & Novak, Human Factors: The Journal of the Human Factors and Ergonomics Society

Grab Bar Placement at the Shower

ADA standards specify grab bar diameter between 1.25 and 1.5 inches, mounted with 1.5 inches of clearance from the wall surface, and rated to support 250 pounds4. In a roll-in shower, the back-wall bar must be at least 36 inches long and the side-wall bar at least 54 inches long4.

For most seniors aging in place rather than transferring from a wheelchair, a horizontal bar at 33 to 36 inches above the shower floor near the entry supports balance during the step-in or the transition to a bench seat. A vertical bar near the shower entry at shoulder height (48 to 54 inches) provides a pull point for the standing-to-seated direction. An L-shaped bar beside the bench supports both the downward and upward components of the seated transfer. Placement that serves the actual transfer movement is more valuable than placement that meets the minimum specification at a location the user does not naturally reach for.

Grab Bar Placement at the Toilet

A side-wall grab bar at the toilet must be at least 42 inches long4, placed on the side where transfer occurs. A rear-wall bar of at least 36 inches provides a push point for the forward lean that initiates standing from the seated position. Mounting height for both is 33 to 36 inches above the finished floor.

In many residential bathrooms, a wall stud is not present at exactly the location where the bar must go. A grab bar anchored with toggle bolts into drywall alone will not hold under 250-pound load. The installation requires either locating an existing stud or opening the wall to add rated blocking. This is the single step that most often causes grab bar installations to fail, and it warrants professional installation by a contractor experienced with accessible design. The handicap bathroom dimensions guide covers reach range and mounting height requirements in detail for different user positions and transfer patterns.

Choose Flooring With Verified Slip Resistance

The feel of a floor surface underfoot does not reliably predict how it performs when wet. A visually rough, matte-finish tile may have lower slip resistance under wet-DCOF testing than a polished one. The standard that governs wet-floor safety is the Dynamic Coefficient of Friction (DCOF), measured under ANSI A326.3-2021. Higher DCOF means more resistance to slip under foot movement on a wet surface.

Minimum Required DCOF by Wet-Floor Environment Horizontal bar chart showing minimum wet DCOF by floor type: General Bathroom Floor 0.42; Shower and Pool Deck 0.50; ADA Advisory Level 0.60. Source: ANSI A326.3-2021 and ADA Advisory Bulletin 4, 2003. Minimum Required DCOF by Wet-Floor Environment 0.0 0.2 0.4 0.6 DCOF (wet dynamic coefficient of friction) General Bathroom Floor 0.42 Shower and Pool Deck 0.50 ADA Advisory Level 0.60 Source: Home Age Fit analysis, 2026
Shower floors and pool decks require a higher minimum DCOF (0.50 under ANSI IW+) than standard bathroom floors (0.42 under ANSI IW); the ADA 2003 Advisory Bulletin 4 recommended 0.60 for level surfaces. Compiled by Home Age Fit from ANSI A326.3-2021 and ADA Advisory Bulletin 4 (2003).

What DCOF Means for Bathroom Tile Selection

ANSI A326.3-2021 uses a tiered system keyed to the floor environment. A standard bathroom floor (general wet use, occasional splashing) must meet a minimum wet DCOF of 0.42 under the Interior Wet (IW) category5. A shower floor or pool deck that remains consistently saturated must meet the higher Interior Wet Plus (IW+) standard of 0.505. That 0.08 difference is not a rounding margin; it represents a meaningfully different grip level under foot pressure on a wet surface, and the test method simulates the actual movement of a foot on a wet tile.

Many retail tiles marketed as “slip-resistant” meet only the IW threshold of 0.42, which is the general bathroom floor minimum and insufficient for a shower floor. Request the DCOF AcuTest result under ANSI A326.3-2021 before selecting any tile for a wet zone; that number is the measured performance result, not a visual estimate.

Transition Zones and Surface Changes

The floor surface changes at the shower entry and at the bathroom door are secondary friction points. A height difference between a tile bathroom floor and a carpeted hallway, or between a shower floor and a bath mat, creates a trip hazard at the exact moment when feet are often wet and balance is already in recovery. Level transitions are preferred at all interior thresholds. Where some height difference is unavoidable, a beveled transition strip no taller than 0.5 inches (12.7 mm) reduces trip risk while remaining passable for most mobility aids.

Bath mats at the shower exit need slip-resistant backing as well as a slip-resistant top surface; a mat that slides when a wet foot lands on it introduces the hazard it was placed to prevent.

Plan Lighting for Aging Eyes

Bathroom lighting is consistently underweighted in accessible bathroom planning, often because its effects are invisible in the daytime when renovation decisions are made. A 60-year-old eye requires approximately three times more illuminance than a 20-year-old eye to perceive the same level of detail6. Most residential bathrooms are lit for general comfort at levels designed for younger visual systems, not for the task precision that medication label reading, shaving, or nighttime navigation requires for aging eyes.

General and Task Illuminance

Applying the 3x illuminance multiplier for aging eyes6, the practical target for a senior bathroom is at least 60 foot-candles for general use and 100 or more at the vanity and medicine cabinet. The vanity target matters because reading a medication label at arm’s length is a precision visual task that fails quietly when light is insufficient: the person adjusts posture or misreads without recognizing light as the limiting factor.

Recessed ceiling fixtures provide general illuminance without eye-level glare. Side-lit vanity sconces at face height on each side of the mirror eliminate the shadows a single overhead fixture casts on the face. The combination of ceiling general lighting and side sconces serves aging eyes without the institutional look of a single bright overhead bank. Color temperature of 3,000 to 3,500 Kelvin (warm white) supports accurate color rendering.

Night Navigation and Motion-Activated Lighting

Nighttime bathroom trips are a concentrated risk window. The user moves from a darkened bedroom with reduced balance and coordination. Switching on a bright ceiling fixture triggers a transient pupil-contraction response that temporarily reduces useful vision exactly when balance recovery is most needed.

A layered approach avoids this: a baseboard night light illuminates the floor path from bedroom to bathroom; a motion-activated light strip along the bathroom baseboard provides 5 to 10 foot-candles to reach the toilet without activating the overhead fixture. Dimmer switches on the main fixture let the user scale illuminance to the task. AARP’s 2024 Home and Community Preferences Survey found 72% of adults 50 and older prioritized grab bars and no-slip tile for planned bathroom modifications7, yet lighting upgrades, despite lower cost, are frequently deferred.

Organize Storage and Mobility-Aid Clearance

Accessible bathroom planning includes not only fixtures and surfaces but the space a person and their mobility aid need to move through. Storage placed at inconvenient heights creates bending and reaching loads. Objects placed in the turning zone force awkward compensating movements. Both are addressable, and many storage changes require no installation work at all.

Doorway Width and Turning Space

The ADA minimum clear door opening is 32 inches at 90 degrees, with 36 inches preferred for comfortable wheelchair or wide-walker passage4. Many residential bathroom doors are 28 to 30 inches clear, which is sufficient for walking but restricts walker access and prevents wheelchair entry. Offset hinges can gain approximately 2 inches of clear opening without door replacement. A full door replacement to 36 inches provides the preferred clearance and may be the better investment when the door is already due for upgrade.

A 60-inch diameter clear turning space is required for a wheelchair to complete a full turn4, and it correlates with comfortable walker maneuverability and caregiver-assist access even for non-wheelchair users. Where a vanity cabinet blocks the turning zone, a wall-mounted (floating) vanity or wall-mounted toilet can free the needed floor area without changing the room footprint.

Storage Height and Reach Zones

The comfortable standing reach zone for most older adults falls between 20 and 48 inches above the floor: high enough to avoid deep forward bending, low enough to avoid full overhead extension with an unstable weight-shifted posture. Items used daily (medications, soap, towels, toothbrush) should live in this zone. Overhead shelving above 48 to 52 inches requires tilting the head back and reaching upward while weight shifts forward, a posture that challenges balance when both hands are occupied.

Drawer storage at counter height (34 to 36 inches above floor) is preferable to upper-cabinet storage for daily-use items. Pull-out drawer organizers allow the user to see the full contents without bending into the cabinet. A small rolling cart within the 20 to 48 inch reach zone is a reversible, no-installation solution for commonly used items that can be repositioned as needs change over time.

The seated reach zone extends approximately 24 inches to either side. Items used from the toilet or shower bench should be reachable without a forward lean that moves the center of mass beyond the support base. A side-mounted tissue holder and shower caddy at 28 to 34 inches address this without structural work.

Common Planning Mistakes to Avoid

Accessible bathroom modification is more often limited by diagnostic gaps than by budget. These are the most consistent mistakes in the planning process.

Mounting Grab Bars Into Drywall Without Blocking

The most common and most consequential installation error is mounting a grab bar with toggle bolts or drywall anchors rather than into wall studs or rated blocking. A grab bar bearing 250 pounds of user weight under a full transfer load will pull out of drywall. A bar that fails at the toilet or shower entry is more dangerous than no bar at all: it shifts weight onto a surface that disappears. The fix is to open the wall to add blocking at the required height, or to locate existing framing. A licensed contractor experienced with accessible design can add blocking correctly without a full-wall replacement.

Selecting Tile by Visual Texture Rather Than DCOF Rating

A matte-finish or textured-looking tile is not inherently more slip-resistant than a smooth one when wet. The DCOF rating is a measurement result under a standardized wet-test protocol, not a visual property. Many products sold in retail as “slip-resistant bathroom tile” carry a DCOF of 0.42, meeting the IW minimum for a general bathroom floor, but not the 0.50 IW+ minimum for a consistently wet shower floor. Requesting the DCOF AcuTest result under ANSI A326.3-2021 before selecting any tile for a wet zone converts the selection from appearance-based to specification-based.

Planning Without Measuring the Available Clearances

A comfort-height toilet, a fold-down shower bench, and a wall-mounted vanity may each be the right individual choice, but they may not fit together in the available floor plan. The 60-inch toilet side clearance, the 30-by-48-inch forward approach space, and the 60-inch wheelchair turning circle can conflict in a 5-by-8-foot bathroom. Sketching the floor plan with dimensions before specifying any fixtures prevents discovering clearance problems after demolition has started.

Treating Accessible Bathroom Planning as a One-Time Project

Bathroom needs change as mobility and strength change over time. Plan for future phases during the current renovation: add wall blocking now even if grab bars are not needed today, and choose a toilet height that leaves room for a raised seat later. This sequencing reduces the disruption and cost of future modifications.

Frequently Asked Questions

What is the single most important accessible bathroom modification for a senior who is still independent?

A curbless shower entry addresses the highest-risk single movement in the bathroom: stepping over a tub curb on a wet surface with all weight on one leg. A feasibility RCT (the BATH-OUT study) found 33 total falls in the group receiving level-entry shower adaptations versus 65 in the control group during follow-up8. Pairing the curbless entry with grab bars and slip-resistant flooring addresses three friction points in one project.

How high should grab bars be mounted in a senior bathroom?

ADA standards specify 33 to 36 inches above the finished floor for horizontal grab bars at the toilet and shower4. The most effective height for a specific user is where the hand naturally lands during the actual transfer, which may differ from the ADA minimum. Bars must be anchored into wall studs or rated blocking to support 250 pounds under load.

What DCOF rating should a bathroom or shower floor have?

Under ANSI A326.3-2021, a standard bathroom floor used when wet needs a minimum DCOF of 0.42 (Interior Wet category)5. A shower floor or pool deck that stays consistently wet must meet 0.50 (Interior Wet Plus). Ask the tile supplier for the AcuTest result under ANSI A326.3-2021 before purchasing; visual texture does not reliably predict wet-surface friction performance.

How much light does an older adult need in the bathroom?

A 60-year-old eye needs roughly three times more illuminance than a 20-year-old eye to perceive the same level of detail6, making the practical target approximately 60 foot-candles for general bathroom use and 100 or more at the vanity for precision tasks like reading medication labels. Motion-activated baseboard lighting improves nighttime navigation without switching on the full ceiling fixture.

Can accessible bathroom changes be made without a full renovation?

Many high-value changes are non-structural: a raised toilet seat with locking attachment adds height without fixture replacement; grab bars can go into existing walls where studs are present; rearranging storage to the 20 to 48 inch reach zone costs nothing. Structural changes (curbless shower conversion, door widening, wall blocking) require contractor involvement but can be staged as priorities and budget allow.

Limitations and Edge Cases

  • ADA clearance dimensions cited here (60-inch toilet side clearance, 30×48-inch approach space, 60-inch turning diameter, 32-36-inch doorway) are ADA public-accommodation minimums. Residential building codes vary by state and municipality; verify with a licensed contractor for the specific jurisdiction before specifying fixtures.
  • DCOF requirements cited apply to level interior surfaces. Surfaces with slopes greater than 1:48 (including shower curbs or ramps used as transitions) require higher friction ratings than those described here; consult ANSI A326.3-2021 directly for sloped-surface specifications.
  • Lighting recommendations reflect general targets scaled from published illuminance research6. Individual visual acuity and dark-adaptation speed vary; an eye care professional can assess specific needs.

References

  1. CDC – MMWR – Kakara R, Bergen G, Burns E, Stevens M. “Nonfatal and Fatal Falls Among Adults Aged ≥65 Years – United States, 2020-2021.” Morbidity and Mortality Weekly Report, 72(35), 2023.
  2. PMC – JAMA Internal Medicine – Lam et al. “Unmet Need for Equipment to Help With Bathing and Toileting Among Older US Adults.” JAMA Internal Medicine, 2021.
  3. SAGE Journals – Human Factors – Levine IC, Montgomery RE, Novak AC. “Grab Bar Use Influences Fall Hazard During Bathtub Exit.” Human Factors: The Journal of the Human Factors and Ergonomics Society, 65(8), 2023.
  4. AccessibilityChecker.org – “ADA Requirements for Grab Bars and Bathrooms.” Citing the 2010 ADA Standards for Accessible Design, updated 2024.
  5. Walkway Management Group – “ANSI A326.3 Explained: Safer Flooring Made Simple.” Covering DCOF requirements by floor environment under ANSI A326.3-2021, 2024.
  6. MATTER Journal – GRDS Publishing – Kunduraci AC. “Designing Residential Spaces for Aging Population.” MATTER: International Journal of Science and Technology, 3(3), 2017.
  7. AARP – “2024 Home and Community Preferences Survey.” AARP Research, December 2024.
  8. PMC – BMC Public Health – Whitehead PJ et al. “Bathing Adaptations in the Homes of Older Adults (BATH-OUT): Results of a Feasibility Randomised Controlled Trial.” BMC Public Health, 2018.

Conclusion

Each bathroom friction point covered here, from threshold step to toilet height to lighting level, is addressable with a targeted modification tied to the cause. The planning approach that makes those modifications land correctly is observation first: walk the route, map the hesitation points, and let the friction points define the work rather than a product checklist.

For sequencing and priorities across the full room, see the bathroom safety planning overview.

Bed Rail for the Elderly: How to Choose the Right Bedside Support

Author: Oded Feigin · Created On: August 17, 2026 · Last Updated: August 24, 2026

Choosing a bed rail for the elderly is more consequential than most product decisions: the wrong type introduces entrapment risk while doing nothing useful for the person’s actual transfer routine. An estimated 320,751 bed-related fall injuries present to emergency departments every year in the United States1, and the bedroom is the single most common indoor location for at-home falls among adults 65 and older. The Bedroom Safety Planning overview places this decision inside the wider sleep-and-nighttime-independence framework. This guide goes deep on the specific decision: which rail type, which attachment method, which size, and what to check for entrapment before anyone relies on it.

An older adult using a bed rail for the elderly to support a wheelchair-to-bed transfer beside a wooden nightstand
The right bedside support begins with understanding which part of the transfer sequence needs mechanical assistance.

Quick Answer

How do you choose the right bed rail for the elderly?

Start by deciding whether you need a transfer handhold (for getting in and out of bed) or a fall barrier (for staying in bed at night). Then match the rail to your specific bed frame and mattress thickness, confirm it complies with the CPSC 2023 mandatory standard5, and verify every gap against the headboard and mattress edge for entrapment risk before the user relies on it for transfers.

Key Takeaways

  • The bedroom is the most common indoor location for at-home falls in adults 65 and older, accounting for 25.0% of those requiring emergency care – rising to 31.6% for adults 85 and older.2
  • Transitions into or out of bed account for 34.4% of bed-related fall incidents; a transfer handhold addresses this risk, while a fall barrier addresses the separate risk of rolling off during sleep.1
  • The CPSC identified 284 entrapment-related deaths involving adult portable bed rails between 2003 and 2021, prompting a mandatory safety standard effective September 2023.4
  • A transfer handhold and a fall barrier serve entirely different mechanical functions and install differently; buying the wrong type is the most common selection error.
  • Mattress thickness must fall within the rail manufacturer’s specified range; foam compression over time can open entrapment gaps even in a correctly installed rail.5

Before You Buy a Bed Rail for the Elderly

Most bed rail mismatches start before the product is ever chosen. Three things should be clear before comparing options: the user’s mobility profile, the bed’s geometry, and the exact point in the bedtime routine where friction is highest. These three inputs determine which of the six decisions below is the most important for the specific situation.

Mobility profile

Whether the user needs help with the push-to-standing transition, with repositioning in bed, or with staying oriented during sleep shapes every downstream choice. Someone who rises with adequate leg strength but needs a fixed grip point during the final push-up is a different case from someone who rolls toward the edge at night. A user recovering from hip or knee surgery has different transfer mechanics than a user managing general fatigue or balance decline. When a specific medical condition affects the transfer routine, an occupational therapist should evaluate the sequence before committing to a rail type. General guidance cannot replace that evaluation.

Bed geometry

Measure three things before shopping: the floor-to-top-of-mattress height (under the user’s weight, not the nominal spec), the mattress thickness (compressed, not the product label), and the frame type. A traditional box-spring setup, a platform bed with a solid deck, an adjustable-base bed, and a hospital-style metal frame each require a different attachment approach. Knowing these in advance eliminates the majority of compatibility problems before any product is purchased.

The friction point in the routine

Walk through the full bedtime sequence: lying down, rolling to one side, pushing up to seated, pivoting legs over the edge, and standing. Note every point where the user grips furniture or hesitates. That map tells you whether the problem is in the seated-to-standing transition (transfer handhold), nighttime repositioning (grab strap or repositioning aid), or roll-off risk during sleep (fall barrier). These are distinct products and should not be chosen interchangeably.

Step 1: Decide Whether You Need a Transfer Aid or a Fall Barrier

This distinction is the most important decision in the selection process. Most rails sold for home use are marketed as if they serve both purposes, but the mechanical function and the positioning geometry differ in ways that matter directly for safety.

Transfer handhold

A transfer handhold (also called a bed handle or assist rail) is positioned at the upper half of the mattress, near where the user sits up. It extends above the mattress edge so the user can push or pull against it while moving from lying to seated to standing. The goal is to offload upper-body effort during the transfer and provide a stable grip surface at the moment the center of mass shifts forward. These rails are typically shorter (24-30 inches in length) and are most effective when placed at the specific point in the mattress where the user actually sits up – usually the zone between the pillow and the mid-mattress line.

Fall barrier

A fall barrier is a longer rail (typically 36-48 inches) installed along the mattress length to prevent the user from rolling off the edge during sleep. It provides lateral containment rather than vertical support. Fall barriers are common in hospital and care settings, where users may have very limited mobility and cannot roll off independently. In a home setting, a full-length barrier for an ambulatory senior often creates more risk than it solves: the user must still transfer past the barrier to get out of bed, and the barrier’s length increases the number of entrapment zones. Most home users need a shorter transfer handhold positioned correctly, not a full fall barrier.

“Prevention efforts should focus on helping older adults remain safely in bed and then assisting with transitions into or out of bed.”

Bui YTN et al., Journal of Clinical Medicine, 20251

This framing maps exactly onto the two product types. The first goal (staying safely in bed) points toward a barrier or repositioning aid. The second goal (transition assistance) points toward a transfer handhold. Identifying which goal is primary determines the rail type before any other factor is considered.

Where At-Home Falls Send Older Adults to the ER Bar chart of at-home fall locations for adults 65 and older requiring emergency department care. Data from Moreland et al. 2021, PMC8669898: Bedroom 25.0%, Stairs 22.9%, Bathroom 22.7%, Kitchen 7.2%, Driveway/Garage 6.0%. Where At-Home Falls Send Older Adults to the ER Bedroom 25.0% Stairs 22.9% Bathroom 22.7% Kitchen 7.2% Driveway/Garage 6.0% Bedroom Other locations Source: Moreland et al. 2021 (PMC8669898)
The bedroom leads all at-home fall locations for adults 65 and older requiring emergency care at 25.0%, rising to 31.6% for adults 85 and older (Moreland et al. 2021, PMC8669898). Separately, Bui et al. (2025, PMC12295163) found that 34.4% of bed-related fall injuries treated in emergency departments occur during transitions into or out of bed, which is the moment a transfer handhold is specifically designed to address.

Step 2: Identify Your Bed Frame and Mattress Combination

Most rail installation failures and entrapment gaps trace back to a mismatch between the product and the specific bed. Rails are not universal, and manufacturers specify their products for particular frame and mattress configurations. Knowing the combination before shopping prevents the most common purchasing mistakes.

A metal safety rail attached to the side of a wooden bed frame with light bedding, installed beside the pillow zone as a bed rail for the elderly
A correctly positioned bedside rail runs along the upper half of the mattress where the user sits up – not along the foot of the bed. The wooden frame and standard mattress profile here represent the most compatible configuration for under-mattress insert rails.

Traditional box-spring frames

A frame with a box spring and innerspring mattress is the most compatible configuration for standard under-mattress insert rails. The wedge insert slides between the mattress and the box spring, and the rail hangs over the side, held in place by the weight of the mattress pressing down on the wedge. This design requires a solid, firm surface below the mattress: if the box spring slats have large gaps, the insert can shift under transfer load. Confirm that the box spring surface is solid before selecting this attachment style.

Platform beds and low-profile frames

Platform beds without a box spring have a solid or slatted deck. Under-mattress insert rails may still be compatible if the mattress has enough depth to secure the wedge, but the lower total bed height common to platform designs can reduce the useful rail height above the mattress. Some platform frames have a lip or inset edge that prevents inserting any wedge at all. Measure the clearance between the mattress bottom and the deck edge before purchasing. Clamp-style rails that attach directly to the frame are generally more compatible with platform setups.

Adjustable beds

Adjustable beds present the most compatibility challenges. A standard under-mattress insert rail will not articulate when the head or foot section raises or lowers, creating a pinch zone or a gap as the mattress profile changes. Adjustable bed rails are a specific product subcategory, typically using a frame bracket or proprietary mount that moves with the articulating section. Do not install a standard insert-style rail on an adjustable base. The incompatibility is not just inconvenient – it creates an entrapment geometry as the bed moves.

Mattress thickness and the 2023 CPSC standard

Mattress thickness directly affects both the height the rail presents above the sleeping surface and the gap between the lower rail bar and the mattress edge. The CPSC’s 2023 mandatory safety standard for adult portable bed rails (16 CFR Part 1270) requires manufacturers to specify and label a tested mattress thickness range for each rail model; a rail used outside that specified range has not been validated under the test conditions the regulation requires.5 Foam and hybrid mattresses compress under weight, so the actual compressed thickness matters more than the label specification. Measure the mattress at the rail installation point under the user’s typical sleeping weight.

Step 3: Choose an Attachment Method

Bed rails use four main attachment approaches. The right one depends on the frame type, whether the bed moves or adjusts, and the installation context (rental versus owned home, permanent versus reversible setup).

Under-mattress insert (wedge-and-rail)

The most widely available home design. A flat wedge slides between the mattress and the box spring or platform deck, and the upright rail attaches to the wedge and hangs over the side. Installation requires no tools and can typically be completed in five minutes. The rail’s stability depends entirely on the friction and compression from the mattress weight pressing down on the wedge. This works reliably on traditional frames with a firm, high-density insert base. It is less reliable on wide-slat box springs, on foam mattresses lighter than the spec’s weight range, or on any bed where the mattress tends to migrate during sleep. Verify that the wedge stays flat under load before use.

Frame-clamp rail

A clamp or bracket connects the rail directly to the bed frame rail or slat. This provides more positive retention than an insert design and is more compatible with platform beds and with beds where the mattress-to-deck interface is tight. Installation typically requires basic hand tools and 15-30 minutes. Confirm that the clamp is rated for the frame material (a wood-frame clamp may not fit a tubular metal frame). Recheck tightening hardware after the first several nights of use, when clamps tend to seat fully and may need a half-turn adjustment.

Free-standing (floor-based support)

Some bedside supports use legs that rest on the floor rather than attaching to the bed, making them compatible with adjustable bases or any frame without a usable attachment point. The trade-off is footprint: floor legs can create a trip hazard if the user’s foot catches them during the pivot to stand, and the floor surface must be stable under load. Thick carpet can allow lateral shift under transfer forces.

Pivot-arm (swing-away) rail

A pivot-arm design attaches to the frame and hinges sideways, swinging the rail out of the transfer zone when the user sits on the edge and back to the support position for transfers. This eliminates the rail as an obstacle at the transfer’s most vulnerable moment, making it practical for tight bedroom layouts. The hinge must be inspected periodically; a worn pivot can release unexpectedly under load.

Step 4: Size the Rail for the Transfer Zone

Position and height matter as much as the product category. A rail at the right height but in the wrong location along the mattress edge fails to support the transfer at the moment of highest demand.

Height above the mattress

For a transfer handhold, the grip surface should be at a height where the user’s elbow is slightly bent when gripping from a seated position and more fully bent when pushing from a reclined position. In practice, 8-12 inches above the compressed mattress top suits most adults in a standard seated-transfer posture. A rail set too high requires the user to reach upward from a seated position, reducing mechanical advantage at the push-off moment. A rail set too low forces the user into excessive trunk forward-lean during the rise, increasing the load on hips and knees. A 2025 clinical study of grab bar height during toilet transfers found that bars positioned at the right height reduced sit-to-stand difficulty by 31% in older adults compared to unaided transfers, with normal-height bars providing the most consistent postural stability benefit.7 The underlying biomechanical principle – that grip height relative to the user’s seated reach affects push-off effort – applies similarly at the bedside when the rail is calibrated to the user’s seated grip position.

Position along the mattress

For a transfer handhold, center the rail at the point where the user actually sits up – typically the upper third of the mattress, between the pillow zone and the mid-mattress mark. This is where the grip is needed during the roll-to-seated pivot and during the push-to-standing phase. A rail positioned too far toward the foot of the bed is out of reach during both of these critical moments. If the user consistently sits up at an unusual point due to bed configuration or positioning preferences, adjust the rail placement accordingly rather than defaulting to a standard position.

Length selection

Transfer handholds run 24-30 inches in length and are intended to span the seated-transfer zone only. Fall barriers run 36-48 inches and span a larger portion of the mattress length. Choosing a transfer handhold length longer than needed moves the rail ends closer to the headboard and footboard, reducing the gaps at those points but also changing the geometry if the rail is repositioned later. Choosing a fall barrier length for a transfer-handhold application positions the rail in the wrong zone and increases the total entrapment surface area without improving transfer support.

Step 5: Screen for Adult Entrapment Risk

Entrapment is the most severe risk associated with adult portable bed rails in home settings. This is not a theoretical concern. The CPSC tracked 284 entrapment-related deaths involving adult portable bed rails between 2003 and 2021, a record that directly led to the 2023 mandatory safety standard.4 Of the patients hospitalized after bed-related falls in one retrospective study, 87% were 65 or older and 41% could not return home after the injury.6 A rail that introduces new entrapment risk while solving a transfer problem has made the situation worse, not better.

The seven entrapment zones

FDA guidance on bed rail systems identifies seven anatomical zones where entrapment can occur. For home portable rails, the highest-priority zones are: Zone 1 (between the rail end and the headboard or footboard), Zone 2 (within the rail structure itself, if there are internal gaps in the rail panel), Zone 3 (between the lower rail bar and the mattress top surface), and Zone 4 (between the compressed mattress edge and the underside of the lower rail bar). All entrapment deaths reported to the FDA from hospital bed systems involved the head, neck, or thorax – the body parts most vulnerable to becoming lodged in a gap during sleep repositioning.4 Home portable rails present the same anatomical risk.

The post-installation gap check

After installing the rail, press the mattress down to simulate compression under the user’s sleeping weight. With the mattress compressed, measure three gaps: (1) the gap between the rail’s end and the headboard (Zone 1), (2) the gap between the rail’s lower bar and the compressed mattress surface (Zone 3), and (3) the gap between the mattress edge and the rail structure where the mattress compresses downward and away from the rail (Zone 4). A gap larger than 60mm (approximately 2.4 inches) at any of these locations creates a meaningful entrapment risk for adult head and neck anatomy. The CPSC standard specifies dimensional test conditions designed to catch exactly these gaps.5 If a gap exists, reposition the rail, add a manufacturer-specified gap filler designed for that rail, or select a different rail that closes the gap under the actual mattress conditions.

Foam mattress compression over time

Foam and hybrid mattresses compress progressively with use. A rail that passes a gap check at installation may develop an entrapment gap as the mattress softens. The CPSC test specifies a static mattress thickness and cannot account for a foam core that has been compressed for two or three years. Recheck all three critical gaps every 6-12 months, or immediately if the user reports that the mattress feels different. For foam-mattress users, this periodic recheck is the most important ongoing safety step.

Step 6: Test the Installation Before Relying on It

A functional test before the rail enters regular use catches installation problems before they occur under a real transfer load. Test before the user relies on the rail, not after.

Stability test

Apply lateral force to the rail in both directions: push toward the bed (as a user would push to stand) and pull away from the bed (as a user would pull to sit up). A correctly installed rail should flex very slightly under load and return to position without any movement at the attachment point. Any lateral shift at the wedge or clamp, any creak from the hardware, or any visible movement between the rail and the frame is an installation failure. Tighten or reinstall before the rail is used for transfers. Do not accept movement as acceptable “flex.”

Transfer simulation

If the user is able, simulate the transfer sequence slowly: roll to one side, grip the rail, push to seated, pivot legs over the edge, and stand. Observe whether the grip is stable at each transition and whether any motion causes the rail to shift. Reaching past the rail end or any hardware movement indicates a sizing or positioning issue to correct before routine use.

When to bring in an occupational therapist

A caregiver or family member can run a stability test and observe a transfer simulation. What they cannot do is assess whether the rail type, height, and position actually address the specific mobility profile of the user – or whether a different rail type or a different setup entirely would serve better. An occupational therapist can evaluate the full transfer routine against the user’s specific strength, balance, and mobility constraints, and can identify mismatches between the rail selected and the friction points in the actual routine. For users with a history of falls, significant balance impairment, or post-surgical transfer restrictions, an OT assessment before final installation is the most reliable path to a correct selection.

Common Selection Mistakes

The most expensive mistakes in bed rail selection are not technical – they are conceptual. Each of the following errors reflects a misunderstanding of what the product is for, not a failure to read a spec sheet.

Buying a fall barrier when you need a transfer handhold

The mistake: choosing a long, full-length rail to address a getting-in-and-out problem. The cause: most marketing presents bed rails as a single category that addresses all sleep-safety needs. The fix: decide which goal (transfer assistance or nighttime containment) is primary before looking at any product. A long barrier installed at the upper mattress does not provide a stable push-up point; its geometry is wrong for that function.

Installing the rail at the foot of the bed

The mistake: positioning the rail at mid-mattress or toward the foot, where the marketing photos often show it. The cause: some product photos show the rail in a central position that looks balanced. The fix: position the rail at the point where the user’s seated body actually rests during transfer. For most adults, this is the upper third of the mattress. A rail 18 inches from where the user sits up is effectively no support at all during the push-off moment.

Not checking mattress thickness before purchase

The mistake: choosing a rail based on appearance or price, without confirming that the user’s mattress falls within the product’s specified thickness range. The cause: thickness ranges are often buried in installation instructions rather than featured in product listings. The fix: record the actual compressed mattress thickness and filter every candidate rail by that specification before looking at anything else. A thickness mismatch can generate entrapment gaps and may also void any compliance the product has with the 2023 CPSC standard.5

What a Well-Matched Rail Feels Like in Use

A correctly selected and installed transfer handhold provides a grip surface at exactly the height and location where the user needs it during the push-to-stand phase, without any wobble or shift under full transfer load. The user should not need to search for the grip, reach past the end of the rail, or adjust their seated position to reach it.

Neither rail type should require the user to change the fundamental direction or posture of their transfer. If the rail requires an awkward reach or a change in the push-off direction, the sizing or placement is wrong. The 1-in-4 annual fall rate for older adults3 reflects cumulative friction in the home environment. A well-matched rail removes one friction point from the bedtime routine, and that point, repeated twice a day across years of use, is where risk accumulates most quietly.

Frequently Asked Questions

What is the difference between a bed rail and a bed handle?

The terms overlap, but most product lines use “bed handle” or “bed assist rail” for shorter transfer handholds (24-30 inches) designed to support getting in and out of bed, and “bed rail” or “bed safety rail” for longer barriers (36-48 inches) designed to prevent rolling off during sleep. The functional difference matters more than the naming: choose by what the user needs to accomplish, not by which label appears on the packaging.

Can I use a bed rail with a memory foam mattress?

Yes, but with an important caveat. Memory foam compresses significantly under load, and many standard insert-style rails are specified for innerspring or firm foam mattresses within a narrower thickness range. Measure the compressed thickness of the foam mattress under the user’s weight at the rail location, and confirm the rail’s specified range includes that measurement. Recheck the entrapment gaps every 6-12 months, as foam continues to soften with use and can open previously acceptable gaps over time.5

Do home bed rails pose an entrapment risk?

Yes, and the risk is documented. The CPSC identified 284 entrapment-related deaths involving adult portable bed rails between 2003 and 2021, which led to the 2023 mandatory safety standard requiring that all rails sold in the U.S. after September 21, 2023 meet ASTM F3186-17.4 The risk is highest when a rail is used with a mattress outside its specified thickness range, when gaps between the rail and the headboard exceed safe limits, or when foam compression has opened gaps over time. The post-installation gap check described in Step 5 addresses all three scenarios.

What does the 2023 CPSC mandatory standard require for adult portable bed rails?

The CPSC’s 2023 final rule (16 CFR Part 1270) established ASTM F3186-17 as the mandatory safety standard for adult portable bed rails manufactured or imported into the U.S. after September 21, 2023.5 Requirements address mattress thickness ranges, gap dimensions at entrapment zones, structural integrity under load, and labeling. Older rails purchased before that date are not required to meet the standard, so checking compliance matters most when a rail has been in the household for several years before use.

Should an occupational therapist assess the need for a bed rail before I purchase one?

An OT assessment is particularly valuable when the user has a fall history, a diagnosed balance or vestibular condition, post-surgical transfer restrictions, or cognitive changes that affect how they interact with a new support. In those cases, an OT can evaluate the specific transfer sequence against the user’s strength, range of motion, and balance profile, and recommend whether a rail is the right tool at all or whether a different approach (hospital bed rental, grab bar, transfer pole) is more appropriate. General guidance on rail selection cannot substitute for that evaluation.

References

  1. PubMed Central – Bui YTN et al. “Trends and Risk Factors for the Hospitalization of Older Adults Presenting to Emergency Departments After a Bed-Related Fall: A National Database Analysis.” Journal of Clinical Medicine. 2025;14(14):5008. PMC12295163.
  2. PubMed Central – Moreland BL, Kakara R, Haddad YK, et al. “A Descriptive Analysis of Location of Older Adult Falls That Resulted in Emergency Department Visits in the United States, 2015.” American Journal of Lifestyle Medicine. 2021;15(6):615-622. PMC8669898.
  3. Centers for Disease Control and Prevention – “Facts About Falls.” Older Adult Fall Prevention. Updated 2024.
  4. National Council on Aging – “Deadly Adult Portable Bed Rail Hazards Target of New Mandatory Safety Standard” (citing CPSC Final Rule data). 2023.
  5. U.S. Government Publishing Office (eCFR) – 16 CFR Part 1270: Safety Standard for Adult Portable Bed Rails. U.S. Consumer Product Safety Commission. Effective September 21, 2023.
  6. PubMed Central – “Falls From Beds Among Elderly Outpatients.” Desert Regional Medical Center retrospective study, 2016-2021. Published 2024. PMC11064969.
  7. PubMed Central – “Impact of Seat Height and Grab Bars on Postural Stability in Older Adults During Sit-to-Stand Transfer.” Medicine. March 2025. PMC11922450.

Conclusion

Choosing a bed rail for the elderly comes down to one prior question: which part of the bedtime routine needs mechanical support? A transfer handhold and a fall barrier are different tools, installed differently, positioned differently, and suited to different problems. Getting that distinction right before selecting any product eliminates the most common mismatches. Then matching the rail to the specific frame and mattress, choosing the right attachment method, sizing for the actual transfer zone, and verifying every entrapment gap turns a generic product purchase into a genuinely useful safety measure.

For the wider context of how bedside support fits into bedroom layout, lighting, and floor-surface planning, see the overview in Bedroom Safety Planning for the full nighttime-independence framework.

Bedside Commode for Elderly Adults: A Safer Nighttime Placement Guide

Author: Oded Feigin · Created On: August 17, 2026 · Last Updated: August 24, 2026

A bedside commode for elderly users does more than eliminate a walk to the bathroom. It changes the geometry of a risky nightly routine. About 50% of adults older than 65 get up at least once a night to void, and a quarter of all overnight falls in that age group are directly linked to those trips1. Placement, not just purchase, determines whether the commode actually reduces that risk. This guide covers the bedroom safety planning decisions that make a commode safer to use: transfer route, height, floor clearance, lighting, arm support, privacy, cleaning access, and walker or wheelchair adaptation.

A bedroom at night with a glowing lamp, nightlights near the floorboards, and an open doorway to a bathroom - the environment surrounding a bedside commode for elderly nighttime use
Nighttime bedroom with floor-level nightlights and an open bathroom doorway: the two environmental conditions that most directly affect how safely a commode setup functions at night.

Quick Answer

Where should a bedside commode be placed for a senior?

Position the commode on the side of the bed the person naturally exits from, close enough to allow a pivot transfer without taking more than one or two steps. The commode seat height should allow the user’s feet to rest flat on the floor with knees at roughly 90 degrees when seated. Clear at least 18 inches of open floor on the transfer side, keep a nightlight at floor level within that path, and ensure the armrests are within easy reach from a seated-edge-of-bed position.

Key Takeaways

  • 63.3% of toileting-related falls in older adults happen between midnight and 6 a.m., compared with only 17.3% of non-toileting falls in that same window2.
  • Commode placement follows a route-first logic: identify which side of the bed the person exits from, then place the commode at the end of the shortest stable path from that exit point.
  • Seat height is a mechanical variable: a seat that positions the knees at approximately 90 degrees reduces the sit-to-stand effort and the time spent balancing during transfer5.
  • Floor clearance, nighttime lighting, and arm support must be planned together – each one compensates for reduced visual acuity, balance, and grip strength that are typical during nighttime waking.
  • An occupational therapist can evaluate the specific home and person to confirm height, transfer technique, and assistive equipment before the commode is put into regular use.

Before You Begin: Planning a Bedside Commode for Elderly Nighttime Safety

Before moving any furniture or ordering a commode, walk the bedroom at night – with only the usual nighttime lighting on. The goal is to observe the route as it actually is, not as it looks in daylight. Note where the person exits the bed, which direction they turn, how many steps they take to reach the bathroom, and where they pause, grip, or shift their weight. That walk is the system diagnosis. Placement decisions follow from it.

The commode’s job is to shorten and simplify this route, ideally reducing it to a pivot from the edge of the bed to a seated position on the commode. If the current bathroom trip requires navigating around a dresser, crossing a rug, passing through a doorway, or traversing a dark hallway, the commode can eliminate most of that exposure. The steps below address each variable in the order that typically matters most for safety.

What you will need before setup:

  • A tape measure (to check seat height and floor clearance)
  • The commode itself, with its bucket and lid installed
  • A nightlight or motion-activated LED strip
  • Confirmation of which side of the bed the person exits from most often
  • An occupational therapy referral if the person has significant mobility limitations, uses a wheelchair, or has a history of falls during transfers

Step 1: Choose the Right Side of the Bed

Place the commode on the side of the bed the person exits from first, oriented so they can pivot directly onto the seat from the edge of the bed without crossing their feet or rotating more than about 90 degrees. That is the mechanical objective: minimum rotation, maximum stability.

Why the exit side matters

Most people have a habitual bed exit side – the side closest to the bathroom, the side farthest from a partner, or simply the side where the nightstand is. During a nighttime waking, this habit operates almost automatically, before full alertness returns. A commode placed on the wrong side introduces an extra step, a direction change, or a reach across the body, each of which adds instability to a moment when balance and grip are already reduced by sleep inertia.

If the habitual exit side conflicts with the room layout (for example, it faces a wall with no clearance), the solution is usually to reorganize the room rather than to retrain the habit. Furniture is easier to move than a decades-old sleeping habit.

Orienting the commode for a short pivot

Once the side is chosen, position the commode so that the person, sitting on the edge of the bed with feet flat on the floor, can reach the nearest commode armrest without leaning or stretching. The commode seat should be roughly parallel to the bed’s long axis, rotated slightly toward the bed if needed so the pivot is a natural quarter-turn rather than a full sideways step. Test this dry: have the person sit on the edge of the bed and reach for the near armrest. If the reach requires a torso lean of more than a few inches, the commode is too far away or at the wrong angle.

Shared bedroom considerations

In a shared bedroom, position the commode on the side farthest from the sleeping partner when room layout allows. A motion-activated nightlight aimed at the transfer zone only, and a commode with a quiet lid mechanism, reduces disruption during nighttime use.

Step 2: Set the Correct Commode Height

The commode seat height should position the user’s knees at approximately 90 degrees, with feet resting flat on the floor, when seated. This is the geometry that minimizes the mechanical effort of the sit-to-stand transition. A seat that is too low requires more hip and knee flexion on the way down and more quadriceps force on the way up. A seat that is too high leaves the feet dangling, which reduces stability and shifts the center of gravity forward during transfer.

“Adjusting the height and angle to suit each individual is likely to help prevent falls.”

Su-Kyoung Lee and Sang-Yeol Lee, Journal of Exercise Rehabilitation5

How to measure the correct height

With the person seated on the edge of their bed in the position they use when getting up, measure the distance from the floor to the back of the knee (the popliteal height). That measurement is a good starting point for the commode seat height. Most adjustable commodes allow height changes in one-inch increments over a range of roughly 17-21 inches. Set the commode to the measured height, have the person sit on it, and confirm that both feet rest flat on the floor and the knees are not above the hips.

When a raised seat is needed

Some commodes ship at standard toilet height (about 17 inches). For taller users, or for users with limited knee flexion from arthritis or hip replacement, the seat may need to be raised. Most commodes accept an additional raised seat attachment, which adds 2-4 inches. The same 90-degree knee rule applies regardless of the starting height. If the person has had a recent hip replacement, the surgical team or occupational therapist will specify a minimum seat height to avoid hip flexion beyond the safe limit; follow that guidance.

Verifying height before regular use

After setting the height, ask the person to perform the full transfer sequence – sit on the bed edge, reach for the near armrest, pivot and lower onto the commode, rise back up, and pivot back – slowly, with someone nearby. Note whether the motion is smooth or requires a lurch forward to stand. A lurch indicates the seat is too low. Note whether feet leave the floor during the descent. If they do, the seat may be too high. Adjust by one inch and retest before the commode goes into unsupervised nighttime use.

Step 3: Clear the Transfer Path

The transfer path is the floor area between the edge of the bed and the commode. It needs to be clear of rugs, cords, footwear, furniture legs, and anything that can catch a foot or cause a stumble during a nighttime pivot. The minimum clear zone is 18 inches on the transfer side of the commode, measured from the commode frame outward, free of obstacles from the floor up to knee height.

When Falls Happen: Toileting vs. Other Falls in Older Adults Overnight 00:00-05:59: 63.3% of toileting-related falls vs 17.3% of non-toileting falls. Daytime 06:00-23:59: 36.7% of toileting-related falls vs 82.7% of non-toileting falls. Source: Zou et al., BMJ Open, cross-sectional study, 2023. When Falls Happen: Toileting vs. Other Falls in Older Adults Toileting-related Non-toileting 0% 25% 50% 75% 100% 63.3% 17.3% Overnight 36.7% 82.7% Daytime Source: Home Age Fit analysis, 2026 (BMJ Open, Zou et al., 2023)
Toileting-related falls concentrate in the overnight window (00:00-05:59) at a rate more than three times higher than non-toileting falls (17.3% overnight), while non-toileting falls are predominantly daytime events (06:00-23:59). Data synthesized from Zou et al., BMJ Open, 20232.

Rugs and floor coverings

Remove any rug, mat, or loose floor covering from the transfer zone. This includes the decorative rugs common beside beds. During a nighttime transfer, the foot often slides slightly as the person pivots, and a rug edge can catch the toe or allow the rug to slide underfoot. A non-slip mat is appropriate only if it is secured on all four edges and sized to cover the entire transfer zone, not just part of it. A partial mat creates a new edge hazard at its boundary.

Floor clearance with a walker or wheelchair

If the person uses a walker, the clear zone widens to at least 30 inches on the transfer side, plus the width of the walker frame added on the approach side. Wheelchair users need a clear turning radius of approximately 60 inches in diameter. These dimensions often require moving a nightstand, relocating a dresser, or rethinking the bed’s position in the room. Measurement before purchase confirms whether the chosen commode model fits the cleared zone without blocking the walker or chair approach path.

Step 4: Position the Nighttime Lighting

Targeted lighting is one of the highest-leverage adjustments in a commode setup. A 2024 study published in the Journal of Applied Gerontology found that 57.7% of monitored care-home bedrooms recorded average lighting below 300 lux, and that each 100-lux increase in bathroom lighting was associated with a 13% reduction in the fall rate4. The goal for nighttime commode use is not bright light but targeted, low-glare light at floor level and near the commode seat.

Warm floor-level LED lights guide a path from the side of a bed toward an open bathroom doorway in a dimly lit bedroom, showing effective nighttime lighting for senior bedroom navigation
Floor-level LED pathway lighting illuminates the route from the bed to the bathroom without the glare that disrupts sleep or creates temporary blindness during a nighttime wake.

Where to place the nighttime lighting

Place one motion-activated nightlight or LED strip at baseboard level beside the bed, positioned so it illuminates the floor between the bed edge and the commode. A second light source near or under the commode itself (some commode bucket assemblies include built-in LED strips) reduces the shadow zone immediately around the transfer. The goal is to make the commode seat, the floor surface, and the armrests all visible without turning on a ceiling or lamp light that would create glare and disrupt sleep.

Motion activation vs. manual switches

Motion-activated lights are generally more reliable in nighttime commode setups than manual switches because they require no hand coordination during groggy waking. A person reaching for a wall switch in the dark is briefly balancing on one side without full visual support. A sensor that activates when the person moves their legs off the bed removes that hazard. Passive infrared sensors placed at 12-18 inches above the floor, aimed at the bed edge, activate before the person stands rather than after.

Avoiding glare at the commode level

High-angle or direct-facing lights create glare that is especially problematic for older eyes, which need more time to adjust from darkness to light. A downward-directed nightlight (aimed at the floor rather than at eye level) or a frosted LED strip at baseboard level reduces glare while still illuminating the transfer zone. A 2022 study in the HERD journal found that LED strip lighting at pathway level produced measurable improvements in walking time and gait confidence during nighttime bathroom navigation compared with standard overhead nightlights6.

Step 5: Add Arm Support on Both Sides

A bedside commode with armrests on both sides provides the bilateral leverage needed for a controlled sit-to-stand transfer. The armrests function as a load-transfer mechanism: they allow the user to push through the hands rather than relying entirely on the hip extensors and quadriceps, which are typically weaker during nighttime waking. The armrests must be positioned so they can be gripped from a seated position on the bed edge before the pivot begins, and gripped again to assist standing after use.

“Using a bedside commode or urinal can minimize the bother, if not the frequency, of nocturia and may reduce the risk of falls.”

Stephen W. Leslie MD, Hussain Sajjad MBBS, and Shashank Singh MD, NIH StatPearls, 20241

Checking armrest height and reach

With the person seated on the edge of the bed in transfer position, the near armrest of the commode should be reachable with a comfortable arm extension – not a full lean or stretch. Most standard commode armrests sit at 28-32 inches from the floor when the commode is at standard height. The user should be able to grip the near armrest, apply downward pressure, and begin the pivot without losing back support. If this is not possible at the current commode position, try moving the commode 2-3 inches closer to the bed edge and re-test.

When the commode armrests are not enough

Some users, particularly those with significant upper-body weakness or poor grip strength, find that commode armrests alone are insufficient for a confident transfer. In these cases, a bed rail on the bed’s exit side – positioned at roughly mattress height so the person can grip it while swinging legs off the bed – provides the first-stage support before the commode armrests take over. A grab bar mounted to the wall or baseboard near the commode (if the wall location allows it) can provide additional post-transfer support for standing. An occupational therapist can assess whether a floor-standing transfer pole is a more appropriate option for a specific room layout.

Step 6: Plan for Privacy and Cleaning Access

Privacy and cleaning access are practical variables that determine whether the commode setup stays in use over time. A commode that is inconvenient to empty or embarrassing to use because of its placement will be avoided – which defeats its purpose. Both variables are worth thinking through before finalizing the commode’s location.

Privacy in a shared bedroom

In a shared room, position the commode on the side of the bed farthest from the sleeping partner if possible, or use a small privacy screen (a lightweight folding panel that stores flat against the wall) when the person wants more separation during use. Privacy screens that stand independently are preferable to curtain rods attached to the ceiling, which require installation. The screen should not block the transfer path or create a new navigation obstacle in the low-light environment.

Access for bucket removal and cleaning

The commode bucket slides out from the frame for emptying and cleaning. Plan for a path from the commode to the bathroom (or utility sink) that the caregiver or user can navigate while carrying the bucket. Keep that path clear of furniture that would require the carrier to turn sideways or duck. Some commode models include splash guards and tight-fitting lids that reduce odor and spill risk during transport. Empty the bucket each morning rather than leaving it until full, which reduces both odor and weight during transport.

Toilet paper and hygiene supplies

Position a toilet paper holder or small caddy within reach on the side opposite the transfer pivot, so reaching for it requires no torso rotation. A wet-wipe dispenser or hand sanitizer on the near armrest side supports hand hygiene before the user rises back to bed.

Step 7: Adapt for Walker or Wheelchair Users

Seniors who use a walker or wheelchair for daytime mobility typically need a modified commode placement that accounts for the turning radius and approach path of the mobility aid. The transfer sequence is longer and involves more steps than a simple bed-to-commode pivot, making each element of the placement more consequential.

Walker users: approach and parking space

A walker user approaches the commode from the front, sets the walker to one side, and uses the commode armrests to lower into the seat. Plan for at least 30 inches of clear floor in front of the commode for the walker during use, and keep the approach surface non-slip and free of thresholds. A folding walker reduces the floor footprint during the transfer.

Wheelchair users: side transfer setup

Wheelchair users typically perform a lateral transfer using a transfer board or bridging technique. The wheelchair seats next to the commode with the transfer-side armrest removed or pivoted away. Set the commode seat height within one inch of the wheelchair seat height to allow a level or slightly downhill lateral slide. A commode with a drop-arm or swing-away armrest on the wheelchair side is worth specifying at purchase for users who need this configuration.

Nighttime lighting for mobility aid users

Mobility aid users need the approach path – not just the immediate transfer zone – illuminated at floor level. For a walker user, this means the path from the bed to the commode approach zone. For a wheelchair user, it means the arc from the bed to the parking position beside the commode. Motion sensors that activate along the entire approach path (rather than only at the commode) are worth the added cost when a mobility aid is part of the routine.

When a Bedside Commode Reduces Nighttime Walking Risk

A bedside commode is not the right solution for every bedroom layout or every person’s mobility situation. It is most clearly indicated when the bathroom trip is the risk – when the distance, the darkness, the floor surfaces, or the person’s balance during nighttime waking make that trip genuinely hazardous.

Roughly one in four adults older than 65 falls at least once per year3, and the overnight bathroom trip is a concentrated risk event. Among adults who get up two or more times per night to use the bathroom, the fracture and fall-related trauma risk is more than double that of those with fewer nighttime voids1. For adults with three or more nightly voids, a prospective cohort study found a 28% increased risk of an incident fall within three years compared with those without nocturia7. Eliminating the walk to the bathroom – and replacing it with a short, well-supported transfer – changes the risk profile of the night meaningfully for this group.

The commode reduces risk most effectively when:

  • The bathroom is more than 10-15 steps from the bed, or requires navigating a hallway, threshold, or multiple direction changes.
  • The person has a history of nighttime near-falls or balance instability on waking.
  • The floor between the bed and the bathroom includes slick surfaces, high thresholds, or a dark hallway with no practical lighting solution.
  • The person uses a mobility aid and the nighttime journey to the bathroom involves multiple transfers or door-width negotiations.
  • Nocturia is frequent enough (two or more times per night) that the cumulative overnight walking distance and transfer count are significant.

When the bathroom is adjacent to the bedroom and the overnight path is short, well-lit, and unobstructed, a grab bar at the toilet, a raised toilet seat, and a motion-activated nightlight in the hallway may address the risk adequately without a separate commode. An occupational therapist can help determine which configuration best fits the specific person’s mobility and the specific home’s layout.

Common Placement Mistakes

Even a well-chosen commode becomes a hazard if placement details are not addressed. These are the most common errors in commode setup, and the fixes are straightforward once identified.

Placing the commode too far from the bed edge

The most common error is leaving too much space between the bed and the commode, assuming that more floor room is safer. In practice, a commode that is more than an arm’s length from the bed edge forces the person to take a step or two before reaching an armrest, which is exactly the unsupported walking the commode was meant to eliminate. Keep the commode close enough that the near armrest is within reach from the seated bed-edge position.

Using the wrong side of the bed

Placing the commode on the side that seems more convenient for daytime caregiver access rather than the side the person habitually exits from creates a conflict between the person’s automatic behavior and the equipment location. At night, habit overrides intention. If the person instinctively exits left, put the commode on the left side regardless of caregiver logistics.

Leaving a rug in the transfer zone

Remove any rug, mat, or runner from the transfer zone. A bedside rug feels welcoming during daytime setup but becomes a slip hazard during a groggy 3 a.m. pivot. If a soft surface is preferred, use a fully secured, low-pile, non-slip mat that covers the entire zone with no partial edge to catch a foot.

Setting the seat at the wrong height and not testing it

Many commodes ship at a height that is too low for most adults. A seat set too low increases sit-to-stand effort and extends the time spent balancing. Set height to the knee-flexion measurement from Step 2, confirm with a supervised test transfer, and adjust before the first overnight use.

Providing no nighttime lighting in the transfer zone

A well-placed commode in a completely dark room still poses a navigation risk. Without floor-level lighting, the user may misjudge the commode’s position, the armrest location, or the floor surface. At least one low-glare, motion-activated nightlight at baseboard level is a minimum requirement for a safe nighttime commode setup.

Frequently Asked Questions

How close should a bedside commode be to the bed?

The near armrest of the commode should be within comfortable arm’s reach from the person’s seated position on the bed edge – typically 6-12 inches from the mattress side. At this distance, the person can grip the armrest before beginning the pivot, which provides support throughout the transfer rather than only at the commode seat itself.

What height should a bedside commode be set to?

Set the seat height so the user’s knees are at roughly 90 degrees and feet rest flat on the floor when seated. Measure the popliteal height (floor to the back of the knee) while the person sits on the bed edge, and use that as the target seat height5. Most adjustable commodes cover 17-21 inches; test the height with a supervised transfer before regular use.

Can a bedside commode reduce nighttime fall risk?

A commode can reduce the nighttime walking distance and the number of unsupported steps a person takes during overnight bathroom trips. NIH clinical guidance notes that using a bedside commode may reduce the risk of falls associated with nocturia1. The degree of benefit depends on how well it is placed and how consistently the transfer technique is used – an occupational therapist can assess the specific person and setup.

Does a bedside commode need special lighting?

Yes. Floor-level or baseboard-mounted motion-activated lighting illuminating the transfer zone is an important part of a safe commode setup. Research published in 2024 found that increasing lighting in care-home bedrooms was associated with measurable reductions in fall rates4. Overhead or high-angle lights create glare that slows visual adaptation during nighttime waking; low-mounted, downward-directed lights are preferable.

How often should a bedside commode bucket be emptied?

Empty the bucket each morning to minimize odor, reduce the weight and spill risk during transport, and keep the setup hygienic for the next use. Most commode buckets hold 7-8 liters. Daily emptying is the standard practice recommended by home health care guidelines; overnight use rarely fills the bucket in a single night, but leaving it longer than 24 hours increases odor significantly in most residential environments.

Limitations and Edge Cases

  • Covers standard bedroom layouts with floor access on at least one side. Murphy beds, beds in corners, or platform beds without clearance may need an assessment by a certified aging-in-place specialist.
  • Height and transfer-technique guidance applies to adults with some standing capability. For individuals who cannot bear weight during any part of a transfer, an occupational therapy evaluation is required before introducing a commode.
  • Lighting research figures come from care-home settings; individual visual needs vary. An eye care professional or occupational therapist can specify targets for a specific person.

References

  1. NIH National Library of Medicine – StatPearls – Nocturia, Leslie SW, Sajjad H, Singh S. Updated February 17, 2024.
  2. BMJ Open – Association between toileting activity and falls in older adults: a cross-sectional study, Zou et al. Published June 2023.
  3. Centers for Disease Control and Prevention – Older Adult Falls Data and Statistics. Updated 2024.
  4. Journal of Applied Gerontology – Shedding Light on Falls: Lighting Levels and Fall Outcomes in Long-Term Care, Emad et al. Published December 3, 2024.
  5. Journal of Exercise Rehabilitation – The effect of toilet seat heights on sit-to-stand in elderly adults, Lee S and Lee S. Published October 2016.
  6. HERD: Health Environments Research and Design Journal – Effects of Different Nighttime Lighting on Elderly Adults’ Sleep and Falls, Lu, Luo, Hu. Published July 2022.
  7. PMC – International Journal of Clinical Practice – Nocturia and the risk of incident falls in community-dwelling elderly, Vaughan et al. Published 2010.

Conclusion

Placing a bedside commode safely is a room-layout and transfer-mechanics problem, not just a product decision. The steps that matter most are choosing the correct exit-side placement for a short pivot, setting the seat height so the knees are at 90 degrees with feet flat on the floor, clearing the transfer path of rugs and obstacles, adding motion-activated floor-level lighting, and confirming that the armrests are within reach before the transfer begins. Done together, these changes replace a walk through a dark bedroom with a supported, short transfer – one that is meaningfully less demanding than the bathroom trip it replaces.

For the broader framework of nighttime safety decisions in the bedroom, see the overview in bedroom safety planning for context on how commode placement fits into the wider set of route, surface, and support decisions that shape safer nights at home.

Wheelchair Accessible Counter Height and Knee Space: A Planning Guide

Author: Oded Feigin · Created On: August 12, 2026 · Last Updated: August 24, 2026

A standard kitchen counter at 36 inches is 2 inches above the maximum wheelchair accessible counter height the ADA Standards permit. At 36 inches, a wheelchair user’s knees press into the cabinet below and their arms rise to an angle that makes sustained prep work uncomfortable. The U.S. Access Board caps accessible work surfaces at 34 inches1 and requires open clearance below for a wheelchair to pull in close. For a broader view of how these counter dimensions fit into kitchen planning, see accessible kitchen design. This guide covers counter height, knee clearance, toe clearance, work-surface depth, and reach ranges for comfortable seated kitchen tasks.

wheelchair accessible counter height demonstrated as a woman in a wheelchair cuts a red pepper at a kitchen counter, reaching forward comfortably
A wheelchair user working at a kitchen counter demonstrates the forward reach and body position that accessible counter height planning is designed to support.

Quick Answer

What is the correct wheelchair-accessible counter height?

ADA Standards set the accessible work surface maximum at 34 inches (865 mm) above the finished floor, with a minimum of 28 inches (710 mm)1. For kitchens specifically, the kitchen work surface maximum is 34 inches, with an adjustable exception that allows a range of 29 to 36 inches when rough-in plumbing permits2. Knee clearance below must be at least 27 inches high at the leading edge, 30 inches wide, and at least 8 inches deep at counter height – tapering to 11 inches deep near the floor.

Key Takeaways

  • Accessible counter height is 28-34 inches (ADA Section 902.3); kitchen work surfaces max at 34 inches (ADA Section 804.3.2), 2 inches below the standard 36-inch kitchen counter.
  • Knee clearance requires a minimum 27-inch height at the leading edge, 30-inch width, and a tapered depth from 11 inches near the floor to 8 inches at counter height.
  • Toe clearance below 9 inches from the floor must extend 17 to 25 inches deep, allowing the chair footrest to slide partially under the counter.
  • Forward and side reach maximum is 48 inches from the floor; the comfortable task zone for most wheelchair users falls between 28 and 48 inches above floor level.
  • An adjustable counter (29-36 inches) is the most flexible option for households where seated and standing users share the kitchen.

What Is the Correct Wheelchair Accessible Counter Height?

Accessible counter height for wheelchair users sits between 28 and 34 inches above the finished floor, according to ADA Section 902.3 (Dining and Work Surfaces)1. For kitchen work surfaces specifically, ADA Section 804.3.2 sets the maximum at 34 inches2. A standard kitchen counter installed at 36 inches sits 2 inches above that maximum – a small number with real consequences for body mechanics and comfort in sustained seated work.

The 34-inch ceiling reflects how the human body works in a seated position. When a manual wheelchair user sits with their forearm resting naturally, the elbow typically falls between 26 and 30 inches from the floor, depending on seat height and individual build4. A work surface at 28-34 inches keeps task height near elbow level, where the shoulder and arm muscles work with mechanical advantage rather than reaching upward or hunching forward to compensate. At 36 inches, the arms must reach up, the torso often leans in, and fatigue arrives sooner in a meal preparation session.

For planning a specific kitchen, 32-34 inches is a reasonable starting target for most adults using manual wheelchairs. The exact optimum depends on the individual’s seated elbow height, which you can measure simply: have the user sit upright in their wheelchair with the elbow bent at 90 degrees and the forearm horizontal, then measure from the floor to the bottom of the forearm. A counter surface within 1-2 inches above that measurement puts tasks at a biomechanically efficient height. If the kitchen will serve multiple users with different needs, an adjustable counter (discussed in a later section) is worth evaluating before committing to a fixed height.

An important sequencing note: counter height and knee clearance are not independent decisions. They share the same vertical column of space below and above the surface. Establish the target counter height first, then verify that the knee and toe clearance requirements can be met at that height with the available cabinet or structure depth. The table below places the key height measurements on a common scale.

Counter Height and Wheelchair Reference Dimensions
Measurement Height (inches) Height (mm) Source
Standard kitchen counter 36 in 915 mm Industry convention
ADA max work surface (Sec. 902.3) 34 in 865 mm U.S. Access Board1
ADA min work surface (Sec. 902.3) 28 in 710 mm U.S. Access Board1
ADA kitchen adjustable range (Sec. 804.3.2) 29-36 in 735-915 mm U.S. Access Board2
Manual wheelchair seat height (mean) 19.5 in 495 mm IDeA Center / U.S. Access Board4
Manual wheelchair seat height (5th-95th pct.) 17-22.3 in 430-566 mm IDeA Center / U.S. Access Board4

The table shows a useful planning insight: the 34-inch ADA maximum sits 7 inches above the top of the knee clearance zone (27 inches), which means there is relatively little vertical space between the top of where the knees can go and the underside of the counter surface. Getting both measurements right requires thinking about them together, not sequentially.

Knee Clearance: Height, Depth, and Width

Knee clearance is the open space under a counter that allows a wheelchair user to pull the chair forward until their torso is close enough to the work surface for controlled, low-effort task work. ADA Section 306.3 defines the minimum geometry: at least 27 inches of vertical height at the leading edge, at least 30 inches of width, and a specific depth that tapers as height decreases above the floor3.

The taper rule is where knee clearance often surprises people planning an accessible kitchen for the first time. The ADA requirements are:

  • At 9 inches above the floor: minimum 11 inches of depth
  • At 27 inches above the floor: minimum 8 inches of depth
  • The depth may reduce linearly between those two heights
  • Width: 30 inches minimum at all heights

This taper mirrors human body geometry. A seated wheelchair user is not a uniform vertical column. The footrests and lower legs occupy the deepest forward reach near the floor. The knees and thighs are wider and higher. The armrests and torso are at the top. The ADA taper rule lets the structure narrow toward the counter edge because the upper knee and thigh – the thickest part of the leg in a seated position – need less forward clearance depth than the lower leg and foot do. At 9 inches from the floor, 11 inches of depth keeps the footrest out of contact with the cabinet structure below the counter. At 27 inches, 8 inches of depth keeps the counter edge above the knee, not pressing against it.

In practical terms, meeting the taper rule means the base cabinet below the accessible counter section cannot run flush with the front face of the counter. The two common solutions are:

  • A recessed design: the toe kick is set back 17-25 inches from the front face of the counter, and the knee space above it is kept open at least 8 inches deep from the face back to any obstruction
  • An open-below design: the entire cabinet is removed under the accessible section, leaving clear floor-to-counter space without any fixed structure

Open-below designs are the most straightforward to build and verify. They eliminate the risk of a knee collision with a cabinet that was set slightly too far forward, and they accommodate the range of wheelchair footrest depths without adjustment. The tradeoff is the loss of under-counter cabinet storage in that section, which requires shifting frequently used items to drawers, pull-outs, or nearby accessible storage. For planning where that storage goes, the overview on reachable kitchen storage solutions covers the options that work within accessible reach zones.

Wheelchair Counter Planning: Four Height Zones Above Floor Horizontal floating bar chart. Four rows share a common x-axis of inches above the floor (0-50 inches). Row 1, Toe Clearance: bar spans 0 to 9 inches (ADA Section 306.2). Row 2, Knee Clearance: bar spans 9 to 27 inches (ADA Section 306.3). Row 3, Work Surface: bar spans 28 to 34 inches (ADA Sections 804.3.2 and 902.3). Row 4, Forward Reach: bar spans 15 to 48 inches (ADA Section 308.2.1). All data from U.S. Access Board 2010 ADA Standards. Original synthesis by Home Age Fit. Wheelchair Counter Planning: Height Zones Above Floor ADA Zone Reach Envelope Toe Clearance Knee Clearance Work Surface Forward Reach 0-9 in 9-27 in 28-34 in 15-48 in 0 12 in 24 in 36 in 48 in Height above floor (inches) Source: Home Age Fit analysis, 2026
The four principal height zones that shape wheelchair counter design share the same floor-to-ceiling scale: toe clearance (0-9 in) and knee clearance (9-27 in) define the open space below the surface, the ADA work surface range (28-34 in) sits immediately above, and the forward reach envelope (15-48 in) sets the outer limit for task and storage access. Compiled by Home Age Fit from U.S. Access Board ADA Standards Sections 306.2, 306.3, 902.3, and 308.2.1.

One planning implication the zones chart reveals: the gap between the top of the knee clearance zone (27 inches) and the bottom of the accessible work surface range (28 inches) is exactly 1 inch. The underside of the counter substrate must sit at 27 inches or above for the knee clearance requirement to be met without encroaching on the work surface minimum. Any under-counter structure (lighting track, apron rail, or recessed drawer) mounted below 27 inches at its lowest point reduces the knee clearance height and may constitute a failure of the ADA requirement.

Toe Clearance: The Zone Below 9 Inches

Toe clearance is the open space from the floor up to 9 inches of height, directly below the counter. ADA Section 306.2 requires that this zone extend at least 17 inches and no more than 25 inches in depth, and at least 30 inches in width3. Its purpose is to allow the wheelchair footrest to slide partway under the counter, letting the user move their torso close enough to the work surface without the footrest hitting the cabinet base.

Why the 17-25 Inch Depth Window Matters

Wheelchair footrests typically extend 12-16 inches forward from the front edge of the seat. A toe clearance depth of at least 17 inches provides enough space for most footrest configurations to clear the cabinet base with a small margin. The 25-inch maximum prevents the toe clearance zone from extending so far that it compromises the structural support of the counter above. Combined with the knee clearance depth above 9 inches (minimum 8-11 inches depending on height), the total forward reach under the counter from the front edge can range from approximately 19 to 25 inches – enough for most wheelchair footrest configurations when the counter is lowered to 34 inches.

Toe and Knee Clearance Work as a System

Toe and knee clearance are defined in two adjacent ADA sections (306.2 and 306.3), but they are one continuous open zone below the counter. The 9-inch threshold is where the toe zone ends and the knee zone begins – and both zones must achieve their required depths simultaneously in the same vertical column of space. In an open-below design (no base cabinet under the accessible section), both requirements are typically met automatically because there are no structures to limit either zone. In a recessed cabinet design, the toe kick must be set far enough back to meet the 17-inch depth requirement, and the knee space above it must be kept open to at least 8 inches from the front face of the counter.

A common installation error is meeting the knee clearance depth at counter height (8 inches) while failing to provide the 17-inch depth in the toe zone below – often because the toe kick is set at 12 inches back, matching standard kitchen cabinet depth conventions rather than the ADA requirement. Checking both measurements separately during installation avoids that error. For the broader set of accessible kitchen standard measurements, the planning guide on accessible kitchen requirements covers the full set of clearances and dimensions in one reference.

Work Surface Depth for Seated Tasks

Counter depth – the front-to-back measurement of the work surface itself – affects whether a wheelchair user can reach across the surface to the back edge, the sink, or the cooktop without excessive forward lean. Standard kitchen counters are 24-25 inches deep (from front edge to back wall or backsplash). For wheelchair users, a deeper counter requires more forward reach from a seated position, which can increase trunk lean and reduce control over knife or cutting board work.

ADA Standards do not set a maximum counter depth for the work surface itself. The constraint on reach comes from the reach range rules (covered in the next section), which cap the maximum forward reach from a seated position at 48 inches above the floor for an unobstructed reach and lower that ceiling when there is an obstruction between the user and the target. In practice, a 24-inch counter depth is accessible for most wheelchair users without requiring them to lean far over the edge, provided the knee clearance allows them to pull close enough to the counter. A 30-inch deep counter can still be accessible if the user’s reach and trunk control allow it, but it should not be assumed accessible without evaluating the individual.

A man in a wheelchair prepares a meal at a wooden kitchen table, demonstrating reach and body position at a lowered work surface
A wheelchair user at a lowered work surface demonstrates the natural body position that accessible counter height planning enables – torso upright, forearms resting near the surface, and no forward lean to reach the task.

The most effective planning approach is to think of the work surface as having two zones: a primary task zone within 12-16 inches of the front edge, and a secondary reach zone extending further back. High-frequency tasks (chopping, mixing, plating) belong in the primary zone. Controls, faucets, and secondary items can sit further back as long as they fall within the user’s reach range. This approach reduces the need to lean or roll forward during routine work, which reduces fatigue over a full meal preparation session.

For seated users, a lowered counter section is more useful when it sits adjacent to a clear floor space of at least 30 inches by 48 inches parallel to the counter. This allows the wheelchair to pull straight in, not at an angle, which maximizes both the reach depth and the knee clearance width available. Where that clear floor space is constrained by appliances or adjacent cabinets, an occupational therapist can assess whether the specific layout works for the individual user’s transfer and working patterns.

Reach Ranges: The Access Envelope

Reach range sets the outer limits of what a wheelchair user can physically access from a seated position – not just across the counter, but upward to wall cabinets and controls. ADA Sections 308.2.1 and 308.3.1 specify the same maximum for both forward and side reach: 48 inches above the floor for an unobstructed reach, with a minimum low reach of 15 inches above the floor3.

The 48-inch maximum for wall-mounted controls, switches, and cabinet hardware is the most practically important reach rule for kitchen planning. A light switch at 54 inches, a cabinet shelf at 52 inches, or a microwave mounted at eye level for standing users will typically be out of reach from a wheelchair without forward lean. Moving these items to 44-48 inches above the floor brings them within unobstructed reach for most wheelchair users, without requiring forward lean that reduces control and increases fatigue.

“People with functional impairments living in accessible home environments have better health and are better able to accomplish everyday tasks and manage living independently than those living in conventional or inaccessible home environments.”

WHO Housing and Health Guidelines, Chapter 7: Housing Accessibility, World Health Organization5

The reach envelope also narrows when there is an obstruction in front of the target. ADA Section 308.2.2 addresses obstructed forward reach: when an obstruction between 20 and 25 inches deep exists (such as a standard-depth counter in front of a wall switch), the maximum forward reach drops to 44 inches above the floor. This means controls mounted above the counter backsplash at 48 inches can be inaccessible from a seated position if the counter is 25 inches deep. Planning controls at 44 inches or below, or recessing them at the front edge of the counter rather than the back wall, keeps them within the obstructed-reach envelope.

For side reach – approaching a surface from the side rather than the front – the maximum stays at 48 inches and the minimum stays at 15 inches, with no reduction for obstructions up to 10 inches deep. Side reach is often more comfortable than forward reach for upper cabinet access, because it does not require leaning over the counter edge. Corner workstations designed for side approach can make more of the counter accessible without moving items to the very front of the surface.

Adjustable Counters: The Flexible Option

ADA Section 804.3.2 includes an exception for adjustable kitchen work surfaces: a counter that can be raised or lowered between 29 and 36 inches is permitted where rough-in plumbing allows sink connections at 29 inches2. The adjustable range is intentionally broader than the fixed work surface range (28-34 inches), because the flexibility of a motorized or hand-crank mechanism serves multiple users with different needs in the same kitchen.

Adjustable counters are most useful in two scenarios: kitchens shared by wheelchair users and standing users of different heights, and kitchens being planned proactively before a specific user’s needs are fully known. A fixed 34-inch counter works well for most manual wheelchair users but may be too high for a power wheelchair user with a lower seat height, or too low for a standing adult performing prep work over an extended session. An adjustable counter serves both without requiring renovation when needs change.

The practical considerations for adjustable counters include the cost of motorized mechanisms, the load capacity of the adjustment system (relevant for heavy stone countertops), and the plumbing flexibility required for an integrated sink. For sections of counter that do not include a sink – a prep island, a secondary work area – the adjustment mechanism is simpler and less expensive. A contractor experienced with accessible kitchens can advise on whether the rough-in plumbing and structural conditions in a specific kitchen support the adjustable option. That evaluation is specific to the home and the installation, and falls outside what a general planning framework can determine.

Common Planning Mistakes to Avoid

Counter height and clearance planning fails most often because the zones are evaluated separately rather than together. These four errors appear most consistently in accessible kitchen retrofits.

Lowering Only the Counter Height Without Opening the Space Below

A counter surface lowered to 34 inches on top of a standard 34-inch base cabinet meets neither the knee clearance nor the toe clearance requirements, because the cabinet itself fills the space that must remain open. The surface height and the clearance below are not two separate decisions – they are one spatial system. Lowering the surface height is only the first part of the modification. The space below must be opened to at least 27 inches of clear height at the leading edge, with the required depth and width at every height from floor to counter bottom.

Using Partial Knee Clearance That Meets Height but Fails Depth

A common retrofit error is creating a knee clearance zone that is 27 inches high at the front face but only 8 inches deep at the bottom (near the floor) rather than the required 11 inches deep at 9 inches above the floor. This often happens when a toe kick is set at the standard 12-inch depth rather than the required 17-inch minimum. The depth taper requires 11 inches at the lower height and 8 inches at the upper height – not 8 inches uniformly. Measuring only at the top of the knee zone misses the more restrictive requirement at the lower height, where the footrest sits.

Planning a Single Lowered Section That Is Too Narrow

Knee clearance requires a minimum width of 30 inches. A lowered counter section that is 24 inches wide – matching a standard base cabinet module – is too narrow to meet the width requirement and too narrow to allow the wheelchair to pull in squarely. The minimum 30-inch width should be the clear measurement between any fixed structures on either side of the knee space, not the width of the counter section itself. In practice, planning for 36 inches of clear knee space width provides enough margin to accommodate both the 30-inch minimum and the wheelchair’s natural approach path without requiring precise alignment on every approach.

Ignoring the Reach Consequences of Standard-Height Storage

Moving the work surface down to 34 inches makes the task surface accessible but does not automatically make the storage above it accessible. A wall cabinet shelf at 52 inches remains out of reach regardless of the counter height below it. Accessible kitchen planning requires evaluating the reach range of the specific user for every storage location – lower cabinets, drawers, pull-outs, and wall-mounted units. A scoping review of 60 accessible housing studies across 18 countries, published in PLOS One in January 2024, found that accessible home environments supported “reduced depression, mortality rates, and falls or injuries, in addition to enhanced social participation”6 – an outcome that depends on the whole home working together, not just one surface being at the right height. For storage-specific planning, the guide on reachable kitchen storage solutions addresses how to position and configure the items most frequently used.

Frequently Asked Questions

What is the standard counter height for wheelchair accessibility?

ADA Section 902.3 sets accessible work surface height at 28 inches minimum and 34 inches maximum above the finished floor1. For kitchen work surfaces specifically, ADA Section 804.3.2 sets the maximum at 34 inches, with an adjustable exception that allows 29-36 inches when plumbing permits2. Standard kitchen counters are installed at 36 inches, which exceeds the accessible maximum by 2 inches.

How much knee clearance is required under an accessible counter?

ADA Section 306.3 requires knee clearance that is at least 27 inches high at the leading edge, at least 30 inches wide, and at least 8 inches deep at 27 inches above the floor – tapering to at least 11 inches deep at 9 inches above the floor3. The depth taper reflects the shape of a seated body: the lower leg and footrest need more forward clearance depth than the knee and thigh do near counter height.

What is the minimum toe clearance depth under an accessible counter?

ADA Section 306.2 requires the toe clearance zone (the space below 9 inches from the floor) to be at least 17 inches deep and no more than 25 inches deep, and at least 30 inches wide3. This depth is required to allow wheelchair footrests to slide under the counter without hitting the cabinet base, which lets the user’s torso move close enough to the work surface for comfortable seated task work.

How high can controls and shelves be for a wheelchair user to reach?

ADA Sections 308.2.1 and 308.3.1 set the maximum unobstructed forward and side reach at 48 inches above the floor, with a minimum low reach of 15 inches3. When there is an obstruction between 20 and 25 inches deep in front of the target (such as a counter), the forward reach maximum drops to 44 inches. Wall switches, cabinet hardware, and controls planned at or below 44 inches above the floor remain accessible even over an obstructed counter depth.

Do all kitchen counters need to be lowered for wheelchair accessibility?

No. A single lowered section of at least 30 inches wide can provide an accessible work area in an otherwise standard-height kitchen. The lowered section should be positioned near the sink or the primary prep zone, with a clear floor space of at least 30 by 48 inches in front of it for wheelchair approach. For households with both wheelchair users and standing users, an adjustable counter (29-36 inches) can serve both without requiring a permanent compromise in either direction.

Limitations and Edge Cases

  • Measurements in this guide reflect the 2010 ADA Standards for Accessible Design as maintained by the U.S. Access Board. State or local building codes may impose different or additional requirements for residential construction.
  • Reach ranges and seat heights vary by wheelchair type. Power wheelchairs often have higher seat heights and different armrest geometry than manual chairs, which can shift the optimum counter height outside the manual wheelchair range used in most planning guidelines. An occupational therapist can measure the individual user’s specific seated reach and translate it into counter height targets for a specific home.
  • Adjustable counter plumbing requirements (ADA Section 804.3.2 exception) depend on the existing rough-in location. Whether a specific sink can be mounted at 29 inches requires a licensed plumber to evaluate the drain slope and supply line flexibility in that kitchen – a decision that cannot be made from a planning guide alone.

References

  1. U.S. Access Board – 2010 ADA Standards for Accessible Design, Chapter 9: Built-In Elements (Section 902.3, Dining and Work Surfaces). Published 2010.
  2. U.S. Access Board – 2010 ADA Standards for Accessible Design, Chapter 8: Special Rooms, Spaces, and Elements (Section 804.3.2, Kitchen Work Surfaces). Published 2010.
  3. U.S. Access Board – 2010 ADA Standards for Accessible Design, Chapter 3: Building Blocks (Sections 306.2, 306.3, and 308 – Knee Clearance, Toe Clearance, and Reach Ranges). Published 2010.
  4. Center for Inclusive Design and Environmental Access (IDeA), University at Buffalo – Anthropometry of Wheeled Mobility Project: Final Report. Prepared for the U.S. Access Board. December 2010.
  5. World Health Organization – Housing and Health Guidelines, Chapter 7: Housing Accessibility. WHO, Geneva. 2018.
  6. Lindsay S, Fuentes K, Ragunathan S, Li Y, Ross T. – Accessible independent housing for people with disabilities: A scoping review of promising practices, policies and interventions. PLoS One. January 25, 2024.

Conclusion

Wheelchair-accessible counter height planning works when the counter surface height, the knee clearance geometry below it, the toe clearance depth near the floor, and the reach ranges above it are treated as one connected system rather than four separate measurements. The ADA Standards set specific, achievable numbers for each zone – 34 inches maximum for the surface, 27 inches minimum height for knee clearance, 17-25 inches depth for toe clearance, and 48 inches maximum for reach – and each number reflects the actual geometry of a seated body at a work surface. Getting all four right in the same section of counter is what produces a space that can be used comfortably, repeatedly, without compensating body positions that build fatigue over time. For the broader kitchen planning context that these counter measurements fit into, see the overview on accessible kitchen design.

Home Safety Checklist for Seniors: Room-by-Room Risks

Author: Oded Feigin · Created On: August 09, 2026 · Last Updated: August 24, 2026

One in four adults age 65 and older falls each year in the United States, and most of those falls happen at home rather than outdoors.1 The fall-prevention priorities overview explains how that risk builds from cumulative friction rather than a single dramatic hazard. This home safety checklist for seniors puts that principle to work room by room – entrances, hallways, stairs, bathrooms, bedrooms, kitchens, and outdoor paths – so you can observe clearly and identify what actually needs attention.

A woman with short gray hair and glasses smiles while washing her hands at a bright bathroom sink - the bathroom appears on every home safety checklist for seniors as one of the three highest-risk rooms
The bathroom is one of the three highest-risk rooms for senior falls alongside the bedroom and stairs, each accounting for roughly 23 to 25% of home fall emergency department visits.

Quick Answer

Which rooms present the highest fall risk in a senior’s home?

Research on emergency-department fall presentations shows the bedroom (25.0%), stairs (22.9%), and bathroom (22.7%) together account for roughly 70% of home falls for adults 65 and older.2 This checklist walks each room in turn and identifies the physical friction points behind those numbers.

Key Takeaways

  • The bedroom is the single most common fall location at 25% of home falls,2 largely because of low-lit nighttime trips from the bed to the bathroom – not the bathroom itself, as many assume.
  • Stairs and bathrooms each account for roughly 23% of falls,2 making them the highest-consequence rooms to assess after the bedroom.
  • A 100-lux increase in room lighting is linked to a 9 to 10% reduction in fall rate, and most home bedrooms and bathrooms fall below recommended lighting levels.3
  • A systematic home hazard assessment followed by targeted modifications can reduce fall rates by 38%, according to a randomized controlled trial published in JAMA Network Open.4

What a Home Safety Checklist for Seniors Actually Measures

Most generic home safety lists focus on products to add: grab bars here, a mat there. This checklist focuses on physical friction points – the specific conditions in each room that make a route harder, less stable, or less visible to navigate. Before starting room by room, walk the two or three routes used most often every day: the path from the bedroom to the bathroom at night, from the kitchen to the dining area, and from the front door to the main seating area. Mark every point where someone grips furniture for support, takes a shorter step, pauses to orient, or leans against a wall. Those grip and hesitation points are where the checklist items will matter most.

Where Home Falls Send Seniors to the ER Percentage of fall-related emergency department visits by home location for adults 65 and older: Bedroom 25.0%, Stairs 22.9%, Bathroom 22.7%, Other indoor 17.4%, Kitchen or Dining Room 7.2%, Living Room 4.8%. Source: Moreland BL et al., American Journal of Lifestyle Medicine, 2021. CDC NEISS-AIP 2015 data. Where Home Falls Send Seniors to the ER % of fall-related ED visits by home location (adults 65+) Bedroom 25.0% Stairs 22.9% Bathroom 22.7% Other indoor 17.4% Kitchen/Dining 7.2% Living Room 4.8% Darker bars: top 3 rooms (~23-25% each) Lighter bars: other indoor locations Source: Home Age Fit analysis, 2021 (Moreland et al. / CDC NEISS-AIP)
The bedroom, stairs, and bathroom together account for roughly 70% of fall-related emergency department visits for adults 65 and older – a distribution that makes all three priority targets on a home safety checklist for seniors. Compiled by Home Age Fit from Moreland et al. and CDC NEISS-AIP 2015 data.2

Entrances, Doorways, and Thresholds

Entrances concentrate several transition hazards at once: level changes at the threshold, door weight and hardware, a lighting shift from bright outdoors to a darker interior, and wet or gritty surfaces carried in on shoes. A misstep at the front door most often happens when someone is carrying bags, adjusting to changing light, or navigating a raised door edge without a support point nearby.

  • Threshold height. Any raised threshold higher than half an inch deserves attention. A small interruption to a shuffling or shorter stride can cause a trip. Check every exterior door, the garage-to-house entry, and any sliding door track for raised edges.
  • Door hardware. Round knobs demand grip strength and forearm rotation that lever-style handles do not. If any exterior or entry door uses a round knob and the person has reduced grip or arthritis, note this as a friction point worth changing.
  • Entry mat stability. A loose mat that slides or curls at its corners is a documented trip hazard. Check that any mat lies flat, grips the floor underneath, and is not positioned immediately inside a threshold where a foot might catch both the edge and the mat edge in the same step.
  • Entry lighting. The visual adjustment from outdoor to indoor light takes several seconds. Check whether a light can be reached or turned on before entering from outside, so the first steps inside happen in adequate lighting.
  • Support point near the door. Many entry areas have no stable object to grip when removing shoes or putting down bags. A fixed wall hook, a stable console table, or a grab bar near the door provides a support point at a common moment of instability.
  • Threshold-to-mat sequence. A mat placed immediately inside a raised threshold means the first step clears the threshold edge and lands on a potentially mobile surface. Check the full sequence together: threshold height, mat position, mat grip, and the first two or three steps into the home.

Hallways and Flooring Transitions

Hallways are thoroughfares that carry high repetition – a hallway traveled six or eight times a day accumulates many opportunities for a small friction to result in a stumble. The key variables are usable width, lighting continuity through the full length, floor surface consistency, and the absence of objects that narrow the walking path.

  • Effective walking width. A hallway that measures 36 inches wide but is partially occupied by a console table, shoe rack, or stacked storage has an effective walking width considerably smaller. Walk the hallway while carrying a common load and note whether anything requires a side-step or posture adjustment.
  • Floor surface transitions. A change from hardwood to tile, from carpet to vinyl, or across a small threshold between rooms creates a visual and tactile shift. Any surface transition that is not flush within a quarter inch can catch a toe or alter a step pattern. Mark every transition point in the main paths.
  • Loose rugs. An area rug with curled edges, no non-slip backing, or placement across a high-traffic line is among the most common trip hazards in any home. Check for curl at the edges, grip on the underside, and whether the rug can be repositioned or removed from the main path.
  • Hallway lighting at night. Test the lighting in the hallway after dark and confirm whether the existing switches are reachable from both ends of the route without having to navigate dark space first. A nighttime route that is bright by day can be nearly dark at 2 a.m.
  • Wall contact surface. People naturally reach for a wall when uncertain of their footing. A hallway with shelves at arm height or smooth-painted surfaces with nothing to grip reduces the usefulness of the wall as an instinctive support surface along the main night-route.
  • Transition strip condition. A metal reducer strip that sits slightly proud of both surfaces, or one that has lifted on one edge over time, can catch a foot. Run a hand along the transition strip at each room entry on the main route and check whether any edge is elevated above the adjacent floor.

Stairs and Level Changes

Stairs carry one of the highest injury rates of any element in the home. A 2023 study published in Osteoporosis International found approximately 2.5 million stair-related injuries in adults 65 and older in the United States over a single decade, with 89% occurring in residential settings and a 56% increase in injuries over the study period.5 Most stair falls involve either a missed step on descent or a loss of grip on the handrail.

  • Handrail continuity and height. A handrail that stops before the bottom step, or that exists only on one side, removes support at precisely the most demanding point. Check whether the rail runs the full length of the flight on at least one side. Standard height is 34 to 38 inches above the stair nosing. A rail significantly below or above that range changes the mechanical leverage it provides during descent.
  • Grip profile. A circular handrail between 1.25 and 2 inches in diameter allows a full power grip. A flat or wide rail provides only friction contact, which is less stable under load. Grip the handrail during the observation walk and check whether it can be held securely throughout a descent.
  • Tread visibility and nosing contrast. The edge of each tread needs to be visually distinct from the riser below it, particularly in low light. Worn carpet, uniform-color tile, or dark wood stairs without nosing contrast make it harder to judge foot placement on descent. Check tread visibility under the lighting conditions that exist during the time of most frequent use.
  • Staircase lighting. Adequate stair lighting means the full flight is illuminated, not just the top and bottom landings. Check whether all steps are uniformly lit and whether a light switch is accessible at both the top and bottom of the flight. Motion-sensor switches at both landings eliminate the need to navigate the staircase in darkness.
  • Step height uniformity. Non-uniform riser heights cause trips because the body calibrates to a rhythm on stairs. One step significantly shallower or deeper than the others can break that rhythm unexpectedly. This is more common on older staircases and on exterior steps that have settled unevenly.
  • Landing and stair clutter. Items left on steps or on the landing narrow the usable step width. Check whether any items are habitually stored on stairs or whether the landings are frequently obstructed with shoes, bags, or boxes.

Bathrooms

Analysis of emergency department data found that approximately 234,000 Americans are treated annually for bathroom fall injuries, with more than 80% of those injuries being fall-related, and adults 65 and older showing the highest injury rate of any age group.6 The bathroom ranks third among rooms for fall frequency – behind the bedroom and stairs – which means it should be assessed thoroughly alongside those two rather than treated as the primary focus in isolation.

A modern accessible bathroom with white tiled walls, a wall-mounted toilet with safety grab bars, a vanity sink, and an emergency alarm pull cord - the kind of support features a home safety checklist for seniors identifies in this room
An accessible bathroom with grab bars at the toilet, a clear floor path, and an emergency pull cord illustrates the support-point and clearance criteria that a home safety checklist for seniors identifies in this room.

The bathroom checklist is organized around two functional zones: the shower or tub, and the toilet area and sink. Each zone has distinct transfer mechanics and therefore different friction points.

Shower and Tub Zone

The shower and tub area combines a wet surface, a step-over entry, the need to change posture during use, and limited grip options in most residential configurations. Each of those variables compounds the others.

  • Entry height. A standard bathtub ledge is approximately 14 to 17 inches. Stepping over that edge on a wet foot requires lifting the leg to roughly hip height – one of the more demanding transfers in a typical home. Check whether the tub entry requires a high step-over and note whether a walk-in shower or tub-cut insert would reduce that transition.
  • Grab bar presence and placement. A towel bar is not a grab bar. Towel bars are designed for hanging loads, not lateral fall-arrest force, and will fail under a person’s weight. Check whether any bars in the shower or tub are weight-rated grab bars mounted to wall studs, positioned at the entry point, inside the wet zone, and at the exit.
  • Shower floor surface. A smooth tile floor becomes substantially more slippery when wet. Check whether the shower floor has a textured surface, a non-slip mat with drain holes, or applied non-slip strips on the area where both feet stand simultaneously.
  • Shower seat availability. Bathing in a standing position requires continuous balance on a wet surface. A fold-down or removable shower seat reduces that demand and allows bathing with feet planted and weight distributed.

Toilet Area and Sink

The toilet transfer – lowering onto a fixed low seat and then rising against gravity – is one of the most physically demanding routine tasks in the home. A standard toilet seat is approximately 15 to 17 inches from the floor, requiring meaningful knee and hip extensor strength to rise from, particularly for someone with reduced lower-body strength or stiff joints.

  • Support near the toilet. A grab bar on the wall beside the toilet, or a floor-mounted safety frame, provides a lever point during the rise. Check whether any fixed support is reachable from a seated position without twisting or reaching forward past the knees.
  • Toilet seat height. If current seat height is low relative to the person’s knee height when seated, a raised toilet seat reduces the sit-to-stand distance without requiring fixture replacement. An occupational therapist can evaluate the specific configuration and transfer mechanics for that bathroom.
  • Sink grip and vanity stability. Gripping the sink counter edge for balance during standing tasks at the vanity is common compensatory behavior. Check whether the vanity is fixed solidly enough to sustain a lateral load without shifting if someone leans on it.
  • Bathroom lighting at night. A 2025 study in the Journal of Applied Gerontology found that 68.5% of home bathrooms fell below the 300-lux recommendation for focused activities, and each 100-lux improvement was linked to a 9 to 10% reduction in fall rate.3 A nightlight or motion-sensor light inside the bathroom reduces fall risk during nighttime use.

Bedrooms and Nighttime Routes

The bedroom is the single most common fall location for adults 65 and older, accounting for 25% of home fall ED visits in the CDC-affiliated analysis by Moreland and colleagues.2 The primary mechanism is not the room itself but the nighttime route from the bed to the bathroom: low light, a transition from lying to standing (which takes several seconds for blood pressure to equilibrate), a walking surface not set up for nighttime navigation, and often bare feet on a harder floor. The bedroom and its nighttime route must be assessed together.

  • Bed height and stability. A bed too low requires greater knee flexion to stand from; too high makes the descent less controlled. A seated hip angle near 90 degrees with feet flat on the floor is the target for a stable sit-to-stand transfer. Confirm that the bed frame itself is stable and does not shift when weight is applied to the edge.
  • Bedside floor clearance. The path from the bed edge to the door should be clear of loose rugs, clothing, shoes, or bag handles on the floor. Check this path under actual nighttime lighting conditions, not full overhead illumination.
  • Nighttime lighting on the route. A 2025 study found 57.7% of home bedrooms fell below the 300-lux recommendation for focused-activity lighting, and inadequate lighting was linked to meaningfully higher fall rates in residential settings.3 A low nightlight at floor level or a motion-sensor light that activates when someone gets out of bed provides enough visual reference to navigate to the bathroom safely.
  • Bedside support point. Getting out of bed requires a push-up from the mattress and a shift to standing. Check whether there is any fixed surface at arm height from a seated edge-of-bed position on the side from which the person typically exits – a stable nightstand, a bed rail, or a transfer pole.
  • Path to the bathroom. Walk the complete route from the bed edge to the toilet, including any hallway and the bathroom entry, under nighttime lighting. Note every place where a foot might contact something unexpected or where there is no light to orient from.

The Bed-to-Bathroom Path

The single most impactful change for many bedrooms is not a grab bar or a new mattress but a low-level night light positioned along the route to the bathroom. The goal is a consistent visual reference at floor level so that a half-awake person can orient and navigate to the bathroom door without searching for a wall switch in the dark.

For a closer look at what to observe and prioritize first about home fall risks and safe movement habits, the article on fall prevention education at home covers the priority-order logic for seniors and caregivers in detail.

Kitchens

The kitchen accounts for 7.2% of fall-related home ED visits for older adults, making it the fourth-highest location after the bedroom, stairs, and bathroom.2 Kitchen falls are more likely to occur during task performance – carrying items, reaching to high or low storage, stepping onto a stool – than during simple transit. The kitchen checklist therefore examines workflow patterns as much as the floor and surfaces.

  • Floor surface near the sink and stove. The area in front of the sink and stove becomes wet or greasy with regular use. Check whether the floor surface in those specific zones has texture or a non-slip mat with drainage holes to avoid water pooling underneath.
  • Path clearance between work areas. Kitchen falls often involve tripping over an open cabinet door, a pulled-out drawer, or a pet underfoot during meal preparation. Walk the main working triangle (sink, stove, refrigerator) and note what might protrude into the path at foot height.
  • Reaching to high storage. Using a step stool to reach items stored above shoulder height combines an unsteady base with an awkward reach. Note whether any items used daily are stored above a safe reach zone – roughly between hip and shoulder height for most adults.
  • Kitchen seating. Extended standing on a hard floor causes fatigue that reduces balance. A high stool at the counter, at the correct height for seated prep work, can reduce that fatigue. Check whether any kitchen seating has a footrest, armrests, and a firm seat from which standing is straightforward.
  • Carrying hot or heavy items. Carrying a filled pot or loaded tray while walking concentrates attention on the load rather than the path. Note whether the route from the stove to the table requires direction changes, threshold crossings, or steps that make carrying difficult or require a free hand for balance.

Reach Zones and Carrying Hazards

Items used daily should be stored in the comfortable reach zone – roughly between hip height and shoulder height without extended reach or bending. Items used weekly can go slightly outside that band with deliberate planned reach. Items used rarely can go to high or low storage where retrieval is an intentional act, not an automatic one during a busy task.

For kitchen-specific burn and fall risks, including slippery floor zones, unstable seating, and carrying near hot surfaces, the article on home safety in the kitchen covers those patterns in depth.

Outdoor Paths, Porches, and Garage Entries

Outdoor approaches – the path from a parked car, the front porch steps, and the garage-to-house entry – concentrate several hazards that rarely appear indoors: uneven surfaces, weather-affected traction, limited lighting after dark, and steps without consistent handrail coverage. Many falls at the home’s perimeter happen at arrival or departure, which makes the specific route from vehicle to front door worth examining carefully.

  • Porch and exterior steps. Check whether porch or exterior steps have a continuous handrail on at least one side, whether the step surface has a non-slip strip at the leading edge, and whether the step height is consistent across the flight. A single step taller than the others is a common trip source on older porches that have settled unevenly.
  • Path surface from driveway to entry. Cracked or heaved concrete, uneven paving stones, and sections of walkway lifted by tree roots are common on paths that are several years old. Walk the path from the parking area to the front door and note any uneven sections that would catch a foot.
  • Garage-to-house transition. The step from the garage floor to the house interior often lacks a handrail because the doorway is narrow. Check whether this step – frequently used while carrying grocery bags or equipment – has any fixed support point nearby.
  • Outdoor lighting after dark. Check whether the path from the parking area to the entry is adequately lit for nighttime arrival. Motion-sensor lights at the driveway end and at the porch entry eliminate the need to navigate steps in darkness and then search for a switch.
  • Weather traction. In climates with rain, ice, or snow, check whether outdoor walking surfaces have a plan for wet or icy conditions. A textured mat at the exterior threshold helps with wet shoes on entry. Exterior ramp installations and permanent handrail additions are structural decisions that need a licensed contractor’s assessment.

What to Do With What You Find

After walking each room and marking the friction points, prioritize the list rather than treating everything as equal urgency. A raised threshold at the front door traveled once a day carries less cumulative risk than a loose hallway rug on the nightly bedroom-to-bathroom route, even if both are worth addressing. Two useful filters: how often the route is traveled (frequency), and how serious a fall would likely be in that location (consequence). Bathrooms and stairs score high on both.

In 2023, the fall death rate for adults 65 and older in the United States reached 69.9 per 100,000 population, according to the most recent National Center for Health Statistics data brief.7 Systematic hazard reduction based on actual observation – rather than generic product lists – is how those risks are most effectively reduced.

“Falls are a big problem nationally for an aging population. They’re costly, debilitating, often end in institutionalization, but they are preventable.”

Geoffrey Hoffman, PhD, MPH, Associate Professor, School of Nursing, University of Michigan8

Home modifications targeted at actual observed hazards can meaningfully reduce fall risk. A randomized controlled trial in JAMA Network Open found a 38% reduction in the rate of falling in the group that received an occupational therapist-delivered home hazard assessment and removal program (relative risk 0.62, 95% CI 0.40 to 0.95).4 Finding the hazards first and then addressing the highest-priority ones is more effective than making changes based on a general product list.

For a structured approach to building a complete priority-based modification plan from the observations this checklist surfaces, see the article on fall prevention for seniors: a priority-based home plan. For decisions about structural changes (wall-mounted grab bars, permanent ramp installation, stair modifications), a licensed contractor who can assess the home’s specific structural conditions is needed. An occupational therapist can evaluate the individual person’s movement patterns, balance, and transfer mechanics to determine which modifications will have the most impact for that specific person in that home.

Frequently Asked Questions

What is the most dangerous room in the house for senior falls?

The bedroom is the most common fall location for adults 65 and older, accounting for 25.0% of home fall ED visits – more than the bathroom (22.7%) or the stairs (22.9%), according to CDC NEISS-AIP data.2 Most bedroom falls occur during nighttime trips from the bed to the bathroom when lighting is low and balance is reduced.

How often should a home safety checklist for seniors be reviewed?

Repeat a home safety walkthrough after any change in mobility, balance, medication, or vision, and at minimum once per year as a preventive measure. Changes in daily routine, new furniture arrangements, or recent repairs can also shift the risk profile enough to warrant a new observation walk of the main routes.

What is the first thing to check on a home safety walkthrough for seniors?

Start with the routes traveled most often – specifically the nighttime path from the bedroom to the bathroom. This is the highest-frequency and highest-consequence route in most homes. Walk it under actual nighttime lighting conditions before assessing any other room, since that route looks very different after dark than it does during the day.

Is there a printable home safety checklist for seniors?

This article provides a complete room-by-room home safety checklist for seniors covering entrances, hallways, stairs, bathrooms, bedrooms, kitchens, and outdoor paths. Each section identifies the specific friction points to observe in that room. Print the page or use it on a mobile device during the observation walk.

Do I need a professional to complete a home safety assessment for a senior?

A self-guided observation using this checklist is a practical starting point. An occupational therapist adds an assessment of the specific person’s movement patterns, balance, and transfer mechanics that no checklist can provide. A randomized trial in JAMA Network Open found occupational therapist-delivered home assessments reduced fall rates by 38%.4 Structural modifications also require a licensed contractor.

References

  1. National Council on Aging – Get the Facts on Falls Prevention, 2024.
  2. PMC / American Journal of Lifestyle Medicine – Moreland BL, Kakara R, Haddad YK, Shakya I, Bergen G. Location of Older Adult Falls Treated in Emergency Departments. 2021 (CDC NEISS-AIP 2015 data).
  3. PMC / Journal of Applied Gerontology – Emad Y, Neef SP, Taylor L, Kerse N, et al. Shedding Light on Falls in Residential Care. 2025.
  4. PMC / JAMA Network Open – Stark SL, Keglovits M, Arbesman M, Lieberman D. Effectiveness of a Home Hazard Assessment and Modification Program in Reducing Falls. 2021.
  5. PMC / Osteoporosis International – Solaiman RH, Irfanullah E, Navarro SM, et al. Stair-Related Injuries Among Older Adults in the United States. 2023.
  6. CDC / Morbidity and Mortality Weekly Report – Nonfatal Bathroom Injuries Among Persons Aged 15 Years and Older, United States, 2008. 2011.
  7. National Center for Health Statistics – Garnett MF, Weeks JD, Zehner AM. Unintentional Fall Deaths in Adults Age 65 and Older: United States, 2023. NCHS Data Brief No. 532, June 2025.
  8. CBS News – More than 41,000 Americans Died of Falls in 2023, 2024. Quote attributed to Geoffrey Hoffman, PhD, MPH, Associate Professor, School of Nursing, University of Michigan.

Conclusion

The bedroom, stairs, and bathroom together represent roughly 70% of senior home falls and deserve the most thorough attention on any room-by-room walkthrough.2 Lighting deficiencies, absent support points, and unstable floor surfaces are the three categories of friction that appear most consistently across rooms and that yield the most improvement when addressed systematically rather than reactively.

For the framework that connects these room-by-room observations into an ordered plan, see the overview in fall-prevention priorities for how to sequence what you find into action.

Handicap Bathroom Dimensions: Height, Reach, and Clearance

Author: Oded Feigin · Created On: August 06, 2026 · Last Updated: August 24, 2026

Handicap bathroom dimensions govern whether a bathroom can be used safely and independently by a person who uses a wheelchair, walker, or other mobility aid. The numbers matter more than most people expect: an estimated 234,094 nonfatal bathroom injuries were treated in U.S. emergency departments in a single year, with falls accounting for 81.1% of those injuries.3 Our overview in Bathroom Safety Planning covers the broader planning system; this article focuses on the specific measurements that define whether entry, maneuvering, fixture reach, and transfer are physically achievable.

A man in a wheelchair at a bathroom vanity in a tiled bathroom, demonstrating accessible sink approach space within handicap bathroom dimensions
A wheelchair user at a bathroom vanity: the distance from the floor to the sink rim and the knee clearance underneath are two of the key handicap bathroom dimensions that determine whether grooming at the counter is possible without leaning forward.

Quick Answer

What are the standard handicap bathroom dimensions?

The core measurements come from the 2010 ADA Standards for Accessible Design. A doorway must provide a 36-inch clear opening when the passage is deeper than 24 inches. Wheelchair turning space requires a 60-inch-diameter circle. Toilet centerline sits 16-18 inches from the side wall, with the seat at 17-19 inches above the floor. Grab bars mount at 33-36 inches above the floor. Counter and sink rims reach no higher than 34 inches. Controls and accessories fall within a 15-48 inch reach window above the floor.12

Key Takeaways

  • A 36-inch clear doorway opening is the ADA standard when a passage is deeper than 24 inches; a 60-inch turning circle is required for wheelchair maneuvering inside the bathroom.2
  • All accessible controls, accessories, and fixtures must land within a 15-48 inch unobstructed reach window above the finished floor; this single constraint connects every other accessible dimension in the room.2
  • Grab bars at 33-36 inches above the floor position support at roughly elbow height for a seated person, which is where mechanical advantage for a sit-to-stand transfer is greatest.1
  • Roll-in showers require a minimum 30-inch width and 60-inch depth with a 60-inch-wide entry; transfer showers are a smaller 36×36-inch alternative for users who transfer to a fixed seat.1
  • ADA Standards technically govern commercial and public facilities; they are used as the best available reference baseline for residential accessible bathroom planning, with an occupational therapist guiding person-specific adaptations.

Handicap Bathroom Dimensions: Entry and Circulation

Entry and circulation set the floor constraints before any fixture is placed. An accessible bathroom requires a 36-inch clear doorway for passages deeper than 24 inches and a 60-inch turning circle once inside, and both must be confirmed in the actual space before any fixture positions are decided.

What is the minimum door width for accessible bathroom entry?

The ADA specifies a clear width of 32 inches minimum for any door opening, rising to 36 inches minimum when the passage depth exceeds 24 inches.2 In practice, most accessible bathroom designs target 36 inches as a universal minimum, because a 32-inch opening leaves limited room for a wheelchair user to approach at an angle and maneuver through without difficulty.

“Clear width” is measured at the narrowest point when the door is open 90 degrees, from the face of the door to the opposite stop. The door panel itself and any hardware that projects into the opening do not count toward the clear width. For a 36-inch clear opening, the rough opening typically needs to be 38 inches to account for the door frame and the door’s thickness.

In narrow hallway bathrooms, converting a standard swing door to a pocket door or offset-pivot door can achieve the required clear width without widening the rough opening. Operable hardware on accessible doors must also meet a separate ADA requirement: lever-style handles, push plates, and loop pulls are required because they can be operated with a closed fist or forearm, without requiring tight grasping or twisting. Round knobs are non-compliant for accessible bathroom entry hardware.

For a broader view of how doorway dimensions connect to wheelchair routing and hallway approach, see wheelchair accessible bathroom planning.

How much turning space does a wheelchair user need inside the bathroom?

The ADA requires a wheelchair turning space of 60 inches in diameter minimum, enough for a full 180-degree pivot, or a T-shaped space that fits within a 60-inch square.2 The circular option (ADA §304.3.1) is the most common planning reference. The T-turn (ADA §304.3.2) is an alternative that works in tighter footprints because it allows a three-point turn rather than a continuous pivot.

The 60-inch circle is measured clear of all obstacles, but it can overlap with knee and toe clearance under a wall-hung vanity or wall-mounted toilet if the clearance meets ADA minimums (at least 27 inches high, 8 inches deep at the knee, and 30 inches wide). This overlap provision is one of the main reasons wall-hung fixtures are preferred in compact accessible bathrooms: they contribute to the turning space calculation without shrinking the room’s footprint.

In centimeters: 60 inches = 152.4 cm. A typical 5×8 foot bathroom (60×96 inches) can technically contain a 60-inch turning circle, but only when the toilet, vanity, and door swing are positioned to leave that circle unobstructed. A bathroom that falls short of the 152.4 cm circle anywhere in the space will limit independent use. This is why the turning space requirement drives layout decisions more than any single fixture dimension.

Fixture Heights and Reach Ranges

ADA-accessible fixtures and controls must fall within a 15-48 inch reach window above the finished floor for unobstructed forward or side reach, with counters and sinks set at a maximum of 34 inches. These three figures form the usable operating zone for a person seated in a wheelchair.

What is the maximum height for an accessible sink or counter?

The ADA sets a maximum counter height of 34 inches above the finished floor for lavatories and sinks, measured to the front of the rim or counter surface.6 A wall-hung sink that meets this height, combined with adequate knee and toe clearance underneath (at least 27 inches high, 8 inches deep, and 30 inches wide), allows a wheelchair user to roll up to the basin and reach the faucet without extended forward lean.

Standard bathroom vanities run 32-36 inches; most are set at 36 inches, which exceeds the ADA 34-inch maximum by two inches. Replacing a standard vanity cabinet with an accessible wall-hung basin, or trimming the existing cabinet and surface-mounting the basin, are the two most common paths to compliance. Pipe and drain clearance under a wall-hung sink must be insulated or covered to protect against contact burns for users who have reduced lower-limb sensation.

In centimeters: 34 inches = 86.4 cm. When sourcing accessible vanities in metric-measuring markets, 86 cm is the reference. Some European accessible bathroom standards specify 85 cm as the target, which falls 1.4 cm below the ADA maximum and is functionally equivalent.

What reach range limits apply to controls and accessories?

For unobstructed forward or side reach, the ADA specifies a low reach of 15 inches minimum and a high reach of 48 inches maximum above the finish floor.2 All controls, dispensers, outlets, and accessories in an accessible bathroom should fall within this 15-48 inch band.

When an obstruction such as a counter intervenes between the wheelchair user and the item being reached, the reach range tightens. At an obstruction depth of 20-25 inches, the maximum high forward reach drops to 44 inches. At 25 inches of obstruction depth on a side reach, the maximum drops to 46 inches. This means that a soap dispenser mounted on a back wall behind a 25-inch-deep counter cannot be placed at the standard 48-inch height; it must come down to 44 inches to remain reachable.

The 15-48 inch reach window is the single unifying constraint that connects every other measurement in an accessible bathroom. Grab bars, towel hooks, soap dispensers, light switches, and shower controls should all be specified to land within this band to remain operable from a seated or limited-mobility position. The chart below shows how the other key accessible bathroom heights all fall within or near this window.

ADA Bathroom Height Dimensions vs. the Reach Window Horizontal bar chart showing four ADA-specified bathroom height dimensions, all measured from finish floor. Reach window (ADA §308): 15 to 48 inches. Grab bar height (ADA §609): 33 to 36 inches. Counter/sink max height (ADA §606): 0 to 34 inches maximum. Toilet seat height (ADA §604): 17 to 19 inches. Data from 2010 ADA Standards for Accessible Design, U.S. Access Board. ADA Bathroom Height Dimensions vs. Reach Window ADA dimension range Reach window 15-48 in. Grab bar height 33-36 in. Counter height max 34 in. Toilet seat height 17-19 in. 0 15 33 48 60 Height above finish floor (inches) Source: Home Age Fit analysis, 2010 ADA Standards for Accessible Design
When grab bars (33-36 in.), counter height (max 34 in.), and toilet seat height (17-19 in.) all land within the ADA unobstructed reach window (15-48 in.), a wheelchair user can operate every fixture without stretching beyond a comfortable seated range. Data compiled by Home Age Fit from ADA §308, §604, §606, and §609.12

Key handicap bathroom dimensions in cm

For planning teams, architects, or readers working in metric, the following table converts the core accessible bathroom dimensions from the ADA’s inch-based standards to centimeters. The ADA Standards themselves publish SI equivalents in millimeters; these are converted to centimeters here for readability.

Measurement Inches (ADA standard) Centimeters
Door clear width (standard) 32 in. min. 81.3 cm
Door clear width (passage >24 in. deep) 36 in. min. 91.4 cm
Wheelchair turning circle 60 in. diameter 152.4 cm
Reach window (low) 15 in. min. 38.1 cm
Reach window (high) 48 in. max. 121.9 cm
Counter/sink max height 34 in. max. 86.4 cm
Grab bar height range 33-36 in. 83.8-91.4 cm
Toilet seat height range 17-19 in. 43.2-48.3 cm
Toilet centerline from wall 16-18 in. 40.6-45.7 cm
Roll-in shower width (min.) 30 in. 76.2 cm
Roll-in shower depth (min.) 60 in. 152.4 cm

Toilet Clearances and Positioning

ADA toilet positioning places the centerline 16-18 inches from the side wall, with the seat at 17-19 inches above the floor, and horizontal grab bars at 33-36 inches. Each of these three dimensions serves a specific biomechanical purpose in the transfer sequence.

Where should an accessible toilet be positioned from the side wall?

The centerline of an accessible toilet must be 16-18 inches from the side wall or partition.1 This narrow range exists for a specific mechanical reason: the wall-mounted grab bar on the side wall needs to be reachable while the user is seated, and the toilet cannot sit so close to the wall that the transfer approach is blocked, or so far away that the grab bar is outside reach.

The 18-inch maximum is not a comfort preference; it is the furthest distance at which a person can reliably reach a wall-mounted grab bar from a seated position on the toilet without significant lateral lean. The 16-inch minimum ensures the toilet tank and seat hinge do not obstruct the grab bar or the lateral transfer approach from the wheelchair.

Adjacent floor clearance on the open (non-wall) side of the toilet requires a 60-inch clear floor space measured from the side wall, providing room for the wheelchair to position alongside the toilet for a side transfer. There is also a required 18-inch minimum of clear floor space from the front edge of the toilet to any obstruction ahead, allowing the user to approach from the front if needed.

What seat height is required for an accessible toilet?

ADA-compliant toilet seats must sit 17-19 inches above the finished floor, measured to the top of the seat.1 Standard residential toilets typically sit at 15-17 inches; comfort-height or “chair height” toilets sit at 17-19 inches, which is why that category aligns with the ADA range.

This height range serves the sit-to-stand mechanics directly. A seat at 17-19 inches requires significantly less knee and hip flexion than a standard 15-inch seat, which reduces the muscular demand of the transfer and lowers the risk of a difficult, off-balance descent. For a person using a manual or power wheelchair, 17-19 inches also aligns closely with typical wheelchair seat heights (commonly 17-20 inches), which makes a lateral transfer more horizontal and less of a drop.

In centimeters: 17-19 inches = 43.2-48.3 cm. Many European accessible toilet standards target 46-48 cm, which falls within the ADA band. When evaluating raised toilet seat products, confirm that the added height places the combined seat surface within the 17-19 inch (43.2-48.3 cm) window rather than above it.

For guidance on choosing raised toilet seats and transfer frames, see senior bathroom safety product quality for how to judge load ratings and fit.

What grab bar heights are required at the toilet?

The ADA requires grab bars to be mounted with the top of the gripping surface at 33-36 inches above the finished floor.1 This applies to the side grab bar at the toilet (which runs from the rear wall to a point 54 inches from the back wall along the side wall) and to the rear grab bar (which is centered on the toilet centerline and extends at least 12 inches from the centerline toward the open side and at least 6 inches from the centerline toward the wall side).

The 33-36 inch height places the gripping surface at roughly elbow height for a person seated on a 17-19 inch toilet seat. This is the position where pushing up into standing or lowering into sitting requires the least arm extension and the most efficient mechanical leverage from the elbow and shoulder. A bar mounted outside this range reduces the mechanical advantage available for the transfer.

“Successful grab bar grasp was associated with balance recovery in all cases. Attempts to stabilize using other environmental elements, or using internal strategies only, were less successful balance recovery strategies.”

Levine IC et al., Human Factors (SAGE Publications), 20235

This finding reinforces that placement matters as much as presence. A grab bar at the correct height and location for the specific transfer task provides effective mechanical leverage for balance recovery. A bar mounted at the wrong height, or on the wrong wall, offers reduced advantage even if it meets load-bearing requirements.

A modern accessible restroom corner with a wall-mounted toilet and both vertical and horizontal grab bars installed on white tiled walls
A wall-mounted toilet with side and rear grab bars: the horizontal bar height (33-36 inches above the floor) and the toilet centerline distance from the wall (16-18 inches) are the two positioning dimensions that determine whether a side transfer is mechanically feasible.

Shower and Wet Area Dimensions

Accessible showers come in two ADA configurations: a 36×36-inch transfer shower with a built-in fold-down seat, or a 30×60-inch minimum roll-in shower with a 60-inch-wide entry. The right choice depends on whether the user transfers to a shower seat or rolls in directly.

What are the dimensions for a roll-in shower?

Standard roll-in shower compartments must be 30 inches wide and 60 inches deep at minimum inside, with a 60-inch-wide entry on the face of the compartment.1 The 60-inch entry width is the governing constraint: it allows a wheelchair to enter the shower without the user having to transfer to an external shower chair first. The 30-inch interior width is narrow; many accessible home designs target 36-42 inches of interior width to allow easier turning and caregiver access.

An alternate roll-in configuration (ADA §608.2.3) allows a 36-inch wide by 36-inch deep compartment with a 36-inch entry opening on one side, but that configuration requires a 36×60-inch clear floor space adjacent to the entry and a fold-down seat on one wall. The standard roll-in (30×60 minimum) is the more common residential choice because it does not require the adjacent side clearance beyond the entry.

Threshold height in a roll-in shower is 0.5 inches maximum under the ADA; a curbless (zero-threshold) design is preferred because even a half-inch lip creates an obstacle for small front-caster wheels and requires a ramp transition. A curbless shower also simplifies the drainage design, which typically slopes to a linear drain at one end to direct water away from the entry.

What is a transfer shower and when is it used?

A transfer shower compartment is 36 inches wide by 36 inches deep, with a 36-inch entry opening on one of the shorter sides.1 It is designed for users who transfer from a wheelchair to a fold-down seat mounted inside the compartment, rather than rolling the chair into the wet area. The fold-down seat runs along the full 36-inch width of the compartment at 17-19 inches above the floor, matching the accessible toilet seat height range.

The comparison below shows how the two configurations differ and when each is appropriate:

Dimension Transfer Shower (ADA §608.2.1) Roll-in Shower (ADA §608.2.2)
Interior width 36 in. (91.4 cm) 30 in. min. (76.2 cm)
Interior depth 36 in. (91.4 cm) 60 in. min. (152.4 cm)
Entry opening width 36 in. (91.4 cm) 60 in. (152.4 cm)
Built-in seat Required (17-19 in. above floor) Not required; optional
Threshold max height 0.5 in. (1.3 cm) 0.5 in. (1.3 cm)
Best suited for Users who transfer from wheelchair to a fixed shower seat Users who remain in a shower wheelchair or use a portable shower chair

The transfer shower’s smaller footprint (36×36 inches vs. 30×60 minimum) often fits more easily in existing bathroom spaces, but it requires the user to be able to complete a lateral transfer from the wheelchair to the shower seat independently or with caregiver assistance. An occupational therapist is the right professional to evaluate which configuration matches a specific person’s transfer method and strength.

Applying These Dimensions at Home

ADA Standards technically apply to commercial and publicly accessible buildings, not private residences. Residential accessible bathroom planning uses them as the most rigorous and widely adopted reference available, with state residential codes and an occupational therapist providing person-specific guidance.

How do ADA standards apply to a residential bathroom?

The 2010 ADA Standards for Accessible Design is a federal regulation enforced for commercial and public facilities.1 Most residential accessibility guidelines, including HUD Fair Housing Act design requirements and AARP livability standards, reference ADA dimensions because they represent the most rigorously developed, federally backed accessible design dimensions available. A home can be built or renovated to ADA dimensions without being subject to ADA enforcement.

Some states have adopted residential accessibility requirements for new construction or significant renovations, often mirroring ADA standards for at least one bathroom in multi-unit housing. A licensed contractor familiar with local building code is the right resource for understanding which requirements apply to a specific renovation project.

The key difference between ADA compliance in commercial settings and residential accessible design is the person-specific layer. In commercial settings, the ADA dimensions are fixed targets for the facility. In a home, those same dimensions become a planning framework that an occupational therapist can adjust for the specific user’s mobility, transfer method, balance, and daily routine. ADA dimensions are the floor, not the ceiling.

What to measure before planning an accessible bathroom renovation

Before calling a contractor or specifying any fixture, measure these five elements in the existing space to see where it stands against the accessible dimensions:

  1. Clear doorway opening: with the door open 90 degrees, measure between the door face and the opposite stop. Compare to 36 inches.
  2. Toilet centerline to nearest side wall: measure from the toilet centerline to both side walls. Compare to the 16-18 inch range.
  3. Counter rim height: measure to the front edge of the existing sink rim above the floor. Compare to 34 inches maximum.
  4. Shower or tub opening width and depth: measure the opening width and the interior depth. Compare to 36-inch entry for transfer shower, 60-inch entry for roll-in.
  5. Available turning radius: tape out a 60-inch circle or mark a 60×60-inch T-turn on the floor to confirm the bathroom can hold a turning space after fixtures are placed.

These five measurements reveal quickly where the current bathroom meets accessible dimensions and where the gaps are. The fuller context of how all dimensions interact with each other within the space – and with the person who will use it – is covered in handicap bathroom layout dimensions.

An occupational therapist can evaluate these measurements against a specific person’s mobility, transfer method, and balance to prioritize which dimensions matter most for daily independent use. Older adults ages 65 and older already account for 14 million falls per year in the U.S., with 3 million fall-related emergency department visits annually.4 Getting the dimensions right before a renovation, rather than reacting after a mobility change, reduces the risk of a rushed and costlier later fix.

Frequently Asked Questions

What is the minimum size for a handicap bathroom?

The ADA does not specify a minimum room size directly, but the dimensional requirements effectively set a practical minimum. A bathroom must accommodate a 60-inch turning circle, a toilet with 16-18 inches of centerline clearance from the side wall, and clear floor space at each fixture. A 5×8 foot (60×96 inch) footprint is generally cited as the practical minimum for a single-user accessible bathroom, but the exact viable footprint depends heavily on fixture placement and door swing.12

How wide does a doorway need to be for wheelchair access?

The ADA requires 32 inches of clear width for standard door openings and 36 inches of clear width when the passage depth exceeds 24 inches.2 Most accessible bathroom designs target 36 inches as a universal minimum, since the approach angle for a wheelchair user approaching a bathroom door typically places the full depth requirement in play. Clear width is measured at the narrowest point with the door open 90 degrees.

Do ADA bathroom dimensions apply to residential homes?

The 2010 ADA Standards for Accessible Design technically applies to commercial and publicly accessible facilities, not private residences.1 However, ADA dimensions are used as the standard planning reference for residential accessible bathrooms because they represent the most rigorously developed accessible design dimensions available. An occupational therapist can evaluate these dimensions against a specific person’s needs and mobility to identify which adaptations matter most for that individual’s daily routine.

What height should grab bars be installed in a bathroom?

The ADA requires grab bars to be installed with the top of the gripping surface at 33-36 inches above the finished floor.1 This positions the bar at roughly elbow height when a person is seated on an accessible toilet (17-19 inches), which is where the mechanical leverage for a sit-to-stand transfer is greatest. A grab bar outside this range provides reduced leverage for the transfer and may require compensating effort from the shoulder or back.

How far from the wall does an accessible toilet need to be?

The ADA requires the toilet centerline to be 16-18 inches from the side wall or partition.1 In centimeters, this range is 40.6-45.7 cm. This positioning keeps the side grab bar reachable while seated and allows enough room for a lateral transfer from a wheelchair on the open side. The floor space on the open side of the toilet must also provide 60 inches of clearance from the side wall to allow the wheelchair to position alongside the toilet.

Limitations and Edge Cases

  • Dimensions in this article are from the 2010 U.S. ADA Standards for Accessible Design.1 International standards, including ISO 21542 and European EN standards, specify similar but not identical dimensions, and metric-market residential codes may differ from the conversions shown here.
  • Obstructed reach ranges (where a counter or obstacle falls between the user and the control) are narrower than the 15-48 inch unobstructed window cited here; ADA §308.3.2 specifies reduced maximums at depths of 20-25 inches for side reach.
  • These dimensions are an engineering-informed planning reference, not a substitute for an occupational therapist’s evaluation of a specific person’s mobility, strength, balance, and transfer method in the specific space being renovated.

References

  1. U.S. Access Board – 2010 ADA Standards for Accessible Design, Chapter 6: Plumbing Elements and Facilities (sections 604, 606, 608, 609), U.S. Access Board, effective March 15, 2012.
  2. U.S. Access Board – 2010 ADA Standards for Accessible Design, Chapter 3: Building Blocks (sections 304, 308 covering turning space, forward reach, and side reach), U.S. Access Board, effective March 15, 2012.
  3. PubMed / Journal of Safety Research – Stevens JA, Haas EN, Haileyesus T. “Nonfatal bathroom injuries among persons aged 15 years and older – United States, 2008,” Journal of Safety Research, 2011; data year 2008.
  4. NCOA (National Council on Aging) – “Get the Facts on Falls Prevention,” citing CDC surveillance data, 2021 data year.
  5. SAGE Journals / Human Factors – Levine IC, Montgomery RE, Novak AC. “Grab bar use influences fall hazard during bathtub exit,” Human Factors, 2023;65(8):1821-1829.
  6. U.S. Access Board – Guide to Chapter 6: Lavatories and Sinks, ADA §606.3 counter height, U.S. Access Board.

Conclusion

Handicap bathroom dimensions are not arbitrary numbers: each one reflects a specific physical constraint of a seated posture, a transfer movement, or a reach arc. A 60-inch turning circle reflects the swept path of a wheelchair. A 33-36 inch grab bar height reflects elbow position at the moment of push-to-stand. A 16-18 inch toilet centerline reflects the distance at which a side grab bar remains reachable without lateral lean. Understanding the mechanical reason behind each figure makes it easier to evaluate trade-offs in a specific space and to ask better questions before a contractor or occupational therapist begins work.

For the broader context of how these dimensions fit into a bathroom safety planning strategy, see the overview in Bathroom Safety Planning.