Stair Safety for Dementia: Visibility, Supervision, and Exit Routes

Author: Oded Feigin · Created On: October 22, 2026 · Last Updated: October 22, 2026

Stair safety for dementia is a planning problem before it is a hardware problem. A staircase asks the person on it to see each edge, choose a direction, move at a steady pace and, in an emergency, get out. Dementia can change all four. For the wider topic of safer stair routes, see the overview in aging in place stair safety. In one UK clinic study, where half the dementia group had Lewy body or Parkinson’s disease dementia, falls ran nearly 8 times higher than in healthy controls1. This guide shows how a family and the person living with dementia can plan visibility, supervision and exit routes together, with professionals reviewing each decision.
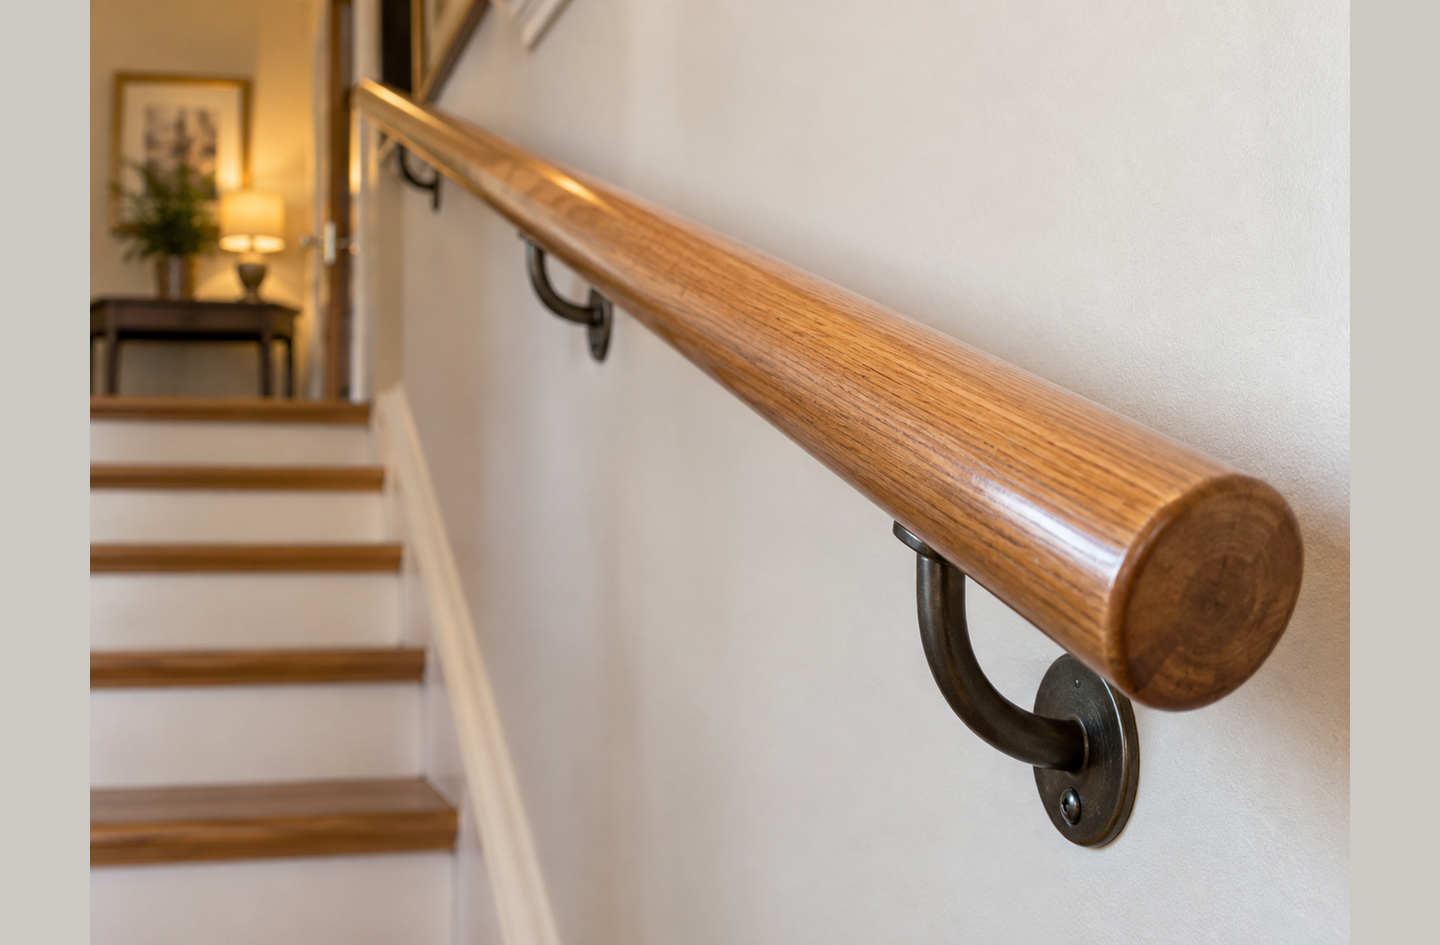
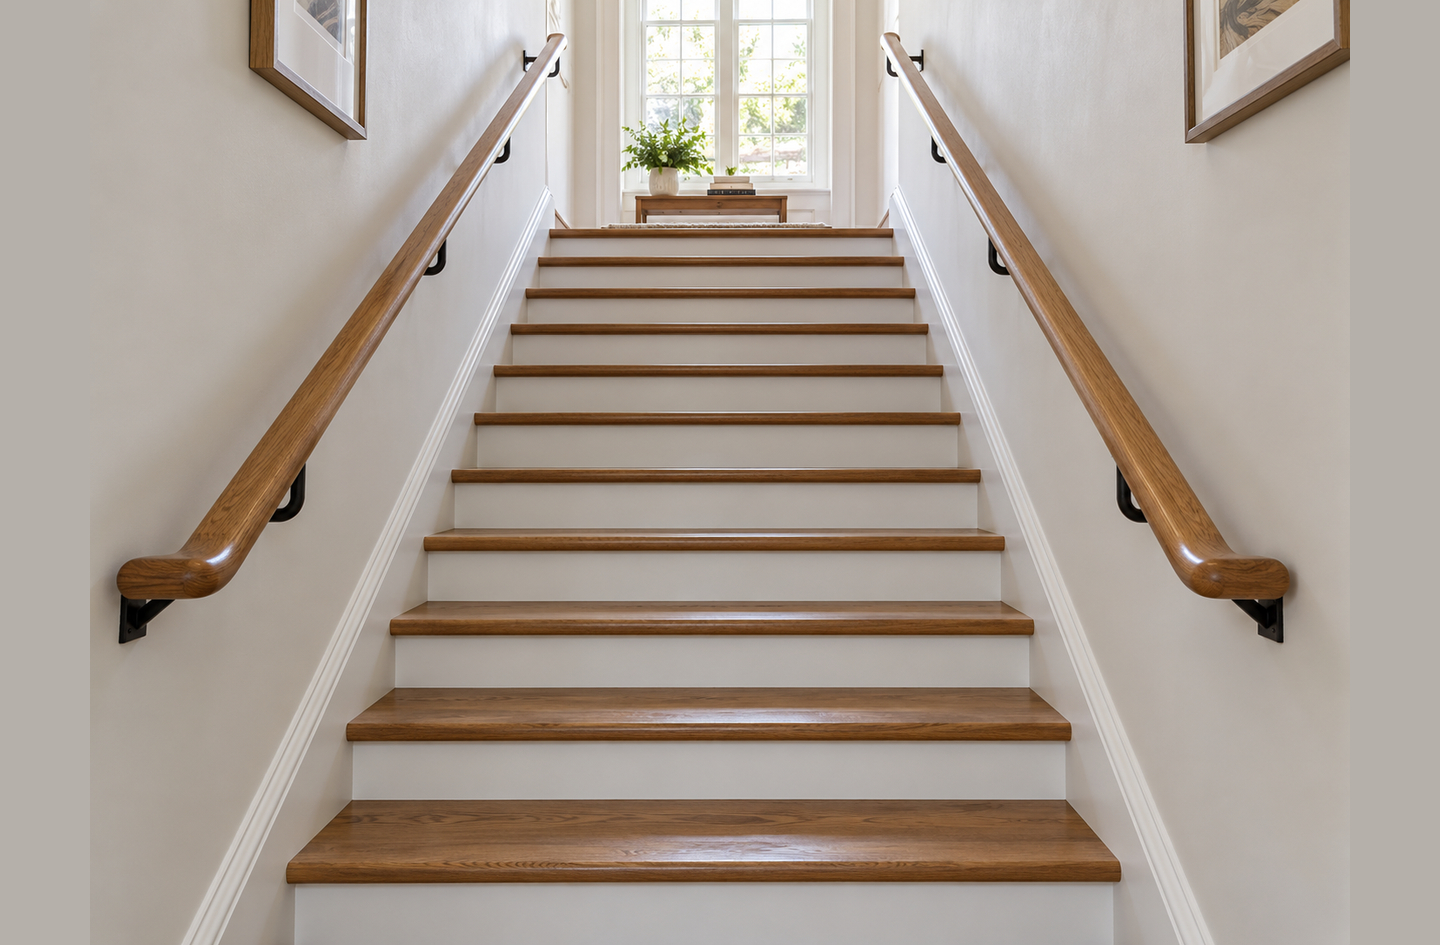
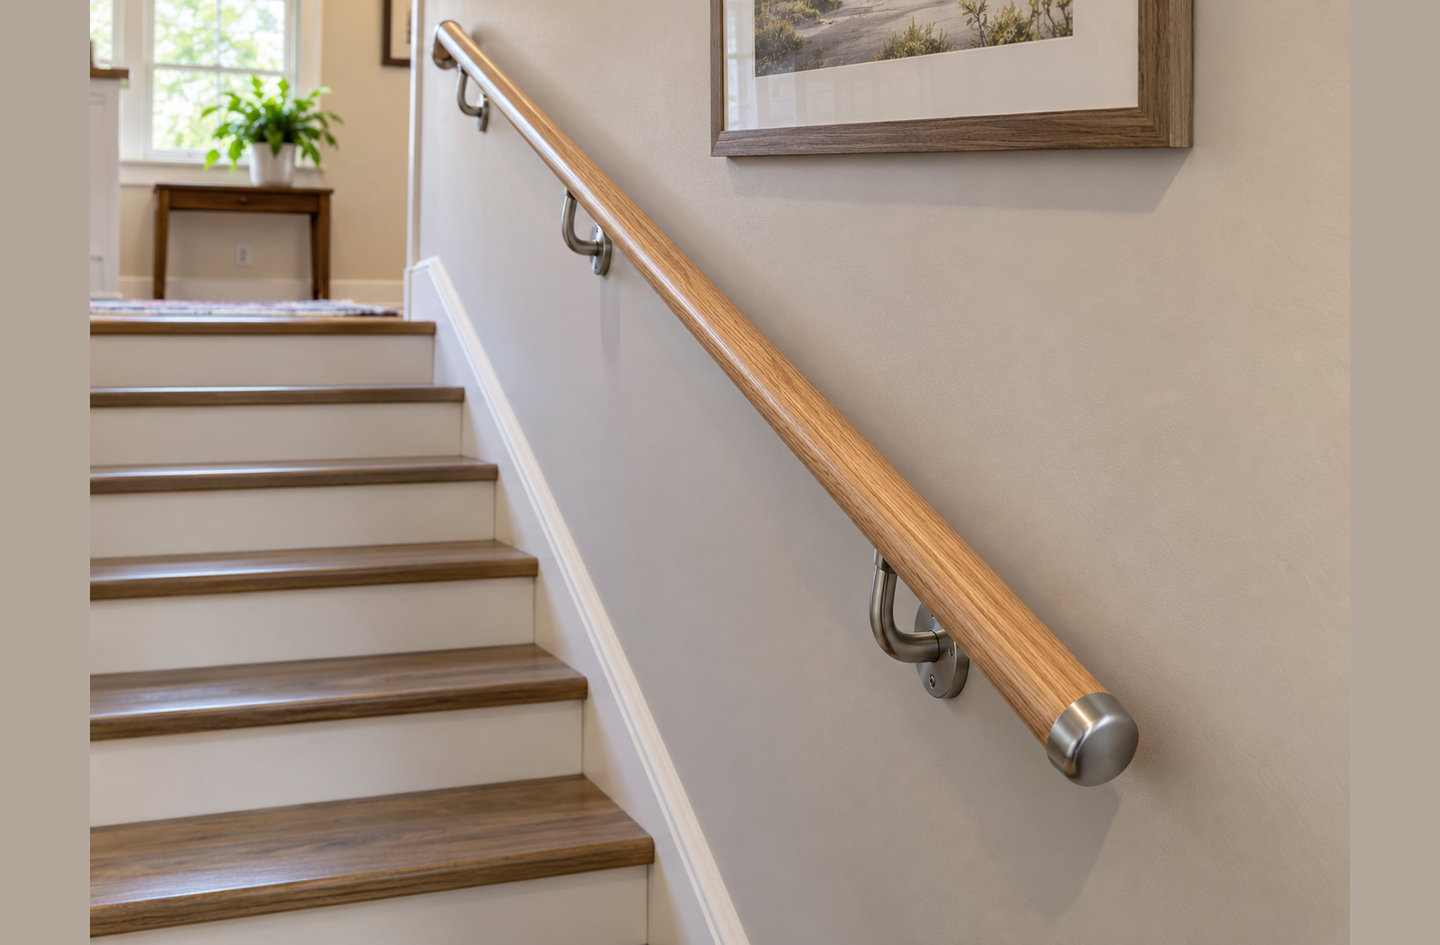
A wooden handrail on dark metal brackets runs beside a staircase toward a softly lit room, showing the support and light that stair safety for dementia depends on.
A wooden handrail on dark metal brackets runs along a light-colored wall beside the stairs, leading toward a warm, softly lit room.

Quick Answer

How do you plan stair safety for someone living with dementia?

Start by watching how the stairs are used now. Then make every edge visible, light the night route, add continuous handrails and protect the way out. Dementia and mild cognitive impairment double the risk of falls2, so an occupational therapist and the person’s physician should review the plan. Never block a staircase without professional review, because it may be the only exit from an upper floor.

  1. Observe how the stairs are used today.
  2. Make every edge and handrail easy to see.
  3. Plan the night route from bed to bathroom.
  4. Add support for quick or unplanned movement.
  5. Choose supervision before barriers.
  6. Protect the emergency exit route.
  7. Bring the plan to the right professionals.

Key Takeaways

  • Dementia and mild cognitive impairment double the risk of falls and fall-related injuries, according to the 2022 World Falls Guidelines2.
  • In 2015 US emergency data, 79.2% of older adults’ fall-related visits came from falls at home, and stairs were among the most common home locations3.
  • Night matters: 26% of people with dementia living at home had symptoms of sleep disturbance in a 2023 meta-analysis6.
  • A stair is also an exit. Adults 65 and older had 2.5 times the general population’s risk of dying in a fire in 20237. Blocking stair access is a professional decision, not a purchase.

Before You Begin: What Stair Safety for Dementia Has to Cover

Stair safety for dementia covers four changes that a staircase is unusually sensitive to: disorientation, impulsive movement, night navigation and changing recognition of edges and objects. A level hallway forgives a wrong turn or a missed cue. A stair does not, because every step is a change of level that has to be seen, judged and controlled. In the 2022 World Falls Guidelines, dementia and mild cognitive impairment double the risk of falls and of fall-related injuries such as hip fractures and head injuries2.

The size of that gap depends on the group studied. A UK study followed 179 adults over 65 from outpatient clinics for a year with fall diaries. Half of the 140 participants with dementia had Lewy body or Parkinson’s disease dementia. Those with dementia had 9,118 falls per 1,000 person-years, against 1,023 for healthy controls1. A history of falls in the previous year raised the hazard of falling again (hazard ratio 2.52)1. These are clinic figures, not a forecast for one person, but they explain why the stair deserves its own plan.

Each of the four changes puts a different demand on the stair:

  • Disorientation: the person may head for the stairs while looking for the bathroom, or lose track of which way leads down.
  • Impulsive or hurried movement: standing up and walking off quickly, often at night, before balance and blood pressure settle.
  • Night navigation: waking in a dark house, sometimes confused about time and place, with the stair near the bedroom door.
  • Changing recognition: step edges, handrails and even doors can become harder to pick out, especially in low contrast.

Keep a simple notebook by the stairs for one week of observation. Sketch the floor plan, marking bedrooms, bathrooms, the stair and every exit door. List current medications for the physician to review. Most of all, ask the person living with dementia what feels hard and what they want to keep doing. This is caregiver planning with the person, not around them.

A stair plan for dementia has to answer four questions at once, and a fix that solves one (a gate, a lock) can quietly make another worse.

Step 1: Observe How the Stairs Are Used Today

By the end of this step you will have a week of notes showing when, why and how the stairs are used. Observation comes first because it turns a general worry into specific friction points. In 2015 US emergency department data, 79.2% of older adults’ fall-related visits came from falls at home3. The same study found the most common home locations were the bedroom, bathroom and stairs3. Those three locations often sit on one night route.

For each stair trip you notice, write down a few facts:

  1. The time of day, and whether lights were on.
  2. The direction (up or down) and what the person was trying to reach.
  3. Whether they paused at the top step, gripped the rail, rushed or turned back.
  4. What they carried, and what they wore on their feet.
  5. Who was nearby, and whether the person asked for help or turned it down.

Patterns usually appear within days. A person who uses the stairs confidently by day but stops at the top step at night is telling you about lighting and orientation. Someone who heads downstairs at night when the bathroom is upstairs is telling you about wayfinding. A sudden rush toward the stairs after standing up points to the support and medical questions in Step 4. Many of the same checks appear in a guide to home factors on the stairs, which separates the stair itself from changes in balance or strength.

Observation also means listening. If you are the person living with dementia, your own account of where the stairs feel uncertain is part of the evidence. If you are helping a parent, share the notes with them rather than keeping a private file. The World Falls Guidelines make this a formal recommendation:

“When creating falls prevention care plans for older adults with cognitive impairment, both the older adults’ and their caregivers’ perspectives should be included as it improves adherence to interventions and outcomes.”

Montero-Odasso M and colleagues, World Guidelines for Falls Prevention and Management for Older Adults, Age and Ageing2

A week of notes is worth more to an occupational therapist than any product list. It shows where on the stair, and when, the plan has to work.

Step 2: Make Every Edge and Handrail Easy to See

By the end of this step, each tread edge, the top and bottom steps and the handrails should stand out clearly from their background. Visibility comes before any other change, because a step that cannot be seen cannot be judged. Contrast sensitivity is the ability to tell an object from its background when the two are close in brightness. One study tested contrast sensitivity with frequency doubling technology. It found deficits in people with Alzheimer’s disease (10 participants) and mild cognitive impairment (28 participants), compared with 29 healthy controls4.

On a stair, low contrast is the normal state. Carpet runs over tread and riser in one color. A beige rail disappears against a beige wall. For someone whose contrast sensitivity has changed, the steps may be harder to read as separate edges. These changes help each edge read as an edge:

  1. Mark each tread edge with a continuous, matte strip in a color that differs strongly in brightness from the tread. It should be flush, slip-resistant and firmly fixed.
  2. Mark the top and bottom steps most clearly, since the change from flat floor to stair is where misjudgment starts.
  3. Make the handrail contrast with the wall, so the hand and eye find it before the first step.
  4. Choose plain surfaces on the stair. A busy pattern adds visual noise exactly where the eye needs a clean edge.
  5. Reduce glare from glossy finishes and bare bulbs, which can hide an edge as well as darkness can.
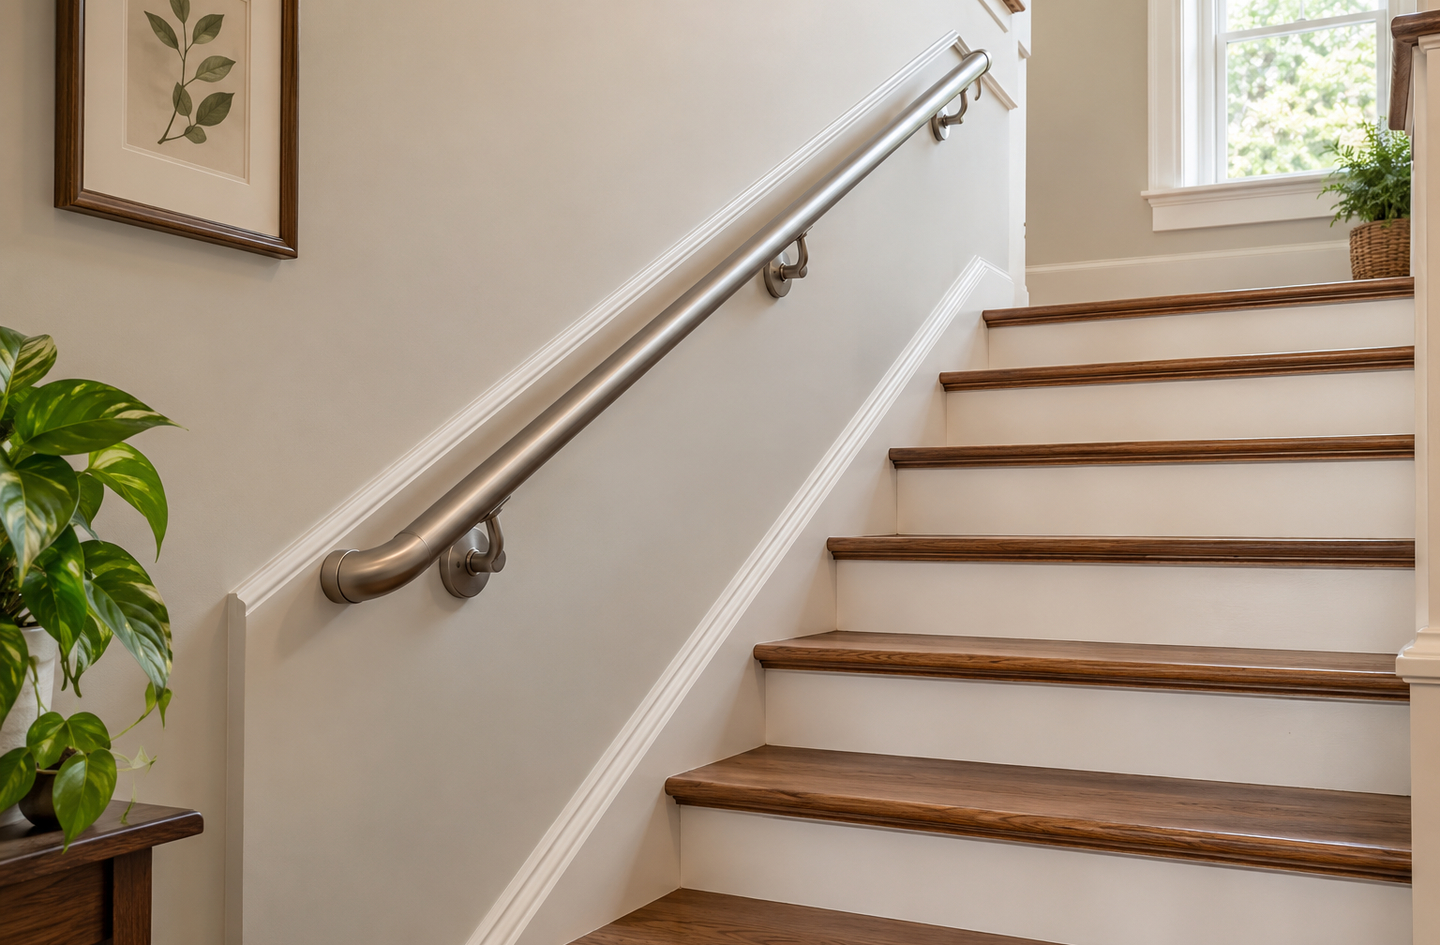
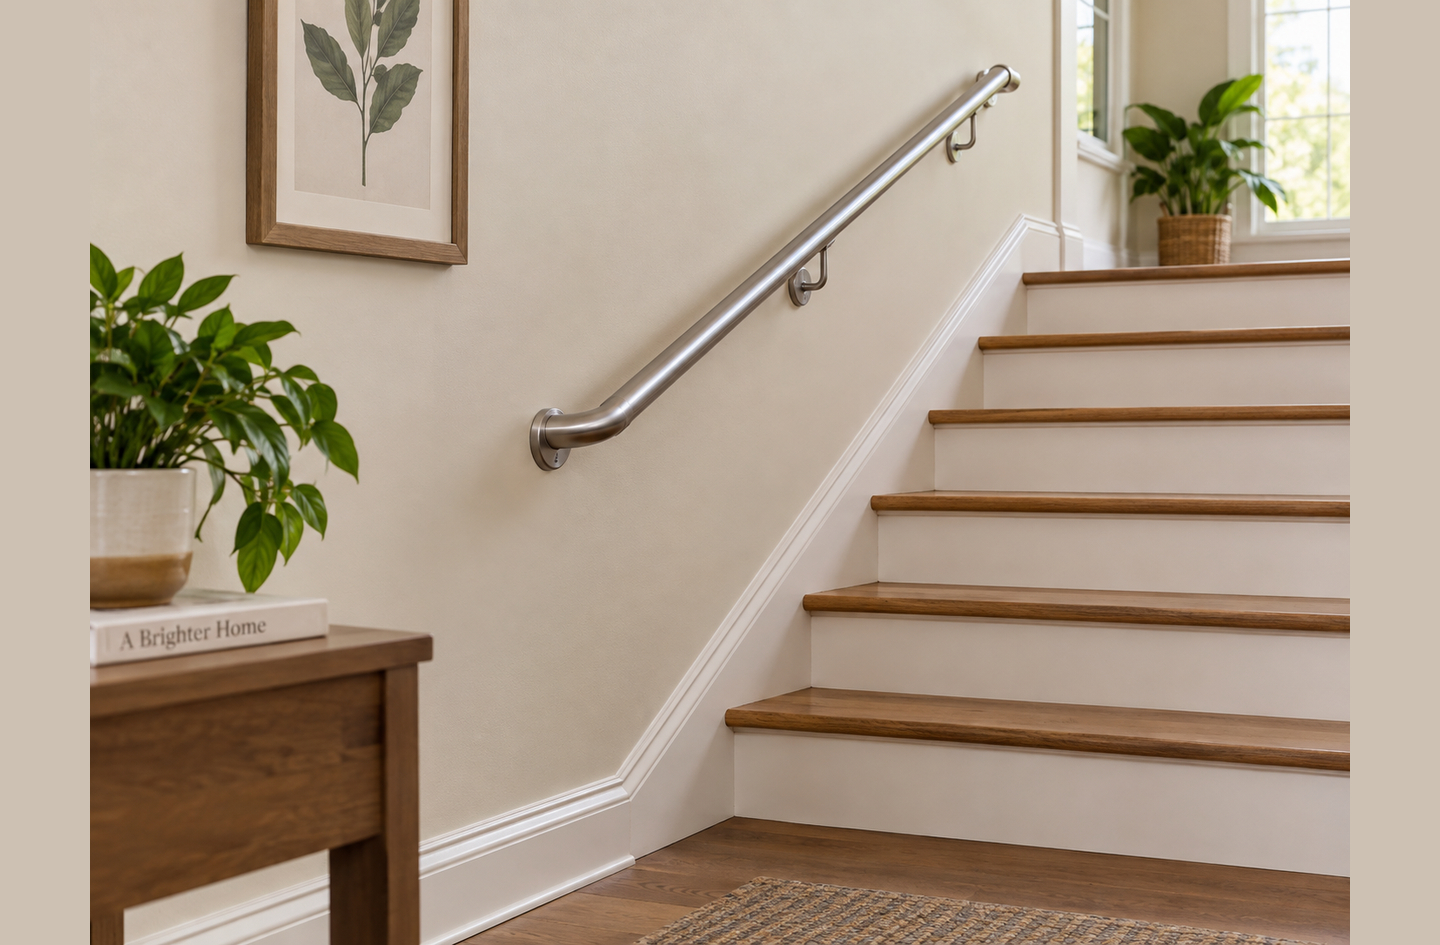
A brushed metal handrail mounted on a wall beside a staircase whose wooden treads contrast with white risers, next to a houseplant and a framed botanical print.
A brushed metal handrail runs along the wall beside a staircase with wooden treads and white risers, a pairing that helps each step edge stand out.

Light levels matter as much as color. The Alzheimer’s Association notes that changes in light level can be disorienting, and it advises adding lights in entries, between rooms and on stairways5. In practice that means light switches at both the top and bottom of the stair. It also means no dark pool at the landing, where the eye has to adapt mid-step.

Visibility work is low-disruption and reversible, so it can start while bigger decisions wait. An eye examination belongs in the plan too, since glasses and cataracts also affect contrast.

Visibility before confidence: when the edges and the rail are easy to see, the stair asks less of memory and judgment on every trip.

Step 3: Plan the Night Route From Bed to Bathroom

The route from the bed to the bathroom should be lit, short and hard to confuse with the route to the stairs. Night is where disorientation and stairs most often meet. A 2023 meta-analysis of people with dementia living in the community found that 26% had symptoms of sleep disturbance, and 19% had clinically significant sleep disturbance6.

The type of dementia changes the picture. Dementia with Lewy bodies is a form of dementia that often brings changes in alertness, visual perception and movement. In the same meta-analysis, sleep disturbance symptoms were reported in 49% of people with Lewy body dementia, against 24% of people with Alzheimer’s disease6. A diagnosis is worth knowing when you plan the night, and the treating physician can explain what it means for this person.

Plan the route, not just the stair:

  1. Keep the bedroom and bathroom on the same floor where the home allows, so the night trip never needs the stairs.
  2. Light the path automatically with low-level, motion-activated lights from the bedside to the bathroom door.
  3. Make the destination obvious. A lit bathroom with the door open gives the person a clear target to walk toward.
  4. Light the top of the stair separately, so the first step is visible before anyone reaches it.
  5. Keep the bedroom door direction in mind. If the bedroom door opens straight onto the top step, that layout belongs on the list for your occupational therapist.

The Alzheimer’s Association recommends night lights in hallways, bedrooms and bathrooms5. Night lighting supports the person who is awake and moving. It does not tell anyone else that they are moving, which is where supervision comes in.

Some families add a bed or motion sensor that alerts a caregiver when the person gets up. An alert is a supervision tool, not a barrier: it lets someone help without locking anything. Discuss it with the person first.

The safer-feeling night route is one the person never has to think about: lit, short and leading somewhere other than the top step.

Step 4: Add Support for Quick or Unplanned Movement

The aim here is something firm to hold from the moment the person reaches the stair until they step off it. Support matters most when movement is hurried. Orthostatic hypotension is a drop in blood pressure on standing that can cause dizziness or a faint. In the UK clinic study, symptomatic orthostatic hypotension was a significant, potentially modifiable predictor of falling in people with dementia (hazard ratio 2.13)1.

Picture the sequence. Someone wakes, stands quickly, feels light-headed and walks toward the nearest doorway, which opens onto the landing. The stair is a few steps from the bed, and the body has not caught up with the decision to move. Two kinds of response help here. The medical side (blood pressure, medications, hydration) belongs with the physician. The home side is about support points and space.

  1. Handrails on both sides, so either hand has a rail going up or down, and a weaker side is never left without one.
  2. Continuous rails that run the full flight without gaps, so the grip never has to let go and find the rail again.
  3. Rails that extend past the top and bottom steps, so the hand is already holding before the first step down.
  4. A clear landing at the top, with no furniture, baskets or items waiting to be carried down.
  5. Nothing stored on the steps, because a person who is hurrying will not step around clutter reliably.

Rail height, the grip shape and how the rail is anchored into the wall are installation questions. A stair rail carries the full load of a stumble, so the fixings matter more than the finish. A licensed contractor should confirm the wall can take the load and that the rail suits the stair. An occupational therapist can advise on which side, how high and what grip suits this person’s hands and gait.

Support before strain: a continuous rail on both sides gives a hurried or unsteady moment a place to land before it becomes a fall.

Step 5: Choose Supervision Before Barriers

By the end of this step, you should have a supervision plan that matches how the stairs are actually used, and a clear rule about barriers. Blocking stair access is a frequent piece of unqualified advice on this topic. A gate or lock at the top of the stair can look like the obvious answer to night walking. It changes the risk rather than removing it.

A barrier at the top of a stair creates three new questions. First, a determined adult can lean on a gate, try to climb it or misjudge it in the dark, right at the top of a drop. Second, a gate that has to be opened in a hurry slows everyone in the house in an emergency. Third, a barrier can feel like confinement to the person living with dementia, which can raise distress rather than lower it. None of these makes a barrier always wrong. They make it a decision for an occupational therapist, the local fire department and the household together, never a quick purchase.

Start with supervision that leaves the stair open:

  1. Timed help at the moments the notes from Step 1 flagged, such as the first trip downstairs in the morning.
  2. Scheduled bathroom trips before bed, so the night trip is shorter or not needed.
  3. Alerts that call a person, such as a bed sensor or door chime, rather than devices that stop movement.

Then consider the route itself. “Routes before rooms” applies strongly here: moving the bedroom to the ground floor, next to a bathroom, can remove the night stair trip entirely. The person’s own wishes should lead that change.

A stair lift is a route decision as much as a product decision. For someone living with dementia, the questions go beyond the stair’s shape and the power supply. Can the person learn and remember the controls? Will they wait for the seat to stop? Can they transfer at the top landing without turning toward the drop? Those are questions for an occupational therapist, and installation is a question for the installer and a licensed contractor.

The goal of supervision is to lower the risk of each stair trip while the person keeps using the stair. Any barrier also has to pass an exit test.

Step 6: Protect the Emergency Exit Route

By the end of this step, everyone in the home should be able to get from every bedroom to an outside door quickly, even at night. Emergency egress is the route and the time a person needs to leave a building when something goes wrong. In an upper-floor bedroom, the stair is usually part of that route. US Fire Administration data show that in 2023 adults 65 and older had 2.5 times the general population’s risk of dying in a fire7.

The risk rises with age. Adults aged 65 to 74 had 2.2 times the general population’s risk, and adults aged 75 to 84 had 2.9 times7. Dementia can add to that, because hearing an alarm, choosing a direction and moving quickly rely on the abilities the stair already tests.

Four demands one staircase must meet Diagram of four demands on one stair route: contrast deficits in AD and MCI, Risacher 2013; sleep disturbance symptoms in 26 percent of people with dementia at home, Koren 2023; fall risk doubled, World Falls Guidelines 2022; fire death risk 2.5 times for ages 65 plus, USFA 2023. Four demands one staircase must meet SEE EACH EDGE Contrast deficits found in AD and MCI MOVE AT NIGHT 26% have sleep symptoms while living at home One shared staircase CARRY FALL RISK Dementia and MCI double the risk of falls GET OUT FAST Age 65+ fire death risk 2.5x general population Demand on the person Shared stair route Source: Home Age Fit analysis, 2026
Compiled by Home Age Fit from the World Falls Guidelines, a UCL meta-analysis, a contrast sensitivity study and US Fire Administration data: one staircase has to work for seeing, night movement, fall risk and escape at the same time.

Protect the exit route with a few clear rules:

  1. Keep the stair clear at all times. It is a walkway by day and an escape route by night.
  2. Avoid locks that need a key from inside on exit doors or any stair gate, unless the local fire department has reviewed the exit plan.
  3. Check interior door locks. The Alzheimer’s Association advises removing locks on interior doors so the person cannot lock themselves in5.
  4. Test smoke and carbon monoxide alarms, which the Alzheimer’s Association advises inspecting regularly5, and plan who helps whom at night.

Your local fire department is the right reviewer for door hardware, gates and alarms on the exit route.

A change that makes the stair harder to fall down but also harder to escape down has not finished its job. The fire department should see it before it stays.

Step 7: Bring the Plan to the Right Professionals

Each part of the plan should end up with a named professional who has reviewed it. Home changes work best when they fit the person and are actually used. One pilot trial randomized 22 people with mild dementia and their carers, and 11 received a home hazard and exercise program. All participants implemented some home safety recommendations (range 19% to 80%), and half implemented 50% or more8.

The same trial concluded that home safety recommendations should put more weight on changing the environment than on changing behavior8. For stairs, that favors edges, light and rails over instructions the person has to remember. The trial was small, so treat it as a lesson in what households tend to adopt, not as proof of an outcome.

Match each question to the right person:

  1. Occupational therapist: how the person uses the stair, rail side and height, supervision, gates, alerts and whether a stair lift suits them.
  2. Physician: dizziness on standing, medications, sleep, and what the type of dementia means for falls.
  3. Eye care professional: glasses, cataracts and changes in contrast or depth judgment.
  4. Licensed contractor or electrician: rail anchoring, stair repairs, new lighting circuits and switches.
  5. Local fire department: exit routes, alarms, door locks and any barrier across the stair.

The medical side deserves weight. The UK clinic study’s authors put it this way:

“The management of symptomatic orthostatic hypotension, autonomic symptoms and depression, and the encouragement of physical activity may provide the core elements for the most fruitful strategy to reduce falls in people with dementia.”

Louise M. Allan and colleagues, Institute for Ageing and Health, Newcastle upon Tyne, PLoS ONE1

Prepare the questions before hiring the professional: a week of notes, a floor plan and this list turn one appointment into a real review.

Results: A Stair Plan to Review With Professionals

If the seven steps went well, you now have a plan for each stair-related change. It names what the change does on the stair, the home response and who reviews it. Print the table, add your notes from Step 1 and bring it to the occupational therapist and physician.

ChangeWhat it does on a stairHome response to discussWho reviews it
DisorientationHeads for the stair instead of the bathroom; loses track of up and downSame-floor bedroom and bathroom, lit destination, separate light at the top stepOccupational therapist
Impulsive or hurried movementReaches the top step before balance and blood pressure settleRails on both sides, continuous and extended, clear landingPhysician, occupational therapist, licensed contractor
Night navigationUses the stair in the dark, half awakeMotion lighting on the route, caregiver alerts, bathroom trip before bedOccupational therapist, physician
Changing recognitionMisreads edges, rails or the drop itselfHigh-contrast matte edge strips, contrasting rail, glare controlEye care professional, occupational therapist
Emergency exitA gate or lock can slow escape from an upper floorClear stair, no key-from-inside locks, tested alarms, night walk-throughLocal fire department

Success is not a stair that nobody uses. It is a stair the person can keep using with less hesitation, plus a household that knows what to watch for. Recheck the plan whenever something changes: a new diagnosis, a fall, a medication change or a move of the bedroom.

Common Mistakes When Planning Stairs for Dementia

Blocking the stair without a review. A gate or lock feels decisive, which makes it a frequent quick fix. The person may climb or lean on it, and it can slow an escape. Bring any barrier to the occupational therapist and the fire department first.

Lighting the stair but not the route. A bright staircase helps little if the bedroom and hallway stay dark. Light the whole path from bed to destination, with the top step lit before anyone reaches it.

Planning around the person instead of with them. Changes made without the person’s input are less likely to be used and can feel like a loss of control. Ask what feels hard, explain each change and keep familiar routines where you can.

Treating the plan as finished. Needs change as dementia progresses. Repeat the one-week observation every few months, and after any fall or health change, so the plan keeps up with the person.

Frequently Asked Questions

Should I put a gate at the top of the stairs for someone with dementia?

Not without professional review. Dementia and mild cognitive impairment double fall risk2. Yet a gate at the top of a drop can be climbed, leaned on or misjudged, and it can slow an exit. An occupational therapist and your local fire department should review any barrier against the whole exit plan.

Why do people with dementia have trouble seeing stairs?

Contrast sensitivity can change. One study found contrast sensitivity deficits in people with Alzheimer’s disease and mild cognitive impairment, compared with 29 healthy controls4. On stairs that are one color, edges can blur together. High-contrast matte edge strips, a contrasting rail and even lighting help each step stand out.

How common are sleep problems in dementia?

Common enough to plan for, since disturbed sleep can mean more trips out of bed in the dark. A 2023 meta-analysis found sleep disturbance symptoms in 26% of people with dementia living at home, and in 49% of those with Lewy body dementia6. Plan a lit, short route from bed to bathroom that does not pass the top step.

Is a stair lift a good idea for someone living with dementia?

It depends on the person. A lift lowers the effort of the climb, but the person must use the controls and transfer at the top landing reliably. Dizziness on standing also matters, since symptomatic orthostatic hypotension predicted falls in dementia (hazard ratio 2.13)1. An occupational therapist should assess fit first.

References

Methodology: every figure in this article comes from an independent published source and was read at that source in October 2026; no stair or person was measured or tested for this article. This is engineering-informed education, not medical, occupational therapy or fire safety advice for a specific home. Oded Feigin holds editorial responsibility for this page.

  1. PLOS ONE – Allan LM, Ballard CG, Rowan EN, Kenny RA. Incidence and Prediction of Falls in Dementia: A Prospective Study in Older People. 2009;4(5):e5521.
  2. Age and Ageing – Montero-Odasso M, van der Velde N, Martin FC, Petrovic M, Tan MP, Ryg J, et al. World guidelines for falls prevention and management for older adults: a global initiative. 2022;51(9):afac205.
  3. American Journal of Lifestyle Medicine – Moreland BL, Kakara R, Haddad YK, Shakya I, Bergen G. A Descriptive Analysis of Location of Older Adult Falls That Resulted in Emergency Department Visits in the United States, 2015. 2021;15(6):590-597, published online August 2020.
  4. Neurobiology of Aging – Risacher SL, WuDunn D, Pepin SM, MaGee TR, McDonald BC, Flashman LA, et al. Visual contrast sensitivity in AD, MCI, and older adults with cognitive complaints. 2013;34:1133, published online October 2012.
  5. Alzheimer’s Association – Home Safety, caregiving guidance, accessed October 2026.
  6. Ageing Research Reviews – Koren T, Fisher E, Webster L, Livingston G, Rapaport P. Prevalence of sleep disturbances in people with dementia living in the community: A systematic review and meta-analysis. 2023;83:101782.
  7. U.S. Fire Administration – Older Adult Fire Death Risk (2014-2023), FEMA, 2023 data.
  8. BMC Geriatrics – Wesson J, Clemson L, Brodaty H, Lord S, Taylor M, Gitlin L, et al. A feasibility study and pilot randomised trial of a tailored prevention program to reduce falls in older people with mild dementia. 2013;13:89.

Conclusion

Stair safety for dementia works best as a system. Observe first, make edges and rails visible and light the night route. Then add continuous support, choose supervision before barriers and keep the exit open. Each change should leave the stair easier to use and no harder to escape. When the stair has to stay part of daily life, firm, continuous rails that the person can find and trust are a practical place to start.

The specific decisions belong with the person, the family and the professionals who can see the home. For how this angle fits safer stair routes more broadly, see the overview of aging in place stair safety.
Difficulty Going Down Stairs for Older Adults: Home Factors Worth Checking

Author: Oded Feigin · Created On: October 16, 2026 · Last Updated: October 16, 2026

Difficulty going down stairs in older adults is rarely one problem. It is usually a home factor and a body factor meeting on the same step. For the wider topic of safer stair routes, see the overview in Aging in Place Stair Safety. In 2015 emergency department data, stairs accounted for 22.9% of injurious falls in or around the home among adults aged 65 and older1. This guide shows how to check the stair itself, what to write down, and when a clinician should take over.

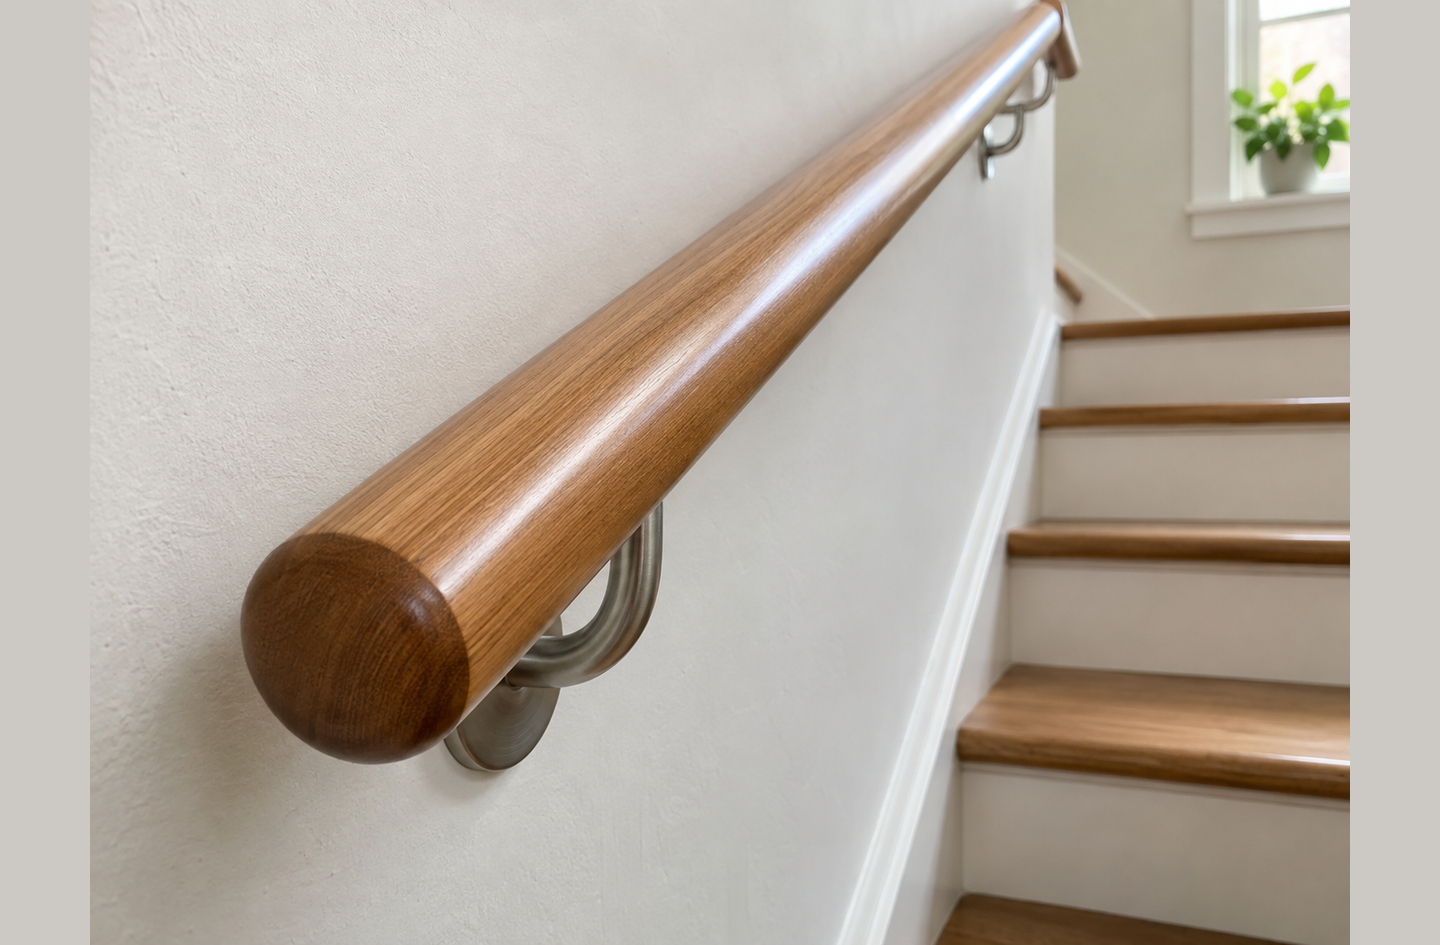
A wooden handrail mounted with brushed metal brackets to a light-colored wall, running alongside a staircase with matching wooden treads.
A wooden handrail on brushed metal brackets runs along a light-colored wall beside a staircase with matching wooden treads.

Quick Answer

What should you check when going down stairs gets harder?

Check the stair before judging the person. Look at tread visibility, lighting, step consistency and handrails, then record when the hesitation happens. In one lab study, relative knee effort in descent was 88% for older adults; for young adults it was 42%2. Home fixes lower the visual and support demands of the stair, while balance and strength changes belong with a clinician.

  1. Record when and where descent feels hard.
  2. Check tread visibility and lighting.
  3. Check whether the steps are consistent.
  4. Check the handrails and support points.
  5. Separate home factors from balance or strength changes.
  6. Decide when a clinician or occupational therapist should evaluate.

Key Takeaways

  • Stairs ranked second among places in or around the home where older adults had injurious falls (22.9% in 2015 data)1, behind the bedroom.
  • Going down asks more of aging knees than going up: relative knee effort was 88% in descent and 78% in ascent for older adults2.
  • Visibility is a visible home factor. A flush, high-contrast edge strip cut accidental foot contacts from 15% to 3% among young adults wearing glasses that simulated cataract4.
  • The 2010 ADA Standards call for uniform risers and treads and handrails on both sides7, which makes a useful benchmark for a home stair.
  • A record of where, when and how the hesitation happens is more useful to a clinician or occupational therapist than a general worry.

Why Difficulty Going Down Stairs Is Common in Older Adults

Difficulty going down stairs is common in older adults because descent loads the knees close to their limit while the eyes judge each edge. Stair descent is the controlled lowering of body weight from one step to the next, with the front leg braking the drop. In lab studies, older participants worked closer to their knee limit on that braking work than on the climb2.

Why Going Downstairs Feels Harder Than Upstairs

Relative effort is the share of a person’s maximum muscle capacity that a task uses. In a laboratory study of 14 older adults with a mean age of 74, Hortobágyi and colleagues measured knee effort on stairs2. For the older group, relative effort in descent was 88% of maximum, and relative effort in ascent was 78%2. For young adults the pattern reversed: relative effort in descent was 42% and in ascent was 54%2.

Knee effort on stairs as a share of maximum capacity, from the Hortobágyi study (2003)2
TaskYoung adultsOlder adults
Stair ascent54%78%
Stair descent42%88%

The practical reading is simple. When going downstairs feels harder than upstairs, that matches the mechanics rather than signalling a sudden problem. A change that began suddenly is different, and a reason to see a doctor. It also means small home details carry extra weight on the way down, because the knees are already working closer to their limit on the way down.

This guide does not teach a way of walking. It shows how to check the stair, how to record what happens, and how to hand both to the right professional.

If descent is the hard direction, start every check from the top step looking down, because that is the view and the load the person actually meets.

Step 1: Record When and Where Descent Feels Hard

The first step produces a short written record of when descent feels hard, which separates a stair problem from a person problem better than memory does. Write it over a week or two of ordinary use, not during a single tense moment. If you are checking your own stair, the same log works, and you know better than anyone where you slow down.

  1. Note which staircase, which step and which direction. A record often points to a specific spot, such as the top step or the last two treads.
  2. Note the time of day and the light: daylight, lamp light, or a switch that sits out of reach.
  3. Note what the person carried, what they wore on their feet, and which glasses they had on.
  4. Note which hand reached for support, and whether a rail existed on that side.
  5. Note any dizziness, knee pain or a near-miss, with the date.

Hesitation at the Top of Stairs

Hesitation at the top of stairs is a useful signal because it shows where confidence breaks before any stumble happens. A pause that occurs only at night, or only on one staircase, points toward the home. A pause that occurs on every stair, in good light, with a rail in hand, points toward balance, strength or vision.

Speed is something clinicians measure. In a study of 513 community-dwelling adults aged 70 and older, Oh-Park and colleagues timed a three-step descent6. People who reported stair difficulty averaged 3.60 seconds, against 2.43 seconds for those without difficulty6. The authors called stair times “simple, quick, and valid clinical measures”6. That is a reason to leave timing to a clinician rather than turn the stair into a test at home.

A record that names the step, the light and the hand on the rail turns a vague worry into a question a professional can answer.

Step 2: Check Tread Visibility and Lighting

Tread visibility decides whether the eye can find each step edge on the way down, and it is the home factor most often missed. Stand at the top in the light the person really uses and look at the edges, not the treads.

A tread is the horizontal surface of a step that the foot lands on. The nosing refers to the front edge of the tread, the line the foot must clear and the eye must find. On a carpeted or uniformly colored stair, the nosings can blur into one surface when viewed from above.

An edge highlighter is a contrasting strip placed along the nosing so the edge stands out. In a University of Bradford study, a flush high-contrast strip cut accidental foot contacts from 15% to 3% for young adults wearing glasses that simulated cataract4. Setting the strip 30 mm back from the edge made things worse than a flush strip did for older adults4. Low foot clearances rose from 2% to 17%4.

The ADA Standards make the same point in an advisory note, suggesting visual contrast on tread nosings for people with low vision7. Lighting works with contrast. Check whether a switch sits at both the top and the bottom and whether the bulb reaches full brightness quickly. Then check whether window glare hides the first edge.

Age changes where this matters most. For adults aged 65 to 74, stairs were the most common place at home for an injurious fall (30.0%)1. Moreland and colleagues drew a plain conclusion from that pattern.

“Making sure stairs have rails and appropriate lighting may be especially important for this age group compared to modifications in other areas of the home.”

Moreland et al., American Journal of Lifestyle Medicine1

If the edges disappear from the top step in evening light, treat that as a home factor to fix before drawing any conclusion about the person’s balance.

Step 3: Check Whether the Steps Are Consistent

Step consistency matters because people settle into a rhythm after the first few steps and expect every step to match. One odd step breaks that rhythm without warning. A riser is the vertical face between two treads, and its height sets how far the body drops on each step.

The 2010 ADA Standards require uniform riser heights and uniform tread depths on every step of a flight7. They set risers between 4 and 7 inches high and treads at least 11 inches deep7. Those figures come from public-building rules, not a residential code, so treat them as a benchmark rather than a pass mark.

  1. Measure each riser with a tape and write the heights in order, top to bottom.
  2. Measure each tread depth from nosing to the riser behind it.
  3. Mark any step that differs from the rest, especially the top and bottom steps, where floor finishes change.
  4. Check for open risers, worn nosings, loose carpet and runners that shift underfoot.

The ADA Standards also limit how far a nosing may project, to 1.5 inches over the tread below7. A deep, square nosing can catch the heel on the way down, so note its shape alongside its size.

A single riser that differs from its neighbors is worth more attention than a flight that is steep but even. The body can plan for steepness, but not for surprise.

Step 4: Check the Handrails and Support Points

Handrails are the main support point on a stair. The check is whether a hand can reach, grip and follow the rail from the first step to the last. A rail on only one side means one direction of travel always puts it on the other hand.

A brushed metal handrail mounted to the wall alongside a staircase with wooden treads and white risers, beside a houseplant and a framed botanical print.
A brushed metal handrail mounted to the wall beside a staircase with wooden treads and white risers.

The 2010 ADA Standards call for handrails on both sides of stairs7. The top of the gripping surface sits 34 to 38 inches above the stair nosings7. The rail should stand at least 1.5 inches clear of the wall, so a whole hand can wrap around it7.

Extensions matter most on the way down. At the top of a flight, the ADA rail runs at least 12 inches past the first nosing7. That gives a hand something to hold before the first step down, which is where a pause at the top happens.

“People with disabilities, older people, and others benefit from continuous gripping surfaces that permit users to reach the fingers outward or downward to grasp the handrail, particularly as the user senses a loss of equilibrium or begins to fall.”

U.S. Access Board, 2010 ADA Standards advisory 505.67

Check that the rail does not rotate in its brackets, that brackets do not interrupt a sliding hand, and that the rail runs the full flight. Note any spot where a person grips a newel post, a door frame or furniture instead.

If a person reaches for the wall or a banister post at the top step, the missing support point is a home factor, whatever their balance is like.

Step 5: Separate Home Factors From Balance or Strength Changes

Sorting the record into home factors and person factors is the step that decides who acts next. The World Guidelines for Falls Prevention describe environmental risk as the interaction between a person’s exposure to hazards, their risk-taking behavior and their physical capacity8. The same stair can be fine for one person and hard for another.

Balance Problems Descending Stairs

Part of what feels like a balance problem on the way down can be a strength-reserve limit rather than the stair. Hortobágyi and colleagues found that relative knee effort in descent was 88% for older adults; for young adults it was 42%2.

Reeves and colleagues measured the same pattern another way. Participants walked down a four-step staircase, and maximum knee capacity was measured separately on a dynamometer3. Older adults operated at 42% of their maximal knee capacity, against 30% for young adults3.

Knee effort in stair descent, % of maximum Hortobágyi 2003: young adults 42%, older adults 88%. Reeves 2008: young adults 30%, older adults 42%. Knee effort in stair descent, % of maximum Young adults Older adults 42% 88% Hortobágyi 2003 30% 42% Reeves 2008 Source: Home Age Fit analysis of Hortobágyi 2003 and Reeves 2008
Both lab studies measured maximum capacity differently, yet each found older adults working closer to their knee limit than young adults on the way down. Compiled by Home Age Fit from the Hortobágyi and Reeves studies.

Vision sits between the two categories. In an Australian cohort of older community-dwelling people, 55.8% were regular wearers of multifocal glasses5. Multifocal wearers were more than twice as likely to fall over the follow-up year5. They were also more likely to fall when walking up or down stairs5. Looking through the lower lens segments impaired their depth perception and edge-contrast sensitivity at a distance5. The glasses are worn by the person, but the record should still note them.

Fear of Going Down Stairs

Fear of going down stairs is a real factor in its own right, not just a reaction to a weak knee or a dark landing. In the Oh-Park cohort, 34% reported fear of falling at baseline6. The world guidelines recommend that an assessment include concern about falling8. Record it plainly, without judgment, alongside the physical notes.

If the trouble follows the stair, fix the stair; if it follows the person to every stair, the record belongs with a clinician.

Step 6: Decide When a Clinician or Occupational Therapist Should Evaluate

A clinician or occupational therapist should evaluate stair use when the record points to the person rather than the stair, or when anyone has already fallen. An occupational therapist is a licensed clinician who assesses how a person performs daily tasks in their own setting and adapts the task or the setting.

The world falls guidelines suggest a short set of screening questions for older adults8. They ask whether you have fallen in the past year, whether you feel unsteady when standing or walking, and whether you worry about falling. A yes to any of them is worth raising with a doctor. If you are the one finding the stairs harder, raising it early keeps the decisions in your hands. The guidelines also name gait speed below 0.8 m/s as a cut-off clinicians use to stratify risk8.

Moreland and colleagues noted that occupational therapist recommendations, including painting the edge of steps and installing stair rails, have been shown to reduce falls1. An in-home visit lets a therapist judge the stair and the person together.

Ask a physician to review stair difficulty when it appears suddenly, comes with dizziness, pain or a fall, or follows a new medication or new glasses. Simple lighting and contrast changes can come first. Rail installation and any riser or tread change belong with a licensed contractor, ideally after an occupational or physical therapist has watched the person on their own stair.

Bring the written record and the measurements from Steps 2 to 4 to that appointment, so the professional spends the visit on judgment rather than discovery.

Results: A Stair Record You Can Hand to a Professional

A finished check gives you two things: a log of when descent feels hard, and a stair measured against a published benchmark. The cross-walk below maps each 2010 ADA stair and handrail requirement onto what to look for on a home stair and what to write down. A private house is not bound by these figures, but they give the conversation with a contractor or therapist a shared reference.

Home stair cross-walk compiled by Home Age Fit from the 2010 ADA Standards, sections 504 and 5057
What to check2010 ADA benchmarkWhat to record at home
Riser heightsUniform on every step, 4 to 7 inches highEach riser height, top to bottom
Tread depthsUniform, 11 inches deep minimumEach tread depth and any worn edge
Nosing shapeProjection 1.5 inches maximum, edge radius 0.5 inch maximumSquare, rounded or worn nosings
Open risersNot permittedAny gap a toe could slide into
Edge visibilityAdvisory: visual contrast on tread nosingsWhether edges show from the top step at night
Handrail sidesBoth sides of the stairWhich sides have a rail
Handrail height34 to 38 inches above the nosings, consistentHeight at the top, middle and bottom
Handrail continuityContinuous for the full flightPosts, gaps or brackets that stop the hand
Top extension12 inches minimum past the first nosingWhether a hand can hold the rail before the first step down
Bottom extensionOne tread depth past the last nosingWhether the rail ends before the floor is reached
Wall clearance1.5 inches minimumWhether knuckles rub the wall

If most rows check out and descent is still hard, the record points toward the person, and Step 6 applies. If several rows fail, start with lighting and edge contrast, then record again, because the change itself will show how much was the stair. Riser, tread and rail work belongs with a licensed contractor.

The cross-walk does not grade a home; it shows which questions to bring to a licensed contractor and which to bring to a clinician.

Common Mistakes When Checking a Stair

The most common mistake is deciding the cause before looking at the stair, which sends the conversation straight to the person’s body. Four others follow close behind.

Checking in daylight only: stair trouble can be worse in low light, so walk the check in the light the person really uses, including the trip from bed.

Adding a strip in the wrong place: a contrast strip set back from the nosing can mislead the eye about the real edge. The Bradford study found this for older adults4. Keep any strip flush with the edge.

Treating one rail as enough: a single rail serves one hand on the way up and the other on the way down. Note which hand the person trusts before deciding which side to prioritize.

Turning the stair into a test: staged or timed trials on a stair add pressure to a task that already asks a lot of the knees. Leave measured tests to a clinician.

A good stair check looks at the house first and the person second, so nobody is asked to adapt to problems the stair can solve.

Frequently Asked Questions

Why is going downstairs harder than upstairs for older adults?

Descent makes the front knee brake the full body weight on each step, and older muscles have less spare capacity for that braking. One lab study put older adults’ knee effort at 88% of maximum in descent and 78% in ascent2. Reading each edge from above adds a visual task as well.

What causes fear of going down stairs in seniors?

Fear can follow a past fall or near-miss, a feeling of being less steady, or a stair that is hard to read from the top. In a cohort of adults 70 and older, 34% reported fear of falling6. Light and a reachable rail ease the stair side; a clinician addresses the rest.

Is hesitation at the top of the stairs a balance problem or a home problem?

It can be either, and the pattern decides. A pause tied to darkness, one particular staircase, or a rail that starts late suggests the house. A pause that appears on every staircase, in bright light and with a good rail, suggests balance, strength or eyesight, which a doctor or therapist should look at.

When should someone see a doctor about trouble going down stairs?

Tell a doctor about any fall, even one without pain, and about stair trouble that starts suddenly or arrives with dizziness, knee pain or new glasses. The world falls guidelines also treat feeling unsteady and worrying about falling as reasons for a fuller falls assessment8.

Can an occupational therapist assess stairs at home?

Yes. The world falls guidelines say a trained clinician, such as an occupational therapist, should assess home hazards together with the person’s abilities and habits8. A home visit lets the therapist watch the actual stair in use and suggest changes that fit both the house and the person.

Limitations and Edge Cases

  • This article is engineering-informed education, not medical or occupational therapy advice, and it does not replace an in-person evaluation of a specific person or stair.
  • The knee-effort figures come from small laboratory samples of healthy volunteers in 2003 and 2008, so they describe a pattern rather than any one person.
  • The ADA figures are written for public and commercial buildings; a private home follows its local residential code, which a licensed contractor can confirm.
  • Stair lifts, ramps and moving a bedroom downstairs are separate decisions that sit outside this check.

References

Methodology: figures were gathered from peer-reviewed studies, an international clinical guideline and the 2010 ADA Standards, each read at its source in October 2026; no stair was measured or tested for this article. Oded Feigin holds editorial responsibility for this page.

  1. American Journal of Lifestyle Medicine – Moreland BL, Kakara R, Haddad YK, Shakya I, Bergen G. A Descriptive Analysis of Location of Older Adult Falls That Resulted in Emergency Department Visits in the United States, 2015. Published online 2020.
  2. The Journals of Gerontology, Series A – Hortobágyi T, Mizelle C, Beam S, DeVita P. Old adults perform activities of daily living near their maximal capabilities. 2003;58(5):M453-60, PubMed abstract.
  3. Journal of Electromyography and Kinesiology – Reeves ND, Spanjaard M, Mohagheghi AA, Baltzopoulos V, Maganaris CN. The demands of stair descent relative to maximum capacities in elderly and young adults. 2008;18(2):218-27, PubMed abstract.
  4. Experimental Gerontology – Foster RJ, Hotchkiss J, Buckley JG, Elliott DB. Safety on stairs: influence of a tread edge highlighter and its position. University of Bradford, 2014, PubMed abstract.
  5. Journal of the American Geriatrics Society – Lord SR, Dayhew J, Howland A. Multifocal glasses impair edge-contrast sensitivity and depth perception and increase the risk of falls in older people. 2002, PubMed abstract.
  6. Archives of Physical Medicine and Rehabilitation – Oh-Park M, Wang C, Verghese J. Stair Negotiation Time in Community Dwelling Older Adults: Normative Values and Association with Functional Decline. 2011.
  7. U.S. Access Board – 2010 ADA Standards for Accessible Design, sections 504 Stairways and 505 Handrails.
  8. Age and Ageing – Montero-Odasso M, van der Velde N, Martin FC, et al. World guidelines for falls prevention and management for older adults: a global initiative. 2022.

Conclusion

Difficulty going down stairs in older adults is best read as a stair and a person meeting at the same edge. Check visibility, consistency and support first, and write down when the hesitation happens. Hand the record to a clinician when the trouble follows the person rather than the stair. Observation, not renovation, comes first.

See the overview in Aging in Place Stair Safety for how stair checks fit into wider decisions about multi-level living.

How to Plan a Wheelchair Accessible Bathroom With a Roll-In Shower

Author: Oded Feigin · Created On: October 14, 2026 · Last Updated: October 14, 2026

A wheelchair accessible bathroom with a roll-in shower works as one connected system. The door, turning space, floor, grab bars, seat and controls together decide whether a seated shower feels easy or effortful. In 2008 emergency department data, most nonfatal bathroom injuries (81.1%) were caused by falls2. For the wider topic of safer daily bathroom use, see the overview in Bathroom Safety Planning. This guide stays on one sequence: measure the chair, plan the way in, then work inward to drainage, support, seating and controls.

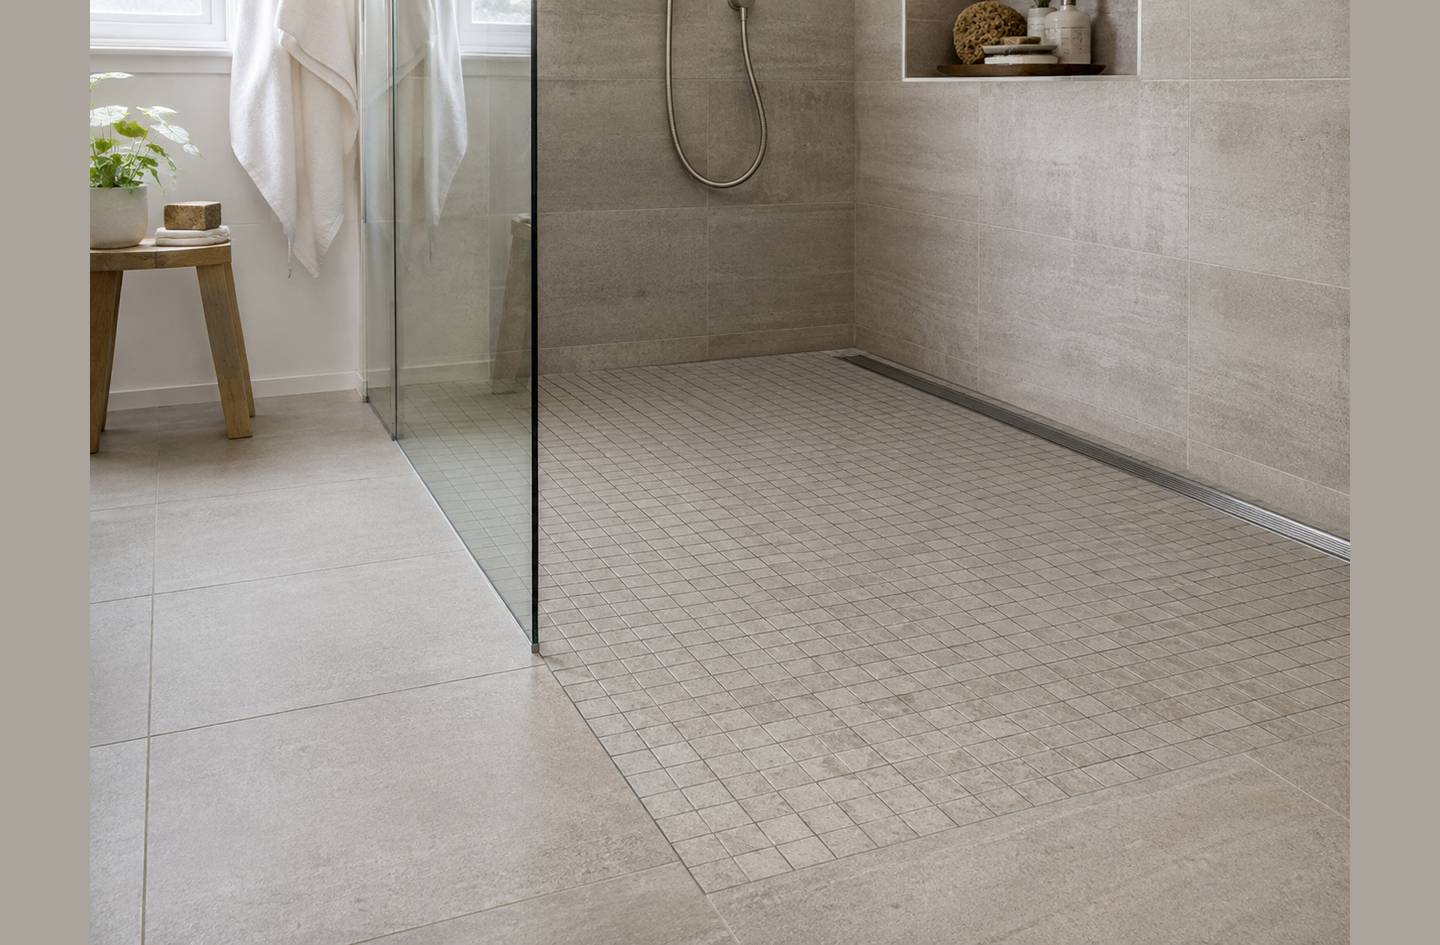
Curbless shower entry in a bathroom with slip-resistant large-format floor tiles, a smaller mosaic-tiled shower floor, a glass panel and a linear drain along the back wall.
A curbless shower entry where large-format slip-resistant tiles meet a mosaic shower floor, with a glass panel and a linear drain along the back wall.

Quick Answer

How do you plan a roll-in shower for a wheelchair user?

Start from the person and the chair, not the catalog. The 2010 ADA Standards set a standard roll-in shower at 30 by 60 inches inside, with a 60-inch-wide open face. Its threshold sits no higher than half an inch1. Then plan the door, turning space, drainage, grab bars, seat and controls in that order.

  1. Measure the chair and the transfer.
  2. Plan the doorway and the route in.
  3. Lay out turning space and shower clearance.
  4. Drain the floor without a curb.
  5. Place grab bars where transfers happen.
  6. Choose and position the seat.
  7. Put controls and the handheld within reach.

Key Takeaways

  • Bathrooms (22.7%) ranked among the most common places for older adults’ falls at home3, so the shower deserves planning, not guesswork.
  • In a University at Buffalo sample, only about 70% of manual chair users and 49% of power chair users fit the 30 by 48 inch clear floor space4. Measure the real chair before sizing anything.
  • The ADA’s 60-inch width for a 180-degree turn accommodates just over 80% of the manual and powered wheelchair users5, which makes it a floor rather than a target.
  • A curbless floor only works when slope, drain position and waterproofing are designed together by a licensed professional.
  • Grab bars, seat and controls form one reach zone: placing them separately can leave a roll-in shower hard to use.

What a Wheelchair Accessible Bathroom With a Roll-In Shower Requires

A roll-in shower lets a person enter the wet area while seated, with no curb to climb. The whole bathroom then has to be planned around a rolling chair. Roll-in shower refers to a shower compartment with a level or near-level entry wide enough for a wheelchair or shower chair to roll straight in. Transfer shower is a smaller compartment, 36 by 36 inches under the 2010 ADA Standards, where the person moves from the chair onto a seat instead1.

Choosing between the two is a question about the person’s transfer, not about the room. Someone who showers on a rolling shower chair, or with help from a caregiver, needs the roll-in footprint. Someone who transfers reliably from the wheelchair to a seat can manage a transfer shower. An occupational therapist can watch the real transfer and tell you which pattern fits. If you are still deciding whether this project makes sense at all, the wheelchair bathroom accessibility guide covers that decision first.

Wheelchair accessible showers are a common adaptation. In a Swiss cohort of people with spinal cord injury, the most frequent home adaptation was a wheelchair accessible shower (62.7%)6. In the same study, unmet need was among the lowest for wheelchair accessible showers (9.4%)6, a share measured among people who needed one. That pattern suggests the adaptation is widely attainable.

Gather these before anyone sketches a plan:

  • The everyday wheelchair and any shower chair, with their overall length and width measured as used.
  • A short note on who showers, how they transfer, and whether a caregiver helps.
  • The floor structure under the bathroom: concrete slab, wood joists or a raised floor.
  • The position of the drain stack and the water supply lines.
  • Time and difficulty: an afternoon of observation and measuring; construction belongs with licensed trades.

Decide the shower type from the person’s transfer first, because every later dimension follows from that choice.

Step 1: Measure the Chair and the Transfer

The first step is measuring the actual chair, because standard clearances were drawn around a reference wheelchair that many current chairs exceed. Clear floor space is the rectangle a stationary wheelchair occupies, set at 30 by 48 inches minimum in the 2010 ADA Standards1.

Researchers at the University at Buffalo tested that rectangle against real users in a transit-space study4. Only about 70% of the manual chair users, 49% of power chair users and 54% of the scooter users had dimensions within it4. The same study found that a clear floor space of 34 by 58 inches would accommodate at least 95% of any of the three device types4.

Turning space is the open floor area a wheelchair needs to reverse direction, a 60-inch circle or a T-shape inside a 60-inch square under the ADA Standards1. For a 180-degree turn, the 60-inch standard accommodates just over 80% of the manual and powered wheelchair users, according to the Anthropometry of Wheeled Mobility final report5. It accommodates less than 50% of the scooter users5. The report estimated that at least 67 inches would be needed to accommodate 95% of manual and powered wheelchair users5.

ADA minimum vs space that fits 95% of users (inches) Clear floor width 30 vs 34 in and length 48 vs 58 in from ADA 305.3 and D’Souza et al. 2010; 180-degree turn 60 vs 67 in from ADA 304.3 and the AWM final report 2010. ADA minimum vs space that fits 95% of users (inches) ADA minimum Fits about 95% of users 30 34 Clear floor width 48 58 Clear floor length 60 67 180-degree turn Source: Home Age Fit analysis of ADA 2010, D’Souza 2010 and AWM 2010
The ADA plan minimums sit several inches below the space a larger share of wheelchair users needs, so they work as a floor rather than a target. Compiled by Home Age Fit from the Access Board ADA Standards, the D’Souza transit study and the University at Buffalo wheeled mobility report.

“In particular, the current standards do not accommodate most of our sample for completing a 360-degree turn.”

University at Buffalo, Anthropometry of Wheeled Mobility final report5

To measure, keep the person seated with feet on the footrests and work through this list:

  1. Measure overall length from the front of the footrests to the rearmost point, including push handles or anti-tip bars.
  2. Measure overall width at the widest point, whether that is the hand rims, the armrests or the wheel hubs.
  3. Watch a full turn in an open room and mark the floor area the chair actually sweeps with painter’s tape.
  4. Repeat the measurements with the shower chair if it differs from the everyday chair.

Treat the ADA figures as the smallest acceptable space and size the room to the measured chair whenever the walls allow it.

Step 2: Plan the Doorway and the Route In

The bathroom door is the first fixed constraint, and the 2010 ADA Standards set its clear opening at 32 inches minimum1. That opening is measured with the door open 90 degrees, from the face of the door to the stop. The walking route leading to it needs a clear width of 36 inches minimum1. Clear width is always smaller than the door leaf, because the open door and its stop take part of the frame.

Wide doors remain rare in existing homes. Across all housing units in the 2011 American Housing Survey, the share with extra-wide doors or hallways was 7.9%7. In many existing homes, the plan therefore starts at the doorway.

The route matters as much as the frame. A chair turning off a narrow hallway into a doorway needs room on the latch side to line up. A door that swings into the bathroom also eats the space where the chair has to turn. Offset hinges, a pocket door or a door that swings outward can each free that space without moving the wall. An outward swing also keeps the door from being blocked if someone falls against it inside.

Fix the doorway and the approach before drawing the shower, because a well-sized shower behind a tight door still fails the person using it.

Step 3: Lay Out Turning Space and Shower Clearance

Inside the room, two zones decide whether a roll-in shower is usable: the turning space and the clearance in front of the shower’s open face. The ADA Standards require a 30 by 60 inch clearance beside the open face of a standard roll-in shower1. A lavatory may sit on one side of it, but not beside the controls or the seat1.

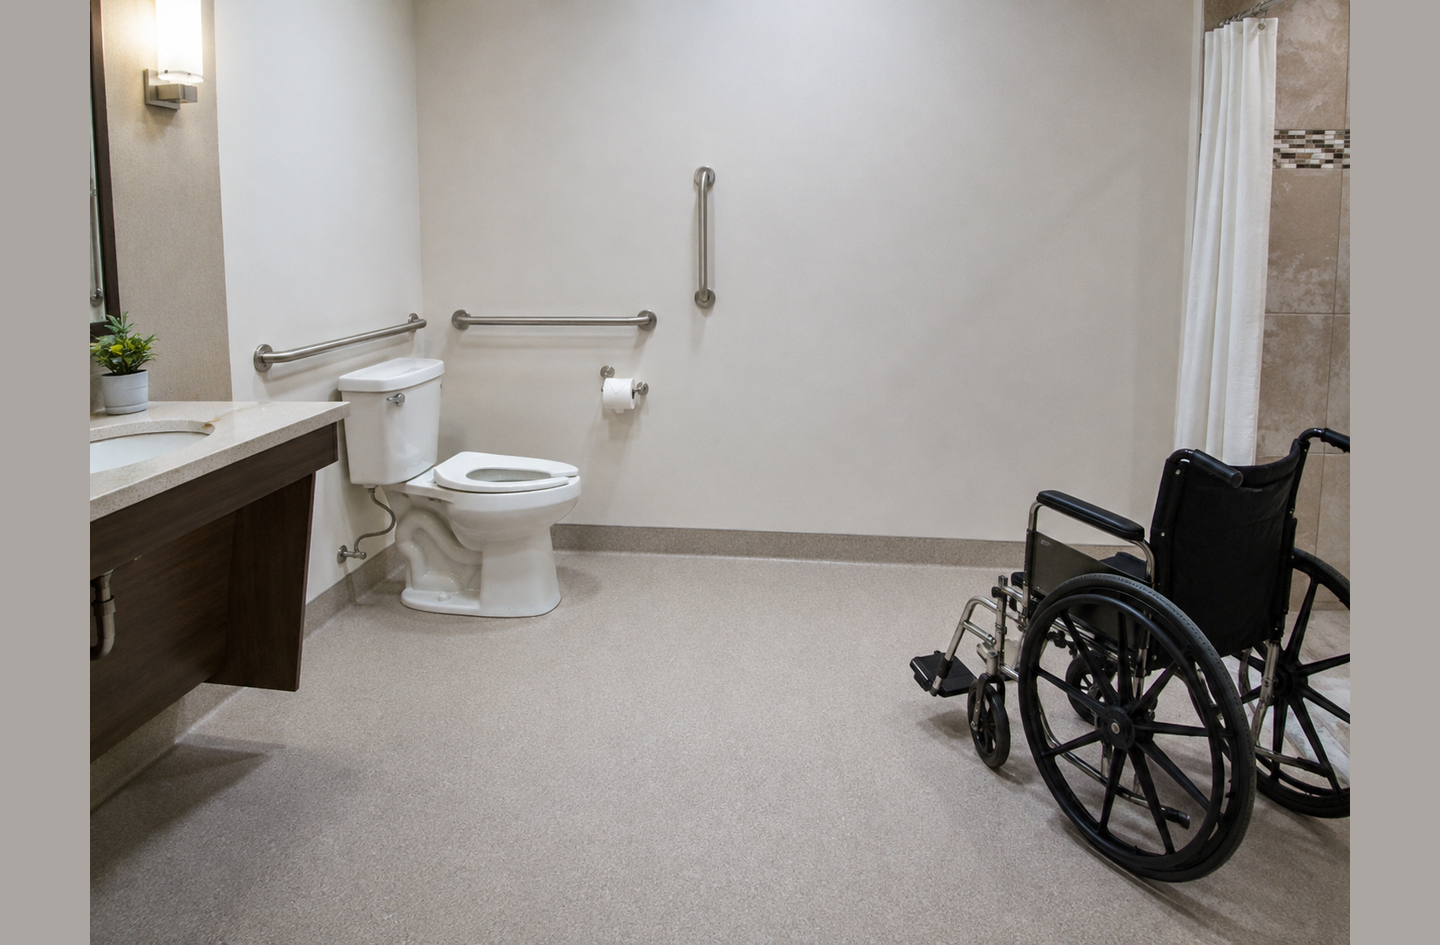
Accessible bathroom with wall-mounted grab bars beside the toilet and a wheelchair positioned in the open floor space, showing clearance for movement.
An accessible bathroom with wall-mounted grab bars and a wheelchair in the open floor space, planned with clearance for easier maneuvering.

The turning space and the shower clearance can overlap, and in a well-planned room they do. A curbless shower floor runs continuously with the bathroom floor. The chair can therefore borrow part of the shower area while it turns, as long as the slope there stays gentle. That overlap is what lets a modest room hold a full roll-in shower.

Before any demolition, tape the plan on the existing floor. Mark the shower footprint, the clearance strip and a five-foot circle. Then roll the actual chair through the real sequence: enter, turn, back into position beside the seat, and leave. Any point where the chair needs several corrections is a friction point to solve on paper, while changes are still cheap.

A layout that passes the tape test with the real chair is worth more than one that only passes on a drawing.

Step 4: Drain the Floor Without a Curb

A roll-in shower has no curb to hold water back, so the floor’s slope and the drain’s position do the work a curb would do. The 2010 ADA Standards cap the threshold of a roll-in shower at half an inch1. Level changes between a quarter inch and half an inch must be beveled no steeper than 1:21.

A linear drain is a long, narrow channel drain set along one edge of the shower, which lets the floor slope in a single plane instead of four. That single plane matters for a wheelchair. A center drain needs the floor to dip from every side, so the wheels cross changing slopes on the way in. A linear drain at the back wall lets the entry stay nearly flat while the far side carries the water.

Outside the shower, the clear floor and turning spaces may slope no more than 1:48, a fall the eye can barely see1. The ADA Standards also ask for floor surfaces that are stable, firm and slip resistant1. That makes the wet-area tile part of the plan rather than a finish detail.

Recessing the shower floor below the bathroom floor is a structural question. On a wood-joist floor the subfloor is commonly lowered between or into the joists, and on a slab the concrete is cut. Both affect structure, waterproofing and plumbing together, so a licensed contractor belongs in this decision, plus a structural engineer wherever joists are cut.

“All persons, but especially older adults, should be aware of bathroom activities that are associated with a high risk for injury and of environmental modifications that might reduce that risk.”

Centers for Disease Control and Prevention (CDC)2

Design slope, drain and waterproofing as one system with the installer, because a curbless floor that leaks or pools fails both the wheels and the building.

Step 5: Place Grab Bars Where Transfers Happen

Grab bars in a roll-in shower belong where the body shifts weight: entering, turning to face the controls, and moving between chair and seat. With a seat in a standard roll-in shower, the ADA Standards place bars on the back wall and the side wall opposite the seat, never above it1. Without a seat, bars go on all three walls. Horizontal bars sit 33 to 36 inches above the floor to the top of the gripping surface1.

Existing homes rarely have this support in place. Across all housing units in the 2011 American Housing Survey, the share with handrails or grab bars in the bathroom was 17.8%7.

Blocking matters more than the bar itself. For residential dwelling units, the ADA Standards let grab bars be left off when wall reinforcement is installed so they can be added later1. During a remodel, solid blocking along every shower wall at grab-bar height costs little while the walls are open and keeps future choices free.

Support before strain: place each bar where the person actually pushes or pulls during the transfer, then choose the finish.

Step 6: Choose and Position the Shower Seat

A seat in a residential roll-in shower is a choice, not a requirement. Where one is fitted, the ADA Standards call for a folding seat on the side wall next to the controls1. The seat runs from the back wall to within 3 inches of the entry. A rectangular seat’s front edge sits 15 to 16 inches from the seat wall1.

Folding matters because the seat and the wheelchair compete for the same floor. With the seat up, a person can roll in on a shower chair. With it down, a person can slide across from the wheelchair. A fixed bench removes that choice and can block the room the chair needs to turn.

Built-in shower seats remain uncommon. Across all housing units in the 2011 American Housing Survey, the share with built-in shower seats was 8.3%7. The seat wall needs blocking matched to the seat maker’s load rating, and the seat height should match the wheelchair seat so the transfer stays level. An occupational therapist can set that height for a specific person.

Choose a folding seat whenever both rolling in and transferring are possible, because it keeps both routines open as needs change.

Step 7: Put Controls and the Handheld Within Reach

Controls in a standard roll-in shower sit above the grab bar and no higher than 48 inches above the shower floor. With a seat, they go on the back wall within 27 inches of the seat wall1. That position lets a seated person reach the valve before the water reaches them, without leaning across the spray.

The ADA Standards call for a hand-held spray unit with a hose at least 59 inches long that also works as a fixed head1. The unit needs its own on/off control, and the water should be no hotter than 120°F. An adjustable head on a vertical bar must not block the grab bars. Every control should work with one hand, without tight grasping, pinching or twisting, at 5 pounds of force or less1.

Lever handles and push-button diverters meet that intent more easily than round knobs. A pressure-balancing or thermostatic valve with a limit stop is the usual way to hold the temperature cap. For choosing the valve, the handheld and the seat themselves, see the handicap bathroom fixtures guide.

Place controls by sitting in the chair at the planned spot, because a valve that is reachable on paper can still sit behind the spray in use.

Fitting a Roll-In Shower Into a Small Residential Bathroom

A small wheelchair accessible bathroom can still hold a roll-in shower when the wet area and the dry floor share space. The ADA’s alternate roll-in shower measures 36 by 60 inches with a 36-inch entry at one end of the long side1. That shape suits a narrow room where the shower runs along the back wall.

The bigger gain comes from dropping the enclosure. When the whole bathroom floor drains toward the shower, an arrangement called a wet room, the shower footprint and the turning circle overlap fully. That approach needs waterproofing across the entire floor, a sealed wall base and a drain sized for the flow, which all belong with a licensed plumber or contractor.

For the room-level measurements behind these choices, see the sibling guide on handicap bathroom dimensions, and for whole-room arrangements, handicap bathroom layout guide.

In a tight room, remove the enclosure before removing clearance, because overlap gains more usable floor than any smaller shower.

Roll-In Shower Checklist: ADA Figures Mapped to a Home

The table below maps each 2010 ADA roll-in shower figure onto a home decision1. In the private sector, the ADA’s coverage of housing does not apply to individually owned or leased housing, including single-family homes, condominiums or apartments7. The figures still offer a well-documented public reference for a residential plan.

ElementADA 2010 figureWhat it means at homeCheck on site
Shower sizeStandard 30 by 60 in inside; alternate 36 by 60 in1Standard suits rolling in head-on; alternate fits a narrow roomMeasure inside finished walls, not studs
Entry width60 in open face (standard); 36 in (alternate)1A glass panel or curtain must not narrow the openingRoll the real chair through
Outside clearance30 by 60 in beside the open face1This strip doubles as part of the turning circleKeep toilet and vanity out of it
ThresholdHalf an inch max; a quarter inch to half an inch beveled no steeper than 1:21Aim for a flush entry; any lip is a step for a front casterLay a level across the entry
Grab bars33 to 36 in to top of gripping surface1Bars at transfer points, blocking behind every wallPhotograph blocking before tile
SeatFolding; front edge 15 to 16 in from seat wall; reaches within 3 in of entry1Folding keeps the floor free for a shower chairMatch seat height to the wheelchair seat
ControlsAbove grab bar, 48 in max; within 27 in of seat wall1Reachable before the spray reaches the bodySit in the chair and reach
Handheld sprayHose 59 in long minimum; water no hotter than 120°F1Lets the user or a helper aim the spray; the temperature figure is a maximumConfirm the valve’s limit stop
Operating forceOne hand, 5 lb max, no tight grasp or twist1Levers and push buttons over round knobsTest with a closed fist
Standards cross-walk by Home Age Fit from the 2010 ADA Standards for Accessible Design; the two home columns are editorial planning guidance, not code requirements.

Use the cross-walk as a conversation sheet with the contractor, because each row turns a code figure into something both of you can check on site.

Common Roll-In Shower Mistakes to Avoid

Many roll-in shower problems come from treating each part on its own instead of as one reach-and-roll system. These are the patterns to catch on paper:

  • Sizing to the minimum: the ADA figures fit most chairs but not all, as the University at Buffalo measurements show5, so size to the measured chair.
  • A center drain under the wheels: a four-way slope tips the chair as it enters; a linear drain keeps the entry plane flat.
  • A fixed bench in the turning space: it removes the option of rolling in on a shower chair later.
  • Controls on the far wall: the person has to roll under the spray to reach the valve.
  • A room that feels clinical: bars, seat and tile can be chosen to look residential; the accessible bathroom ideas for seniors guide shows warmer layouts.

Comfort without institutionalizing the home is a design choice, and making it early keeps the person who showers there invested in using the room.

Frequently Asked Questions

How big does a roll-in shower need to be?

Under the 2010 ADA Standards, a standard roll-in shower measures at least 30 by 60 inches inside with a 60-inch-wide entry1. It also needs a 30 by 60 inch clear space outside the open face. The alternate type is 36 by 60 inches. At home, size to the measured chair, since many chairs need more room.

What is the difference between a roll-in shower and a transfer shower?

A roll-in shower lets a person stay seated on a wheelchair or shower chair and roll straight in. A transfer shower is a 36 by 36 inch compartment where the person moves from the chair onto a seat1. The right choice follows the person’s transfer, which an occupational therapist can assess.

Do you need a seat in a roll-in shower?

Not always. Outside transient lodging, the ADA Standards leave the roll-in seat optional, but a fitted seat must fold1. Folding keeps rolling in on a shower chair possible while still allowing a seated transfer. Survey data from 2011 put the share of US housing units with built-in shower seats at 8.3%7.

How do you keep water inside a curbless shower?

Slope the shower floor toward a drain, ideally a linear drain at the back wall, and keep the entry nearly flat. The ADA caps a roll-in threshold at half an inch1, so containment comes from slope and waterproofing rather than a curb. A licensed contractor or plumber should design both together.

Can a small bathroom fit a roll-in shower?

In many cases, yes. The ADA’s alternate roll-in shower is 36 by 60 inches1, and letting the turning circle overlap the curbless shower floor saves more space than shrinking the shower. A fully waterproofed wet-room floor goes further. Tape the plan on the floor and test it with the real chair first.

Limitations and Edge Cases

  • The ADA figures here come from the 2010 Standards for public and commercial buildings1. Local building codes, the plumbing code and state accessibility rules can differ, and the local building department has the final word.
  • The University at Buffalo measurements describe a US sample of wheeled mobility users measured for standards and transit research, so an individual chair can fall outside every percentile5.
  • The injury figures are emergency department data from 20082 and 20153; they show where injuries happen, not how much a specific shower design changes them.

Bring in an occupational therapist to assess the transfer, the seat height and the control reach for the specific person. A licensed contractor or plumber should handle slope, drain and waterproofing. Where floor joists or a slab must be cut, a structural engineer should review the plan before work starts.

References

Methodology: figures were gathered from the 2010 ADA Standards, peer-reviewed studies, a federal housing survey analysis and a university research report, each read at its source in October 2026. Oded Feigin holds editorial responsibility for this page.

  1. U.S. Access Board – 2010 ADA Standards for Accessible Design, sections 303, 304, 305, 403, 404, 608, 609 and 610.
  2. Centers for Disease Control and Prevention (CDC) – Nonfatal bathroom injuries among persons aged 15 years or older, United States, 2008. MMWR 60(22):729-33, 2011, PubMed abstract.
  3. American Journal of Lifestyle Medicine – Moreland BL, Kakara R, Haddad YK, Shakya I, Bergen G. A Descriptive Analysis of Location of Older Adult Falls That Resulted in Emergency Department Visits in the United States, 2015. 2021.
  4. Transportation Research Record – D’Souza C, Steinfeld E, Paquet V, Feathers D. Space Requirements for Wheeled Mobility Devices in Public Transportation: An Analysis of Clear Floor Space Requirements. 2010.
  5. University at Buffalo – Steinfeld E, Paquet V, D’Souza C, Joseph C, Maisel J. Anthropometry of Wheeled Mobility Project: Final Report, prepared for the U.S. Access Board. December 31, 2010.
  6. The Journal of Spinal Cord Medicine – Hertig-Godeschalk A, Gemperli A, Arnet U, Hinrichs T, for the SwiSCI study group. Availability and need of home adaptations for personal mobility among individuals with spinal cord injury. 2018.
  7. U.S. Department of Housing and Urban Development – Bo’sher L, Chan S, Ellen IG, Karfunkel B, Liao HL. Accessibility of America’s Housing Stock: Analysis of the 2011 American Housing Survey (AHS), Table 5. March 19, 2015.

Conclusion

A roll-in shower works when the chair, the doorway, the floor, the support points and the controls are planned as one route rather than as separate purchases. Start with observation, not renovation: measure the real chair, tape the plan on the floor and roll through it before any wall comes down. Then prepare the questions before hiring the professional, using the cross-walk table as the list, so the occupational therapist and contractor solve the right problem.

See the overview in Bathroom Safety Planning for how the shower fits the wider topic of safer daily bathroom use.

Senior Safety in the Home: The Fall Risks to Fix First

Author: Oded Feigin · Created On: October 11, 2026 · Last Updated: October 12, 2026

Senior safety in the home improves fastest when the riskiest hazards are fixed first, not when every tip on a list gets equal attention. In one national analysis, 79.2% of fall-related emergency visits by US adults 65 and older followed a fall at home.1 This article sits under our fall-prevention priorities overview, which summarizes how to order safety work in a home. The angle here is narrower: a scoring method that ranks each hazard by severity, exposure, and ease of correction.

Senior safety in the home on the stairs: a wooden staircase with handrails mounted along both walls, rising toward a sunlit window at the top.
Wooden handrails mounted along both walls of a staircase give a steady hand-hold on each side, from the first step up to the sunlit landing.

Quick Answer

Which fall risks in the home should be fixed first?

Score each hazard from one to three on severity, exposure, and ease of correction, then multiply the three scores. The highest products go first. Any hazard that is both severe and met every day goes first regardless of cost. Targeting matters: home hazard programs cut falls by 38% in people at higher risk of falling.2

Key Takeaways

  • Most injurious falls start at home: 79.2% of fall-related emergency visits by adults 65 and older followed a fall at home.1
  • Exposure clusters in three places: the bedroom (25.0%), stairs (22.9%), and bathroom (22.7%) of at-home falls with a recorded location.1
  • Severity differs by hazard: stair-related upper-limb fractures in older adults rose 56% over ten years, and 89% happened in homes.3
  • Cheap fixes count: low-cost home modifications and repairs cut the rate of fall injuries at home by 26% in a randomized trial.5
  • Targeting decides results: hazard programs cut falls by 38% in higher-risk people, with no reduction in groups not selected for risk.2

Why Senior Safety in the Home Needs a Ranking, Not a List

A home safety list treats every item as equal, but hazards differ in how badly they hurt, how often they are met, and how hard they are to fix. Each year about 3 million older adults are seen in US emergency departments for fall injuries, and more than 950,000 are hospitalized.1 Those injuries come from very different hazards. A loose bath mat and a dark staircase sit side by side on every checklist. They do not carry the same weight.

Failure mode and effects analysis is an engineering method that ranks what can go wrong by multiplying separate scores for severity, occurrence, and detection. The product, called a risk priority number, tells an engineering team which problem to work on first. The method here borrows that logic for a home. Severity stays severity, exposure replaces occurrence, and ease of correction replaces detection. An easy fix should move up the queue, because it delivers protection this week instead of next season.

The method serves two readers at once. A senior planning ahead can score their own home in an afternoon and keep control of every decision. An adult child helping a parent can use the same scores to talk about priorities without turning the talk into a list of worries. Both end up with the same thing: a short, ordered list that starts with the changes that protect the most.

For a household with limited time or money, three high-scoring hazards fixed well protect more than twelve low-scoring ones fixed halfway.

Before You Begin: What You Need to Score Fall Risks

Scoring takes one slow walk through the home, a notebook or phone, and an hour or two of attention. Plan two walks if you can: one in daylight and one after dark. Lighting changes the score of almost every route, and the night walk is where hidden hazards show up.

  • The person who lives there, walking their own routes at their own pace. Their hesitation points are the data.
  • A notebook with four columns: hazard, severity, exposure, and ease.
  • A list of recent falls, near misses, and places where someone reaches for furniture to steady themselves.
  • No tools. Measuring and fixing come later, once the list is ranked.

If you are helping a parent, let them lead the walk and name the spots that feel hard. You will learn more by watching than by asking. If you are scoring your own home, walk it the way you move on a tired evening, not on your best morning. Both views count, and the scores work best when the two of you agree on them together.

Step 1: List Every Hazard Along the Daily Routes

By the end of this step you will have a raw list of hazards, each tied to a route and a movement. Start with routes, not rooms. Mark every point where someone grips, turns, hesitates, reaches, or changes level. Those friction points are what the home is asking you to solve.

  1. Walk the night route first: bed, hallway, toilet, and back to bed.
  2. Walk the daily routes: kitchen, main chair, entry, and any stairs.
  3. Walk the outside routes used each week, such as porch steps, the driveway, and the path to the mailbox.
  4. Add the tasks that change body position: stepping into the tub, rising from the toilet, and reaching a high shelf.

A fall hazard is any feature of the home that raises the chance of a slip, trip, or loss of balance during a normal movement. Hazards hide at junctions more than in open floor. US emergency data on rug and carpet falls among adults 65 and older show the pattern. Frequent injuries occurred at carpet-to-floor transitions, on wet rugs, and while hurrying to the bathroom.4

Write each hazard as a movement, not an object. A loose bath mat is an object. Stepping out of the shower onto a loose mat with wet feet is a movement, and the movement is what gets scored. This keeps the list honest, because one object can create two hazards on two different routes. For a room-by-room prompt list to check against, use the senior home safety checklist.

A list written as movements is already half-ranked, because the movements a person repeats every day stand out on the page.

Step 2: Score Severity by What a Fall Would Cost

By the end of this step every hazard carries a severity score from one to three. Severity is the expected injury cost of a fall at that spot. It is judged by the height of the drop, the hardness of the landing, and what the body strikes on the way down.

Stairs sit at the top of almost every severity scale. A national analysis estimated 251,041 stair-related upper-limb fractures among US adults 65 and older between 2012 and 2021.3 Over the same decade, the hospitalization rate for these injuries rose 38%, and 89% of the injuries happened in homes.3

Severity is not only about stairs. About one third of community-dwelling people 65 and older fall each year, and about 10% of falls result in serious injury.7 In a Boston cohort of older adults, the chance of a seriously injurious fall varied by personal characteristics, activity, and location.7 That variation is exactly what a severity score tries to capture.

ScoreSeverity levelTypical examples
3High: a drop in height, a hard edge, or a hard wet landingStairs, tub edge, wet tile, outdoor concrete steps
2Medium: a fall at floor level onto a hard surfaceKitchen tile, bathroom floor away from fixtures, hard hallway flooring
1Lower: a fall at floor level onto a softer surface with open space around itCarpeted bedroom with clear floor, flat living room carpet

A score of one never means harmless. Any fall can injure an older adult, and the score only compares hazards with each other. Score severity for the person as well as the house. A past fracture or a condition a physician has flagged can justify moving a hazard up one level, so ask the physician which conditions apply.

When two hazards tie on everything else, the one with the higher severity goes first, because severity is the one score a household cannot lower by changing habits.

Step 3: Score Exposure by How Often the Body Meets the Hazard

By the end of this step every hazard carries an exposure score. Exposure is how often a person passes a hazard, weighted by the conditions at that moment: wet, dark, rushed, or carrying something. A hazard met ten times a day scores higher than one met once a month.

National data show where exposure concentrates. Of at-home falls with a recorded location, 25.0% happened in the bedroom, 22.9% on stairs, and 22.7% in the bathroom.1 The pattern shifts with age. Stairs led at ages 65 to 74 (30.0%), while the bedroom led at 85 and older (31.6%).1 For a location-by-location view of that pattern, see high-risk areas first.

Night trips raise exposure in a way daytime walks hide. Nocturia is waking at night to pass urine. A meta-analysis found nocturia was associated with an approximately 1.2-fold increased risk of falls.6 Each extra night trip adds a dark, sleepy pass along the bed-to-toilet route, so that route earns a higher score.

The bathroom adds a second multiplier: water. From 2001 to 2008, US emergency departments treated an estimated 37,991 adults 65 and older a year for falls involving rugs and carpets. The bathroom was the most common home location for those falls, at 35.7%.4

A grey textured slip-resistant mat lying on the tiled bathroom floor directly outside a walk-in shower, where wet feet first land.
A textured slip-resistant mat outside a walk-in shower adds traction at the exact spot where the bathroom route turns from wet to dry.
  • Score 3: met daily and also at night, wet, rushed, or while carrying something.
  • Score 2: met daily in good conditions, or weekly in poor ones.
  • Score 1: met weekly or less, in good light, on a dry surface.

Exposure is the easiest score to get wrong, because the hazards met at night or in a hurry are the ones a daytime walk never sees.

Step 4: Score Ease of Correction by Cost, Effort, and Reversibility

By the end of this step every hazard has its third score. Ease of correction refers to how quickly, cheaply, and reversibly a hazard can be reduced, scored so that the easiest fix earns a three. Removing a loose rug is a three. Adding a second stair handrail is a two. Rebuilding a shower entry is a one.

Easy fixes are not token gestures. In a New Zealand cluster-randomized trial, low-cost changes cut the rate of fall injuries at home by 26%.5 The package included stair handrails, bathroom grab rails, outside lighting, and slip-resistant surfacing. Injuries specific to those modifications fell by 39% per year of exposure.5

“Our findings suggest that low-cost home modifications and repairs can be a means to reduce injury in the general population.”

Michael D. Keall and colleagues, University of Otago, Wellington, HIPI trial published in The Lancet5

Reversibility counts too. A renter, or a senior who wants to test a change first, gains from fixes that can be undone. Plug-in night lights, a removable mat, and furniture moved to clear a path all qualify. Structural work still belongs on the list. It scores lower on ease, and it needs a licensed contractor before anything is cut, plumbed, or anchored into a wall.

  • Score 3: under an hour, low cost, simple or no tools, fully reversible.
  • Score 2: a weekend job or a handyperson visit, moderate cost, fixings into walls or floors.
  • Score 1: a contractor, permits, plumbing, or any structural change.

Scoring ease honestly stops the list from stalling: when the top item needs a contractor, the easy items below it still get done while the quote is pending.

Step 5: Multiply the Scores and Rank the List

By the end of this step you will have a ranked list. Multiply severity by exposure by ease for each hazard. The product runs from one to twenty-seven, and the highest numbers go to the top. Multiplying, rather than adding, makes a low score on any one factor pull the whole product down sharply.

Then apply one override. Any hazard that scores three on severity and three on exposure goes to the top, whatever its ease score. This mirrors how engineers treat a failure with grave consequences: high severity earns action even when the overall number looks modest. A wet shower entry with no grab point is the classic case, because it is hard to rebuild and met every day.

Hazard, written as a movementSeverityExposureEasePriority
Stepping out of the shower onto wet tile with no grab point3313 x 3 x 1 = 9, override: first
Climbing stairs daily with a rail on one side only3323 x 3 x 2 = 18, override: first
Walking to the toilet at night along a dark hallway2332 x 3 x 3 = 18
Crossing a loose rug at the bathroom doorway2332 x 3 x 3 = 18
Rising from a low toilet with nothing to push on2322 x 3 x 2 = 12
Stepping over a lamp cord in the living room2232 x 2 x 3 = 12
Climbing porch steps with no rail, twice a week3123 x 1 x 2 = 6
Reaching a high kitchen shelf from a step stool2132 x 1 x 3 = 6

Notice what the ranking does. The two overrides lead, but the next two items are a night light and a rug removal, both done in an afternoon. The shower moves first only because of the override, and its first fix can be an interim one while the larger plan is priced. Porch steps used twice a week fall to the bottom for this person, though they would rise for someone who walks daily.

Three scores, one priority number Diagram of the scoring method. Severity anchor: hospitalization rate for stair-related upper-limb fractures in US adults 65 and older rose 38% from 2012 to 2021, Solaiman et al. Exposure anchor: bedroom 25.0%, stairs 22.9%, bathroom 22.7% of at-home falls with a known site, Moreland et al., 2015 US data. Ease anchor: low-cost home repairs cut fall injuries at home by 26%, Keall et al., HIPI trial. The three scores multiply into a priority from 1 to 27, with an override for severity 3 plus exposure 3. Three scores, one priority number Severity Stair fracture hospital rate up 38% from 2012 to 2021 x Exposure Bedroom 25.0% stairs 22.9%, bath 22.7% of located home falls x Ease of correction Low-cost repairs cut home fall injuries by 26% Priority = severity x exposure x ease, 1 to 27 Override: severity 3 plus exposure 3 goes first Scored factor and its evidence Ranking rule Source: Home Age Fit analysis, 2026
Anchoring each score to independent evidence turns a flat checklist into one ranked priority number per hazard. Compiled by Home Age Fit from Solaiman et al. (2012 to 2021 US data), Moreland et al. (2015 US data), and Keall et al. (HIPI trial, 2015).

How does bathroom senior safety score?

Bathroom senior safety scores high on two of the three scales almost by default. Wet tile and hard fixtures push severity up, and daily use, including night trips, pushes exposure up. That leaves ease as the deciding score. Traction mats and a properly anchored grab bar rank high because they are quick to add. A curbless shower conversion ranks lower on ease, but the override can still move its interim fixes to the top.

The exact numbers matter less than the multiplication. A hazard that scores low on any one factor drops sharply, which keeps rare or costly items from crowding out daily ones.

Step 6: Fix in Order, Then Re-Score After Each Change

By the end of this step the top items are fixed or booked, and the list has a date for its next review. Work down the ranking in order. After each fix, re-score that hazard. A good fix drops it below the next item on the list, and a weak one leaves it near the top.

Targeting is what makes the effort pay. A Cochrane review found home fall-hazard programs reduced the overall rate of falls by 26%.2 The reduction was 38% in people selected for higher fall risk, and there was no reduction when people were not selected for risk.2

An occupational therapist is a licensed clinician who assesses how a person performs daily tasks and adapts the task or the setting to fit. In a St Louis trial of adults 65 and older at high fall risk, an occupational therapist-led hazard removal program produced a 38% reduction in the rate of falling.8 After a recent fall or hospital stay, an OT assessment is the strongest check on a self-scored list.

“Fall prevention programs should be tailored to personal characteristics, activities, and locations.”

Jennifer L. Kelsey and colleagues, MOBILIZE Boston study, American Journal of Public Health7

Re-score the full list when any of these happen:

  • A fall or a near miss anywhere in the home.
  • A hospital stay, a new medicine, or a change in vision.
  • A new walker, cane, or wheelchair, which changes both routes and clearances.
  • Six months pass, even when nothing seems to have changed.

For a calendar view of the same work, the priority-based home plan sequences it from immediate hazards through support, lighting, access, habits, and ongoing review.

A ranking is a snapshot of one person in one home, so it should change whenever the person or the home changes.

Common Mistakes When Ranking Fall Risks

Scoring the house instead of the person: the same staircase scores differently for someone who climbs it ten times a day and for someone who now lives on one floor. Score the routes this person actually uses.

Skipping the night walk: the bed-to-toilet route looks harmless at noon. At night it is dark, the person is drowsy, and the trip is often rushed, which is when exposure peaks.

Letting ease decide everything: if only the easy items get done, the severe ones wait forever. The override rule exists to stop that drift.

Ignoring habits a home cannot fix: rushing, loose footwear, and medicine side effects all raise risk on every route. Those belong in a conversation, and the guide on what to teach first covers safe movement, footwear, and medication review.

Scoring combined hazards as separate parts: carrying a hot pan across a slick floor is one movement with two hazards. Score the combination. The kitchen burn and fall guide covers that pairing, including unsafe carrying near hot surfaces.

What a Finished Risk Ranking Looks Like

A finished ranking fits on one page. It lists every hazard as a movement, carries three scores and a product for each, marks the overrides, and shows a date beside every item that has been fixed. The top three items are done or booked, and the next review date is on the calendar.

Success also shows in how the person moves. They walk the night route without reaching for furniture, step out of the shower onto a stable surface, and use the stair rail going down as well as up. Those observations are the real test of the scores, and they are worth noting at each review.

Frequently Asked Questions

What is the first thing to fix for senior safety in the home?

Fix the hazard with the highest product of severity, exposure, and ease, plus any hazard that is both severe and met daily. In US emergency data, the bedroom (25.0%), stairs (22.9%), and bathroom (22.7%) led at-home falls with a recorded location, so top items tend to sit on those routes.1

Do home modifications actually reduce falls?

Yes, when they are targeted. A Cochrane review found home fall-hazard programs cut the rate of falls by 38% in people at higher risk, with no reduction in people not selected for risk.2 That is why scoring a person’s own routes beats working through a generic checklist.

How should bathroom senior safety be scored?

Score each bathroom movement separately: stepping out of the shower, rising from the toilet, and walking in at night. Water raises both severity and exposure. The bathroom was the most common home location for rug and carpet falls among older adults, at 35.7%.4 Low-cost traction and support fixes rank near the top.

Are cheap fixes worth doing before a renovation?

Yes. In a randomized trial, low-cost home modifications and repairs cut the rate of fall injuries at home by 26%.5 Easy fixes deliver protection while larger work is planned and priced. Structural changes still belong on the list, with a licensed contractor involved before work begins.

How often should a fall risk ranking be re-scored?

Re-score every six months, and after any fall, hospital stay, new medicine, or new mobility aid. About 10% of falls among older adults result in serious injury, so a changed risk deserves a fresh score rather than a year-old list.7

Limitations and Edge Cases

  • The scores are structured judgments, not measurements. They compare hazards within one home and do not predict whether a specific person will fall.
  • The exposure and severity figures come mainly from US emergency data and a US cohort, and the ease figure comes from a New Zealand trial. Patterns differ by country, housing type, and climate.
  • Anyone with a recent fall, dizziness, or a new diagnosis should have a physician or occupational therapist review the list before relying on it.

References

Methodology: every figure in this article comes from an independent published source, each link was checked live and matched to the sentence that states the figure on October 11, 2026, and the scoring method and worked example are an engineering synthesis by Home Age Fit’s founder, who wrote and reviewed the article.

  1. PubMed Central – Moreland BL, Kakara R, Haddad YK, Shakya I, Bergen G. A Descriptive Analysis of Location of Older Adult Falls That Resulted in Emergency Department Visits in the United States, 2015. American Journal of Lifestyle Medicine, published online August 2020.
  2. Cochrane Database of Systematic Reviews – Clemson L, Stark S, Pighills AC, Fairhall NJ, Lamb SE, Ali J, Sherrington C. Environmental interventions for preventing falls in older people living in the community. March 2023.
  3. Osteoporosis International – Solaiman RH, Irfanullah E, Navarro SM, Keil EJ, Onizuka N, Tompkins MA, Harmon JV Jr. Rising incidence of stair-related upper extremity fractures among older adults in the United States: a 10-year nationwide analysis. April 2023.
  4. Journal of Injury and Violence Research – Rosen T, Mack KA, Noonan RK. Slipping and tripping: fall injuries in adults associated with rugs and carpets. January 2013.
  5. The Lancet – Keall MD, Pierse N, Howden-Chapman P, Cunningham C, Cunningham M, Guria J, Baker MG. Home modifications to reduce injuries from falls in the home injury prevention intervention (HIPI) study: a cluster-randomised controlled trial. January 2015.
  6. The Journal of Urology – Pesonen JS, Vernooij RWM, Cartwright R, et al. The Impact of Nocturia on Falls and Fractures: A Systematic Review and Meta-Analysis. April 2020.
  7. American Journal of Public Health – Kelsey JL, Procter-Gray E, Hannan MT, Li W. Heterogeneity of Falls Among Older Adults: Implications for Public Health Prevention. November 2012.
  8. JAMA Network Open – Stark S, Keglovits M, Somerville E, Hu YL, Barker A, Sykora D, Yan Y. Home Hazard Removal to Reduce Falls Among Community-Dwelling Older Adults: A Randomized Clinical Trial. August 2021.

Conclusion

Senior safety in the home moves fastest when hazards are ranked before anything is bought. Score each movement on severity, exposure, and ease, multiply the three, apply the override, and fix from the top. Observation, not renovation, sets the order, and a licensed contractor or occupational therapist confirms the fixes that need one.

See the fall-prevention priorities overview for how this scoring fits the wider question of ordering safety work in a home.

How to Choose a Raised Toilet Seat for Lower-Effort Transfers

Author: Oded Feigin · Created On: October 06, 2026 · Last Updated: October 12, 2026

A raised toilet seat works best when it closes the height gap between the toilet and the person using it, not when it adds the most height. That precision matters: among adults aged 85 and older, 51.7% of bathroom injuries treated in emergency departments happened on or near the toilet.1 This article is one focused angle under our toilet transfer safety overview, which summarizes that wider topic. Here the angle is selection: how much height to add, how the seat fits the bowl, how it locks, and which features change the effort of each sit-to-stand.

A white 2-inch raised toilet seat fitted to a standard toilet in a home bathroom with stainless steel grab bars, a toilet paper holder, and a small waste bin on a tiled floor.
A 2-inch raised toilet seat on a standard toilet, set up beside wall-mounted grab bars for aging-in-place use.

Quick Answer

How do you choose a raised toilet seat for lower-effort transfers?

Start with the person, not the product. Measure knee height and the current seat height, then add only enough height to bring the seat close to knee level while both feet stay flat. In sit-to-stand research, a higher seat cut knee moments by up to 60%.3 Then match the bowl shape, pick a lock that cannot shift, confirm the weight rating, and add arms only if the transfer calls for them.

Key Takeaways

  • Seat height is the biggest single setting in a sit-to-stand: a higher seat lowered knee moments by up to 60% and hip moments by up to 50%.3
  • More height is not always better. Mean knee height for Australian women over 65 is 379 mm (about 14.9 inches), below the 17-inch accessible seat minimum.5
  • Feet come first: one NHS trust tells users not to use a raised seat if their feet cannot reach the floor.6
  • The need is common and often unmet: 52% of older adults who needed toileting equipment never received it over four years.8

Before You Begin: What to Measure and Observe

Choosing a raised toilet seat starts with a tape measure, a second person, and one observed transfer. A raised toilet seat is a molded riser that sits on the toilet bowl rim and lifts the sitting surface by a fixed amount printed on its label. That fixed lift is the number you are really choosing, so the measurements come before the product.

Take these measurements in the shoes normally worn at home:

  • Knee height: sit on a firm chair with feet flat and thighs level. Measure from the floor to the crease behind the knee.
  • Rim height: lift the existing toilet seat and measure from the floor to the top of the bowl rim, because most clamp-on risers sit directly on it.
  • Bowl length: measure from the center point between the two seat bolts to the front edge of the rim.
  • Rim profile: run a hand under the rim and note whether it has a clear lip that a bracket could grip, or a smooth, skirted surface.
  • Body weight and landing style: note whether the person lowers with control or drops the last few inches onto the seat.

Popliteal height is the vertical distance from the floor to the underside of the thigh just behind the knee, measured while seated with feet flat. It is the anthropometric name for knee height, and seat designers rely on it because it sets how far the body travels to stand up.

Then watch one ordinary transfer. Look for the friction points: gripping the sink, reaching for a towel bar, rocking forward several times, or dropping onto the seat. Each one tells you what the seat has to solve. If you are planning for yourself, describe where the effort feels highest. If you are helping a parent, measure together and let them lead that description. An occupational therapist can assess the transfer itself when balance, pain, or recent surgery is part of the picture.

Step 1: Set the Raised Toilet Seat Height From Knee Height

The right raised toilet seat height brings the sitting surface close to knee level, because seat height is the strongest single factor in sit-to-stand effort. A 2002 review of 39 experimental studies found that a higher seat lowered moments at the knee by up to 60% and at the hip by up to 50%.3

The sit-to-stand transfer is the movement from sitting to standing: the trunk leans forward, weight shifts over the feet, and the hips and knees straighten. A joint moment is the turning force the muscles must produce around a joint to lift and control the body. Lower moments mean less muscle effort for the same movement.

An earlier lab study tested seats set at 65, 80, 100, and 115% of each subject’s knee height.4 Peak knee moments nearly doubled from the highest seat to the lowest, while hip moments changed by less than 12%.4 The subjects were young adults, so the pattern matters more than the exact values: the knee carries most of the penalty when a seat is too low.

Why the tallest riser is not the safest choice

Knee height differs widely between individuals. A fifth-percentile Australian woman over 65 has a popliteal height of 330 mm (about 13.0 inches), while the group mean is 379 mm (about 14.9 inches).5 The ADA Standards set accessible toilet seats at 17 to 19 inches, measured to the top of the seat.2 Even the bottom of that range sits about 4 inches above the shorter woman’s knee height. A seat that tall can leave her feet hanging, which removes the base she pushes from.

The researchers who gathered those knee-height figures put the trade-off plainly.

“Higher seat height reduces the motion and strength required by the hips and knees to rise from the chair, and less exertion is required to rise from higher chairs as the distance travelled by the body is smaller.”

Alethea Blackler and colleagues, QUT Design Lab, Queensland University of Technology5

The same paper warns that seats that are too high can compromise stability, because the feet can no longer reach the floor.5 So the goal is not maximum height but a seat close to knee level with both feet planted.

A practical height rule

Aim for a finished seat height between measured knee height and about 1 inch above it, then confirm both feet rest flat, as NHS fitting guidance requires.6 Finished seat height equals rim height plus the riser’s listed lift. With a 15-inch rim and a 16.5-inch knee height, a 2 inch raised toilet seat lands at 17 inches, inside the target band. A 5-inch riser on the same toilet would land at 20 inches, well above it.

Riser liftFinished height on a 15-inch rimFinished height on a 16.5-inch rimKnee heights it suits best
2 inches17 inches18.5 inches16 to 17 inches (15-inch rim)
3 inches18 inches19.5 inches17 to 18 inches (15-inch rim)
4 inches19 inches20.5 inches18 to 19 inches (15-inch rim)
5 inches20 inches21.5 inches19 to 20 inches (15-inch rim)
6 inches21 inches22.5 inches20 to 21 inches (15-inch rim)

The table uses two example rim heights, so measure your own rim before reading across. Tall risers still suit tall users and people under a surgical flexion limit, and surgery often sets the target outright. In a UK survey of physiotherapists and occupational therapists, 95% said their health trusts commonly prescribed raised toilet seats after hip replacement.7 Advice on how long to keep that equipment ranged from 6 weeks to life.7 When a surgical team sets a hip-flexion limit, its height target overrides any general rule.

If several people share one toilet and most of them need more height, a permanent fixture change can be the better system. The comparison of comfort height toilets covers that trade-off.

For most households, the best raised toilet seat is the smallest lift that brings the seat to knee level, not the tallest one on the shelf.

Putting the published figures on one scale shows the gap clearly. Mean knee height for women over 65 is about 14.9 inches, and the fifth percentile is about 13.0 inches,5 while accessible toilet seats start at 17 inches.2 The highest seat in the classic lab study, 115% of knee height, works out to about 17.2 inches for the mean older woman.4

Knee height vs seat-height benchmarks, in inches Horizontal bar chart in inches. Knee (popliteal) height of Australian women over 65: fifth percentile 330 mm, about 13.0 inches, and mean 379 mm, about 14.9 inches (Blackler et al., SAGE Open Medicine, 2018). Optimal seat height for older people recommended in earlier seating studies: 430 mm, about 16.9 inches (cited in Blackler et al., 2018). ADA accessible toilet seat height: 17 inches minimum and 19 inches maximum, measured to the top of the seat (U.S. Access Board, ADA Standards section 604.4). Seat at 115 percent of mean knee height, the highest seat tested by Rodosky et al. (Journal of Orthopaedic Research, 1989), applied to the 379 mm mean: about 17.2 inches (Home Age Fit calculation). Knee height vs seat-height benchmarks, in inches Knee height, 5th pct woman, 65+ 13.0 in Knee height, mean woman, 65+ 14.9 in Seat height suggested in studies 16.9 in ADA toilet seat minimum 17.0 in Seat at 115% of mean knee height 17.2 in ADA toilet seat maximum 19.0 in Knee height, women over 65 Seat height benchmark Source: Home Age Fit analysis, 2026
Even the lowest seat-height benchmark sits about 2 inches above mean knee height for women over 65, and about 4 inches above the fifth percentile, so a seat chosen only to meet a benchmark can be too tall for a shorter user. Compiled by Home Age Fit from Blackler et al. (2018), the U.S. Access Board guide to the ADA Standards, and Rodosky et al. (1989).

Step 2: Match the Seat to an Elongated or Round Bowl

Bowl shape decides whether a riser sits fully supported on the rim or overhangs it. A raised toilet seat for an elongated toilet is longer front to back than a round-bowl model, and many products fit only one shape. An elongated bowl is an oval toilet bowl that extends farther forward than a round bowl, which gives more sitting room at the front.

The front edge matters most, because a person slides forward and leans over the feet to stand, which puts most of their weight on the front of the seat. If an elongated riser hangs past the front of a round bowl, that unsupported plastic can flex just when the person needs a firm edge to push from.

The opposite mismatch, a round riser on an elongated bowl, leaves the front of the rim exposed and sets the opening farther back, which makes wiping harder. Products sold as universal use adjustable brackets to cover both shapes. Check that the listed fit includes your bowl length, then confirm it on the toilet.

Two more details decide fit on modern toilets. First, many one-piece and skirted toilets have a smooth, rounded rim with no lip under it. A bracket or clamp needs an edge to grip, so check the rim profile you noted earlier against the product’s mounting method. Second, check the back, because a riser that is too long can press against the tank or stop the original lid from opening fully.

A riser that matches the bowl shape turns the front edge into a firm push-off point; a mismatched one turns it into the weakest part of the seat.

Step 3: Choose a Locking Method That Will Not Shift

A raised toilet seat must stay fixed under shifting loads, so the locking method matters as much as the height. The hardest moment for any lock is the forward lean before standing, when weight moves to the front edge. A side transfer adds a sideways push on top of that. A lock that resists only downward weight can still slide, tip, or rotate.

A 5-inch raised toilet seat with gray side-locking mechanisms installed on a white porcelain toilet beside a wooden vanity and a wall-mounted grab bar.
A 5-inch raised toilet seat held by gray side-locking clamps, with a wall grab bar within reach of the toilet.
Locking methodHow it attachesTools neededBest fitWatch for
Front bracket with locking knobA bracket under the front rim tightens with a hand knobNoneDaily home use on a bowl with a clear front lipMust be re-tightened after every removal for cleaning
Side clampsTwo or more adjustable clamps grip the sides or inside of the rimNone to a screwdriverSide transfers and heavier usersEach clamp needs a rim edge to bite on; check both sides
Friction or wedge fitA molded underside drops into the bowl openingNoneShort visits and travelCan lift or rotate when a user pushes sideways
Bolt-on hinge replacementReplaces the standard seat and bolts through the hinge holesScrewdriver or wrenchLong-term setups for one main userSmaller lifts; bolts loosen over time and need checks

A raised toilet seat with clamps usually gives the most even hold, because it grips at more than one point around the rim. One NHS trust’s fitting guidance is direct: secure the adjustable brackets to the toilet bowl, and do not use the seat if balance issues or spasms could loosen them.6 That rule points at the real failure mode: a lock rarely fails on the first day but loosens a little with each transfer and each cleaning.

Rock-test any lock before first use: press hard on the front edge, then push firmly left and right, and confirm the seat does not move, lift, or click.

Choose the lock for the hardest load the seat will see, which is the forward lean and any sideways push, not for the easiest one, which is simply sitting still.

Step 4: Decide on Arms, a Lid, and the Opening Shape

Arms, a lid, and the shape of the opening are add-ons, and each one should earn its place by matching how the person actually transfers. Arms change the mechanics the most: the same 2002 review found that using armrests lowered the moments needed at the hip by 50%.3 For someone who pushes up through the hands, that is a meaningful drop in effort.

Arms also take up space: they widen the seat, block a sideways slide from a wheelchair, and can get in the way of a caregiver who needs to stand close. Removable or flip-up arms keep the push-off point for daily use and clear the side when the transfer changes. The trade-offs between fixed and removable designs are covered in detail in the guide to raised seats with handles.

Seat-mounted arms load the same rim clamps that hold the seat in place. A separate toilet safety rail frame sends the push-off load to the floor or the toilet’s bolts instead. That matters for heavier users and anyone who pushes hard on one side.

Lid and opening shape

A raised toilet seat with lid closes like a regular seat. That keeps the bathroom from looking like a clinic, which matters for dignity and for whether the seat stays in use. Treat the lid as a cover only, never as a backrest, and check that it opens fully without hitting the tank.

The opening shape affects hygiene: a front cut-out makes wiping easier for people with limited hip bending. A larger or rear-access opening helps when a caregiver assists with cleaning. A closed, round opening is easiest to keep clean but gives the least room.

Add arms when the person pushes up through the hands on a front-facing transfer; choose removable arms, or none, when the approach is sideways or a caregiver needs room.

Step 5: Check Weight Capacity and Bariatric Fit

Weight capacity is a tested rating printed on the product, and it should sit comfortably above the user’s body weight. Ratings differ by design, and one NHS trust lists a maximum weight limit of 180 kg (about 397 pounds) for the raised seat it issues to patients.6 That is one product’s limit, not a standard, so read the label on the seat you are buying.

Body weight is not the whole load: a drop onto the seat at the end of the descent adds an impact, and the clamps take it at an angle. If the person tends to drop, choose a rating with clear margin and a lock that grips at several points.

Bariatric means designed for higher body weights, usually with a wider seat, a larger opening, and a higher rated capacity. A bariatric raised toilet seat solves the seat’s share of the problem only. The bowl, its floor bolts, and the flange beneath it carry the same load. The same NHS guidance says not to use a raised seat when the bowl or cistern fixtures are loose.6 If the toilet itself rocks on the floor, a licensed plumber should secure it before any seat goes on.

A seat’s weight rating is only as good as the toilet under it, so check the bowl’s footing before trusting the number on the box.

Step 6: Test the Fit, Cleaning, and Stability at Home

A raised toilet seat is ready for daily use only after it passes a short series of checks in the real bathroom, which catch fit problems before they become habits:

  1. Rock test: press down on the front edge, then push left and right; nothing should shift.
  2. Feet-flat test: sit fully back; both feet should rest flat with the thighs close to level.
  3. Stand test: stand up three times using the planned support. Count any rocking starts or reaches for a sink or towel bar.
  4. Clearance test: confirm the lid opens, the toilet paper is in reach, and any grab bar is still usable from the new height.
  5. Cleaning test: remove and refit the seat once, then repeat the rock test straight away.

The cleaning test matters more than it looks. A seat removed for every cleaning gets re-fitted many times a month, so its lock must be easy to tighten fully.

Match the seat to the transfer pattern

The transfer pattern decides which features matter most, so use this matrix to check that the chosen seat suits the way the person actually moves:

Transfer patternHeight priorityLock priorityArmsWatch for
Front-facing, independentKnee height to 1 inch aboveFront bracket or clampsOptionalFeet lifting off the floor
Front-facing with a walkerKnee height to 1 inch aboveClamps at several pointsOften helpfulWalker parking space in front
Side transfer from a wheelchairLevel with the wheelchair seatSide clampsRemovable or noneGap or step between surfaces
Caregiver-assistedSet for the user, not the helperClamps at several pointsRemovableRoom for the helper to stand close
After hip replacementSurgical team’s targetClamps at several pointsPer the surgical planHip bending past the set limit

Some bathrooms have no wall that can carry a grab bar where the hands need it. In that case a floor-to-ceiling transfer pole can add a fixed hand-hold beside the raised seat. Anchoring to a floor or ceiling is a structural question, so have a qualified installer confirm the surfaces first.

The test that matters is the third stand-up of the day, not the first, so judge the setup by how repeatable it feels.

Common Mistakes When Buying a Raised Toilet Seat

The most common mistake is buying for height alone, and each of the others has an equally simple fix.

Buying the tallest riser available: taller feels safer in the store but can lift the feet off the floor at home, so measure knee height and stay close to it.

Ignoring the bowl shape: product photos look alike, yet an overhanging front edge flexes during the forward lean, so match bowl length to the listed fit.

Trusting a friction fit for daily use: drop-in risers resist downward weight but not a sideways push, so choose brackets or clamps for any long-term setup.

Skipping the re-check after cleaning: a partly tightened clamp is the usual source of a shifting seat, so rock-test the seat every time it goes back on.

Choosing without the user: equipment bought before anyone watches a real transfer can end up in a closet, so observe a transfer and decide together.

What a Good Raised Toilet Seat Fit Looks Like

A good fit shows up as a calm, repeatable transfer: both feet stay flat, and the person stands in one smooth movement without rocking or reaching for the sink. The seat does not move when weight shifts forward or sideways, and the lid, toilet paper, and any grab bar stay usable.

Getting this right is worth the effort, because the gap in this equipment is large. A national cohort study estimated that 5 million older US adults, 42% of those who would benefit, lacked equipment to help with bathing or toileting.8 Over four years of follow-up, 52% of those who needed toileting equipment never received it.8 A correctly chosen seat closes part of that gap at low cost and without renovation.

Recheck the setup whenever something changes: new surgery, a new walking aid, a change in weight, or a new person helping. The right seat for this year can be the wrong seat after a hip replacement. Aging in place is system tuning, not a one-time purchase.

Frequently Asked Questions

What height raised toilet seat do I need?

Aim for a finished seat between knee height and about 1 inch above it, with both feet flat. Measure knee height and rim height, then pick the riser that closes the gap. In lab testing, peak knee moments nearly doubled from a seat at 115% of knee height to one at 65%.4 Too low costs effort; too high costs foot contact.

Is a 2 inch raised toilet seat enough?

A 2 inch raised toilet seat is enough when it brings the seat close to knee height. On a 15-inch rim it finishes at 17 inches, the bottom of the ADA accessible range of 17 to 19 inches.2 Many shorter users need no more than that, while taller users, or anyone under a surgical hip-flexion limit, can need a larger lift.

Will a raised toilet seat fit an elongated toilet?

It fits only if the product lists elongated bowls in its fit range. Measure from the seat bolts to the front of the rim and compare that length with the listing. A front edge that overhangs the bowl can flex during the forward lean, which is the phase where a well-set seat height cuts knee moments by up to 60%.3

Can a raised toilet seat slip off the toilet?

It can, when the lock is loose or the wrong type for the transfer, and friction-fit risers can rotate under a sideways push. One NHS trust that issues seats rated to 180 kg advises against using one if balance issues or spasms could loosen its brackets.6 Rock-test the seat after every refit, and keep a loose toilet out of use until it is secured.

Do I need a raised toilet seat after hip replacement?

Ask the surgical team, because practice varies. In a UK survey, 95% of physiotherapists and occupational therapists said their trusts commonly prescribed raised toilet seats after hip replacement.7 Advice on how long to keep the equipment ranged from 6 weeks to life. The team’s flexion limit sets both the height and the duration.

Limitations and Edge Cases

  • The knee-height figures describe Australian women over 65 in a 2018 study. The person using the seat can measure quite differently, so their own measurement always wins.
  • The sit-to-stand moment data come from chair studies, and the 1989 lab test used young adults. A toilet rim has no backrest or cushion, so treat the figures as a direction, not a prediction.
  • Side transfers from a wheelchair, severe balance problems, and recent surgery change the height and lock priorities; an occupational therapist should set the plan for those cases.

References

Methodology: every figure in this article comes from an independent published source, each link was checked live and matched to the sentence that states the figure on October 6, 2026, and the article was written and reviewed by Home Age Fit’s founder.

  1. CDC MMWR – Nonfatal Bathroom Injuries Among Persons Aged 15 Years and Older, United States, 2008. Morbidity and Mortality Weekly Report, Vol. 60, No. 22, June 10, 2011.
  2. U.S. Access Board – Guide to the ADA Standards, Chapter 6: Toilet Rooms (2010 ADA Standards, section 604.4, seat height).
  3. PubMed – Janssen WG, Bussmann HB, Stam HJ. Determinants of the sit-to-stand movement: a review. Physical Therapy, Vol. 82, No. 9, September 2002.
  4. PubMed – Rodosky MW, Andriacchi TP, Andersson GB. The influence of chair height on lower limb mechanics during rising. Journal of Orthopaedic Research, Vol. 7, No. 2, 1989.
  5. PubMed Central – Blackler A, Brophy C, O’Reilly M, Chamorro-Koc M. Seating in aged care: Physical fit, independence and comfort. SAGE Open Medicine, January 2018.
  6. Kingston and Richmond NHS Foundation Trust – Raised toilet seat, patient information leaflet, current version.
  7. PubMed Central – Smith TO, Sackley CM. UK survey of occupational therapist’s and physiotherapist’s experiences and attitudes towards hip replacement precautions and equipment. BMC Musculoskeletal Disorders, May 2016.
  8. PubMed Central – Lam K, Shi Y, Boscardin J, Covinsky KE. Unmet Need for Equipment to Help With Bathing and Toileting Among Older US Adults. JAMA Internal Medicine, May 2021.

Conclusion

Choosing a raised toilet seat is a fit decision, not a height contest. Measure knee height and rim height, add only the lift that brings the seat near knee level, and keep both feet flat. Then match the bowl shape and choose a lock that resists a forward lean and a sideways push. Check the weight rating, and add arms only when the transfer calls for them. Physics, not popularity, should pick the seat.

For how the seat fits with support points and turning space, see the toilet transfer safety overview. Bring your measurements to an occupational therapist when surgery or balance is part of the plan.

Replace Stair Handrail: When Repair Is Not Enough

Author: Oded Feigin · Created On: October 01, 2026 · Last Updated: October 12, 2026

Deciding to replace stair handrail hardware forces four questions the old rail already answered. Can you grip it? Can you reach it? Does it run continuously along the flight? Can it hold your weight if you slip? Our Senior Safety Handrails planning guide is the overview of how a graspable rail fits the wider aging-in-place system; this article drills into the one decision that comes before any trip to the hardware store. Between 2012 and 2021, US emergency departments logged an estimated 2,515,245 stair-related injuries in adults aged 65 and older5.

A natural wood stair handrail with brushed metal brackets on a light wall, the kind of installation a homeowner should assess before deciding to replace stair handrail hardware.
A natural wood stair handrail with brushed metal brackets and a rounded gripping surface.

Quick Answer

When should you replace a stair handrail instead of repairing it?

Replace the stair handrail when the grip falls outside the 1.25 to 2 inch circular range2. Replace it when the top of the grip misses the 34 to 38 inch height band above the stair nosings2. Replace it when brackets wobble on their fasteners, when the rail is not continuous along the flight, or when the assembly cannot resist a 200 pound concentrated load3. Repair fixes cosmetic damage. Replacement is for any failure that reaches the load path.

Key Takeaways

  • US emergency departments treated an estimated 2.5 million stair-related injuries in adults 65 and older between 2012 and 20215.
  • A graspable circular handrail sits between 1.25 inches and 2 inches in outside diameter2.
  • The top of the gripping surface sits 34 inches to 38 inches above the stair nosings2.
  • A compliant handrail resists a 200 pound concentrated load and a 50 pound per linear foot uniform load3.
  • The old attachment holes rarely satisfy the new grip, the new height, and stud location at the same time, so planning starts with measurement.

What Repair and Replacement Mean for a Stair Handrail

A handrail is the graspable rail that runs alongside a stair at a height your hand can hold while you climb or descend. It is the piece that carries the force of a slip, not a decorative moulding. Repair restores a stair handrail that already meets height, grip, and load specifications. Replacement removes the rail, its brackets, and its fasteners, and installs a new assembly matched to the stair, the user, and the current code.

The two choices sound similar and are not. Repair returns the rail to its original condition. Replacement raises or lowers the condition to meet a new target. If the old rail was never graspable, no amount of refinishing will make it graspable; the only path to a graspable rail is a new one. Confusing the two is how homeowners end up with a reconditioned non-compliant rail and the same risk.

Repair is a cosmetic and surface task

Repair handles the signs that do not touch the load path. Loose paint, a split along the finish grain, a scuffed section near the newel, and a brass end cap that fell off are repair tasks. The rail is still the right dimension, still at the right height, and still mounted into something that will hold a body weight pull. You are preserving a working assembly.

If you are not yet sure whether your handrail is graspable at all, start upstream. Our sibling article on stair handrail height measurement walks through the reach and leverage logic behind the repair-versus-replace call.

Replacement is a load-path and dimension task

The load path is the chain through which force travels from your hand, through the rail, into brackets, through fasteners, into the wall framing. Any failure along that chain is a replacement, not a repair. Four failures reach that chain: a split in the rail at a bracket, a bracket pulling out of the drywall, a fastener in nothing but hollow wall anchor, or a rail diameter you cannot close your hand around. Any one of them means the chain is wrong. You can refinish a wrong chain and still fall.

Replacement is also the correct answer when the rail you have is for a different purpose. A guardrail along a landing is not a handrail; it blocks a fall from an edge. For how the two differ and why swapping one for the other is a replacement rather than a repair, see our handrail versus guardrail comparison.

Six Signs to Replace Stair Handrail Hardware

Six observations move a stair handrail from repair into replacement. Each one is a single, measurable property that costs nothing to check with a tape measure, a torch, and a honest hand grip. If one is true, replacement is on the table. If two or more are true, repair is no longer the lower-risk choice.

  1. The grip is wrong. A compliant circular handrail has an outside diameter between 1.25 inches and 2 inches2. A rail outside this range cannot be closed by a typical adult hand firmly enough to arrest a slip.
  2. The height is wrong. The top of the gripping surface sits 34 to 38 inches above the stair nosings2. Below 34 inches the user bends; above 38 inches the user reaches up and loses leverage.
  3. The brackets wobble. A bracket that moves under hand pressure is not fastened into framing. The fastener is in drywall, lath, or a toggle that spins when loaded.
  4. The rail is not continuous. A graspable rail should run without interruption along the full flight so the hand never has to release the rail mid-stair.
  5. The rail is damaged. A split at a bracket, a loose joint, a cracked finial, or soft rot inside the end cap all signal the member can no longer carry 200 pounds of concentrated force3.
  6. The configuration no longer matches the user. One handrail becomes insufficient when a resident starts to use both hands on the stair, when a walker joins the household, or when the resident’s balance changes.

These six are not opinions. They map onto measurable conditions and specific code sections. The second observation is the one that catches most older rails: a decorative moulding at 42 inches reads as a handrail at first glance and reads as a reach for a hand that needs leverage.

A rail that fails one check often fails two. A bracket pulling out of drywall usually sits on a rail that was never at the right height, because the two decisions were made by one builder on one day, with the same wrong assumption. Treating any single sign as isolated understates the risk.

The Pre-Replacement Checklist: Five Numbers Before You Decide

Before you replace a stair handrail, measure five numbers. Each one is a short, repeatable check, and together they tell you whether the current rail is a repair candidate or a replacement candidate. The checklist works whether you plan to do the project yourself with a licensed contractor or hand the whole thing to a professional.

MeasurementWhere to measureTarget rangeSource
Grip diameter (circular)Across the rail at mid-flight1.25 to 2 inches2US Access Board
Grip height above nosingVertically from the stair nosing to the top of the rail34 to 38 inches2US Access Board
Rail continuityAlong the full flightNo gaps along the usable lengthIRC R311.7.8 pattern4
Concentrated load capacityAt the weakest bracket span200 pound concentrated load3IBC 1607.9.1
Uniform load capacityAlong the rail length50 pounds per linear foot3IBC 1607.9.1

Graspability refers to the measurable property that lets a hand close around the rail firmly enough to arrest a slip. It is not a general sense that the rail feels nice. The two markers of graspability are the grip diameter and the clearance to the wall; both are measurable, and both have target ranges that come from accessibility and building codes rather than product marketing.

Measuring the grip

Hold the rail with your dominant hand near the middle of the flight. If your thumb and your middle finger meet when you close around it, the rail is probably within the 1.25 to 2 inch grip range2. If your hand slides on the surface without a firm close, the rail is too thick or too shaped for a reliable grip. Decorative square or ornate profiles often fall into the second category.

Measuring the height

Measure vertically from the stair nosing to the top of the gripping surface at the middle of the flight. The 34 to 38 inch window is the band every current accessibility standard uses2. A rail at 33 inches is low enough to force a user to bend, which transfers more load into the arm and less into the rail. A rail at 40 inches is a reach for a user whose shoulder mobility has changed.

Checking continuity

Walk the flight from top to bottom with one hand on the rail. The hand should never have to release the rail along the usable length. A newel post that interrupts the grip, a terminated return at mid-flight, or a bracket that catches the hand all break continuity. A broken grip at the moment of a slip is the moment the rail stops being a handrail.

Why the Old Mounting Points May Not Fit the New Rail

Most replacement surprises start at the brackets. The old attachment points were chosen for the old rail at the old height, and almost nothing about that geometry transfers directly to a new assembly. A new rail at a new height almost never passes through the same vertical plane as the old one. A new bracket pattern almost never lands on the same studs as the old brackets. Treating the old holes as a template often doubles the time of the project and triples the drywall patching.

Residential wall framing in North America is usually built with vertical studs placed 16 inches on centre, and sometimes 24 inches on centre in some newer construction. A bracket that must land in a stud has only limited positions along the flight, and those positions do not shift when you decide to raise the rail. The result is predictable: the old holes land either on nothing or on the wrong stud for the new rail’s path. Our guide to studs, brackets, and the load path covers the structural fastening logic in depth.

The implication for the budget is concrete. A homeowner who assumes the old holes will carry the new brackets usually underestimates both the drywall repair and the structural blocking work. A plan that treats the stud map as a fresh constraint, drawn before the new rail is ordered, usually finishes faster and with less patch-and-paint at the end.

What to document before you remove the old rail

Take four pieces of information off the old installation before anything comes off the wall. The exact height of the top of the gripping surface at three points: top, middle, and bottom of the flight. The exact centreline-to-centreline distance between each bracket. The fastener type visible at each bracket, and whether it is in a stud or in drywall. The clear distance between the rail and the wall. Those four numbers are the baseline against which every replacement option is sized.

What a stud finder can and cannot tell you

A good stud finder locates framing within an inch under most conditions. It does not tell you whether the stud behind a bracket is a full-length stud, a short cripple above a header, or a strap. A rail that pulls on a cripple can split the cripple from its header. A rail that pulls on a strap can pull the strap off its anchor. The rule for replacement is simple: locate the stud, mark it, then open a small inspection cut to confirm the stud is full-length where the top bracket will anchor. A licensed contractor should sign off on blocking and fastener type for the final assembly.

The Replacement Envelope: Height, Grip, Continuity, and Load

Every replacement handrail has to fit inside a specific envelope. Four independent constraints bound that envelope. Three come from accessibility standards and the building code; the fourth comes from the human body. A replacement that misses any one of them is not a replacement, it is a different problem on the same wall.

Continuity means the rail runs without interruption along the full length of the stair flight, so the hand never has to let go while climbing or descending. Continuity is the quiet constraint. It is the one that disappears when a run of rail is spliced at a landing and the splice catches the hand. For how the applicable residential rules fit together, our sibling article on residential stair handrail code organizes the questions a homeowner should verify locally before building.

The Replacement Envelope: Four Checks a New Stair Handrail Must Pass Four independent requirements compiled from three code and standards sources. Height 34 to 38 inches above the stair nosings (US Access Board, Section 505.4). Circular grip 1.25 to 2 inches in outside diameter (US Access Board 505.7.1 and International Residential Code R311.7.8.5). Concentrated load capacity 200 pounds (International Building Code 1607.9.1). Uniform load capacity 50 pounds per linear foot (International Building Code 1607.9.1). The Replacement Envelope: Four Independent Checks Height Above Nosing 34 to 38 in top of gripping surface US Access Board 505.4 Circular Grip Diameter 1.25 to 2 in outside diameter Access Board 505.7.1 and IRC R311.7.8.5 Concentrated Load 200 lb at any single point IBC 1607.9.1 Uniform Load 50 lb per ft applied along the rail IBC 1607.9.1 Source: Home Age Fit analysis, 2026
Compiled by Home Age Fit from the US Access Board ABA Standards (Section 505) and the International Building Code (Section 1607.9.1). Any replacement that misses one of the four is not a replacement, it is a different problem on the same wall.
A dark-stained wooden handrail mounted along a staircase with industrial dark-metal brackets, a profile that pairs a graspable round section with a visible mounting pattern.
A round-section handrail with a visible mounting pattern. The three variables a replacement must satisfy are the rail profile, the bracket interval, and the fastener engagement into framing.

Why the four variables are coupled

The four envelope variables are coupled. A grip change usually drives a bracket change. A height change usually drives a bracket pattern change. A continuity constraint can force a different wall termination at the newel. A load capacity requirement sets the minimum fastener engagement. You cannot solve one variable in isolation and expect the other three to co-operate. The planning order that works: height first, grip second, continuity third, load last, because the load calculation depends on the final fastener pattern that the other three set.

What the envelope does not decide

The envelope does not pick the material, the finish, or the colour of the rail. It also does not decide whether a second rail on the opposite wall is a good idea for your household. Those are decisions a resident, a caregiver, and a qualified occupational therapist can discuss after the engineering envelope is settled. The envelope is a floor, not a design brief.

Common Mistakes When Replacing a Stair Handrail

Replacement projects fail at a few predictable points, and most of them are decided before the first bracket comes off the wall. Each mistake below has a short description and a short remedy, so the pattern is easy to spot in a planning conversation with a contractor.

Mistake 1: Choosing the rail before measuring the stud layout

The rail profile and the bracket style are often the first thing a homeowner picks, because they are the visible part. The stud layout decides whether those brackets can be fastened to framing at the required pattern. Measure the stud map first. Order the rail second. If the two conflict, change the rail or add solid blocking between studs before you order anything.

Mistake 2: Reusing the old holes

Old holes are a cost trap. They are rarely where the new brackets need to be, and patching the old holes while opening new ones increases cost and finish-time without reducing the number of fasteners that end up in framing. Plan the drywall patching as a line item in the project.

Mistake 3: Treating a wobble as a tightening problem

A bracket that wobbles is not under-tightened. It is in the wrong substrate. More torque on a screw into drywall will not create a stud. The remedy is to move the bracket to a stud, add blocking, or replace the fastener with one engineered for the actual substrate behind the drywall and sized for the handrail load from IBC 1607.9.13.

Mistake 4: Skipping the top and bottom return

A rail that ends in open space at the top or bottom of the flight catches sleeves and bags, which pulls the user forward at exactly the moment the user needs the rail. A proper replacement either returns to the wall at both ends or terminates at a newel that does not catch. This is a continuity question, not a decoration question.

Mistake 5: Treating a replacement as a cosmetic refresh

Stair-related injuries in older US adults were not evenly distributed across settings. Among reported upper-extremity fractures with a documented location, 89 percent happened at home5. A replacement decision made as a decorative update, with the dimensional and load checks skipped, is a cosmetic refresh that leaves the risk pattern in place.

“Among patients with UE fractures where the physical location of the injury incident was recorded, 89% occurred at home5.”

Rafat H. Solaiman and colleagues, University of Minnesota Medical School, in Osteoporosis International (2023)

Independent nationwide data cuts the question down to its scale. If replacement is a home-level decision for most older-adult stair injuries, then the replacement envelope matters more than the retail choice between oak and maple.

Frequently Asked Questions

How do I know a stair handrail is the right diameter to grip?

A compliant circular handrail has an outside diameter between 1.25 inches and 2 inches2. Measure across the rail with a tape or a caliper at mid-flight. If the number sits inside that range, the diameter is a repair question. If it sits outside, no refinishing can bring it back inside and replacement is on the table.

What is the correct height for a stair handrail above the stair nosing?

The top of the gripping surface sits 34 inches to 38 inches above the stair nosings2. Measure vertically from the leading edge of a tread to the top of the rail. A reading below 34 inches forces the user to bend; a reading above 38 inches forces a reach. Both reduce leverage during a slip.

Can I replace a stair handrail without hitting a stud?

The handrail must resist a 200 pound concentrated load at any single point3, which is not what a drywall anchor is engineered to carry alone. Reach a stud, add solid blocking between studs, or use fasteners the licensed contractor confirms are engineered for the actual substrate. “No stud behind the drywall” is not an option; it is a reason to open the wall and add blocking.

Does a loose stair handrail always mean replacement?

A loose rail is a replacement candidate when the looseness is in the brackets, the fasteners, or the rail itself. A loose finial on a sound rail at the right height and the right grip is a repair. A rail that wobbles under a firm hand pull is not a repair; the fastener is in the wrong substrate and no tightening will fix that. The required load capacity is 200 pounds concentrated3, which drywall anchors are not designed to carry alone.

How dangerous are stair falls for older adults in the United States?

In 2023, the unintentional fall death rate for adults age 65 and older was 69.9 per 100,000 population, and the rate rose to 373.3 per 100,000 for men age 85 and older1. Falls are the leading cause of injury death in this group. A handrail that fails any one of the four envelope checks sits in the risk path.

Limitations and Edge Cases

  • The envelope figures above come from US federal standards and the current International Codes. Local jurisdictions adopt and amend these codes on their own timetable; always verify the version adopted where you build.
  • The grip and height ranges in this article assume a typical adult user with ordinary hand size. A resident with reduced hand strength, limited reach, or a different dominant hand may need an occupational therapist’s evaluation before the final selection.
  • For the measurement logic that sits upstream of this decision, see our stair handrail height measurement article; for the structural fastening question that sits downstream, see our studs, brackets, and the load path article.

References

Methodology: every figure below comes from an independent published source, and this methodology prioritizes US federal standards, the current International Codes, and peer-reviewed epidemiology as the three independent evidence streams a replacement decision rests on.

  1. Centers for Disease Control and Prevention, National Center for Health Statistics – NCHS Data Brief No. 532, “Unintentional Fall Deaths in Adults Age 65 and Older: United States, 2023,” Garnett MF, Weeks JD, Zehner AM, June 2025.
  2. US Access Board – Architectural Barriers Act Accessibility Standards, Chapter 5, Section 505 Handrails (505.4 Height and 505.7.1 Circular Cross Section), 2015.
  3. UpCodes – International Building Code 2021, Section 1607.9.1 “Loads on Handrails, Guards, Grab Bars and Seats,” International Code Council, 2021.
  4. UpCodes – International Residential Code 2021, Section R311.7.8.5 Grip Size, International Code Council, 2021.
  5. PubMed Central – Solaiman RH et al., “Rising incidence of stair-related upper extremity fractures among older adults in the United States: a 10-year nationwide analysis,” Osteoporosis International, 2023.

Conclusion

The decision to replace a stair handrail turns on four envelope checks, not on how the rail looks. If the grip, the height, the continuity, or the load capacity misses the target, replacement is the lower-risk path. If none of them miss, repair preserves a working assembly.

Start with the whole stair system before you order parts. See the Senior Safety Handrails overview for the broader planning context, then bring the four envelope checks to a licensed contractor and, where mobility is changing, an occupational therapist.