
Toilet transfer safety is the practice of planning the height, support, space, and technique around a toilet to reduce the physical effort and fall risk of sitting down and standing up. About 36 million falls are reported among older adults aged 65 and older each year in the United States,1 and the bathroom ranks among the home’s highest-risk zones for those events. This guide covers the full topic across six planning dimensions and routes to 25 detailed guides on specific equipment, techniques, and scenarios.
Quick Answer
What is Toilet Transfer Safety?
Toilet transfer safety is the planning framework addressing seat height, support structure, floor space, and transfer technique around the toilet. Standard toilet seats sit 14 to 15 inches from the floor; the ADA Standards for Accessible Design set the accessible height range at 17 to 19 inches from finished floor to top of seat.2 A safer transfer addresses two separate problems: how far the body must lower and rise (vertical travel) and where the hands load during the movement (push-off leverage).
Why it matters:
Approximately 234,000 emergency department visits result each year from nonfatal bathroom injuries in the United States.3 The toilet sit-to-stand movement loads the knees, hips, and core in predictable ways, and targeted adjustments to height, support geometry, and floor conditions reduce hesitation and physical strain at this specific task.
Key Takeaways
- Toilet transfer safety covers 6 interconnected factors: seat height, support structures, equipment fit and compatibility, transfer technique, room space, and professional assessment.
- The ADA Standards for Accessible Design specify toilet seat height at 17 to 19 inches from finished floor to top of seat.2
- Height aids and support aids solve different problems: a raised seat shortens vertical travel; a safety frame or grab bar provides leverage for the push-off phase.
- Mobility aids change the approach path and require different support geometry around the toilet.
- When a transfer is unpredictable, regularly difficult for a caregiver, or has already caused a near-fall, an occupational therapist assessment is the appropriate next step.
- About 1 in 4 Americans aged 65 and older falls each year;5 the bathroom is among the home’s highest-risk zones for those events.
- More than 800,000 older adults are hospitalized each year in the United States from fall injuries.1
Toilet Transfer Safety in 30 Seconds
| If you are… | Do this |
|---|---|
| Walking without a mobility aid but finding sit-to-stand harder | Measure current seat height from floor to seat top; determine whether height, push-off support, or both are the limiting factor |
| Using a walker for toilet trips | Clear a 3-foot turning area, position the walker to one side before sitting, grip stable support (not the walker) to push up |
| Transferring from a wheelchair | Approach at 30 to 45 degrees on the preferred transfer side, lock brakes, remove footrests, use a stable side support at toilet height |
| Returning home after hip or knee surgery | Confirm the required seat height with your surgical care team before selecting equipment; typical raised seats add 2 to 6 inches |
| In a tight bathroom with no suitable wall space | A floor-standing safety frame or floor-to-ceiling transfer pole provides support without wall anchoring |
| Assisting someone else with transfers | Review cueing and body mechanics with an OT; avoid pulling under the arms; a gait belt reduces load on both people during instability |
What Is Toilet Transfer Safety?
Toilet transfer safety is a planning discipline treating the sit-to-stand movement at the toilet as an engineering problem with identifiable variables. The toilet itself is a fixed surface at a fixed height. The person approaching it has a specific range of hip and knee movement, a specific amount of leg and core strength, and specific footwear, floor conditions, and any mobility aids in play. The transfer is the sequence connecting those two: approaching the toilet, lowering controlled onto the seat, and rising with enough leverage and balance to stand upright again.
The discipline covers equipment (raised seats, safety frames, grab bars, transfer poles, powered lift seats, bedside commodes), technique (approach angle, hand placement, clothing management, cueing), and environment (floor surface, lighting, room clearance for mobility aids). None of those categories is optional. A well-chosen raised seat on a poorly lit night route with a slippery floor has not solved the transfer safety problem; it has addressed one part of it.
It is an educational planning topic, not a certified medical or occupational therapy service. Decisions about a specific person’s mobility, balance, or strength belong with a qualified clinician.
Why Toilet Transfer Safety Matters
Falls send more than 3 million older adults to emergency departments each year in the United States,1 with total health care costs now estimated at $80 billion per year.5 The toilet transfer is among the most physically demanding routine tasks in the home: the sit-to-stand requires the largest joint excursion of any daily activity and places peak load on the knees and hips at the moment of lowest mechanical leverage.
Three specific knowledge gaps make the bathroom riskier than it needs to be:
- Most people select toilet safety equipment based on product category (raised seat, grab bar) without first identifying which part of the transfer is the actual limiting factor.
- Height aids and support aids solve different problems: a raised seat reduces vertical travel; a grab bar or frame provides push-off leverage. Combining them addresses more of the transfer than either alone.
- Mobility aids change the transfer geometry entirely; equipment suited for a walker user is often the wrong configuration for a wheelchair transfer.
Planning toilet transfer safety before a fall produces better outcomes than reacting after one. Equipment chosen under post-discharge pressure, without measuring the actual toilet, frequently misses the right height-and-support combination.
The 6-Part Toilet Transfer Safety Framework
Toilet transfer safety breaks into six interconnected planning dimensions. Addressing all six reduces hesitation and physical demand at the toilet in a way no single product category achieves alone.
1. Seat Height and Vertical Distance
The first dimension is the toilet seat’s height from the floor. A standard seat sits at 14 to 15 inches; a comfort-height toilet reaches 16.5 to 17.5 inches; a raised seat adds 2 to 6 inches more. For someone with limited hip or knee range of movement, each additional inch shortens the joint travel required to complete the sit phase. The goal is not maximum height but the height that allows controlled lowering while keeping both feet flat on the floor. Seats set too high shift body weight backward and remove the foot-contact stability the legs provide during the transfer.
Deeper read: how to measure toilet seat height for easier transfers.
Deeper read: comfort height toilet vs raised toilet seat.
Deeper read: comfort height toilet vs standard height.
Deeper read: raised toilet seats after knee or hip surgery.
2. Support Structures Around the Toilet
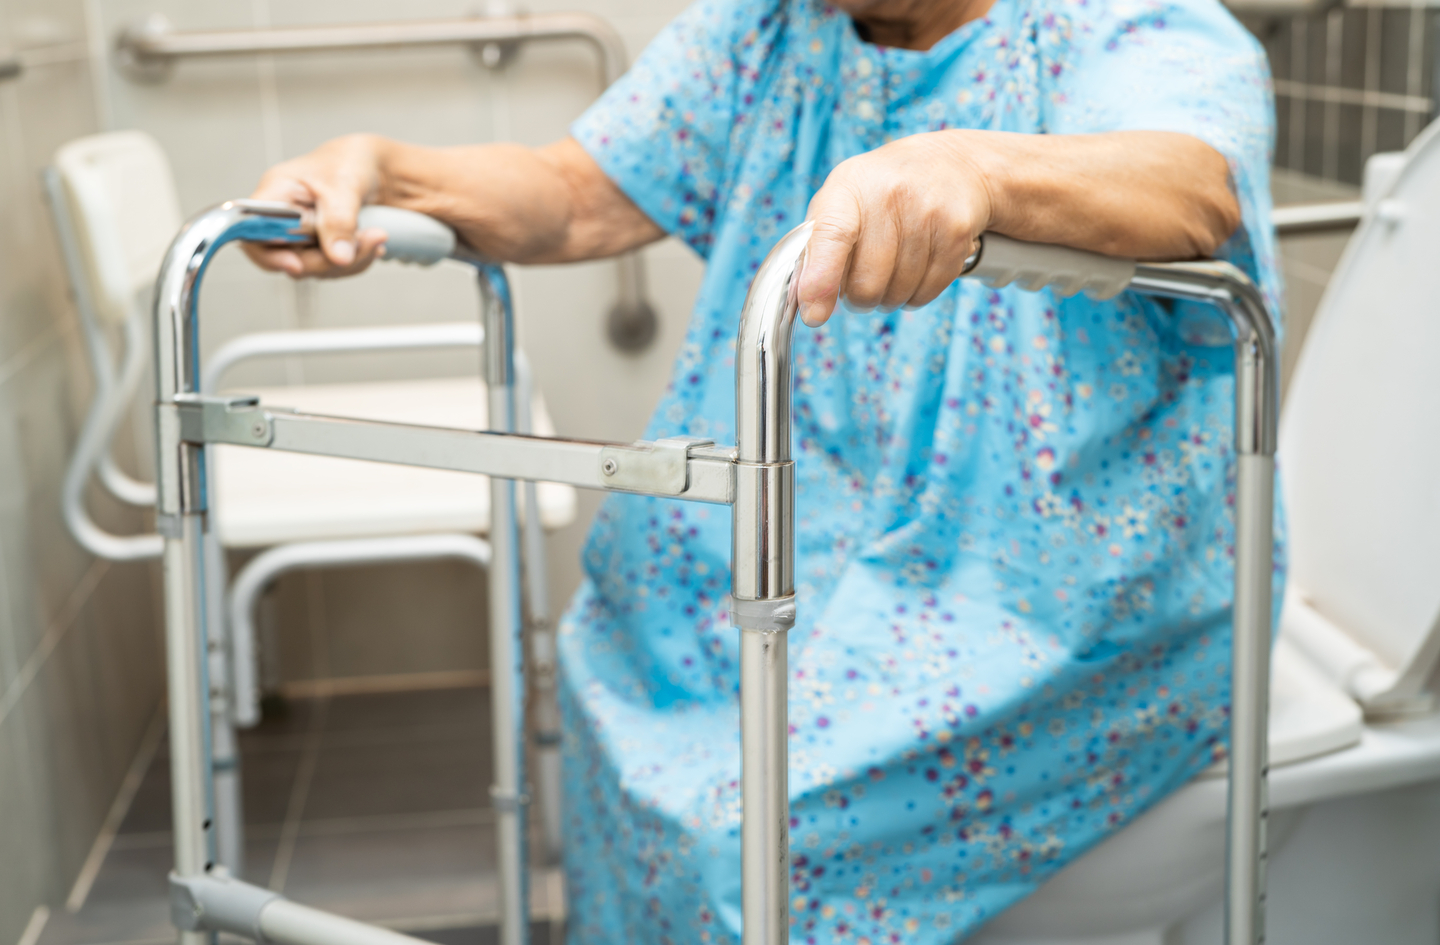
Once vertical distance is addressed, push-off leverage is the next variable. The sit-to-stand phase requires enough arm force to initiate movement without loading fixtures not designed for that purpose. Towel bars and toilet paper holders are not load-rated for transfer forces. Purpose-designed structures include wall-anchored grab bars (require structural anchoring into studs or blocking), toilet-mounted safety frames and rails (attach to the toilet’s floor bolts), floor-to-ceiling transfer poles (use tension between floor and ceiling), and powered lift seats (provide mechanical assistance when leg strength is insufficient). Each design differs in load path, installation requirements, transfer direction supported, and renter compatibility.
Deeper read: toilet safety rails and stable frame selection.
Deeper read: toilet safety frame vs grab bars.
Deeper read: fixed vs swing-away grab bars for toilet transfers.
Deeper read: toilet safety poles and floor-to-ceiling support.
Deeper read: toilet lift seats and powered sit-to-stand assistance.
3. Equipment Selection and Compatibility
The third dimension covers choosing, fitting, and confirming the stability of individual pieces of equipment relative to the specific toilet, person, and transfer pattern. A raised seat must match the bowl shape (round vs. elongated), the clamp design, and the user’s weight distribution under dynamic loading. A seat with integrated arms narrows the toilet opening and affects side-approach transfers for wheelchair users. Weight capacity on the label reflects static load testing, not the dynamic forces of an actual transfer under side-loading. A seat that rocks during the stability test is a failure before the transfer has even started.
Deeper read: raised toilet seat vs toilet safety frame.
Deeper read: how to choose a raised toilet seat for lower-effort transfers.
Deeper read: raised toilet seat with handles.
Deeper read: raised toilet seat weight limits and stability.
Deeper read: how to install a raised toilet seat.
Deeper read: raised toilet seat vs bedside commode.
Deeper read: bidet compatibility with raised toilet seats.
4. Transfer Technique and Mobility Aids
The fourth dimension is technique: how the person (or the caregiver) executes the transfer given the specific mobility aid in use. Walker users must park the walker to the side and not pull on it during sit-to-stand, since walkers tip under backward or sideways loads. Wheelchair users approach at an angle, lock the brakes, remove footrests, and require a clear transfer side with a stable lateral support point. Transfer boards bridge the height gap between a wheelchair and toilet seat when heights differ significantly. For caregivers, cueing the person through each step is more effective than physical lifting, and protects the caregiver’s spine from asymmetric loads over repeated transfers.
Deeper read: toilet transfers with a walker.
Deeper read: wheelchair-to-toilet transfers.
Deeper read: transfer boards for toilet transfers.
Deeper read: helping with a toilet transfer as a caregiver.
5. Space and Environmental Factors
The fifth dimension addresses the room around the toilet. Floor clearance determines which support structures are physically possible and whether a mobility aid completes the approach turn. The floor surface beneath the toilet affects how much support load transfers through footwear to solid ground. Nighttime trips reduce visual orientation and alertness, compounding risk on a route that feels routine during daylight. Tight bathrooms force trade-offs between wheelchair turning room, safety frame footprint, caregiver access, and door swing direction.
Deeper read: wheelchair toilet clearance and floor space.
Deeper read: wheelchair toilet transfers in small bathrooms.
Deeper read: bathroom rugs and toilet transfers.
Deeper read: nighttime toilet trips and route planning.
6. Professional Assessment
The sixth dimension is knowing when this hub is no longer the right tool. Educational frameworks help identify the likely problem and narrow equipment categories. An occupational therapist goes further: observing the actual transfer in the actual home, assessing the person’s strength, balance, and range of movement, and recommending a combined intervention. An OT assessment is the appropriate next step when a transfer has caused a near-fall, when mobility has changed recently, when a caregiver regularly provides physical assistance, or when equipment has already been tried without success.
Deeper read: when to ask an occupational therapist about toilet transfers.
How to Choose the Right Transfer Support
The most important first step is identifying which part of the transfer is the limiting factor. Equipment chosen without that clarity often addresses the wrong problem.
- Define the problem first. Is the difficulty in the lowering phase (too far to go down), the rising phase (not enough strength or leverage to push up), the approach path (restricted by a walker or wheelchair), or the landing (unstable foot contact or equipment wobble)? Each problem has a different solution category.
- Measure the current seat height. Measure from the finished floor to the top of the toilet seat with the lid raised. For accessible home planning, a useful reference range is 17 to 19 inches per ADA Standards.2 The right height for a specific person depends on leg length, hip and knee range, and whether both feet maintain floor contact at the target height.
- Check wall and floor structure. Wall grab bars require anchoring into studs or solid blocking. When the bathroom wall cannot support permanent anchoring, a toilet-mounted frame or floor-to-ceiling pole does not require wall work. Renters should verify lease terms before any permanent installation.
- Account for the mobility aid being used. A walker requires a clear turning radius near the toilet and a parking position not blocking the approach path. A wheelchair requires clear floor space on the transfer side and a side support bar at usable height when seated on the toilet. These space requirements affect which support structures are geometrically possible in the room.
- Confirm equipment compatibility before purchasing. Raised seat clamps differ between round and elongated bowls. Arms on raised seats reduce the bowl opening width and affect side transfers. If a bidet seat is already installed, check manufacturer guidance for stack compatibility before adding a raised seat above it.
- Test stability before relying on any installed equipment. After installation, apply body weight and simulate the transfer direction before trusting the equipment for a real transfer. A seat rocking slightly under static load will move significantly under the dynamic side-loading of an actual sit-to-stand.
Red flags: any installed surface moving under testing, any armrest sitting too low to provide leverage at the push-off point, and any configuration conflicting with the mobility aid’s approach path. When the combination of factors is complex, an occupational therapist assessment provides specificity a general selection guide cannot match.
Compare All Toilet Transfer Approaches
| Criteria | Raised Seat | Safety Frame | Wall Grab Bar | Transfer Pole | Powered Lift Seat |
|---|---|---|---|---|---|
| Primary function | Reduces vertical travel | Push-off support at toilet | Directional grip support | Alternative anchor point | Mechanical sit-to-stand |
| Adds seat height | Yes (2-6 inches) | No | No | No | Yes, adjustable range |
| Adds push-off support | No (without arms) / Limited (with arms) | Yes | Yes | Yes | Mechanical only |
| Wall anchoring required | No | No | Yes | No | Varies by model |
| Renter-friendly | Yes | Yes | No | Conditionally | Usually yes |
| Best for | Limited hip or knee flexion range | Push-off without wall anchoring | Permanent lateral support | No suitable adjacent wall | Very limited leg strength, post-OT assessment |
Choose a raised seat if: the sit-phase range of movement is the primary challenge and the feet maintain solid floor contact at the added height.
Choose a safety frame if: push-off support is the primary need and permanent wall anchoring is not available or appropriate.
Choose wall grab bars if: the wall has structural backing for anchoring, the installation is permanent, and reliable lateral or directional support is the goal.
Choose a transfer pole if: no suitable adjacent wall exists on the transfer side but the floor and ceiling are structurally sound for tension installation.
Choose a powered lift seat if: leg and core strength are insufficient even with height and support aids in place, and an OT has assessed the transfer as needing mechanical assistance.
Deeper read: raised toilet seat vs toilet safety frame.
Common Mistakes
Mistake 1: Treating the weight limit on the label as the only stability measure
Why it is a mistake: Weight ratings on raised toilet seats reflect static load testing. Real transfers involve dynamic side-loading as the body shifts to push up from one arm, and those lateral forces are what cause many seat failures. Bowl condition, clamp fit, and the tightness of installation all affect stability independent of the listed capacity.
What to do instead: Test the seat under simulated transfer forces before relying on it. Apply body weight and push laterally on each arm or edge. Movement under that test means the installation or the bowl-seat interface is inadequate, regardless of the weight listed on the packaging.
Read more: raised toilet seat weight limits and stability.
Mistake 2: Choosing maximum seat height without checking foot contact
Why it is a mistake: A raised seat setting the toilet so high the feet hang free during the sit phase shifts body weight backward and removes the stable base the legs provide during the transfer. Higher is not always safer. The right height allows controlled lowering with both feet flat on the floor throughout the movement.
What to do instead: Measure popliteal height (back of knee to floor when seated) as a starting reference and match seat height to that measurement. Then test actual foot contact at the target height before committing to a raised seat at that elevation.
Read more: how to measure toilet seat height.
Mistake 3: Skipping the floor surface check
Why it is a mistake: A wet or loose mat under foot during a transfer is as much a fall risk as a missing grab bar. When foot contact shifts during the push-up phase, even a well-fitted raised seat and a properly placed grab bar cannot compensate. The floor surface is the final link in the load path from the body to solid ground.
What to do instead: Check the floor within arm’s reach of the toilet and along the entire transfer route for mats with curled edges, soft backings, or any surface shifting underfoot when wet. Remove loose items; replace with non-slip, firmly-backed surfaces where needed.
Read more: bathroom rugs and toilet transfers.
Mistake 4: Using a towel bar or toilet paper holder as a grab point
Why it is a mistake: These fixtures are designed for towels and paper, not for resisting the outward and upward forces of a sit-to-stand. They are typically fastened with short screws into drywall alone, not into structural backing. Under transfer load, they pull from the wall, creating a sudden loss of support mid-movement.
What to do instead: Install purpose-designed grab bars with stud or blocking anchoring, use a floor-mounted safety frame attached to the toilet bolts, or position a transfer pole at the correct reach distance. None of these depend on decorative hardware to carry the transfer load.
Read more: toilet safety frame vs grab bars.
Mistake 5: Selecting equipment before mapping the transfer direction
Why it is a mistake: A raised seat with fixed arms is a reasonable choice for someone lowering straight down and rising straight up. For a wheelchair user approaching from the side, those fixed arms block the transfer path entirely. Equipment designed for one transfer pattern actively impedes another, which is one of the most common reasons toilet safety equipment ends up unused.
What to do instead: Walk through the actual transfer sequence before purchasing anything. Note the approach direction, where the hands naturally reach during lowering and rising, and what the mobility aid requires from the surrounding space. Let that sequence drive equipment selection.
Read more: wheelchair-to-toilet transfers.
Best Toilet Transfer Safety by Use Case
For Independent Seniors Finding Sit-to-Stand Harder
The priority is identifying whether the difficulty is in vertical range (how far to lower and rise) or push-off leverage (not enough arm support to complete the stand). A height measurement and a straight-pattern transfer evaluation narrow that down before any equipment purchase.
Deeper read: how to choose a raised toilet seat for lower-effort transfers.
For Walker Users Navigating the Turning-Space Problem
The walker cannot occupy the transfer path during the sit or stand phase, but must be within reach before leaving the toilet. The approach sequence and parking position matter as much as any equipment attached to the toilet. A safety frame or side grab bar provides the push-off point while the walker is parked.
Deeper read: toilet transfers with a walker.
For Wheelchair Users Managing a Daily Transfer Pattern
Wheelchair transfers require a clear transfer side, stable lateral support at the toilet, and enough floor space for the chair’s approach angle. The equipment suited to a side transfer differs from what a forward-pivot transfer requires. Floor clearance, door swing, and caregiver access all feed into what is achievable in the specific bathroom.
Deeper read: wheelchair-to-toilet transfers.
For Post-Surgical Patients With Temporary Height Requirements
After hip or knee replacement surgery, the care team specifies movement precautions that translate directly into toilet height requirements. A raised seat is typically needed, but the specific height and arm-support requirements belong with the surgeon, OT, or PT managing the discharge plan.
Deeper read: raised toilet seats after knee or hip surgery.
For Caregivers Providing Regular Assisted Transfers
Caregiver technique matters independently of the equipment on the toilet. The approach angle, the cueing sequence, and whether the caregiver loads under the person’s arms (a back-strain risk) all affect the caregiver’s physical health over time. For regularly-assisted transfers, a technique review with an OT is one of the highest-leverage steps available.
Deeper read: helping with a toilet transfer as a caregiver.
Frequently Asked Questions
What toilet seat height is recommended for easier transfers?
The 2010 ADA Standards for Accessible Design specify toilet seat height at 17 to 19 inches from finished floor to top of seat.2 That range is a useful reference for accessible home planning, not a universal prescription. The right height for a specific person depends on leg length, hip and knee range restrictions, and whether both feet maintain floor contact at the chosen height. An occupational therapist evaluates that combination for the specific person and toilet.
What is the difference between a toilet safety frame and wall grab bars?
A safety frame attaches to the toilet’s existing floor bolts and stands independently around the bowl, providing bilateral push-off arm support without wall anchoring. Wall grab bars are structurally anchored into studs or blocking and provide a fixed, load-rated surface for directional support. Grab bars carry transfer loads more reliably across a wider range of movement directions. A safety frame is renter-friendly and installs without any wall modification, making it practical when permanent anchoring is not feasible.
Do raised toilet seats have weight limits I should know about?
Most raised toilet seats list a weight capacity from the manufacturer, but the published rating reflects static load testing rather than the dynamic forces of an actual transfer. Side-loading during the push-up phase, bowl condition, and installation security all affect real-world stability. A seat feeling solid under a straight sit-stand load may wobble noticeably under lateral pressure on the armrests. Test stability under simulated transfer forces after installation, before relying on the equipment for a real transfer.
How should I set up a bathroom for a wheelchair toilet transfer?
Position the wheelchair at 30 to 45 degrees to the toilet on the preferred transfer side and as close as possible without blocking foot placement. Lock both brakes and remove footrests before starting. Have a stable hand support at the transfer side at roughly armrest height when seated on the toilet. Floor clearance on the transfer side needs to accommodate the wheelchair, footrests when removed, and any caregiver presence. In tight bathrooms, this trade-off between equipment and maneuvering space often warrants a professional layout review.
When should I consult an occupational therapist about toilet transfers?
An OT assessment makes sense when a transfer has caused a near-fall or is becoming increasingly difficult, when mobility has changed due to surgery or a new mobility aid, when a caregiver regularly provides physical assistance, or when equipment has been tried without success. The National Institute on Aging advises older adults who experience falls to discuss them with their healthcare provider to identify contributing factors.4 An OT observes the actual transfer in the actual home environment, a specificity no general guide achieves.
What This Hub Does Not Cover
- Certified structural engineering or code-compliance assessment for grab bar installation in a specific home. A licensed contractor should evaluate structural work before installation.
- Individualized occupational therapy or physical therapy for a specific person’s transfer technique, balance, or mobility condition. This hub provides educational planning guidance; a qualified clinician provides the person-specific evaluation.
- Bathroom renovation planning beyond the toilet zone. Shower and bath transfers, flooring replacement, and full layout redesign are separate topic areas covered in other guides on the site.
- Specific product purchase recommendations. The selection guides in Related Guides cover criteria, fit, and trade-offs; the final purchase decision belongs to the reader and, where relevant, a treating clinician.
References
- Centers for Disease Control and Prevention – Facts About Falls: annual fall incidence, emergency department visits, deaths, and estimated medical costs among older adults in the United States.
- U.S. Department of Justice – ADA.gov – 2010 ADA Standards for Accessible Design: Section 604.4 specifying toilet seat height of 17 to 19 inches from finished floor to top of seat.
- Centers for Disease Control and Prevention – MMWR – Nonfatal Bathroom Injuries Among Persons Aged 15 Years and Older, United States, 2008: emergency department visit data for nonfatal bathroom injuries.
- National Institute on Aging – Falls and Fractures in Older Adults: Causes, Assessment, and Prevention: risk factors, recommended assessment steps, and guidance on discussing falls with healthcare providers.
- National Council on Aging – Get the Facts on Falls Prevention: falls epidemiology data, economic impact estimates, and evidence-based prevention approaches for older adults.
Next Read
Toilet transfer safety is a six-part planning challenge: seat height, support structures, equipment compatibility, transfer technique, room space, and professional guidance. Equipment chosen without first identifying the specific limiting factor often addresses the wrong problem. The most productive starting point is mapping the actual transfer sequence before evaluating any product category.
Use the How to Choose framework above to identify which part of the sit-to-stand movement is the limiting factor before evaluating specific equipment or support structures.