
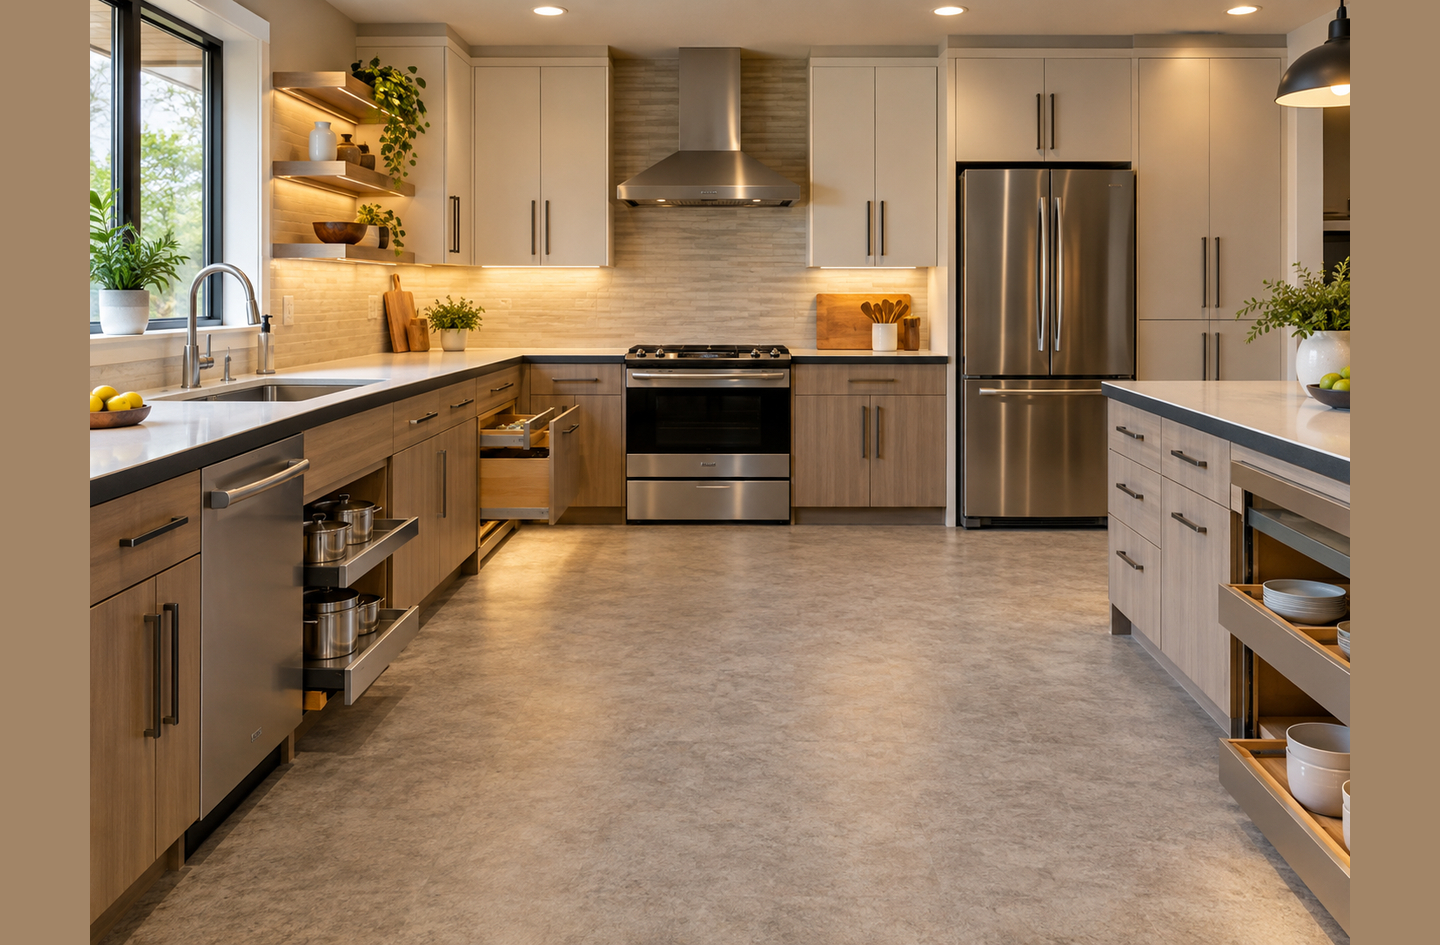
An accessible kitchen design checklist turns a vague remodel goal into measurements you can test before anyone tears out a cabinet. For how this assessment fits the wider topic, see the accessible kitchen design guide, the overview of easier daily cooking. The checklist matters because few homes start out ready: a 2015 analysis of the American Housing Survey estimated that just 0.15% of US housing is wheelchair accessible1. This page covers one job, which is assessing the kitchen you already have. Bring a tape measure and a notepad.
Quick Answer
What should an accessible kitchen design checklist cover before a remodel?
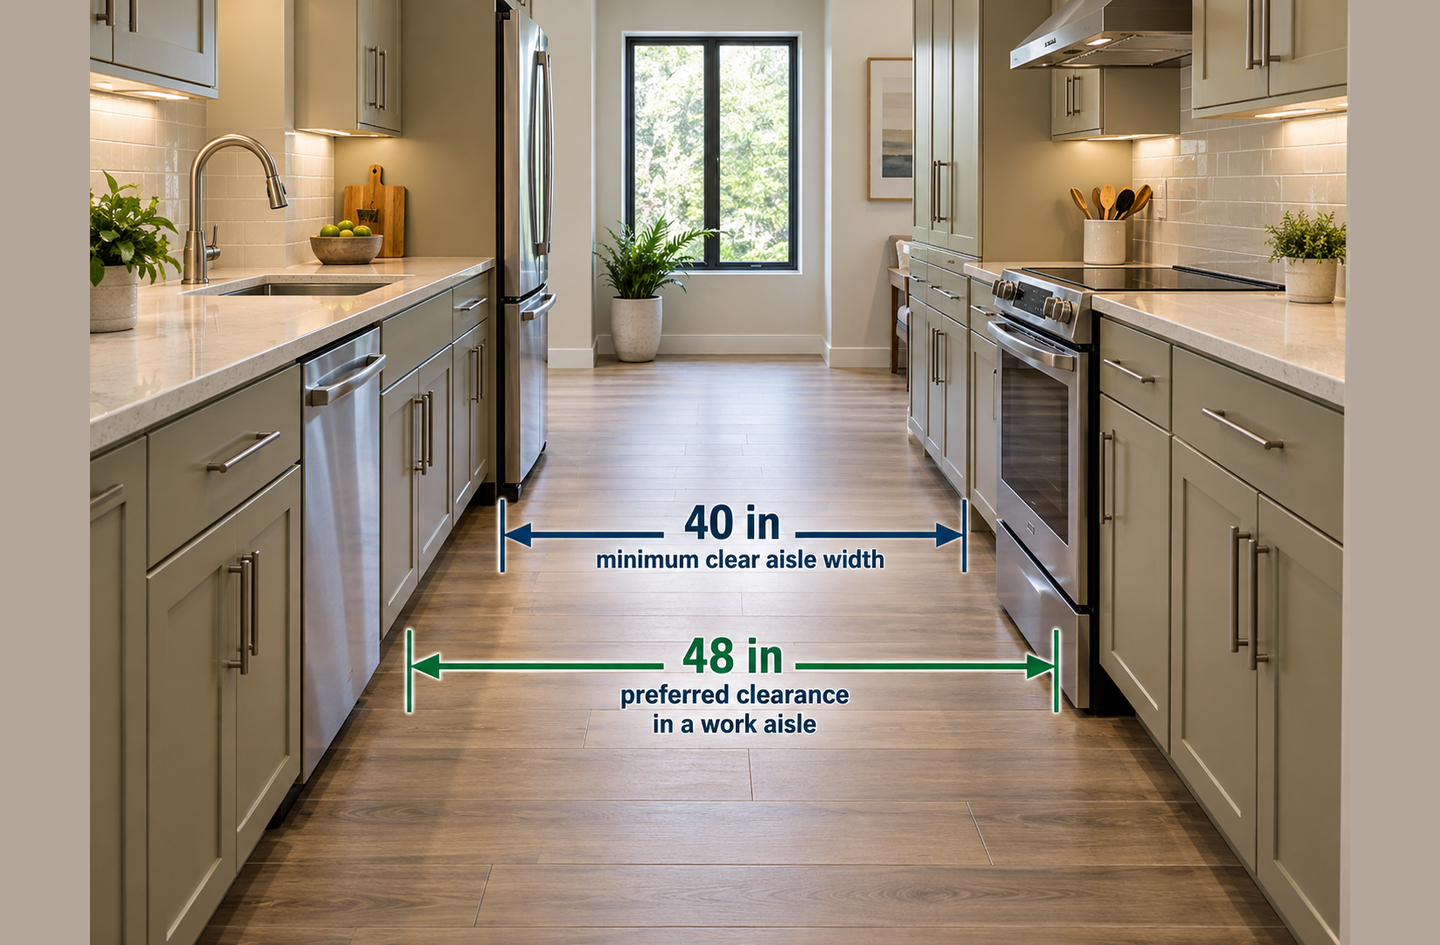
It should cover seven systems in a fixed order: circulation, counters, storage, appliances, controls, lighting and flooring. Each item is measured against a published benchmark, such as the 40-inch minimum aisle between opposing counters in the 2010 ADA Standards2. Layout items come first because they are the hardest to change later.
Key Takeaways
- Kitchen and dining areas accounted for 7.2% of at-home falls that sent older adults to US emergency departments in 20153. The room deserves an assessment even when the bathroom feels more urgent.
- In one UK study of 48 older adults, reaching, bending or standing for long periods limited 54% of participants in their own kitchens4. Storage and reach belong on every checklist.
- Self-reports overstate access: 51.0% of homes were reported to have wheelchair accessible countertops, against 0.15% judged fully wheelchair accessible1. Measure instead of asking.
- The most common mistake is assessing finishes before layout. Aisles, turning space and counter heights set the limits for every other choice.
Why an Accessible Kitchen Design Checklist Comes Before the Contractor
An accessible kitchen design checklist is a structured walk-through that compares the existing room with measurable targets before any design or demolition starts. Its value is simple: it separates what the home actually does from what the household assumes it does. That gap is larger than most people expect. In the 2011 American Housing Survey, 51.0% of homes were reported to have wheelchair accessible countertops, and only 15.8% reported wheelchair accessible kitchen cabinets1.
The researchers who analyzed those responses did not take the countertop figure at face value. Their verdict is the reason this checklist asks for a tape measure rather than an opinion.
“It seems likely that many respondents do not know the requirements for accessibility.”
Lauren Bo’sher, Sewin Chan, Ingrid Gould Ellen and colleagues, HUD Office of Policy Development and Research report on the 2011 American Housing Survey1
A kitchen is also a system, not a list of parts. The aisle width decides where a wheelchair or walker can turn, and the turn decides which counters are usable. Those counters decide where appliances and storage can sit. Lighting and flooring come last because they serve the layout rather than define it.
Federal ADA rules do not cover a private home. The HUD report notes that ADA coverage “does not apply to individually owned or leased housing, including single-family homes, condominiums, or apartments”1. This checklist borrows the 2010 ADA numbers as reference points, not legal requirements.
The practical meaning: treat any “yes, it’s accessible” answer as a hypothesis, and let the measurements on this page confirm or reject it.
Before You Begin: Observe a Normal Cooking Day
The assessment starts with observation, not renovation. Before measuring anything, watch the person who cooks most often prepare an ordinary meal from start to finish. If you are planning for yourself, ask a family member to take notes while you cook. If you are helping a parent, cook alongside them and let them lead the task.
Mark every point where the cook grips a counter edge, turns sideways, hesitates, stretches upward or bends low. These friction points show what the kitchen asks of the body, and effort adds up across hundreds of small movements a week.
- Tools: a 25-foot tape measure, a notepad or phone camera, a flashlight and painter’s tape for marking spots on the floor.
- Mobility aids: have any wheelchair, walker or rollator present so you measure the real device, not a guess.
- Time: about two hours for observation and measurement, spread over two visits if fatigue is a factor.
An occupational therapist is a licensed clinician who evaluates how a specific person performs daily tasks and recommends changes to the task or the environment. General guidance, including this page, cannot replace that individual assessment. Everything below is engineering-informed planning, not a certification of any home or person.
If you skip the observation, you will measure the kitchen accurately and still solve the wrong problem.
Step 1: Map Circulation and Turning Space
Circulation is the first item because aisle width and turning space set the footprint for everything else. The 2010 ADA Standards require at least 40 inches between opposing cabinets, counters, appliances or walls in a pass-through kitchen, and 60 inches in a U-shaped kitchen2. Measure every aisle at its narrowest point, including handles and appliance doors.
Clear floor space is the open rectangle a seated user needs to approach a fixture, set by the ADA at 30 by 48 inches minimum2. Use painter’s tape to outline that rectangle in front of the sink, the range, the refrigerator and the main prep counter. Then check whether the rectangles overlap the walkway or a door swing.
- Measure the narrowest point of each aisle with drawers and the dishwasher closed.
- Repeat with the dishwasher and oven doors open, since that is when people actually pass.
- Test for a turning circle: the ADA defines turning space as a circle 60 inches in diameter minimum2.
- Trace the route from the kitchen entry to the sink, range and table, noting tight corners.
A walker user turns differently from a wheelchair user, but both benefit from an aisle that meets the minimum. A cook who stands without aids still gains from room to pass a second person. For planning the circulation around a specific chair, the sibling guide on wheelchair kitchen layout goes deeper on work zones.
Verify the step: every key fixture has its own taped rectangle, and the cook can reach each one without a backward three-point turn.
If the aisle fails here, budget for layout change first; no amount of hardware or lighting will make up for a footprint that blocks the turn.
Step 2: Check Counter Heights and Knee Space
Counters come second because their height and the space beneath them decide whether the main tasks can be done seated, standing or both. The ADA sets a maximum kitchen work surface height of 34 inches, with an adjustable surface permitted between 29 and 36 inches2. Many existing counters sit higher than that, so the prep zone is where this item most often fails.
Knee clearance is the open space under a counter that lets a seated person pull close, defined by the ADA as 9 to 27 inches above the floor2. Measure the height of each counter at its front edge. Then check whether any section is open below or has cabinets that could be removed without replacing the top.
- Record the finished height of every counter run, including the island and any table used for prep.
- Note the height and depth of the open space under the sink, if any.
- Mark whether pipes under the sink are exposed, because the ADA requires them to be insulated or shielded where knee space exists2.
- Flag the counter the cook uses most and note whether they stand, perch or sit there.
Unmet need for these features is high. In a Swiss study of people with spinal cord injury, 78.7% of those who needed an adjustable kitchen worktop did not have one5. The details of seated heights, lap depth and toe space are covered in the sibling guide on counter height and knee space.
Verify the step: every counter has a written height, and the sink, cooktop and one prep surface each have a yes or no for knee space.
One lowered section done well is usually worth more than a full kitchen of counters set a few inches lower without knee space.
Step 3: Audit Cabinet and Drawer Reach
Storage reach is the third item because it governs how often the cook must stretch, bend or climb. The ADA sets an unobstructed forward reach range of 15 inches minimum to 48 inches maximum above the floor2. In the UK kitchen study, the ability to reach, bend or stand for long periods limited 26 of 48 participants, or 54%4.
The reach zone is the band of shelf height a person can use without stretching overhead or bending below the knees. Map it for the actual cook, not an average adult. Stand or sit them in front of each cabinet and note the highest and lowest shelf they reach comfortably.
- List the 20 items used most often, such as plates, mugs, pots, oils and the kettle.
- Record where each one lives and whether it sits inside the comfortable reach zone.
- Measure the bottom shelf of every wall cabinet from the floor.
- Note any step stool in use, since ladders carried an adjusted odds ratio of 5.48 for fall-related injuries in a US emergency department analysis8.
Strength matters as much as height. In the same UK study, 40% of participants reported limits in strength and dexterity, often from arthritis4. Heavy pots in a low corner cabinet fail both tests at once. The options for pull-outs, drawers and corner units are compared in the sibling guide to reachable kitchen storage.
Verify the step: each of the 20 everyday items has a “keep,” “move” or “change storage” note next to it.
Moving the 20 most-used items into the reach zone costs nothing and often removes the step stool from the routine before any carpentry begins.
Step 4: Review Appliances and Their Landing Space
Appliances are the fourth item because each one needs both an approach space and a nearby surface to set things down. The ADA calls for a 30 by 48 inch clear floor space at each kitchen appliance2. It also requires a work surface beside every oven, on the latch side for a side-hinged door2.
Heat is the second reason this step matters. A national study of burn injuries from 2004 to 2022 found that 75.9% of burns in older patients happened at home, compared with 67.4% in younger adults6. The same study listed hot water, cookware and oven or range units among the top five burn sources6.
- Range or cooktop: check whether the controls sit at the front or side. The ADA says their location “shall not require reaching across burners”2.
- Oven: measure the height of the oven rack in use and the nearest counter. A long carry of a hot dish is a friction point.
- Refrigerator: check the freezer. The ADA asks for at least 50 percent of freezer space at 54 inches maximum above the floor in a combination unit2.
- Microwave: note whether it sits above the cooktop, which forces an overhead lift of hot liquids.
A landing surface is a clear stretch of counter right beside an appliance where a hot or heavy item can be set down at once. Measure the landing space on each side of the range, oven, microwave and refrigerator. Missing landing space forces the cook to carry hot food while turning, which is exactly the movement this checklist tries to remove.
Verify the step: each appliance has a note on its approach, control position and the nearest landing surface.
Relocating a microwave from over the range to counter or drawer height is often the highest-value appliance change in the whole kitchen.
Step 5: Test Controls, Faucets and Hardware
Controls are the fifth item because they are touched more often than any other part of the kitchen. The ADA sets a clear rule: operable parts must work with one hand, without tight grasping or twisting, and need 5 pounds of force or less2. The same standard applies that rule to all appliance controls2.
Test every handle the cook uses, from cabinet pulls and the faucet to range knobs, appliance doors and light switches. Try each with a closed fist, and record any control that needs a pinch or a twist.
- Faucet: a single lever is easier than two round knobs that need a grip and twist.
- Cabinet hardware: loop or bar pulls accept a hooked finger; small round knobs do not.
- Displays: check that the cook can read oven and microwave displays from where they stand or sit.
- Switches: check that the switch for task lighting sits within the 15 to 48 inch reach range2.
Readability of controls is a real problem, not a cosmetic one. In the UK kitchen study, four participants had trouble seeing cooker or microwave displays and controls, and two said bright sunlight made them hard to read4. One participant with low vision used tactile markers on a washing machine to find its controls4.
Verify the step: every control on the list has a pass or fail for one-hand use without twisting, and a pass or fail for readability.
Hardware is the cheapest category to fix, so a long list of failed controls is good news for the budget, not bad news.
Step 6: Measure Lighting at Every Task Zone
Lighting is the sixth item because good light depends on knowing where the tasks will happen. In the UK kitchen study, 17 of 48 participants, or 35%, reported task-related sight problems in the kitchen4. Their own fixes included under-cupboard lights, a light above the cooker and carrying packages into a brighter hallway to read them4.
Lux is the metric unit of illuminance, the amount of light landing on a surface, and one lux equals 0.093 foot-candles7. A free light-meter app on a phone gives a rough reading that is good enough for comparison. Take readings on the prep counter, the cooktop, the sink and the inside of the darkest cabinet.
- Compare task readings with the benchmark cited in a 2025 care-facility study: 300 to 500 lux for focused activities such as reading7.
- Check for shadows cast by the cook’s own body when standing at the counter under a single ceiling light.
- Check glare on glossy counters and on appliance displays at different times of day.
- Test the route from the kitchen to the bedroom at night, including the switch location.
The evidence on falls is associative and comes from care homes, not private kitchens. In that 2025 study, each 100 lux increase in dining-room lighting was linked to a lower fall rate, with an incidence rate ratio of 0.927. It does not prove that brighter kitchens prevent falls at home.
Verify the step: every task zone has a lux reading and a note on shadow and glare.
Lighting is often higher leverage than a renovation: under-cabinet task lights can fix a failing prep zone in an afternoon.
Step 7: Inspect Flooring and Transitions
Flooring is the last item because its job is to support the layout already chosen, but it is not the least important. In a US emergency department analysis covering 2007 to 2017, flooring materials accounted for 29.1% of the injuries analyzed among older adults8. Flooring carried an adjusted odds ratio of 3.09 for fall-related injury in that analysis8.
The kitchen itself is a moderate-frequency fall location. Among falls at home that led to an emergency visit in 2015, 8.1% of women’s and 5.6% of men’s happened in the kitchen3. The surface rules are straightforward: the ADA calls for floors that are “stable, firm, and slip resistant”2.
- Measure each threshold. The ADA allows a vertical change in level of up to a quarter inch, and a bevel up to half an inch2.
- Check rugs and mats at the sink and the entry; note any that slide, curl or bunch.
- Wet a small area near the sink and test the floor with the cook’s usual footwear.
- Note any glossy finish that reflects ceiling lights and hides spills.
Verify the step: every transition has a measured height, and every loose mat has a “keep,” “secure” or “remove” note.
A slip-resistant floor is a support for the whole system, but it cannot make up for an aisle that forces awkward turns while carrying something hot.
The seven steps follow one rule: check what is hardest to change before what is easiest. The diagram pairs each step with its benchmark from the 2010 ADA Standards2 and the lux range cited in the 2025 care-facility lighting study7.
Small Accessible Kitchen Design: Adapting the Checklist to Tight Footprints
Small accessible kitchen design uses the same seven steps, but the order matters even more because every inch is contested. A galley kitchen that cannot reach the 40-inch aisle minimum2 needs a decision before any other spending: widen, open one side, or accept a standing-only layout for now.
When widening is not possible, the checklist still produces useful accessible kitchen design ideas. Each one trades a little storage or a little counter for less effort:
- One open bay: remove a single base cabinet beside the sink to create a seated prep station with knee space.
- Drawers over doors: swap low base cabinets for full-extension drawers so nothing hides at the back.
- Lower the everyday shelf: drop one wall-cabinet shelf, or add an open rail, inside the 15 to 48 inch reach range2.
- Countertop appliances: a counter-height microwave and a two-burner induction unit can replace hard-to-reach fixed units in a rental.
Renters and condo owners may need approval for some changes, so capture the reversible ideas first.
In a small kitchen, the best single change is usually one seated workstation done properly, not a dozen small compromises spread across the room.
Common Mistakes When Using a Kitchen Accessibility Checklist
The most frequent mistake is trusting a label instead of a measurement. Reported wheelchair accessible countertops, at 51.0% of homes, far outran the 0.15% of housing judged fully wheelchair accessible1. Three other errors are worth planning around.
Assessing finishes first: new flooring and hardware chosen before the layout is settled may be torn out when an aisle moves. Work through the seven steps in order.
Measuring for an average adult: reach and counter targets only help if they fit the actual cook and their actual device. Measure the person, the wheelchair or walker and the seat height they use.
Planning only for today: a cook who stands comfortably now may sit for some tasks later. A removable base cabinet keeps that option open. The ADA permits cabinetry under a work surface if it can be removed without replacing the top2.
Each of these mistakes comes from skipping a measurement, which is why the checklist asks for numbers at every step rather than impressions.
What a Finished Checklist Looks Like
A finished checklist is one page of measured results, ranked by how hard each item is to change. It should list every failed item with the measurement, the benchmark it missed and the friction point it explains. The table gathers the benchmarks used in the seven steps, with the ADA figures treated as reference points for a private home rather than legal requirements2.
| System | What to check | Benchmark to compare against | Change difficulty |
|---|---|---|---|
| Circulation | Narrowest aisle, turning space | 40 in aisle; 60 in for U-shape; 60 in turning circle | Hard: layout change |
| Counters | Work surface height, knee space | 34 in maximum; adjustable 29 to 36 in; knee space 9 to 27 in high | Hard: cabinetry and plumbing |
| Storage | Shelf heights for top 20 items | 15 to 48 in forward reach | Medium: inserts or new boxes |
| Appliances | Approach, controls, landing space | 30 by 48 in clear floor; freezer half at 54 in or lower | Medium: relocation or replacement |
| Controls | Handles, faucet, knobs, switches | One hand, no twist, 5 lb force or less | Easy: hardware swap |
| Lighting | Task zones, shadow, glare | 300 to 500 lux for focused tasks | Easy to medium: add fixtures |
| Flooring | Slip resistance, transitions, mats | Quarter inch vertical; half inch beveled | Medium: surface and thresholds |
The difficulty column is a planning judgment drawn from the order of the steps, not a cost estimate. Exact numbers for each standard, explained for homeowners, are in the sibling guide on key kitchen measurements.
The next step is to prepare the questions before hiring the professional. Bring the page to a kitchen designer, a licensed contractor or an accessibility specialist. Ask an occupational therapist to review any item tied to balance, transfers or a changing condition.
A contractor can price a measured list in one visit, while a list of impressions usually needs a second site visit and a second quote.
Frequently Asked Questions
What is the minimum aisle width for an accessible kitchen?
The 2010 ADA Standards set 40 inches minimum between opposing counters, cabinets, appliances or walls in a pass-through kitchen, and 60 inches in a U-shaped kitchen2. Measure at the narrowest point, including handles, and repeat with the dishwasher and oven doors open.
Does the ADA apply to a kitchen in a private home?
No. A 2015 HUD report notes that ADA coverage does not extend to individually owned or leased housing such as single-family homes1. The 2010 standards are still useful benchmarks, such as the 34-inch maximum work surface2. Local codes and any public funding rules may differ.
How high should a counter be for a seated cook?
The ADA benchmark is a work surface of 34 inches maximum, or an adjustable surface between 29 and 36 inches, with knee space underneath2. The right height for one person depends on their seat, their lap and the task, so an occupational therapist should confirm it.
What is the least expensive place to start?
Controls and storage are usually the cheapest wins. In a UK study of 48 older adults, 40% reported limits in strength and dexterity4, which lever handles and loop pulls address directly. Moving the 20 most-used items into easy reach costs nothing.
References
Methodology: every figure on this page comes from an independent published source, each link was checked live and matched to a verbatim supporting sentence on October 11, 2026, and the assessment order and difficulty ranking are the author’s own synthesis, as described on the about the founder page.
- HUD Office of Policy Development and Research – Bo’sher L, Chan S, Ellen IG, Karfunkel B, Liao HL. Accessibility of America’s Housing Stock: Analysis of the 2011 American Housing Survey. March 2015.
- U.S. Access Board – ADA Accessibility Standards (2010 ADA Standards for Accessible Design), sections 302, 303, 304, 305, 306, 308, 309, 606 and 804.
- PubMed Central – Moreland BL, Kakara R, Haddad YK, Shakya I, Bergen G. A Descriptive Analysis of Location of Older Adult Falls That Resulted in Emergency Department Visits in the United States, 2015. American Journal of Lifestyle Medicine, published online August 2020.
- International Journal of Design – Maguire M, Peace S, Nicolle C, Marshall R, Sims R, Percival J, Lawton C. Kitchen Living in Later Life: Exploring Ergonomic Problems, Coping Strategies and Design Solutions. Vol 8, No 1, 2014.
- PubMed Central – Hertig-Godeschalk A, Gemperli A, Arnet U, Hinrichs T. Availability and need of home adaptations for personal mobility among individuals with spinal cord injury. Journal of Spinal Cord Medicine 41(1), 2018, published online March 2017.
- Journal of Burn Care and Research – Boroumand S, Katsnelson B, Dony A, et al. Understanding Epidemiological Trends in Geriatric Burn Injuries: A National Multicenter Analysis from NEISS 2004-2022. March 2025.
- PubMed Central – Emad Y, Neef SP, Taylor L, et al. Shedding Light on Falls: The Effect of Lighting Levels on Fall Risk in Long-Term Residential Care Facilities. Journal of Applied Gerontology, August 2025.
- International Journal of Injury Control and Safety Promotion – Aldailami D, Banta JE, McCleary KJ, et al. Predictors of fall-related injuries due to common consumer products among elderly adult emergency department visits in the United States during 2007-2017. June 2022.
Conclusion
An accessible kitchen design checklist works because it replaces impressions with measurements, in the order that layout decisions demand. Circulation, counters, storage and appliances set the footprint. Controls, lighting and flooring then make that footprint easier to use every day. The outcome is a measured, ranked list a contractor or occupational therapist can act on. Done in order, it lowers the effort of daily cooking.
For how this checklist fits the wider picture, return to the accessible kitchen design overview and choose the next decision from there.