Bathroom safety planning is the systematic process of evaluating a bathroom’s layout, fixtures, surfaces, and support points against the user’s movement needs, then making targeted changes to reduce fall risk and improve access. Bathrooms account for a significant share of home fall-related emergency visits each year, with falls representing the majority of those incidents by a wide margin.1 This guide covers the full planning framework – from measuring clearances and placing grab bars to evaluating shower access, selecting fixtures, and funding a renovation – and routes to 23 deeper guides on every dimension.
Quick Answer
What is Bathroom Safety Planning?
Bathroom safety planning is the process of identifying and addressing layout, surface, and support-point gaps in a bathroom before a fall or mobility change forces a reactive decision. It covers clearances, grab-bar placement, shower access, fixture selection, and renovation sequencing.
Why it matters:
Bathrooms combine wet surfaces, height changes at the toilet and tub, and limited maneuvering room – conditions that compound small friction points into measurable fall risk. Planning before mobility changes occur produces better outcomes and lower renovation costs than reacting after a health event.
Key Takeaways
- Bathrooms are the leading source of fall-related emergency visits among home rooms for adults, with falls accounting for the majority of those incidents according to national CDC data.1
- ADA-compliant grab bars must withstand a minimum of 250 pounds of applied force, requiring installation into structural blocking or wall studs – not drywall anchors.2
- A 60-inch turning diameter is the ADA minimum for wheelchair maneuverability inside a bathroom.3
- Bathroom safety planning is most effective as a preventative framework – applied before mobility changes require it, not after a fall or health event forces the issue.
- Grab bars, a curbless shower entry, and a handheld showerhead address the highest-frequency risk zones and can be added without a full structural renovation.
Bathroom Safety Planning in 30 Seconds
| If you are… | Start here |
|---|---|
| Planning ahead while still fully independent | Assess grab-bar placement, shower entry type, and floor surfaces; no renovation required yet |
| Experiencing balance or strength changes now | Get an occupational therapist assessment before modifying; measure clearances against ADA minimums first |
| A wheelchair user or planning for one | Prioritize a 60-inch turning radius, roll-in shower entry, and knee clearance under the sink |
| Working with a small bathroom | Focus on barrier-free shower access and well-placed grab bars; a full turning radius may require wall removal |
| Starting a full renovation | Install structural blocking for grab bars before drywall; layout changes are far less expensive at the framing stage |
What Is Bathroom Safety Planning?
Bathroom safety planning is the structured process of evaluating a bathroom’s floor area, door clearances, fixture placement, surface conditions, and support points against the actual movement demands placed on them – then sequencing modifications by urgency, cost, and structural complexity.
It is not a product checklist. A bathroom safety plan begins with observation: the daily routes into and out of the bathroom, the transfers at the toilet and tub, the reach patterns at the sink and medicine cabinet, and the lighting conditions at night. These observations reveal where friction actually accumulates – not where a product catalog suggests it should.
Bathroom safety planning applies to a wide range of situations. It covers preventative modifications made while a resident is still fully independent, accessibility upgrades made in response to changing mobility, and full renovations designed to ADA or wheelchair-accessible standards. The same underlying logic – route, transfer, clearance, support – applies across all three levels of intervention.
The scope includes layout and floor clearances, grab-bar placement and structural requirements, shower entry design, toilet and sink accessibility, fixture and accessory selection, and the financial planning needed to fund modifications.
Why Bathroom Safety Planning Matters
Bathrooms generate more fall-related emergency visits than any other room in the home, with falls accounting for the large majority of bathroom-related emergency incidents according to national CDC injury surveillance data.1 The risk is highest during transfers – getting in and out of the tub or shower, sitting down and standing from the toilet – where the body moves between weight-bearing positions on surfaces that are often wet.
Falls are the leading cause of accidental injury death among adults 65 and older in the United States.4 The bathroom is the room where bathroom-specific hazards – wet floors, height changes, limited turning space, and inadequate grip points – converge most consistently in a residential setting.
Three specific reasons make planning worthwhile:
- Earlier intervention costs less. Installing structural blocking for grab bars during a wall-open phase costs a fraction of retrofitting into finished walls later.
- Most modifications are reversible or incremental. Grab bars, shower seats, and handheld showerheads can be added or upgraded without structural commitment.
- The bathroom affects daily independence directly. A bathroom that requires hesitation, grip on a towel bar, or outside assistance for transfers imposes real daily costs on independence – not hypothetical future ones.
The majority of adults 50 and older prefer to remain in their current home as they age.5 Bathroom safety planning is the practical mechanism that makes that preference realistic over time.
The 5-Part Bathroom Safety Planning Framework
Bathroom safety planning covers five interdependent dimensions. A decision in one – expanding the floor area, for example – often enables or constrains choices in others. The framework addresses them in dependency order: space first, then structural support, then shower access, then fixtures, then the broader planning and funding process.
1. Space, Layout, and Clearance
The first constraint in any bathroom safety plan is the existing floor area and door width. ADA standards specify a minimum 60-inch turning diameter for wheelchair users, a 36-inch minimum accessible route width, and a doorway clear width of at least 32 inches (36 inches is preferred).2 Standard residential bathrooms often fall below one or more of these thresholds. Understanding the footprint – and which walls are structural versus partition walls – determines which modifications are feasible before any product is selected.
Clearances at the toilet approach (60-inch width minimum, 56-60 inches on the approach side), the shower entry, and the sink approach each have independent requirements that may overlap spatially in a small bathroom. Meeting all three simultaneously may require relocating a fixture, narrowing a cabinet, or removing a partition wall. Measuring these clearances is the necessary first step before any other planning decision is made. Visual layout examples that show these clearances in a real floor plan are among the most useful early planning resources.
Deeper read: accessible bathroom layout dimensions and clearances.
Deeper read: handicap bathroom dimensions, height, and reach.
Deeper read: small accessible bathroom layout planning.
Deeper read: wheelchair-accessible bathroom requirements.
Deeper read: accessible bathroom design examples and layout pictures.
2. Grab Bars and Structural Support
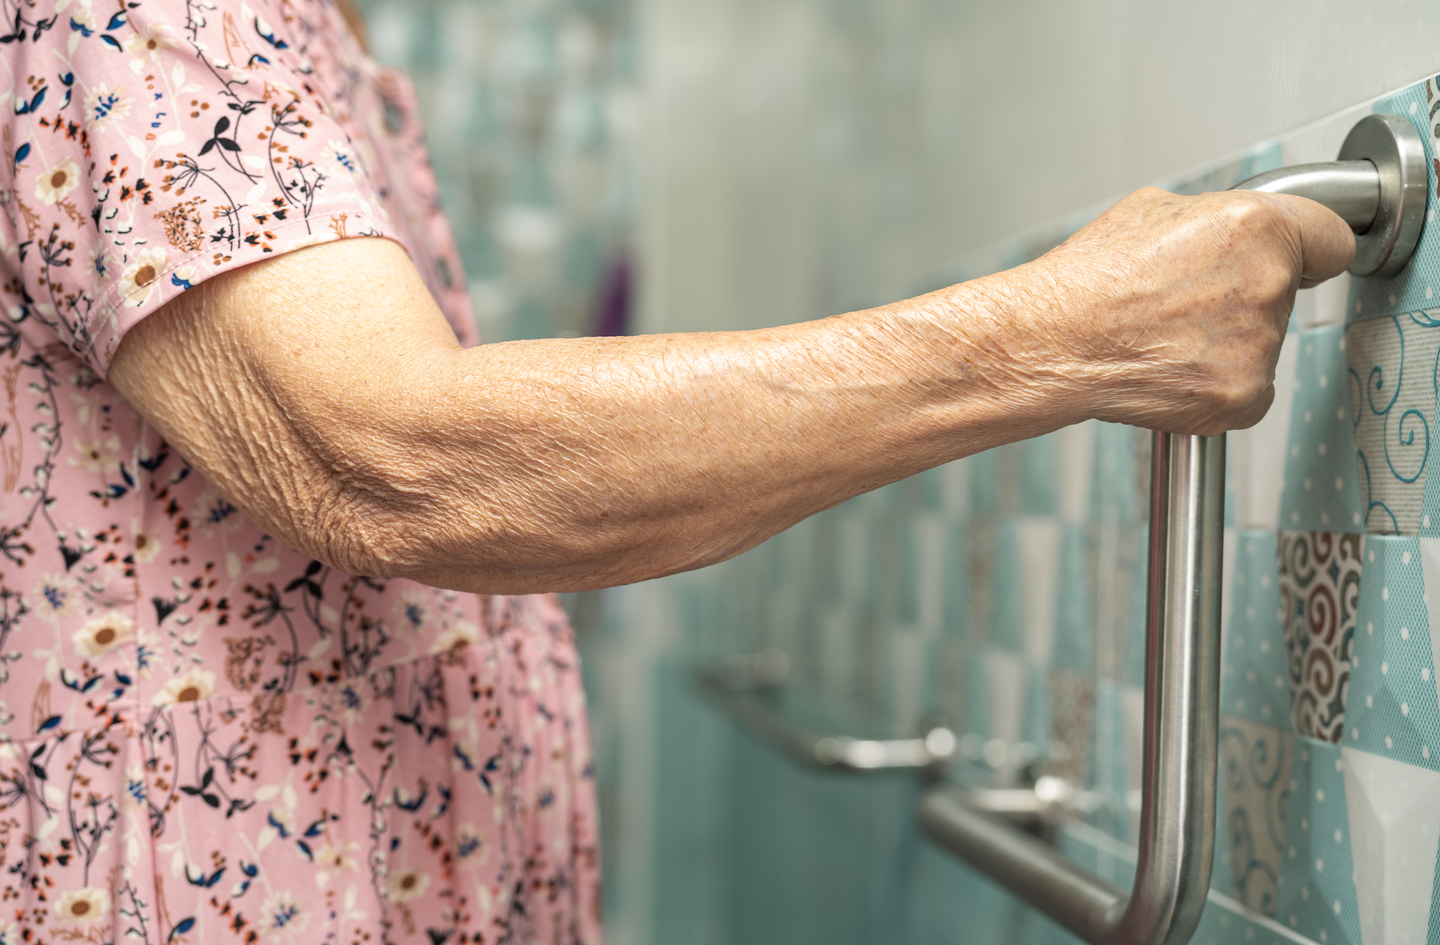
Grab bars are the highest-leverage single intervention in bathroom safety planning. ADA standards require that grab bars withstand a minimum of 250 pounds of applied force in any direction.2 Meeting that requirement demands installation into wall studs or pre-installed blocking – not standard drywall anchors. A bar that fails under load at a critical transfer moment is not a partial safety improvement; it eliminates the safety benefit entirely and can accelerate a fall.
Placement follows distinct maps for each bathroom zone. In the shower, a horizontal bar at 33-36 inches above the floor supports standing balance; a vertical or angled bar near the entry supports the step-in transfer. At the toilet, a rear-wall bar and a side-wall bar both positioned at 33-36 inches off the floor address the sit-to-stand movement. The number of bars, their lengths, and their angles all affect usability – and these decisions depend on the user’s dominant hand, available wall area, and approach direction rather than a standard placement diagram.
Deeper read: how many grab bars are needed in an ADA bathroom.
Deeper read: ADA grab bar placement around a toilet.
Deeper read: ADA bathroom grab-bar requirements explained.
Deeper read: ADA grab bar height and placement explained.
Deeper read: how to choose grab bars for an accessible bathroom.
3. Shower and Bathing Access
Shower entry is the highest-risk single task in the bathroom. Stepping over a curb on a wet floor, with one foot momentarily unsupported, is where the majority of shower falls occur. A curbless (barrier-free or zero-threshold) entry eliminates that transition entirely. A roll-in shower extends this by providing enough floor area for a wheelchair or shower chair to enter without a transfer – requiring a minimum 36×36-inch floor area, with 60×30-inch or larger layouts providing more room for both the user and an attendant if needed.
Shower seating reduces fatigue and the chance of losing balance during bathing. A handheld showerhead on a slide bar allows bathing in multiple positions without turning or reaching. Thermostatic controls or anti-scald valves reduce burn risk during temperature changes. Each of these modifications can be added incrementally. A full roll-in shower, however, requires layout and waterproofing decisions that should be integrated into any broader renovation plan from the start – retrofitting a roll-in shower into a finished bathroom is significantly more expensive than designing for it initially.
Deeper read: ADA bathroom layout with shower planning guide.
Deeper read: handicap bathroom ideas with a walk-in shower.
Deeper read: wheelchair accessible bathroom planning and systems.
Deeper read: wheelchair-accessible bathroom with a roll-in shower.
4. Fixtures, Accessories, and Products
After layout and structural support, the fixtures define the remaining daily friction points. ADA-compliant toilet seat height is measured at the seat surface, not the bowl – the required height range is 17-19 inches, compared to a standard toilet’s 15-inch seat.2 An accessible sink requires knee clearance of at least 27 inches high, 30 inches wide, and 19 inches deep for a forward wheelchair approach, with insulated or covered pipes beneath to prevent leg contact burns.
Lever-style faucet handles, pressure-balance valves, and pull-out drawer storage reduce grip demand and overhead reach requirements. Raised toilet seats, toilet safety frames, and removable shower benches address specific transfer needs without requiring permanent fixture changes. Selecting these products based on load rating, fit to the existing fixture, ease of daily cleaning, and compatibility with the overall layout – rather than product marketing or bestseller rankings – is the core of a functional selection process.
Deeper read: handicap bathroom fixtures for safer daily use.
Deeper read: handicap bathroom accessories for safer daily use.
Deeper read: senior bathroom safety products worth installing.
Deeper read: wheelchair-accessible bathroom sink height and clearance.
5. Planning, Design, and Funding
The planning process itself is a dimension of bathroom safety work. Aging-in-place bathroom design integrates grab-bar blocking, curbless shower entries, and adequate clearances from the beginning of a renovation – rather than retrofitting them after walls are closed and tile is laid. Accessibility modifications made during the framing and rough-in stages cost a fraction of retrofitting equivalent changes into a completed bathroom. HUD’s Fair Housing Accessibility requirements provide additional residential design guidance for new multi-family construction that complements ADA standards.6
For households facing significant renovation costs, federal, state, and local assistance programs may provide grants or low-interest loans for qualifying accessibility modifications. Eligibility requirements vary by program, location, and household income. An occupational therapist assessment before renovation identifies the highest-priority changes and can produce the documentation required for grant applications. Starting the planning process before a health event or mobility change gives the household more time, more options, and more control over both the outcome and the cost.
Deeper read: accessible bathroom ideas for seniors.
Deeper read: small handicap bathroom ideas for daily use.
Deeper read: aging-in-place bathroom design for safer living.
Deeper read: what to plan before a bathroom safety remodel.
Deeper read: grants for disabled bathroom renovation.
How to Choose the Right Bathroom Safety Planning Approach
The most important first decision in bathroom safety planning is scope: targeted modifications to an existing bathroom versus a full accessible renovation. The right scope depends on four factors.
- Current mobility status and likely trajectory. A resident who is fully independent but planning ahead has different time constraints than one whose balance or strength has already changed. Planning ahead allows for incremental, lower-cost changes. Reacting to a health event compresses that timeline significantly and limits the available options.
- Existing floor area and structural constraints. A bathroom with less than 36 square feet of usable floor area, a 28-inch door, or no access to wall framing is a harder candidate for full ADA compliance than one with structural flexibility. Measuring the bathroom before selecting any modifications avoids costly mismatches.
- Wheelchair or rollator clearance requirement. If the bathroom needs to accommodate a wheelchair – now or in the near future – the 60-inch turning diameter and door-width requirements drive the entire layout. These cannot be met by accessories alone and typically require structural work.
- Budget and reversibility preference. Grab bars, shower seats, and raised toilet seats are lower cost and reversible. Structural modifications – wall removal, new waterproofing, relocating a fixture – are higher cost and permanent. The plan should match available budget to the modifications that carry the highest fall-risk reduction for that household.
A practical sequencing rule: start with the highest-frequency, highest-consequence zones. The shower entry and the toilet transfer carry the most daily repetitions and the steepest consequences if something goes wrong. Address those first, then move to clearance improvements and fixture replacements in later phases. Consult a licensed occupational therapist before finalizing any structural modification.
Compare All Bathroom Safety Planning Approaches
| Criteria | Safety accessories only | Targeted modifications | Accessible remodel | Wheelchair-accessible renovation |
|---|---|---|---|---|
| Typical cost range | $200-$800 | $1,000-$5,000 | $5,000-$20,000 | $15,000-$40,000+ |
| Structural changes | None | Minor (blocking, grab bars) | Moderate (shower, door) | Major (layout, walls, plumbing) |
| Reversibility | Fully reversible | Mostly reversible | Partially reversible | Permanent |
| Wheelchair support | Not supported | Limited | Partial | Full – 60-inch turning radius |
| Best situation | Early planning, rental units | Balance or strength changes | Planned independence, new build | Full wheelchair access required |
Choose safety accessories if: the resident is still independent, the bathroom layout is otherwise adequate, and the goal is reducing daily friction without a structural commitment.
Choose targeted modifications if: there are identifiable high-risk transfer points (toilet, shower entry) and structural support for grab bars is the next step.
Choose an accessible remodel if: the bathroom is being renovated anyway, or the current layout cannot support safe daily use with accessories alone.
Choose a wheelchair-accessible renovation if: the resident uses or will use a wheelchair and the bathroom cannot be safely navigated without a full turning radius and roll-in shower entry.
Common Mistakes in Bathroom Safety Planning
Mistake 1: Installing Grab Bars Without Structural Backing
Why it is a mistake: ADA standards require grab bars to withstand 250 pounds of applied force in any direction.2 Standard drywall anchors – including heavy-duty toggle bolts – typically cannot sustain that load under the dynamic, body-weight force of a real fall. A bar that pulls from the wall at the moment of a fall does not provide partial protection; it can accelerate the fall and create a secondary injury risk.
What to do instead: Locate wall studs with a stud finder before installation. If studs are not in the right location, a licensed contractor can install a backing board behind the wall surface during any wall-open phase. Surface-mounted backing plates rated for the required load are also available as a retrofit alternative. Confirm the specific fastener and substrate rating with a licensed contractor before proceeding.
Read more: how to choose grab bars for an accessible bathroom.
Mistake 2: Planning Only for Current Mobility
Why it is a mistake: A bathroom that fits the resident’s current needs may not accommodate a walker, rollator, or wheelchair that becomes necessary in the future. Renovations designed only for current mobility often require a second renovation later – at higher cost and greater disruption – because the layout was not built to accept future modifications at the framing stage.
What to do instead: During any renovation, install the infrastructure for anticipated future needs: wider doorways, pre-installed blocking in shower and toilet walls, and enough floor area for a 60-inch turning radius even if a wheelchair is not needed now. These additions cost very little during active construction and significantly more after walls are closed.
Read more: aging-in-place bathroom design for safer daily living.
Mistake 3: Choosing Tile Based on Appearance, Not Traction
Why it is a mistake: Polished and large-format tile can be visually appealing and significantly slick when wet. Slip resistance in wet conditions varies widely between tile finishes, and smooth polished surfaces generally provide less grip than matte or textured alternatives under the same conditions – a difference that matters most in shower floors and high-splash zones.
What to do instead: Specify matte-finish, textured, or small-format tiles with more grout joints for bathroom floors; these generally provide better wet traction than large polished slabs. Request the wet slip-resistance rating directly from the tile manufacturer before ordering floor tile for any bathroom application.
Read more: what to plan before a bathroom safety remodel.
Mistake 4: Ordering Products Before Measuring Clearances
Why it is a mistake: Many bathroom safety modifications are selected and ordered before the actual floor clearances are confirmed. A shower seat purchased for a 36-inch shower stall that is actually 33 inches, a grab bar ordered for a wall section that holds a recessed medicine cabinet, or a raised toilet seat that conflicts with an adjacent cabinet are common, avoidable errors. These result in returns, reorders, and additional labor cost.
What to do instead: Measure all critical dimensions before selecting any product or planning any modification: doorway clear width, floor area and turning radius, approach space at each fixture, available wall sections for grab bars, and toe and knee clearance under the sink. Record all measurements before any design conversation or purchase decision.
Read more: what size accessible bathroom layout you actually need.
Mistake 5: Skipping the Occupational Therapist Assessment
Why it is a mistake: General bathroom safety frameworks – including this one – address population-level patterns, not individual movement profiles. A person’s specific balance deficits, range of motion, dominant hand, transfer habits, and assistive device use all affect where support is actually needed. A grab bar installed in the wrong location can reinforce an unsafe movement pattern rather than supporting a safe one.
What to do instead: Before finalizing any structural modification, consult a licensed occupational therapist who can observe the resident in the actual bathroom and identify the specific points where support is needed. An OT assessment also produces documentation that may support grant applications or insurance reimbursement for qualifying modifications.
Read more: grants for disabled bathroom renovation.
Best Bathroom Safety Planning Approach by Use Case
Best for Independent Adults Planning Ahead
Proactive planning while still fully independent focuses on observation first: walking the bathroom route at night, identifying where gripping or hesitation occurs, and addressing those points before they represent active risk. Grab bars at the toilet and shower, a non-slip shower floor, and a handheld showerhead cover most priority interventions without requiring structural changes. Pre-installing blocking in the walls during any planned renovation preserves the option for future grab-bar placement at low cost.
Deeper read: aging-in-place bathroom design for safer daily living.
Best for Seniors With Current Mobility Changes
When balance or strength has already changed, the most immediate needs are at the highest-frequency transfer points: the toilet and the shower entry. A raised toilet seat or ADA-height replacement, properly anchored grab bars on both the side wall and rear wall at the toilet, and a curbless or low-threshold shower entry address those points. An occupational therapist assessment is strongly advisable before undertaking any structural modification.
Deeper read: accessible bathroom ideas for seniors: safer layouts.
Best for Wheelchair Users
Wheelchair access requires a systems-level approach: a 60-inch turning diameter, a roll-in shower or tub transfer bench with adequate clearances, knee and toe clearance under the sink, lever-handle controls within reach range, and a doorway clear width of at least 32 inches. These requirements usually demand a full layout evaluation and at least partial renovation.
Deeper read: wheelchair-accessible bathroom with a roll-in shower.
Best for Small Bathrooms
Small bathrooms require prioritization rather than full ADA compliance. Grab bars at the toilet and shower, a barrier-free shower entry, and adequate lighting can often be achieved within a constrained footprint. A full 60-inch turning radius may require wall removal; when that is not feasible, a wall-mounted sink, compact toilet, and pocket or barn-style door can recover enough floor area to improve mobility within the existing footprint.
Deeper read: small accessible bathroom layout: how to use limited space.
Frequently Asked Questions
Where should grab bars go in a bathroom?
ADA guidelines place grab bars at 33-36 inches above the floor in shower and tub areas, with a rear-wall bar and a side-wall bar at the same height range near the toilet.3 Exact placement depends on the user’s approach direction, dominant hand, and transfer pattern. A horizontal bar supports standing balance; a vertical bar near the shower entry supports the step-in transfer. An occupational therapist can evaluate individual placement needs for a specific person and bathroom.
What is the minimum size for an accessible bathroom?
ADA standards require a minimum 60-inch turning diameter for wheelchair users and a doorway clear width of at least 32 inches (36 inches preferred).2 A 60-inch turning circle typically needs a floor area of at least 60 square feet to function in practice. Smaller bathrooms can be made significantly safer with grab bars and curbless shower access, but may not achieve full ADA turning-radius compliance without removing or relocating a wall or fixture.
Can grab bars be installed without opening the wall?
Grab bars must withstand 250 pounds of applied force per ADA standards,2 which requires a structural substrate. If studs are not positioned where the bar needs to go, surface-mounted backing plates rated for the required load can be installed without opening the wall, and provide a code-compliant mounting surface. Drywall anchors alone are typically insufficient for body-weight loads. A licensed contractor should confirm the substrate and fastener rating before installation.
What is the difference between accessible and wheelchair-accessible?
An accessible bathroom includes features that reduce the physical demands of daily use for people with limited mobility – such as grab bars, lever-handle faucets, and appropriate fixture heights. A wheelchair-accessible bathroom specifically provides the 60-inch turning diameter,3 roll-in shower entry, knee and toe clearance under the sink, and approach clearances required for full wheelchair maneuverability. Accessible is the broader category; wheelchair-accessible is a stricter subset with specific dimensional requirements for each fixture zone.
Are there financial assistance programs for bathroom safety renovations?
Yes. Federal programs, state housing agencies, and some local nonprofits offer grants, low-interest loans, or tax credits for qualifying accessibility modifications – including grab bars, roll-in showers, and doorway widening. Eligibility typically depends on income, disability status, age, and modification type. Medicaid Home and Community-Based Services waivers and USDA Rural Development programs may cover costs for qualifying households. Contact the state housing finance agency or an occupational therapist familiar with local programs to identify specific options.
What This Hub Does Not Cover
- Project-specific engineering design or code-compliance certification for a particular home – those require a licensed contractor, structural engineer, or certified accessibility specialist evaluating the actual space.
- Medical advice or occupational therapy for a specific person’s mobility condition – a licensed occupational therapist provides individual assessments that this guide cannot replicate.
- Product brand comparisons or ranked purchase recommendations – the spoke guides cover product selection criteria without affiliate-driven brand rankings.
- Bathroom modifications in commercial or public facilities – ADA requirements for commercial construction differ from residential contexts and are outside this guide’s scope.
References
- Centers for Disease Control and Prevention (CDC) – Nonfatal Bathroom Injuries Among Persons Aged >=15 Years, United States, 2008 (MMWR, 2011)
- U.S. Department of Justice – 2010 ADA Standards for Accessible Design (grab bar load, toilet height, turning diameter, clearances)
- U.S. Access Board – ADA Accessibility Guidelines for Buildings and Facilities (grab bar placement, heights, and clearances)
- National Safety Council – Injury Facts: Falls in the Home and Community
- AARP Public Policy Institute – 2021 Home and Community Preferences Survey
- U.S. Department of Housing and Urban Development (HUD) – Accessibility First: Fair Housing Accessibility Design Requirements
Next Read
Bathroom safety planning is most effective when it starts with observation rather than product selection. The five planning dimensions – space and clearance, grab bars and structural support, shower access, fixtures and accessories, and the broader renovation and funding process – work as a system. A change in one dimension affects the constraints and options in the others, and the sequence matters as much as the individual decisions.
The practical starting point is understanding which approach fits the current situation. Review the approach selection framework above to identify where to begin based on mobility status, bathroom footprint, and available budget.