
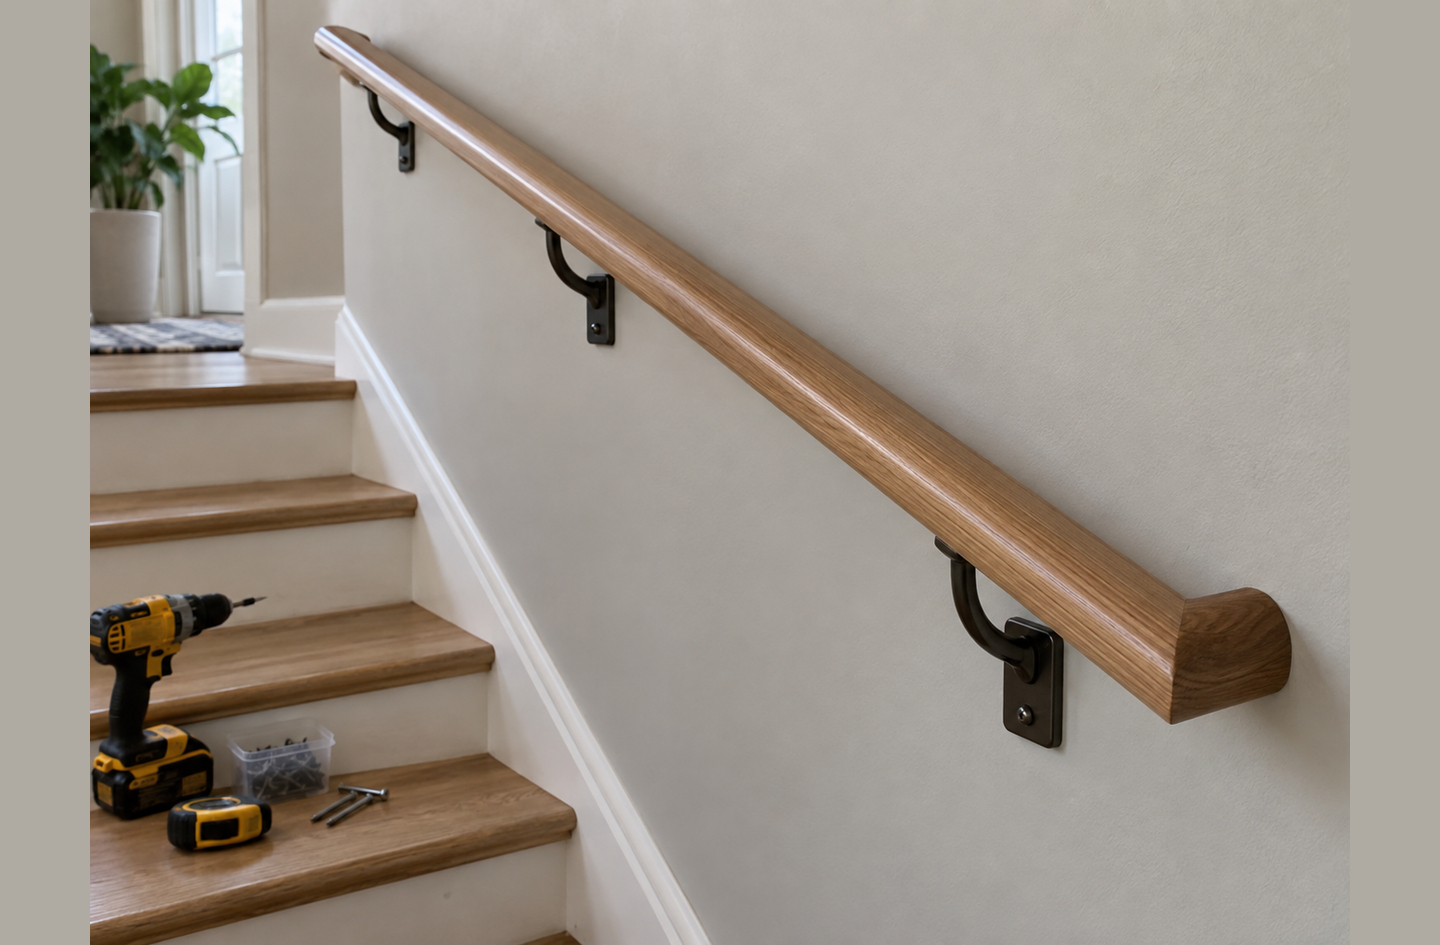
To install stair handrail hardware correctly, the structural work begins before any bracket goes on the wall. The International Residential Code requires handrail brackets to resist a concentrated load of 200 pounds applied from any direction,5 and that force travels a specific path: from your grip, through the rail, through each bracket, and into the wood framing. Knowing where that path terminates determines every other planning decision. For the broader context on how a handrail fits into stair safety as a system, see the overview in senior safety handrails guide.
Quick Answer
What planning steps matter before you install a stair handrail?
Map the load path from grip to framing, locate wall studs at their standard 16-inch spacing,6 identify where blocking is needed when stud positions don’t land at required bracket locations, and select brackets with non-rotating fittings. The IRC requires brackets to handle 200 pounds from any direction,5 so the substrate behind each bracket matters as much as the hardware itself. Structural fastening, code compliance, and project-specific decisions belong with a licensed contractor.
Key Takeaways
- IRC requires stair handrail brackets to resist 200 pounds from any direction;5 that load reaches the wall only through studs or structural blocking.
- Residential studs are typically 16 inches on center,6 so a 48-inch bracket span crosses three stud bays, making stud location the first planning step rather than a last-minute adjustment.
- A bracket that allows the rail to rotate under grip load replicates the failure of a missing handrail even when hardware is physically present.
What to Assess Before You Install Stair Handrail Brackets
This article covers the planning phase of a stair handrail installation: load paths, stud location, blocking needs, and hardware selection. It does not address structural fastening for your specific wall, code compliance in your jurisdiction, or any determination about a particular home or person. Those decisions require a licensed contractor, structural engineer, or occupational therapist. Falls send roughly 4.5 million older adults to emergency departments every year in the United States.1 Before planning your installation in detail, gather these:
- Electronic stud finder, more reliable than magnetic models on drywall thicker than 1/2 inch
- Tape measure to record stud positions and plan bracket spacing
- Camera or notebook to document stud locations before any marks are erased
- Wall material assessment: drywall over wood framing, plaster, or masonry each present different anchoring conditions
- Height reference: the IRC places the required handrail height range between 34 and 38 inches above the stair nosing; the companion article on stair handrail height measurement covers how to establish that reference line before bracket positions are marked
Completing this assessment before purchasing hardware prevents the common outcome of buying brackets sized for one spacing and discovering the studs require another.
Step 1: Map the Load Path Before Choosing Hardware
By the end of this step, you’ll understand the complete structural chain the handrail must form and the reason stud location matters more than bracket aesthetics.
A load path is the sequential chain of structural elements that transfers force from the point of application down to a fixed anchor point. In a stair handrail, the chain runs in one direction: your hand grips the rail, the rail transmits force to the brackets, each bracket transmits force to its wall fasteners, and the fasteners transfer that force into the stud or blocking behind the drywall. Every link in that chain must hold. If any link is weak, the chain fails at that point.
The IRC sets the design requirement at 200 pounds of concentrated load applied in any direction at any point along the top.5 That is the force one person in difficulty places on a single point of the rail. It is not a static number to meet in theory. It is the real loading condition a rail must survive at the moment someone grabs it hard to stop a fall.
The links you need to trace
Work through the chain from grip to wall before you select a single piece of hardware:
- Grip to rail. The rail diameter determines whether a hand wraps around it for a firm grip or only rests on top. Type I graspability standards address this directly, covered in Step 5.
- Rail to bracket fitting. A bracket fitting refers to the hardware assembly connecting the rail to the wall fastener. Fittings vary in how they hold the rail: some allow rotation, some lock the rail in position. That distinction matters under load.
- Bracket to fastener. The bracket plate transfers load to the screw or bolt driven into the substrate. Fastener type and size depend on the substrate material.
- Fastener to stud or blocking. Drywall alone holds nothing meaningful under a 200-pound pull. The fastener must reach wood framing: a stud or a piece of blocking installed between studs.
Verification
You’ve completed this step when you trace the full chain on paper or in your stairwell and identify which link requires the most attention in your specific wall. For most homeowners installing over standard drywall framing, the stud-to-fastener link is the planning constraint that drives all other decisions.
For most homeowners planning a handrail installation, mapping the load path before visiting a hardware store prevents the mistake of choosing hardware by appearance when structural position is what determines the bracket locations.
Step 2: Locate Your Wall Studs and Assess the Framing
After this step, you’ll know where each stud sits behind your staircase wall, how many are available for bracket anchoring across the run, and which positions need blocking to close gaps.
Residential stud framing follows a standard spacing. Standard residential walls place studs 16 inches on center6 measured from the center of one stud to the center of the next. Some older homes and non-load-bearing interior walls use 24-inch spacing. Exterior walls, garage walls, and masonry or concrete substrates present different conditions entirely and require a professional assessment before any bracket installation.
Finding and marking stud positions
- Scan at handrail height. Run an electronic stud finder along the wall at the planned bracket height, moving slowly. Mark each stud center with a small piece of painter’s tape rather than a pencil mark that could become permanent.
- Verify with a second pass. Stud finders produce false positives, especially near electrical wiring or metal plumbing. A second pass, offset by 2 inches horizontally, confirms the reading. If results disagree, probe with a thin finish nail at the marked position before committing.
- Record every stud center across the full run. Measure and write down each stud position from one end of the staircase wall to the other. This map is the input to Step 3.
- Photograph the tape marks. A photo of the marked wall documents stud positions before they are erased or covered.
When studs don’t align with bracket positions
Blocking is horizontal lumber installed between two adjacent studs, cut from the same nominal material as the studs (typically 2×4 or 2×6), to create a solid fastening surface where no stud exists. When your ideal bracket position falls between studs, blocking is the standard carpentry solution. Installing blocking requires opening the wall, cutting and nailing a horizontal member between the adjacent studs, and patching the wall surface before bracket installation begins. This is work a licensed contractor performs. Your job at this planning stage is to identify where blocking is necessary so the professional knows the scope before they arrive.
Knowing the stud map before planning bracket positions separates the homeowners who order the right hardware once from those who re-order after discovering the framing doesn’t cooperate with their initial layout.
Step 3: Plan Your Bracket Positions
After this step, you’ll have a bracket spacing plan drawn against your stud map, with every bracket either landing on a stud or flagged as requiring blocking.
The stud map from Step 2 sets the structural constraints. Bracket positions must land on studs or blocking, full stop. The spacing question is about how many brackets you need and how far apart they sit while still meeting both the structural requirement and the practical limit for rail stiffness.
Bracket spacing: the 48-inch standard and why it follows from stud layout
Industry guidance for residential stair handrails places the maximum bracket spacing at 48 inches. At standard 16-inch stud spacing, 48 inches equals exactly three stud bays, meaning a bracket at every third stud. This alignment is not coincidental. It is the natural consequence of the IRC’s stud spacing standard applied to bracket anchoring practice.
For wood rails, 36-inch spacing is the better target. A wood handrail spanning 48 inches between brackets deflects noticeably under hand pressure. At 36 inches (roughly two stud bays plus a few inches), the same rail feels solid. The difference matters when someone grips the rail at mid-span during a difficult step.
At minimum, any run needs two brackets regardless of length. Short runs of 24 to 36 inches still require a bracket at each end. Longer runs add brackets as spacing and stud positions dictate.
Drawing the bracket plan
- Start from a fixed end point. Mark the bracket position at the top of the stair run or at a wall corner where a stud is confirmed. This is your anchor position.
- Step through the stud map at your chosen spacing. At 16-inch stud spacing and 48-inch maximum, mark every third stud. At 36-inch target spacing, mark every second stud with a one-stud offset where the spacing works out cleanly.
- Flag any required bracket position that falls between studs. These are blocking locations. Write a count of how many blocking installations the layout requires before calling a contractor.
- Count the total brackets. This number drives your hardware order. Add one to account for damage or measurement error during the actual installation.
A bracket spacing plan drawn against the stud map before hardware is ordered prevents the common mistake of placing brackets where they look right rather than where the framing allows.
Step 4: Choose Non-Rotating Brackets and Fittings
After this step, you’ll understand the specific hardware property that determines whether a rail stays fixed under load or spins when someone grabs it in difficulty.
Not all brackets hold the rail against rotation. A non-rotating bracket fitting is a wall bracket whose design physically prevents the rail from spinning around its long axis when gripped hard. It accomplishes this through a set screw, a shaped rail channel, or a clamping mechanism that locks the rail in position. A bracket without this feature holds the rail under light loads but allows it to rotate when a firm grip applies force at an angle.
The distinction matters because a rotating rail trains the user to avoid it. A rail that shifts slightly when touched stops feeling like a support. Research published in PLoS One measured this in direct behavior comparison:
“there was a difference in the use of handrails while descending stairs, with 55% of stair fallers stating that they do not used [sic] handrails compared to 45% of non-fallers.”3
Wharton et al., PLoS One (2025)
Stair fallers were ten percentage points more likely to skip the available rail. A rail that feels unstable is a rail that doesn’t get used, which replicates the structural absence of a handrail from a functional standpoint.
What to look for in bracket construction
- Confirm a set screw, grub screw, or rail clamp is present. A set screw threads into the bracket body and presses against the rail surface. A rail clamp wraps around the profile. Either locks the rail against spin. If neither is present, verify the profile fit prevents rotation before purchasing.
- Test rotation resistance on the actual rail profile. Place the bracket on the rail and apply a firm rotational force without fastening anything. If the rail turns, the bracket needs a set screw or is incompatible with that rail cross-section.
- Verify the bracket’s load rating meets the IRC minimum. The 200-pound requirement5 applies per attachment point. A bracket rated at 150 pounds does not meet it. Confirm the rating covers the full load, not only a static axial pull.
- Cross-check bracket arm length against the clearance requirement. This step connects to Step 5. A bracket that locks the rail but positions it less than 1-1/2 inches from the wall fails on clearance even if the rotation issue is solved.
Bracket construction choice is not only a structural decision. It shapes whether the finished rail communicates stability or uncertainty at the moment a person reaches for it on a difficult step.
Step 5: Confirm Handrail Profile and Wall Clearance
After this step, you’ll know the dimensional requirements governing the rail cross-section and its distance from the wall, and why both affect real grip function rather than code compliance alone.
Type I handrail graspability refers to the IRC dimensional standard for a circular cross-section handrail that a person wraps their hand around fully for support. The outside diameter must fall between 1-1/4 inches and 2 inches.4 A rail thinner than 1-1/4 inches doesn’t give a full hand enough contact surface for a secure grip. A rail thicker than 2 inches prevents most hands from wrapping around it, converting a grasp into a surface push. Both extremes reduce the useful force a person generates when they need the rail most.
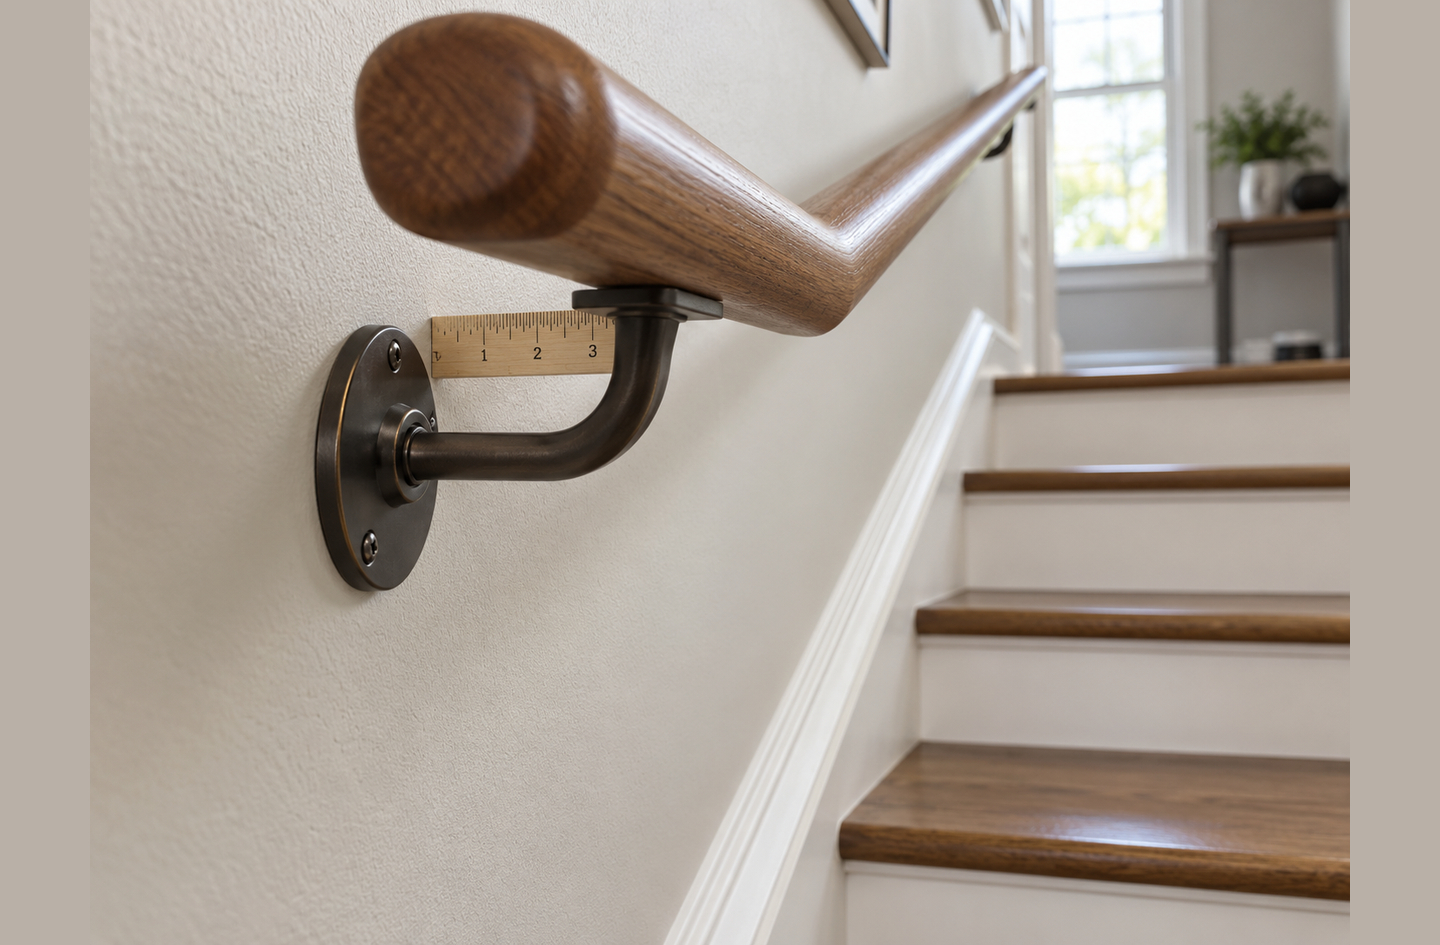
The clearance requirement addresses a second anatomical constraint. The IRC requires at least 1-1/2 inches between the wall surface and the handrail.7 This is knuckle clearance: a person gripping the rail needs space for their fingers between rail and wall all the way down the run. Brackets with short arm lengths position the rail too close to the wall, forcing an awkward partial grip on every step.
Confirming profile and clearance before ordering hardware
- Measure the rail’s outside diameter. If replacing an existing rail, measure the current profile before ordering new brackets. Brackets are sized for specific rail diameters. A 1-1/2-inch round-rail bracket won’t fit a 1-3/4-inch round rail.
- Hold the bracket against the wall and measure the arm length. The gap from wall face to near-rail-face must reach at least 1-1/2 inches. Add a small margin: 1-3/4 to 2 inches is a practical target that absorbs minor wall surface irregularities.
- Account for baseboard and trim. A staircase wall with baseboard running diagonally along the rake adds thickness at the wall surface. The bracket arm must clear the baseboard profile and still maintain the 1-1/2-inch clearance from wall face to rail. Some installations need longer bracket arms or a spacer block behind the bracket plate.
- Cross-reference the height range. The IRC places the required handrail height at 34 to 38 inches above the stair nosing. The companion spoke on stair handrail height measurement covers how to set that reference line, and handrail versus guardrail differences explains how graspability requirements differ between the two types.
Graspability is the dimensional requirement most homeowners skip, and it is the one that decides whether the rail provides genuine support or only the appearance of support at the moment of a difficult step.
Step 6: What to Hand Off to Your Licensed Contractor
This step summarizes what this planning guide covers and what remains outside its scope, so you arrive at the professional conversation with a specific brief rather than a general question.
The planning work in Steps 1 through 5 prepares you to describe the stud layout, blocking requirements, hardware selection, and clearance constraints before anyone picks up a drill. That preparation compresses what a contractor needs to assess in the first site visit. It does not replace the contractor’s judgment or the structural and code decisions that are their responsibility.
What requires a licensed professional
- Structural fastening. Drilling into wall framing, setting structural anchors, and fastening brackets to studs or blocking requires the right tools and the correct fastener specification for your specific wall. Overtightened fasteners split studs; undertightened fasteners pull under load. A licensed contractor specifies the fastener for your wall condition.
- Blocking installation. Installing blocking inside a wall requires opening the wall surface, cutting and nailing horizontal lumber between studs, and patching the finish. Cost and scope vary by wall type. Flag the blocking location count from Step 3 when requesting a quote.
- Code compliance for your jurisdiction. The IRC figures in this article are from the model code. Your home is governed by the locally adopted version, which may include amendments. A local contractor or building department confirms what applies. The companion spoke on residential stair handrail code requirements organizes the questions to raise before work begins.
- Masonry and non-standard substrates. Concrete block, brick, or tile-over-concrete walls require masonry anchors and equipment outside standard residential framing practice. Any wall material other than wood-framed drywall needs professional assessment before bracket selection.
What to bring to the conversation
Bring the stud map from Step 2, the bracket spacing plan from Step 3 with blocking locations marked, the hardware spec sheet, and the rail profile dimensions. These inputs let a contractor scope the work accurately and confirm the plan is structurally sound for your wall before any fastening begins. A specific brief produces a more accurate estimate than a general one.
The planning work here doesn’t shortcut the professional’s role. It sharpens the questions you bring to that conversation, which is a better outcome than arriving without a stud map and a bracket plan.
Common Planning Mistakes
Most installation errors trace back to planning decisions made before the first bracket goes on the wall.
Fastening brackets into drywall without reaching framing
Drywall anchors handle decorative loads, not 200 pounds applied at an angle. A bracket anchored to drywall alone may hold in everyday use and pull out under the load it was installed to handle. Every bracket must reach a stud or blocking, confirmed with a stud finder before any fastening begins.
Choosing decorative brackets without checking for rotation
Decorative and functional brackets share retail shelf space. A bracket that looks substantial may have no set screw or locking mechanism. Test rotation resistance on the actual rail profile before purchasing, or confirm the anti-rotation spec in the product datasheet.
Skipping the clearance measurement
Ordering brackets before verifying arm length against the 1-1/2-inch minimum7 and the actual wall profile (including baseboard) produces brackets too short for the clearance requirement or too long for the available mounting surface. Both require a second order.
Treating stud location as something to figure out during installation
The assumption that “studs are around 16 inches apart and it’ll work out” produces a bracket plan that depends on luck. In many stair walls, framing doesn’t align with ideal bracket spacing for the run length. Mapping studs first and building the plan from that map eliminates the re-planning that happens after the first bracket is already on the wall.
Ordering hardware before confirming blocking scope
A plan requiring one or two blocking installations changes project scope, timeline, and cost. Discovering this after hardware is ordered and a contractor is scheduled creates either a delay while blocking is installed first or a revised layout that the stud map doesn’t support. Step 3 surfaces the blocking count before any ordering happens.
Frequently Asked Questions
What does the load path mean in a stair handrail installation?
The load path is the structural chain from grip to wall: rail, bracket fitting, fastener, and stud or blocking. The IRC requires the full chain to handle 200 pounds applied from any direction at any point along the top.5 A weak link at any point, whether a loose fastener, a drywall-only anchor, or a rotating bracket, breaks the chain at the moment it matters most.
How far apart should stair handrail brackets be?
Industry guidance for residential installations sets the maximum at 48 inches. At standard 16-inch stud spacing,6 48 inches equals three stud bays, making a bracket at every third stud the typical layout. For wood rails, 36 inches is the better target: a 48-inch span deflects noticeably at mid-span under hand pressure. Any run requires a minimum of two brackets.
What is blocking in a stair handrail installation?
Blocking is horizontal lumber installed between two adjacent wall studs to create a fastening surface at positions where no stud falls. It is cut from the same nominal material as the studs, typically 2×4 or 2×6, and is nailed between studs inside the wall. Installing blocking requires opening the wall surface and is work for a licensed contractor.
What is Type I handrail graspability?
Type I graspability is the IRC’s standard for a circular handrail cross-section a person wraps their hand around fully. The outside diameter must fall between 1-1/4 and 2 inches.4 Below 1-1/4 inches, there is not enough contact surface for a full hand grip. Above 2 inches, most hands cannot wrap around the rail and grip it securely.
Can I plan a stair handrail installation without a contractor?
This article covers the planning phase: load path mapping, stud location, bracket spacing, hardware selection, and clearance. Structural fastening of brackets to framing, blocking installation, and code compliance for a specific home require a licensed contractor. The IRC requires brackets to resist 200 pounds from any direction,5 and delivering that load safely is contractor work.
Limitations and Edge Cases
- This article addresses wood-framed drywall stair walls. Masonry, brick, concrete block, and plaster-over-lath walls require different anchor systems and a professional assessment before any bracket selection.
- The IRC figures cited are from the model code. Locally adopted versions may include amendments or stricter requirements. Confirm which code edition governs your jurisdiction before beginning work. See the sibling spoke on stair handrail code requirements for the questions to verify.
- The planning steps here are for standard residential stair handrails. Commercial buildings follow IBC rather than IRC, with different section references and local enforcement.
References
Methodology: every figure below comes from an independent published source and links to the page that carries it; figures were verified against the source text at time of writing, and the article reflects engineering-informed educational analysis reviewed by the founder.
- CDC – Older Adult Fall Prevention: Data & Statistics. National Center for Injury Prevention and Control. Current.
- PubMed Central – Solaiman RH, Irfanullah E, Navarro SM, et al. Rising incidence of stair-related upper extremity fractures among older adults in the United States: a 10-year nationwide analysis. Osteoporosis International, 2023.
- PubMed Central – Wharton E, O’Brien T, Foster RJ, et al. “I don’t know if it makes a difference to safety?” A mixed-methods study on older adults’ experiences of home stair falls. PLoS One, 2025.
- UpCodes – IRC R311.7.8.5 Grip Size. International Residential Code 2021.
- UpCodes – IBC Section 1607.9.1.1 Loads on Handrails, Guards, Grab Bars and Seats. International Building Code 2021.
- JAspektor – IRC R602.3 Stud Spacing and Wall Framing. International Residential Code 2024.
- UpCodes – IRC R311.7.8.3 Handrail Clearance. International Residential Code 2021.
Conclusion
Planning to install a stair handrail is primarily a structural mapping exercise. The load path runs from grip to wall framing through rail, bracket, and fastener, and each link in that chain has a code requirement and a practical implication for how the finished rail performs. Studs at 16 inches on center set the geometry; bracket selection determines whether the rail stays fixed under a firm grip; graspability and clearance dimensions determine whether a hand wraps around it or pushes against it.
For how this installation fits into stair safety as a whole system, see the overview in senior safety handrails guide.