
Stair handrail height is measured from a specific point on the stair surface: the nosing. That leading edge of each tread is the reference both the International Residential Code and the ADA accessibility standard use, and both independently specify the same 4-inch compliant window: 34 to 38 inches above the stair nosing.12 For a broader overview of how handrail planning fits a complete stair route, see the planning guide for Senior Safety Handrails. Within that 4-inch window, the exact height you choose shapes how your arm reaches the rail, how your elbow angle distributes load, and how much effort the grip asks of you on every trip up or down.
Quick Answer
How is stair handrail height measured?
Stair handrail height is measured vertically from the nosing (the leading edge of the stair tread) to the top of the handrail gripping surface. The standard residential range is 34 to 38 inches, per IRC Section R311.7.81 and ADA Section 505.4.2 Within that range, the specific height affects grip angle, the force your arm transmits to the rail, and how much elbow bend the reaching motion requires during ascent and descent.
Key Takeaways
- Measure from the stair nosing (the leading tread edge), not from the flat tread surface behind it and not from the floor below.
- The 34-to-38-inch range is specified by both IRC R311.7.8 and ADA Section 505.4, two independent standards that arrived at the same 4-inch window.12
- Heights near the 34-inch minimum suit a more bent-elbow reach; heights near 38 inches suit a more upright posture but require faster hand movement to catch the rail during a stumble.
- Locally adopted codes govern the actual requirement; verify the applicable version with your building department or a licensed contractor before any modification.
- Measurement tells you where the rail sits. Whether the rail serves a specific person on a specific stair requires an individual assessment by a qualified professional.
Before You Begin
You need a tape measure that reaches at least 5 feet. A standard contractor tape works well; a 6-foot folding rule works in tight spots. Bring a notepad or phone to record readings. If the stair has a carpet runner covering the nosings, a small flashlight helps you find the leading tread edge clearly.
This process covers planning and documentation, not installation. Any change to the rail’s height, mounting brackets, or wall attachment belongs with a licensed contractor who knows the local code and can assess the wall framing behind the mount. Stair-related injuries account for roughly one million U.S. emergency department visits each year,8 and stairs rank as the top-rated injury location in the United States for adults 65 and older.5 Getting the measurement right is the first step in a larger conversation, not a substitute for it.
Expect 10 to 15 minutes for a standard residential stair with one straight run and no landings. A stair with a landing or a turn takes slightly longer because each run section deserves its own readings.
Step 1: Locate the Stair Nosing
The stair nosing is the leading edge of each tread, the front edge of the horizontal surface you step on. On most residential stairs, the nosing projects slightly beyond the riser (the vertical face connecting one tread to the next). Look at a step from the side: the nosing is the small horizontal overhang at the tread front, where the step surface meets open air.
Finding the nosing on your stair:
- Stand beside the stair and look along the slope from the side. The nosings form a sloped line running from the bottom tread to the top of the run.
- On a carpeted stair, the nosing is where the carpet wraps around to the front face of the riser. Slide your finger along the front of a tread until you feel the edge transition.
- On an open-tread stair with no riser, the nosing is simply the front edge of each tread board.
- On a stone or tile stair, look for the finished leading edge of the tread surface, which often has a different texture or a bullnose profile to reduce slip.
Why the nosing is the reference point: handrail height is measured from the sloped plane connecting all the nosings, not from the floor below and not from the flat tread surface back from the nose. The International Residential Code specifies handrail height “measured vertically from the sloped plane adjoining the tread nosing.”1 The ADA uses the same reference: “vertically above walking surfaces, stair nosings, and ramp surfaces.”2 Both standards trace back to the same physical reference point.
The practical implication: a tread with a 10-inch run depth has 10 inches of horizontal distance between the nosing and the back of the tread. Starting the tape at the wrong edge introduces up to 10 inches of horizontal error. That error translates to a significant vertical difference when you read up to the rail along a sloped surface. A rail at 36 inches above the nosing reads as 46 inches if your tape begins at the tread back. The reference matters.
One more point about nosing condition: on older residential stairs, individual treads sometimes cup, sag, or wear unevenly. Measure from a nosing in good condition. Any tread whose nosing is damaged, soft, or structurally suspect is a separate item for the contractor to assess before the broader rail question gets resolved.
After locating the nosing on two or three treads near the top, middle, and bottom of the run, you’re ready to measure. A consistent nosing line confirms the stair geometry is predictable. A line where some treads noticeably vary in nosing position suggests the stair itself may need attention beyond the rail.
Step 2: Take the Vertical Measurement
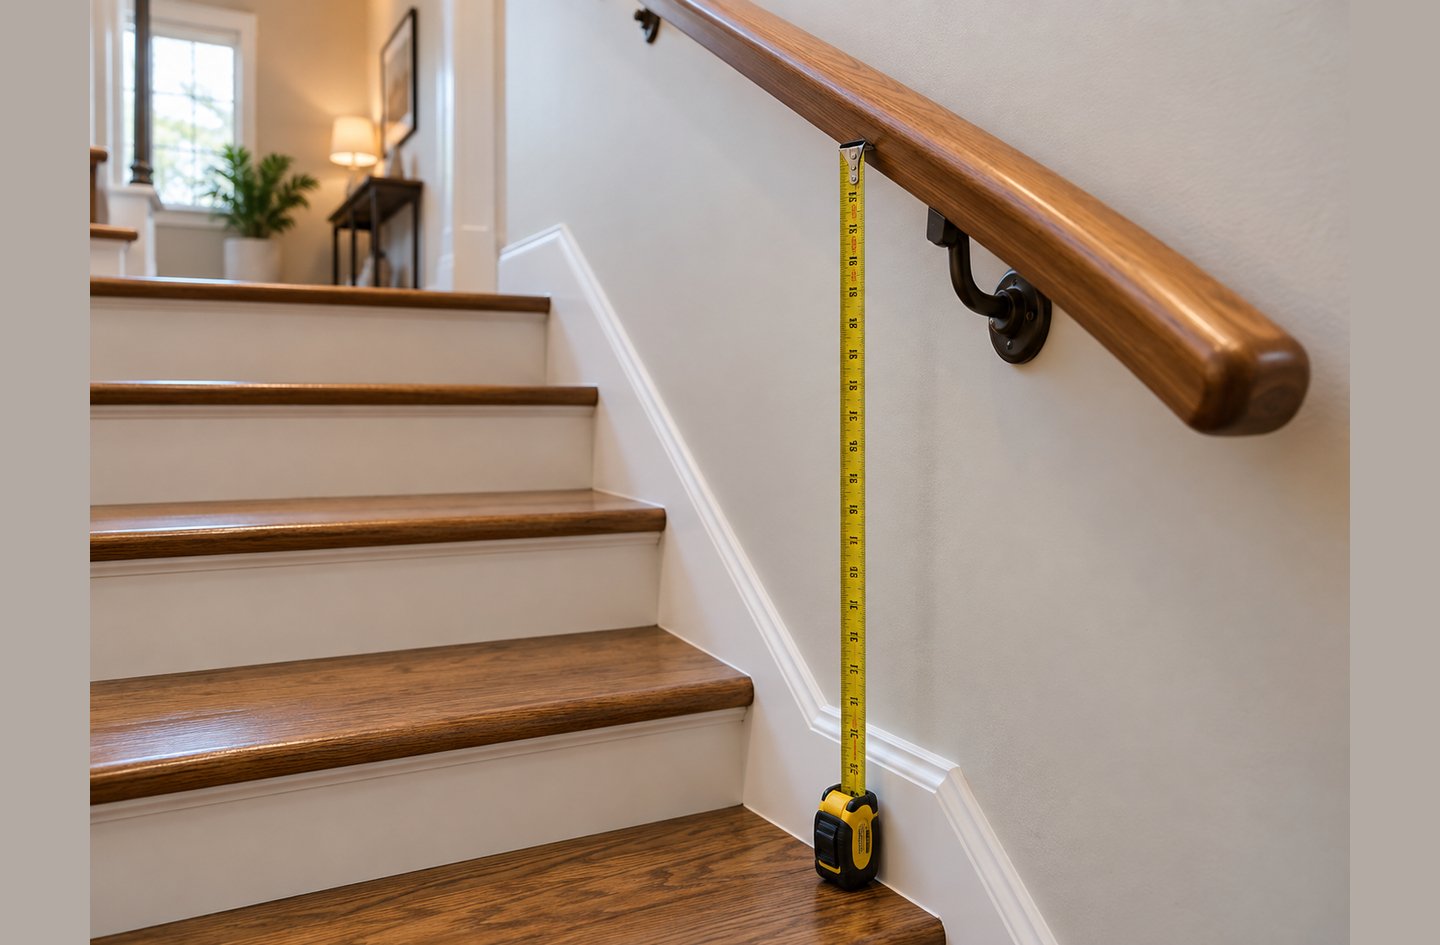
With the nosing located, take a plumb measurement from the nosing to the top of the handrail gripping surface. “Vertical” means plumb (straight up), not perpendicular to the stair slope.
This distinction matters for accuracy. A handrail runs at the stair’s slope angle, typically somewhere between 30 and 38 degrees from horizontal on a standard residential stair. If you hold the tape measure perpendicular to the rail (following the stair’s angle), you get a shorter reading than the actual plumb height. On a stair at 35 degrees, a rail at 36 inches plumb reads as roughly 29.5 inches when measured perpendicular to the slope. The IRC and ADA both specify the height in the plumb direction.12 Measuring perpendicular produces an undercount that can make an out-of-range rail appear compliant.
Measurement steps:
- Rest the end of the tape at the tip of the stair nosing on a mid-run tread. Hold the tape end firmly at the nosing edge.
- Extend the tape straight up, keeping the tape plumb. A level held against the tape confirms vertical alignment. On most stairs, holding the tape steady by hand and sighting it against a vertical wall surface works well enough for a planning measurement.
- Read where the tape meets the top of the gripping surface of the handrail. On a round or oval rail, this is the topmost point of the profile where the palm rests. On a flat-top rail with a rounded lower section, this is the highest point of the area your hand contacts.
- Note the reading, the tread number, and the location on the run.
What counts as the gripping surface: the gripping surface is the part of the rail your hand wraps around, not decorative elements above it. Some rails have a finish cap or a post extension that sits above the gripping profile. Measuring to the top of the decorative cap inflates the reading and can make a below-range rail appear compliant. Always measure to the part the hand actually contacts.
How many measurements to take: one mid-run reading gives a representative number for a straight run. Three readings at the top, middle, and bottom of the run show whether the height is consistent along the installation. On a well-installed rail parallel to the stair slope, all three readings agree to within about 1 inch. A spread of more than 2 to 3 inches across the run suggests the rail is not installed parallel to the slope, which is a separate question for the contractor.
On a stair with a landing or turn, measure each straight run section independently. The handrail height refers to each section’s nosing line. If the slope angle changes between sections (uncommon but not rare in split-level homes), each section has its own effective height relationship. Measure each at its own mid-run tread and record them separately.
Step 3: Check Your Reading Against the 34-to-38-Inch Range
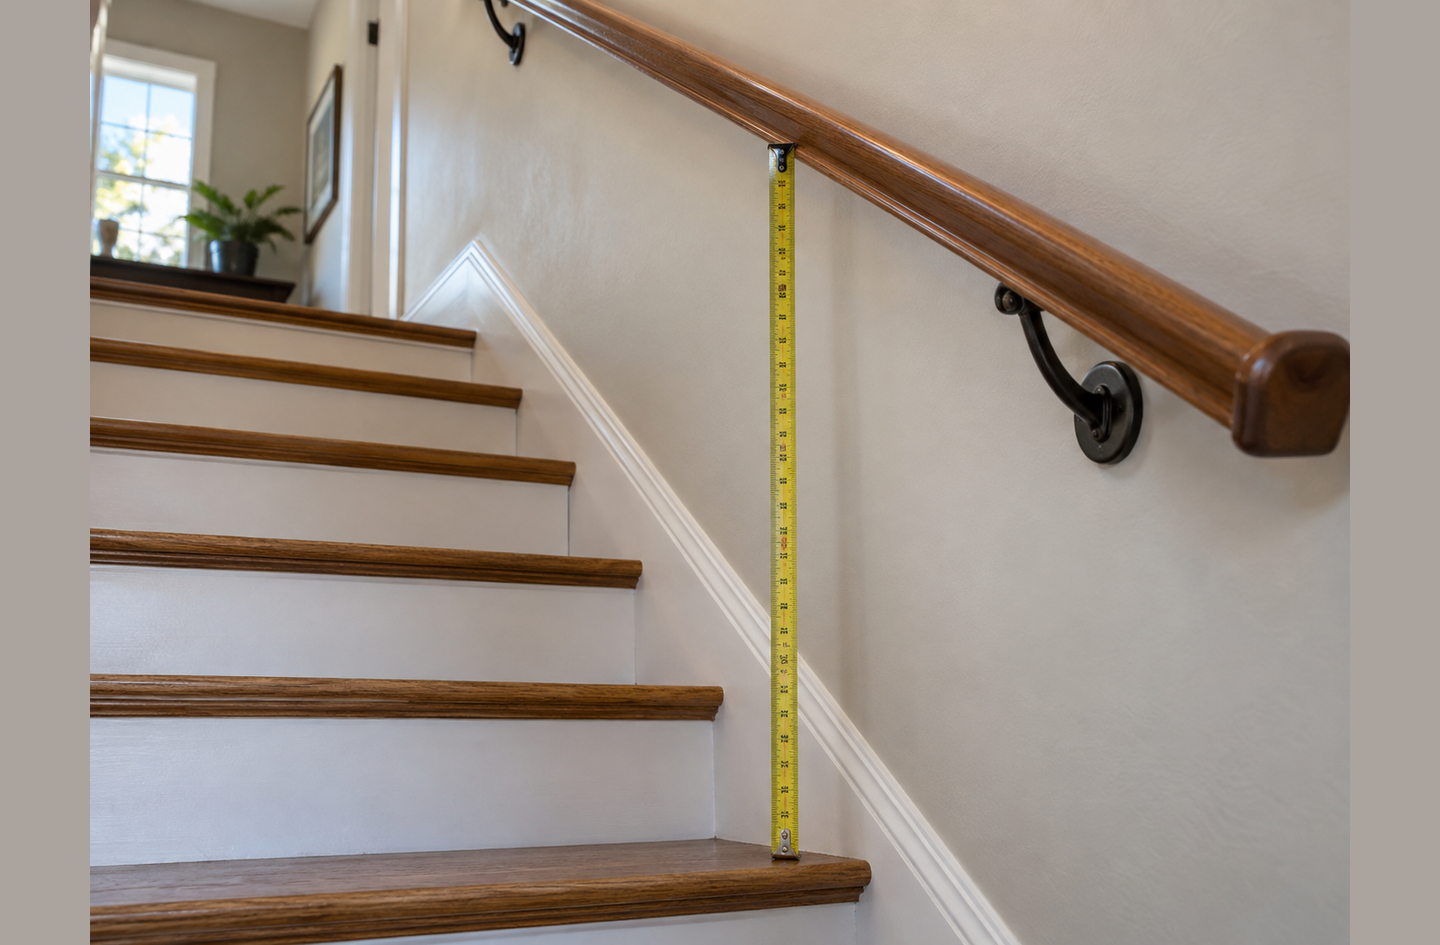
Once you have a number, compare it to the 34-to-38-inch window. The International Residential Code, Section R311.7.8, states that handrail height “shall be not less than 34 inches (864 mm) and not more than 38 inches (965 mm),” measured from the nosing plane.1 The 2010 ADA Standards for Accessible Design, Section 505.4, specify the same window: “Top of gripping surfaces of handrails shall be 34 inches (865 mm) minimum and 38 inches (965 mm) maximum vertically above walking surfaces, stair nosings, and ramp surfaces.”2 Two independent standards bodies arrived at precisely the same 4-inch zone.
| Standard | Gripping Surface Height | Reference Point | Scope |
|---|---|---|---|
| IRC Section R311.7.81 | 34 to 38 in. | Stair nosing (sloped plane) | U.S. residential construction |
| ADA Section 505.42 | 34 to 38 in. | Stair nosings and walking surfaces | U.S. accessible design |
A reading below 34 inches means the rail sits below both minimums. Reaching down to a low rail changes the mechanics of the grip: most adults bending the wrist downward to reach a rail well below elbow height transmit load less efficiently through the arm during a stumble recovery. The grip feels less secure because the arm’s leverage geometry works against the braking direction.
A reading above 38 inches places the rail above both maximums. At that height, reaching up raises the shoulder above its natural resting position, which shifts the posture of the trunk and changes where force concentrates during a recovery. For shorter individuals, a rail above 38 inches can require a near-straight-arm reach that transfers load primarily through the shoulder joint rather than distributing through the elbow and wrist as well.
Within the 34-to-38-inch range, neither the IRC nor the ADA specifies a single “ideal” height. The range exists because body dimensions vary. A person who stands 5 feet 2 inches and a person who stands 6 feet 2 inches feel a different grip angle at the same rail height. Person-specific preferences within the compliant range are decisions best made in conversation with a qualified professional who observes actual grip and posture on the specific stair.
A note on locally adopted codes: the IRC is a model code. Individual jurisdictions adopt it, often with local amendments or on a delayed edition cycle. The 34-to-38-inch range is widely adopted across the U.S., but your specific municipality may have accepted an amended version. Before any installation or modification, verify the locally adopted requirement with your building department or a licensed contractor familiar with local code. A measurement within the IRC range that does not match a locally amended requirement still has a compliance issue.
Step 4: How Height Affects Reach, Posture, and Leverage
Height is not only a compliance number. Within and outside the compliant range, where the rail sits changes how your body reaches the gripping surface, how your elbow angle distributes the load, and how the grip transmits force during ascent and descent.
Elbow angle and the mechanics of grip
When a handrail sits near the 34-inch minimum, most adults reach it with the elbow bent at roughly 90 degrees or less while standing upright on a mid-run tread. A moderately bent elbow distributes load across the elbow and shoulder joints during a pulling motion going up, and brakes the descent by transmitting downward pressure efficiently through the bent-arm geometry.
At 38 inches, the arm extends higher before gripping. For individuals with shorter arm spans, this means a straighter arm with the shoulder raised slightly. For taller individuals, 38 inches remains a comfortable, natural-reach height. The mechanical difference matters most in a stumble: a more extended arm pressing down on a high rail concentrates more force at the shoulder joint. A moderately bent arm shares the braking load more broadly. Neither geometry is universally superior; the relevant question is which height matches the person’s natural arm position when standing on that specific stair.
Research on reaching speed during balance recovery
A 2019 study by Komisar, Maki, and Novak in Applied Ergonomics examined how handrail height affects the timing and speed of reach-to-grasp balance reactions during slope descent. The researchers found that participants compensated for the increased hand-to-rail distance with higher rails by increasing peak upward hand speed, and decreasing vertical overshoot after contact.7 The reaching time to contact the rail did not change significantly with height. In practical terms, users adapt to a higher rail by moving the hand faster. The adaptation requires physical effort and changes the contact dynamics. The takeaway for planning: a rail within the 34-to-38-inch range does not eliminate the adaptation cost, but staying in the range keeps the compensation manageable for most adults.
“A handrail is pivotal for stair safety, providing a sense of security and stability.”
Mulliner, O’Brien, Maliene, Maganaris, and Mason, Healthcare (MDPI), 20256
Posture, trunk load, and center of gravity
Most people lean slightly forward during stair descent. A rail near the bottom of the compliant range keeps the reaching arm closer to the body’s center of gravity, which many people find more stable when relying heavily on the rail. A rail near the top of the range suits a more upright descending posture, where the arm reaches forward and slightly upward rather than primarily upward.
Neither posture is inherently safer for everyone. The relevant variable is the individual’s balance, strength, and habitual descent posture on that specific stair. An occupational therapist observing actual stair use brings information no measurement alone supplies. That observation becomes particularly important when the person using the stair has a condition affecting balance, grip strength, or joint range of motion.
Horizontal reach distance from the user’s body to the rail
Handrail height standards address the vertical dimension. The horizontal distance from the user’s body to the gripping surface (how far they must reach sideways to hold the rail) depends on where the rail is mounted relative to the stair’s walking path. A rail mounted too far from the stair center forces a lateral lean to grip it, which shifts the center of gravity in a different direction than the person is trying to stabilize. IRC specifies that handrails must have a clearance of at least 1.5 inches between the gripping surface and the wall, to allow the hand to wrap fully around the rail.1 That clearance affects grip quality as much as height does. Document both the vertical height and the wall clearance when preparing notes for a professional review.
Step 5: Document What Needs a Professional’s Input
After measuring, you have a height number. The number tells you where the rail sits relative to the 34-to-38-inch standard. Here is what the number alone does not tell you:
- Whether the rail is properly anchored to the wall framing. The IRC requires handrails to resist a single concentrated load of 200 pounds applied in any direction at any point.1 Bracket spacing and the type of wall substrate determine whether that requirement is met. This is a structural question for a licensed contractor or engineer.
- Whether the rail’s profile is graspable. Round or oval profiles between 1.25 and 2 inches in diameter generally allow the fingers to close around the rail. Decorative rails with wide flat tops or sharp corners change the grip mechanics regardless of height.
- Whether the height works for the specific person using the stair. A measurement in the compliant range does not confirm the rail serves the individual’s actual reach, grip, or balance needs.
- Whether locally adopted code differs from the IRC/ADA 34-to-38-inch range. Verify the current local requirement with the building department.
- Whether the stair configuration triggers a requirement for a rail at all under local code. The trigger condition (number of risers, total rise height) varies by jurisdiction and code edition.
What to record and bring to a professional conversation:
- Height reading at the top tread, mid-run, and bottom tread (in inches)
- Horizontal clearance between the gripping surface and the wall (in inches)
- Whether the rail runs continuously from the full top to the full bottom of the stair run, or has breaks at posts, landings, or transitions
- The rail profile type (round, oval, flat-top, decorative)
- Any signs of movement or looseness in the brackets when the rail is loaded
- The wall material behind the mount (drywall over studs, masonry, plaster)
Stair-related upper extremity fractures among U.S. older adults increased 56% between 2012 and 2021, with 89% of those injuries occurring in the home.4 Documentation prepared before the contractor or occupational therapist visit shortens the time needed to assess the stair and helps the professional focus on the decisions only they can make. Measurement is the beginning of the conversation, not the end.
Common Stair Handrail Height Measurement Mistakes to Avoid
Five errors come up often enough in handrail measurement to name specifically.
Measuring from the tread flat instead of the nosing
The nosing is the leading edge of the tread, not the flat tread surface behind it. A tread with a 10-inch run depth has 10 inches of horizontal distance between the nosing and the tread back. Starting the tape from the wrong point introduces that horizontal distance as error, which translates to a measurable vertical difference along a sloped surface. On a stair at 35 degrees, a 10-inch horizontal error at the base produces roughly a 7-inch vertical error in the reading. A rail at 36 inches above the nosing reads as 43 inches if the tape starts from the back of the tread.
Measuring perpendicular to the slope instead of plumb
The IRC and ADA both specify height in the vertical (plumb) direction.12 A tape held perpendicular to the stair surface measures the shorter dimension along the slope face, not the plumb height. On a stair at 35 degrees, the perpendicular reading is about 18% shorter than the plumb reading. A rail at 36 inches plumb reads as approximately 29.5 inches when measured perpendicular. This makes a compliant rail appear out of range, or a slightly above-range rail appear compliant, depending on which direction the error runs.
Measuring to the wrong part of the rail
Decorative cap rails, newel post extensions, and finish pieces sit above the gripping surface on many residential installations. Measuring to the top of a decorative element inflates the reading and gives a false pass for a rail whose gripping surface is actually below the minimum. The measurement goes to the top of the part the hand contacts during normal use. On a round profile, this is the topmost point of the circular cross-section. On a profile with a decorative element above, measure to where the hand naturally closes around the rail, not the element’s top.
Taking only one measurement and treating it as the whole run
A single mid-run reading gives a useful representative number for a straight, uniformly built stair. On an older or custom-built stair where the bracket heights were not all set consistently, the reading varies from the top to the bottom of the run. A spread of more than 2 to 3 inches between the top-tread and bottom-tread readings indicates the rail is not parallel to the stair slope. That condition is worth flagging for the contractor. Three readings take less than two additional minutes and give a much clearer picture of the installation.
Treating a compliant reading as a complete answer
A reading within the 34-to-38-inch range confirms the rail sits in the code-specified zone. The reading does not confirm the rail is structurally secure, does not confirm the profile is graspable, and does not confirm the height works for the specific person using the stair. In 2021, falls caused 38,742 older adult deaths in the United States.3 A measurement within the compliant range is a necessary starting point for a safe-feeling handrail installation. On its own, the number is incomplete information. Bring the measurement to a contractor for a structural check and, when individual mobility or balance is a factor, to an occupational therapist for a personal assessment.
Frequently Asked Questions
What is the standard stair handrail height for residential stairs?
The standard residential stair handrail height is 34 to 38 inches, measured vertically from the stair nosing to the top of the gripping surface, per IRC Section R311.7.8.1 The ADA Standards for Accessible Design specify the same 34-to-38-inch range.2 Your locally adopted code governs the actual requirement; verify with your building department before any installation or modification.
How do I measure handrail height from the stair nosing correctly?
Place the tape end at the stair nosing (the leading edge of the tread) and extend the tape straight up, plumb, to the top of the handrail gripping surface. Do not measure perpendicular to the stair slope. Both the IRC and ADA specify height in the plumb (vertical) direction,12 and measuring along the slope produces an undercount of several inches on a typical residential stair.
Does the same height range apply to ramp handrails?
Yes. ADA Section 505.4 applies the 34-to-38-inch gripping height requirement to ramp surfaces as well as stair nosings.2 Residential codes address ramp handrails in separate sections; verify the locally adopted requirement with your building department or a licensed contractor before any ramp installation or modification.
What should I do if my handrail reading falls outside the 34-to-38-inch range?
A reading below 34 inches or above 38 inches places the rail outside both the IRC minimum and maximum.1 Adjusting the height requires moving the mounting brackets, which involves the wall framing behind the mount. Bring your reading to a licensed contractor who can assess the attachment conditions and verify the locally adopted code requirement before making any change.
Do I need a professional to adjust my handrail height?
Yes, for any change to the mounting hardware. The IRC requires handrails to resist a 200-pound concentrated load applied in any direction at any point,1 and bracket placement relative to wall framing determines whether that requirement is met. Any adjustment to height, brackets, or wall attachment belongs with a licensed contractor familiar with local code.
Limitations and Edge Cases
- The standards referenced here (IRC R311.7.8 and ADA Section 505.4) apply to U.S. residential and accessible-design contexts; international building codes specify different ranges for handrail height.
- The measurement process described here addresses geometry only. Structural adequacy of the current mounting (bracket type, fastener load path, substrate condition) requires an in-person assessment by a licensed contractor or structural engineer.
- Person-specific reach, grip, and balance decisions require individual evaluation by a qualified occupational therapist or accessibility specialist, not a code measurement alone.
References
- International Code Council (ICC) – International Residential Code 2021, Section R311.7.8 Handrails. ICC, 2021.
- U.S. Access Board – ADA Standards for Accessible Design, Chapter 5, Section 505.4 Height. U.S. Access Board / U.S. Department of Justice, 2010 (effective 2012).
- Centers for Disease Control and Prevention (CDC) – Nonfatal and Fatal Falls Among Adults Aged 65 Years, United States. MMWR, Vol. 72, No. 35, September 2023.
- BMC Geriatrics (PubMed Central) – Solaiman, M.A., et al. Rising incidence of stair-related upper extremity fractures among older adults in the United States: a 10-year nationwide analysis. BMC Geriatrics, 2023.
- BMC Geriatrics (PubMed Central) – Blanchet, R., and Edwards, N. A need to improve the assessment of environmental hazards for falls on stairs and in bathrooms. BMC Geriatrics, 2018.
- Healthcare – MDPI (PubMed Central) – Mulliner, E., O’Brien, T.D., Maliene, V., Maganaris, C.N., and Mason, R. Older Adults’ and Professionals’ Attitudes Towards Stair-Fall Prevention Interventions. Healthcare, Vol. 13, No. 11, 2025.
- Applied Ergonomics (PubMed) – Komisar, V., Maki, B.E., and Novak, A.C. Effect of handrail height and age on the timing and speed of reach-to-grasp balance reactions during slope descent. Applied Ergonomics, Vol. 81, 2019.
- CED Technologies – Stair-Related Falls: A Forensic Engineering Analysis (citing Gould, C.V., Metzger, R., Werner, B.C., et al. Stair-related injuries treated in United States emergency departments. American Journal of Emergency Medicine, 2018).
Conclusion
The measurement takes less than 15 minutes and produces a number worth knowing before any conversation with a contractor. Whether the rail sits at 34 inches or 38 inches matters less than whether those numbers put the gripping surface in a zone that works for the person using the stair every day. Measurement starts the planning conversation. See the broader picture in Senior Safety Handrails for how handrail height fits into a complete stair route review.