Handicap bathroom fixtures reduce the physical effort of the daily routines bathrooms demand most: getting on and off the toilet, reaching a faucet, and stepping into a shower. Falls account for 81.1% of nonfatal bathroom injuries treated in U.S. emergency departments each year, according to a CDC analysis of national emergency department data1. The toilet is the highest-risk location for older adults, and that risk rises sharply with age. For a broader view of the bathroom environment as a planning system, see the bathroom safety planning overview. This guide covers the fixture decisions that most directly affect reach, transfer support, and daily ease of operation.

Quick Answer
Which criteria matter most when choosing handicap bathroom fixtures?
Reach range, transfer height, and control operation are the three primary filters. ADA Standards specify a toilet seat height of 17 to 19 inches, grab bar mounting at 33 to 36 inches, and a forward reach limit of 48 inches for controls2. Fixtures that match these ranges lower the biomechanical load of transfers and reduce hesitation at the points where bathroom injuries are most likely to occur.
Key Takeaways
- Falls cause 81.1% of bathroom injuries in the U.S.; the toilet transfer is the highest-risk moment for adults over 65, accounting for 36.9% of bathroom injuries among adults 85 and older1.
- ADA Standards set toilet seat height at 17 to 19 inches, grab bar height at 33 to 36 inches, and lavatory rim height at a maximum of 34 inches with 27 inches of knee clearance underneath23.
- Lever and single-handle controls reduce grip demand, which matters because more than half of adults 75 and older have doctor-diagnosed arthritis6.
- Fewer than 1% of U.S. homes have five basic accessibility features installed5 – fixture selection is the most targeted way to close that gap one location at a time.
- Layout compatibility (turning radius, door swing, transfer clearance) must be confirmed before a fixture is ordered, not after it is installed.
Before You Start: Observe the Bathroom Route First
Fixture selection that starts at a product catalog instead of the bathroom itself tends to produce installs that are physically correct but positioned poorly for the way the room is actually used. Before ordering anything, walk the route from the bedroom to the toilet and back. Note where a hand reaches for support, where a footfall requires extra attention, and where the body turns or changes direction. Those are the friction points, and they tell you what each fixture needs to do before you decide what it should look like.
Three things to confirm before selecting any fixture:
- Who will use it. A person with reduced grip strength needs different faucet controls than someone with reduced leg strength. A wheelchair user needs different sink clearance than someone who stands with a walker. The fixture serves the person, not a generalized “accessible” category.
- Which moments carry the most load. Toilet transfers, shower entries, and faucet reaches are the highest-effort moments in a typical bathroom routine. Fixtures near those moments have the most leverage on daily safety and fatigue.
- What the existing layout allows. A wall-mounted sink requires structural backing. A roll-in shower needs a sloped drain and a waterproof subfloor. Confirm structural and spatial constraints before selecting a fixture. A licensed contractor should evaluate suitability for any wall-mounted or anchored installation.
This pre-selection check is the “observation, not renovation” principle applied to fixtures: understand the specific friction points before committing to a product. The bathroom reach and clearance standards guide covers the dimensional framework that should inform those observations.
Step 1: Match Fixtures to Reach and Height Standards
Height and reach are the first engineering filters for any accessible fixture. A fixture installed at the wrong height shifts load onto joints that may already be under stress, and a control placed outside a comfortable reach zone forces a lean or a stretch that introduces balance risk. The ADA Standards for Accessible Design provide the clearest published framework for these dimensions.
Toilet height
A toilet seat height of 17 to 19 inches above finish floor is the ADA-specified range for accessible toilet installations2. Standard residential toilets typically measure 15 inches to the seat, which requires a deeper knee bend and more eccentric load through the hip during the sit-to-stand transfer. “Comfort height” or “ADA height” toilets are manufactured to the 17-to-19-inch range and are widely available as a direct replacement. A raised toilet seat adapter can close the gap on an existing fixture without replacing the toilet, though the structural security of the adapter and the underlying toilet connection should be confirmed before relying on it for a loaded transfer.
Lavatory and sink height
ADA Standards specify a maximum lavatory rim height of 34 inches, with a minimum of 27 inches of knee clearance beneath the basin for a wheelchair approach3. For a standing user, 34 inches is lower than many residential vanity tops (which commonly reach 36 inches) and keeps the faucet within a comfortable forward reach. Wall-mounted sinks can be set at a height that serves both standing and seated users and can be positioned to provide the required knee clearance. Vanity-based sinks at the correct rim height can still provide chair access if the cabinet doors are removed and the drain and supply lines are insulated against contact burns.
Reach ranges for controls
ADA Standards set the maximum forward reach at 48 inches and the maximum side reach at 54 inches from finished floor2. Shower controls, faucet handles, and flush actuators should all fall within the 15-to-48-inch window for forward reach and the 9-to-54-inch window for side reach. Controls mounted too high require a raised arm with the elbow above shoulder level, which reduces grip strength and balance simultaneously. Controls mounted too low require a forward lean from a standing position or a reaching lean from a seated one.
The table below compares key fixture types against their ADA-specified dimensional targets. These figures apply to new accessible construction and renovation intended to meet ADA Standards; a licensed contractor or occupational therapist should confirm how they apply to a specific home.
| Fixture | ADA Height / Reach Target | Typical Residential Standard | Transfer or Reach Benefit |
|---|---|---|---|
| Toilet seat | 17-19 inches above floor | 15 inches (standard) | Reduces hip and knee flexion during sit-to-stand |
| Grab bar (toilet, shower) | 33-36 inches above floor | Not installed in most homes | Provides leverage at elbow height when seated |
| Lavatory rim | 34 inches max; 27 in. knee clearance | 32-36 inches (varies by vanity) | Allows roll-under approach and reduces forward lean |
| Shower / faucet controls | 15-48 inches (forward reach) | Often 48-60 inches (varies by builder) | Reachable without shoulder raise or balance shift |
| Shower floor threshold | 0.5 inches maximum change in level | 1-4 inches (curbed shower common) | Eliminates step-over that interrupts stride |
Sources: U.S. Access Board, ADA Standards for Accessible Design, Chapters 6 and 423. Typical residential standards reflect common builder practice; individual homes vary.
Step 2: Choose Controls That Work Without a Tight Grip
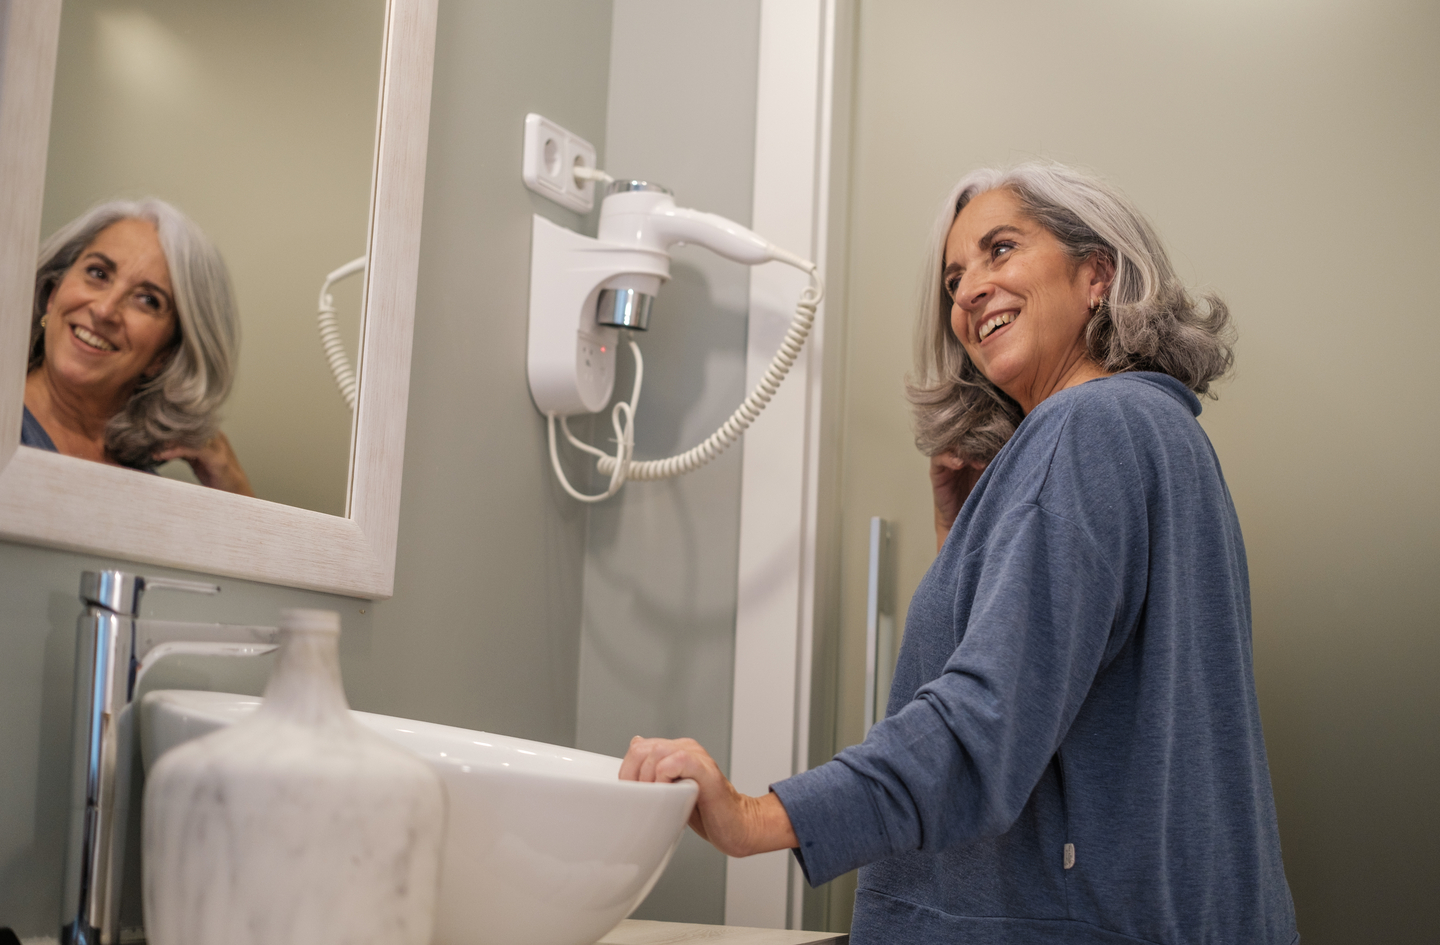
Grip strength declines with age, and grip demand is the hidden variable in faucet, flush, and shower control selection. A round ball-style faucet knob requires a pinch-and-twist motion. A single-lever faucet can be operated with a closed fist, a palm, or even an elbow. That difference is not cosmetic: it determines whether a control can be used reliably in the presence of wet hands, arthritic joints, or early morning reduced coordination.
More than 53.9% of adults aged 75 and older have doctor-diagnosed arthritis, as do 42.3% of adults aged 65 to 74, according to CDC National Center for Health Statistics data from 20226. For a substantial share of the population the bathroom serves, round knob controls are a friction point, not a design choice.
Faucet controls
Single-lever faucets with a long handle are the most broadly accessible option. They allow water temperature and flow to be controlled with one motion from one hand, require no grip, and can be set to a safe pre-mixed temperature when combined with a thermostatic valve. Touch-sensitive and motion-activated faucets eliminate hand contact entirely but require a power source (battery or line) and may require an adjustment period for users unfamiliar with the activation zone. Pull-out or pull-down spout faucets allow water to be directed without repositioning the body, which reduces the lean-and-reach sequence common at fixed-spout sinks.
Shower controls
A thermostatic shower valve with separate volume and temperature controls provides the most accessible shower experience. The temperature is set once and held regardless of supply pressure fluctuations; the volume lever (not knob) starts and stops flow without a grip. Placement matters as much as control type: a shower control mounted 48 to 52 inches from the floor on the short wall (not the shower head wall) can be reached from outside the shower before entering, which eliminates the risk of a cold-water surprise on entry. A handheld showerhead on a slide bar allows height adjustment to seat level and gives the user directional control without moving under a fixed stream.
Flush mechanisms
Elongated toilet bowls with a large flush lever on the approach side are easier to reach than those with a button on the tank lid or a handle on the far side. Automatic flush sensors eliminate the reach entirely but may require a manual override for users who prefer control. Wall-mounted flush plates, common in European-style toilets, can be positioned lower on the wall than a tank-mounted lever and can be designed as large-format push pads rather than small buttons.
“The vast majority of Americans age 50-plus would like to live in their current home (75 percent) and community (73 percent) for as long as possible.”4
AARP Research, 2024 Home and Community Preferences Survey4
Among those planning home modifications in the same survey, 72% specifically identified the bathroom as a priority upgrade4. Controls are the most frequently used fixtures in that upgrade list – faucets and flush mechanisms are operated multiple times daily, making their grip demand a cumulative factor in bathroom fatigue. For guidance on evaluating the durability and quality of these fixtures, see the judging fixture quality guide.
Step 3: Select Fixtures That Support Transfers
A transfer is any move between two positions – sitting to standing, standing to seated, stepping into a shower, or lowering to a tub. Transfers are the highest-load moments in a bathroom routine because they require the body to move through an unstable intermediate position with no fixed support point. Fixtures that support transfers provide a stable, correctly positioned anchor at the exact moment when balance and strength are most demanded.
Grab bars: the primary transfer fixture
A grab bar is the highest-leverage transfer fixture in the bathroom. ADA Standards specify a circular cross-section diameter of 1-1/4 to 2 inches and a wall clearance of 1-1/2 inches to allow a full-hand grip2. At the toilet, the side wall bar should be 42 inches minimum in length, beginning no more than 12 inches from the rear wall and extending to at least 54 inches in front of the toilet, mounted at 33 to 36 inches from the floor2. A rear wall bar, 36 inches minimum in length, provides a push-back support point during the initial lowering phase. At the shower, a vertical bar at the entry and a horizontal bar on the back wall give the user distinct grip options for stepping in versus bracing during washing. Grab bars must be anchored to structural backing – typically a blocking board, a stud, or a solid substrate behind the tile. This is a structural question that belongs with a licensed contractor, not a product decision.
Shower entry fixtures
A curbless (barrier-free) shower eliminates the step-over curb that requires a single-leg balance moment on entry and exit. ADA Standards allow a maximum change in level of 0.5 inches at a shower threshold2. For a wheelchair user, the ADA minimum shower width is 36 inches for a transfer shower or 30 by 60 inches minimum for a roll-in configuration. A fold-down shower seat, installed at 17 to 19 inches from the floor, allows the shower to be used while seated, removing the sustained standing balance demand. For planning the layout dimensions that make these fixtures viable, the bathroom layout dimensions guide covers the spatial requirements in detail.
Tub-to-shower transition decisions
A bathtub requires a high step-over (typically 14 to 18 inches) and a seated-to-reclined transfer that demands significant shoulder and trunk strength to reverse on exit. For many adults with reduced balance or upper-body strength, a tub becomes the highest-risk fixture in the bathroom. Converting a tub enclosure to a curbless shower involves waterproofing, subfloor reinforcement, and drain repositioning, and warrants a contractor evaluation. A tub transfer bench can reduce step-over risk on an existing tub without a full conversion; an occupational therapist can evaluate suitability for a specific person’s strength and balance.
Step 4: Verify Clearance and Layout Fit
A fixture that meets every dimensional standard can still fail in a specific bathroom if the layout does not provide the clearance that makes it usable. Layout compatibility is a constraint that exists before a fixture is chosen, and confirming it before ordering is far less costly than reversing a decision after installation.
Turning radius and floor clearance
ADA Standards require a 60-inch turning diameter for a wheelchair to complete a 180-degree turn in a bathroom2. Even for users who do not use a wheelchair, this clearance standard is a useful planning floor: it ensures that a walker, a rollator, or a transfer aide can be positioned correctly at the toilet or shower without the door or a vanity blocking the approach. Before selecting a wall-mounted sink or a comfort-height toilet, measure the floor clearance between the toilet centerline and the nearest obstruction (vanity, door, tub wall) and between the sink and the toilet. For specific dimensions on doorway widths, turning space, and fixture-to-fixture clearance, the bathroom reach and clearance standards guide covers those numbers in detail.
Door swing and fixture placement
An inward-swinging door in a small bathroom can block access to the toilet or prevent a fallen person from being reached by a rescuer. ADA Standards allow outswing, sliding, or offset-pivot doors to solve this without enlarging the doorway. Before selecting a new vanity or toilet, check whether the existing door swing conflicts with the fixture’s approach clearance. A pocket door or a barn-style sliding door on an accessible track is a lower-disruption alternative to widening the rough opening.
For a full review of how accessible bathroom planning fits into a broader layout strategy, see the safer layout ideas guide.
Step 5: Plan for Maintenance and Long-Term Use
An accessible fixture that requires effort or dexterity to clean can partially undo its own safety contribution. Cleaning is a frequent, repeated bathroom task, and fixtures with complex geometry – deep grout lines around decorative grab bar flanges, recessed ledges in wall-mounted sinks, or intricate textured finishes on shower walls – accumulate biofilm and mineral deposits that require kneeling, reaching, or significant scrubbing to remove.
Surface and finish selection
Grab bars with a smooth or brushed finish and a simple cylindrical profile are easier to wipe clean than those with knurled textures or decorative flanges. Solid-surface or acrylic shower walls, installed without grout lines, reduce cleaning effort significantly compared to tiled wet areas. A toilet with a skirted base (where the trapway is enclosed by the base) eliminates the crevice between the trapway and the floor that collects residue and requires reaching low to clean. A single-hole faucet eliminates the gaps around a three-hole deck plate where mineral deposits accumulate.
Long-term durability and load ratings
Accessible fixtures are used differently from standard fixtures: grab bars receive body-weight loads during transfers, elevated toilet seats are subjected to eccentric lateral loads as the user stands, and shower seats carry sustained static loads during seated use. These are legitimate structural loads. A grab bar spec sheet should state a minimum load rating (typically 250 pounds for residential use); a wall-mounted toilet or shower seat should have a manufacturer-stated weight capacity that exceeds the user’s weight with a safety margin. This is not about worst-case scenarios – it is about confirming that the fixture was designed for the use it will actually see. For a broader framework on evaluating accessible bathroom products by load, fit, and daily use, see the judging fixture quality guide.
Future adaptability
Accessible fixtures work best as part of a bathroom that can be modified as needs change without full reconstruction. Blocking installed in walls during any renovation allows grab bars to be added later without opening the wall. A comfort-height toilet and a curbless shower are usable by anyone, at any mobility level. Specifying these during an active renovation, rather than after a fall or health event, is the lower-cost path. That is the “plan before the crisis” principle applied to fixture selection.
Common Selection Mistakes to Avoid
Most fixture selection errors fall into one of three categories: choosing by appearance before confirming function, specifying to code minimums without accounting for the actual user, or treating each fixture as an independent decision rather than as part of a shared layout.
Choosing a grab bar by finish instead of load path
A grab bar’s finish (chrome, oil-rubbed bronze, brushed nickel) matters for appearance. What matters for safety is its diameter (1-1/4 to 2 inches), its anchor method (into structural backing, not drywall anchors), and its placement relative to the transfer arc. A bar installed at the right height and position on solid backing will outlast and outperform a decorative bar anchored to hollow drywall at the wrong angle, regardless of finish. Confirm anchor points before selecting a bar style, not after.
Specifying ADA-minimum dimensions without accounting for the specific user
ADA Standards describe a minimum accessible envelope – the smallest space and the boundary heights that must be met to serve the broadest range of wheelchair and ambulatory users. They are not optimized for any specific person. A user who is taller will need grab bars at the upper end of the 33-to-36-inch range. A user who is shorter will need them at the lower end. A user who transfers from a specific side will need the grab bar on that side. ADA compliance is a floor, not a design target. An occupational therapist can evaluate the specific person’s transfer mechanics and recommend precise bar placement – a detail that code cannot supply.
Treating the toilet, sink, and shower as independent decisions
The toilet, sink, shower, and door form a shared floor plan. A comfort-height toilet installed without confirming adjacent clearance may block a wheelchair approach. A roll-in shower added to one end of the bathroom may reduce floor clearance at the toilet transfer zone. Selecting each fixture in isolation produces a bathroom that meets individual specs but fails as a system. Review the full layout with all fixtures on a dimensioned floor plan before ordering any of them.
Ordering before confirming the rough-in
Toilets are manufactured to different rough-in dimensions (most commonly 12 inches, but also 10 and 14 inches in older homes). A comfort-height toilet ordered to the wrong rough-in will not fit against the finished wall without plumbing work. Measure the rough-in from the finished wall to the floor drain center before ordering any toilet replacement.
What Well-Chosen Handicap Bathroom Fixtures Accomplish
A well-selected set of accessible bathroom fixtures produces a bathroom that is simply easier to use – not one that announces its purpose. The toilet transfers with less effort. The faucet opens without a grip. The shower entry requires no step-over. The grab bars are where the hand reaches naturally, not where the wall happened to have a stud.
Practically, this means:
- The toilet seat is at 17 to 19 inches, and a bar on the approach-side wall is within arm’s reach at 33 to 36 inches from the floor.
- The faucet operates with a lever or a single handle from the same position the user stands or sits to wash hands, with no forward lean required to reach it.
- The shower entry is flush or has a maximum 0.5-inch transition, and the controls can be reached and adjusted before stepping under the water.
- The layout provides at least 18 inches of clearance from the toilet centerline to the nearest fixed obstruction on the transfer side.
- All fixtures were confirmed against the existing rough-in, door swing, and floor plan before ordering.
This outcome is achievable in most bathrooms without a full gut renovation. The path to it is the same in every case: observe the route, map the friction points, confirm the constraints, select the fixtures that fit, and install them to a structural standard. The home does not need to be rebuilt; it needs to be understood. For planning a wheelchair-specific bathroom configuration, the wheelchair accessible bathroom planning guide covers the additional layout and fixture requirements that apply.
Frequently Asked Questions
What is the correct height for a handicap toilet?
ADA Standards specify a toilet seat height of 17 to 19 inches above the finished floor, measured to the top of the seat2. Standard residential toilets typically measure 15 inches at the seat. “Comfort height” or “ADA height” toilets are manufactured to this range and are available as direct replacements in most residential configurations.
Where should grab bars be installed in an accessible bathroom?
At the toilet, the side wall bar should be 33 to 36 inches high, 42 inches minimum in length, starting no more than 12 inches from the rear wall and extending to at least 54 inches in front of the toilet2. At the shower, a vertical bar at the entry and a horizontal bar on the back wall cover the two main grip moments. All bars must anchor to structural backing, not drywall.
Do handicap bathroom fixtures need to look institutional?
No. Accessible fixtures are available in the same finishes and styles as standard residential fixtures. Lever faucets, comfort-height toilets, and grab bars in brushed nickel, matte black, or oil-rubbed bronze are widely available and visually indistinguishable from standard residential hardware at normal viewing distance. The accessible performance comes from the dimensions, not the appearance.
Can I install accessible fixtures in a rental apartment?
Some accessible modifications are reversible (raised toilet seat adapters, handheld showerhead conversions, lever-handle faucet replacements) and may be permitted in rentals without structural work. Grab bars require wall penetration into structural backing and typically need landlord approval. Under the Fair Housing Amendments Act, renters with disabilities generally have the right to make reasonable modifications at their own expense, with restoration required on vacancy. An attorney or disability rights organization can clarify the applicable rules for a specific tenancy.
What is the difference between ADA-compliant and accessible fixtures?
ADA compliance is a legal standard that applies to places of public accommodation and commercial facilities; it does not apply as a mandate to private residences. “Accessible” in a residential context generally means the fixture meets or approaches the dimensional standards the ADA describes – toilet height, reach range, grab bar diameter, and so on – which are the best available published framework for residential accessible design even when ADA enforcement does not legally apply. An occupational therapist can translate those standards into a specific recommendation for a specific person.
Limitations and Edge Cases
- This guide covers fixture selection criteria for residential bathrooms; commercial and healthcare settings have additional code requirements beyond what is described here.
- Dimensional standards (ADA toilet height, grab bar placement, reach ranges) apply to the general accessible population. An occupational therapist should confirm specific placement for a user with unusual height, reach limitations, or asymmetric strength.
- Structural suitability for wall-mounted fixtures, grab bar anchors, and threshold modifications must be evaluated by a licensed contractor for each specific home before installation begins.
References
- CDC Morbidity and Mortality Weekly Report – Nonfatal Bathroom Injuries Among Persons Aged 15 Years and Older, United States, 2008. Centers for Disease Control and Prevention, June 10, 2011.
- U.S. Access Board – ADA Standards for Accessible Design, Chapter 6: Toilet Rooms. U.S. Architectural and Transportation Barriers Compliance Board, 2010 (continuously maintained).
- U.S. Access Board – ADA Standards for Accessible Design, Chapter 6: Lavatories and Sinks. U.S. Architectural and Transportation Barriers Compliance Board, 2010 (continuously maintained).
- AARP Research – 2024 Home and Community Preferences Survey. AARP Public Policy Institute, November 2025.
- PubMed Central / NIH – Innovations in Home Modification Research: The State of the Art. Sanford et al., Gerontologist, 2019. Cites American Housing Survey analysis showing only 1% of U.S. homes have five key accessibility features.
- CDC National Center for Health Statistics – Arthritis in Adults Age 18 and Older: United States, 2022. NCHS Data Brief No. 497, February 2024.
Conclusion
Handicap bathroom fixtures address the bathroom’s three highest-effort moments – toilet transfers, faucet operation, and shower entry – by matching fixture height, control design, and support placement to the body’s actual reach, grip, and balance demands. The gap between where bathroom injuries occur and how most homes are configured is wide: the toilet transfer accounts for 36.9% of bathroom injuries among adults 85 and older1, yet fewer than 1% of U.S. homes have basic accessibility features in place5. Fixture selection, confirmed against layout constraints and installed to a structural standard, is the most targeted way to close that gap.
For a broader view of how these fixtures fit into bathroom planning as a system, see the bathroom safety planning overview.