
A bedside commode for elderly users does more than eliminate a walk to the bathroom. It changes the geometry of a risky nightly routine. About 50% of adults older than 65 get up at least once a night to void, and a quarter of all overnight falls in that age group are directly linked to those trips1. Placement, not just purchase, determines whether the commode actually reduces that risk. This guide covers the bedroom safety planning decisions that make a commode safer to use: transfer route, height, floor clearance, lighting, arm support, privacy, cleaning access, and walker or wheelchair adaptation.
Quick Answer
Where should a bedside commode be placed for a senior?
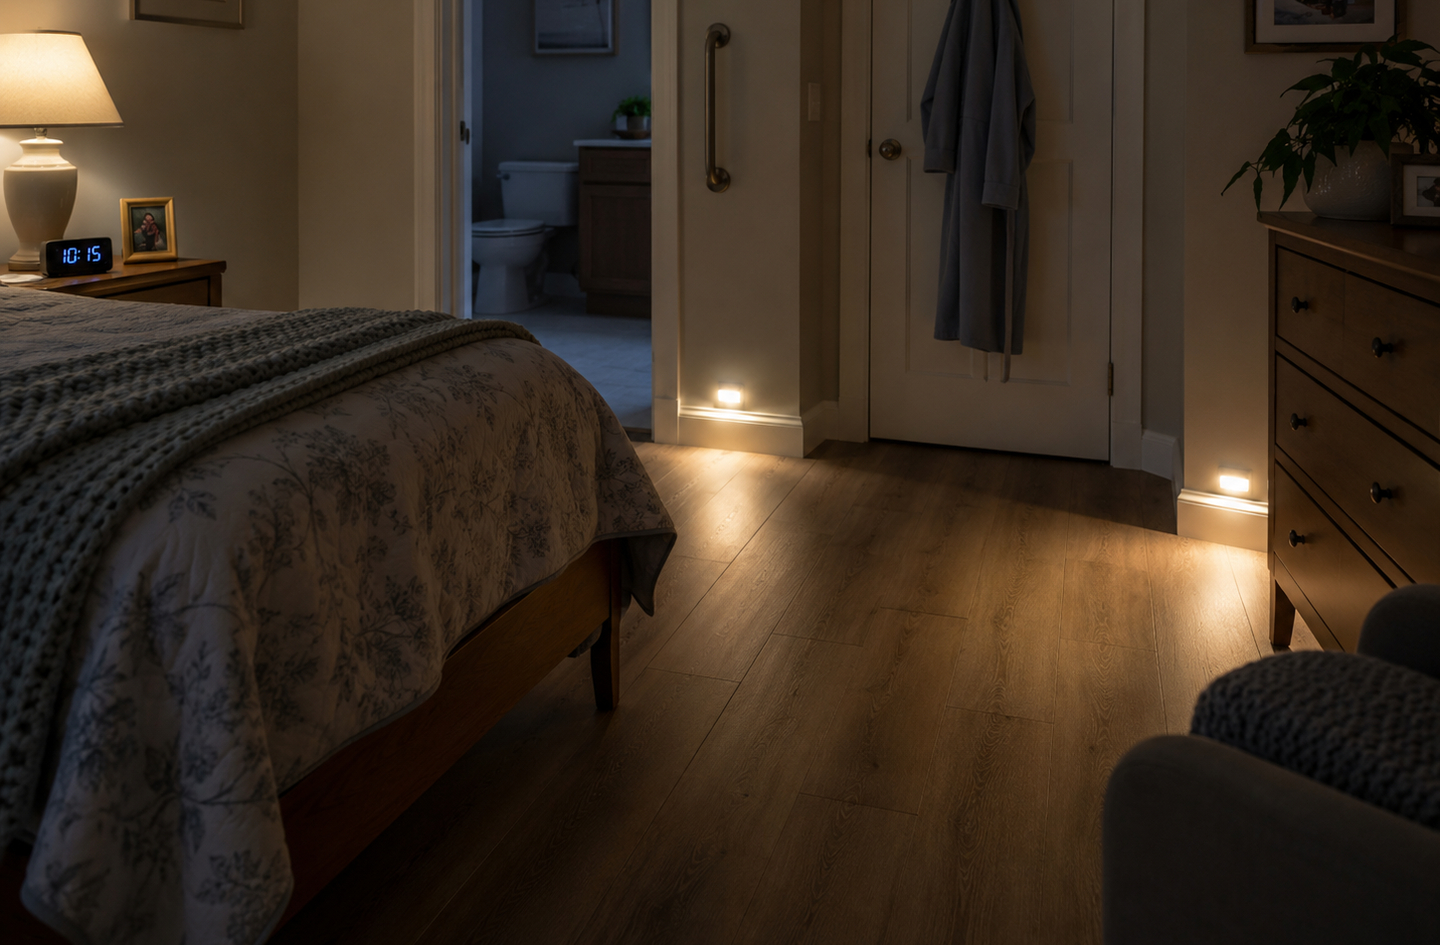
Position the commode on the side of the bed the person naturally exits from, close enough to allow a pivot transfer without taking more than one or two steps. The commode seat height should allow the user’s feet to rest flat on the floor with knees at roughly 90 degrees when seated. Clear at least 18 inches of open floor on the transfer side, keep a nightlight at floor level within that path, and ensure the armrests are within easy reach from a seated-edge-of-bed position.
Key Takeaways
- 63.3% of toileting-related falls in older adults happen between midnight and 6 a.m., compared with only 17.3% of non-toileting falls in that same window2.
- Commode placement follows a route-first logic: identify which side of the bed the person exits from, then place the commode at the end of the shortest stable path from that exit point.
- Seat height is a mechanical variable: a seat that positions the knees at approximately 90 degrees reduces the sit-to-stand effort and the time spent balancing during transfer5.
- Floor clearance, nighttime lighting, and arm support must be planned together – each one compensates for reduced visual acuity, balance, and grip strength that are typical during nighttime waking.
- An occupational therapist can evaluate the specific home and person to confirm height, transfer technique, and assistive equipment before the commode is put into regular use.
Before You Begin: Planning a Bedside Commode for Elderly Nighttime Safety
Before moving any furniture or ordering a commode, walk the bedroom at night – with only the usual nighttime lighting on. The goal is to observe the route as it actually is, not as it looks in daylight. Note where the person exits the bed, which direction they turn, how many steps they take to reach the bathroom, and where they pause, grip, or shift their weight. That walk is the system diagnosis. Placement decisions follow from it.
The commode’s job is to shorten and simplify this route, ideally reducing it to a pivot from the edge of the bed to a seated position on the commode. If the current bathroom trip requires navigating around a dresser, crossing a rug, passing through a doorway, or traversing a dark hallway, the commode can eliminate most of that exposure. The steps below address each variable in the order that typically matters most for safety.
What you will need before setup:
- A tape measure (to check seat height and floor clearance)
- The commode itself, with its bucket and lid installed
- A nightlight or motion-activated LED strip
- Confirmation of which side of the bed the person exits from most often
- An occupational therapy referral if the person has significant mobility limitations, uses a wheelchair, or has a history of falls during transfers
Step 1: Choose the Right Side of the Bed
Place the commode on the side of the bed the person exits from first, oriented so they can pivot directly onto the seat from the edge of the bed without crossing their feet or rotating more than about 90 degrees. That is the mechanical objective: minimum rotation, maximum stability.
Why the exit side matters
Most people have a habitual bed exit side – the side closest to the bathroom, the side farthest from a partner, or simply the side where the nightstand is. During a nighttime waking, this habit operates almost automatically, before full alertness returns. A commode placed on the wrong side introduces an extra step, a direction change, or a reach across the body, each of which adds instability to a moment when balance and grip are already reduced by sleep inertia.
If the habitual exit side conflicts with the room layout (for example, it faces a wall with no clearance), the solution is usually to reorganize the room rather than to retrain the habit. Furniture is easier to move than a decades-old sleeping habit.
Orienting the commode for a short pivot
Once the side is chosen, position the commode so that the person, sitting on the edge of the bed with feet flat on the floor, can reach the nearest commode armrest without leaning or stretching. The commode seat should be roughly parallel to the bed’s long axis, rotated slightly toward the bed if needed so the pivot is a natural quarter-turn rather than a full sideways step. Test this dry: have the person sit on the edge of the bed and reach for the near armrest. If the reach requires a torso lean of more than a few inches, the commode is too far away or at the wrong angle.
Shared bedroom considerations
In a shared bedroom, position the commode on the side farthest from the sleeping partner when room layout allows. A motion-activated nightlight aimed at the transfer zone only, and a commode with a quiet lid mechanism, reduces disruption during nighttime use.
Step 2: Set the Correct Commode Height
The commode seat height should position the user’s knees at approximately 90 degrees, with feet resting flat on the floor, when seated. This is the geometry that minimizes the mechanical effort of the sit-to-stand transition. A seat that is too low requires more hip and knee flexion on the way down and more quadriceps force on the way up. A seat that is too high leaves the feet dangling, which reduces stability and shifts the center of gravity forward during transfer.
“Adjusting the height and angle to suit each individual is likely to help prevent falls.”
Su-Kyoung Lee and Sang-Yeol Lee, Journal of Exercise Rehabilitation5
How to measure the correct height
With the person seated on the edge of their bed in the position they use when getting up, measure the distance from the floor to the back of the knee (the popliteal height). That measurement is a good starting point for the commode seat height. Most adjustable commodes allow height changes in one-inch increments over a range of roughly 17-21 inches. Set the commode to the measured height, have the person sit on it, and confirm that both feet rest flat on the floor and the knees are not above the hips.
When a raised seat is needed
Some commodes ship at standard toilet height (about 17 inches). For taller users, or for users with limited knee flexion from arthritis or hip replacement, the seat may need to be raised. Most commodes accept an additional raised seat attachment, which adds 2-4 inches. The same 90-degree knee rule applies regardless of the starting height. If the person has had a recent hip replacement, the surgical team or occupational therapist will specify a minimum seat height to avoid hip flexion beyond the safe limit; follow that guidance.
Verifying height before regular use
After setting the height, ask the person to perform the full transfer sequence – sit on the bed edge, reach for the near armrest, pivot and lower onto the commode, rise back up, and pivot back – slowly, with someone nearby. Note whether the motion is smooth or requires a lurch forward to stand. A lurch indicates the seat is too low. Note whether feet leave the floor during the descent. If they do, the seat may be too high. Adjust by one inch and retest before the commode goes into unsupervised nighttime use.
Step 3: Clear the Transfer Path
The transfer path is the floor area between the edge of the bed and the commode. It needs to be clear of rugs, cords, footwear, furniture legs, and anything that can catch a foot or cause a stumble during a nighttime pivot. The minimum clear zone is 18 inches on the transfer side of the commode, measured from the commode frame outward, free of obstacles from the floor up to knee height.
Rugs and floor coverings
Remove any rug, mat, or loose floor covering from the transfer zone. This includes the decorative rugs common beside beds. During a nighttime transfer, the foot often slides slightly as the person pivots, and a rug edge can catch the toe or allow the rug to slide underfoot. A non-slip mat is appropriate only if it is secured on all four edges and sized to cover the entire transfer zone, not just part of it. A partial mat creates a new edge hazard at its boundary.
Floor clearance with a walker or wheelchair
If the person uses a walker, the clear zone widens to at least 30 inches on the transfer side, plus the width of the walker frame added on the approach side. Wheelchair users need a clear turning radius of approximately 60 inches in diameter. These dimensions often require moving a nightstand, relocating a dresser, or rethinking the bed’s position in the room. Measurement before purchase confirms whether the chosen commode model fits the cleared zone without blocking the walker or chair approach path.
Step 4: Position the Nighttime Lighting
Targeted lighting is one of the highest-leverage adjustments in a commode setup. A 2024 study published in the Journal of Applied Gerontology found that 57.7% of monitored care-home bedrooms recorded average lighting below 300 lux, and that each 100-lux increase in bathroom lighting was associated with a 13% reduction in the fall rate4. The goal for nighttime commode use is not bright light but targeted, low-glare light at floor level and near the commode seat.
Where to place the nighttime lighting
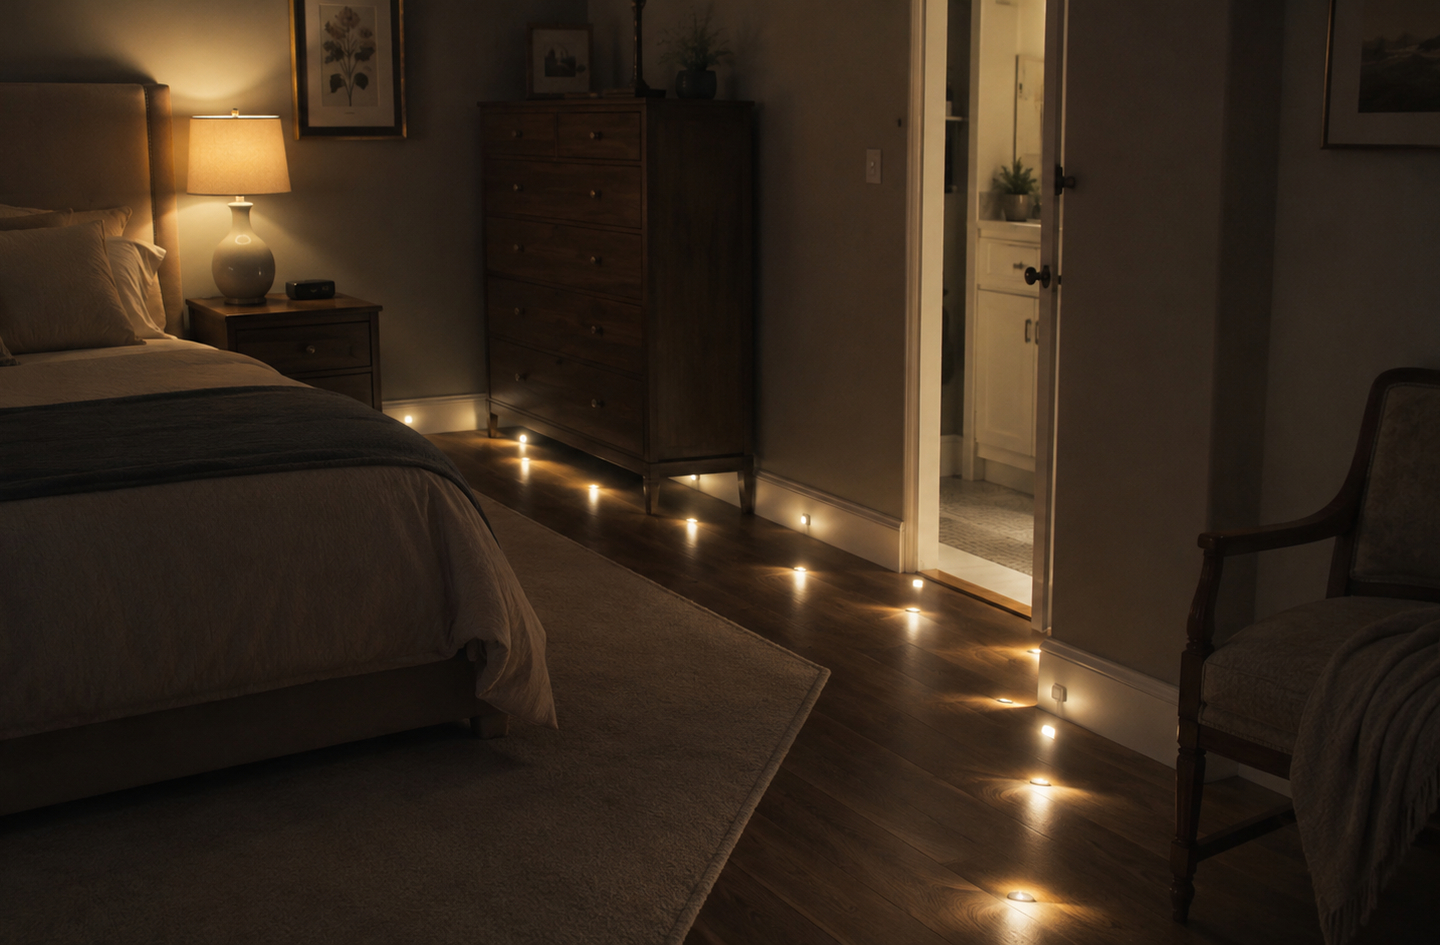
Place one motion-activated nightlight or LED strip at baseboard level beside the bed, positioned so it illuminates the floor between the bed edge and the commode. A second light source near or under the commode itself (some commode bucket assemblies include built-in LED strips) reduces the shadow zone immediately around the transfer. The goal is to make the commode seat, the floor surface, and the armrests all visible without turning on a ceiling or lamp light that would create glare and disrupt sleep.
Motion activation vs. manual switches
Motion-activated lights are generally more reliable in nighttime commode setups than manual switches because they require no hand coordination during groggy waking. A person reaching for a wall switch in the dark is briefly balancing on one side without full visual support. A sensor that activates when the person moves their legs off the bed removes that hazard. Passive infrared sensors placed at 12-18 inches above the floor, aimed at the bed edge, activate before the person stands rather than after.
Avoiding glare at the commode level
High-angle or direct-facing lights create glare that is especially problematic for older eyes, which need more time to adjust from darkness to light. A downward-directed nightlight (aimed at the floor rather than at eye level) or a frosted LED strip at baseboard level reduces glare while still illuminating the transfer zone. A 2022 study in the HERD journal found that LED strip lighting at pathway level produced measurable improvements in walking time and gait confidence during nighttime bathroom navigation compared with standard overhead nightlights6.
Step 5: Add Arm Support on Both Sides
A bedside commode with armrests on both sides provides the bilateral leverage needed for a controlled sit-to-stand transfer. The armrests function as a load-transfer mechanism: they allow the user to push through the hands rather than relying entirely on the hip extensors and quadriceps, which are typically weaker during nighttime waking. The armrests must be positioned so they can be gripped from a seated position on the bed edge before the pivot begins, and gripped again to assist standing after use.
“Using a bedside commode or urinal can minimize the bother, if not the frequency, of nocturia and may reduce the risk of falls.”
Stephen W. Leslie MD, Hussain Sajjad MBBS, and Shashank Singh MD, NIH StatPearls, 20241
Checking armrest height and reach
With the person seated on the edge of the bed in transfer position, the near armrest of the commode should be reachable with a comfortable arm extension – not a full lean or stretch. Most standard commode armrests sit at 28-32 inches from the floor when the commode is at standard height. The user should be able to grip the near armrest, apply downward pressure, and begin the pivot without losing back support. If this is not possible at the current commode position, try moving the commode 2-3 inches closer to the bed edge and re-test.
When the commode armrests are not enough
Some users, particularly those with significant upper-body weakness or poor grip strength, find that commode armrests alone are insufficient for a confident transfer. In these cases, a bed rail on the bed’s exit side – positioned at roughly mattress height so the person can grip it while swinging legs off the bed – provides the first-stage support before the commode armrests take over. A grab bar mounted to the wall or baseboard near the commode (if the wall location allows it) can provide additional post-transfer support for standing. An occupational therapist can assess whether a floor-standing transfer pole is a more appropriate option for a specific room layout.
Step 6: Plan for Privacy and Cleaning Access
Privacy and cleaning access are practical variables that determine whether the commode setup stays in use over time. A commode that is inconvenient to empty or embarrassing to use because of its placement will be avoided – which defeats its purpose. Both variables are worth thinking through before finalizing the commode’s location.
Privacy in a shared bedroom
In a shared room, position the commode on the side of the bed farthest from the sleeping partner if possible, or use a small privacy screen (a lightweight folding panel that stores flat against the wall) when the person wants more separation during use. Privacy screens that stand independently are preferable to curtain rods attached to the ceiling, which require installation. The screen should not block the transfer path or create a new navigation obstacle in the low-light environment.
Access for bucket removal and cleaning
The commode bucket slides out from the frame for emptying and cleaning. Plan for a path from the commode to the bathroom (or utility sink) that the caregiver or user can navigate while carrying the bucket. Keep that path clear of furniture that would require the carrier to turn sideways or duck. Some commode models include splash guards and tight-fitting lids that reduce odor and spill risk during transport. Empty the bucket each morning rather than leaving it until full, which reduces both odor and weight during transport.
Toilet paper and hygiene supplies
Position a toilet paper holder or small caddy within reach on the side opposite the transfer pivot, so reaching for it requires no torso rotation. A wet-wipe dispenser or hand sanitizer on the near armrest side supports hand hygiene before the user rises back to bed.
Step 7: Adapt for Walker or Wheelchair Users
Seniors who use a walker or wheelchair for daytime mobility typically need a modified commode placement that accounts for the turning radius and approach path of the mobility aid. The transfer sequence is longer and involves more steps than a simple bed-to-commode pivot, making each element of the placement more consequential.
Walker users: approach and parking space
A walker user approaches the commode from the front, sets the walker to one side, and uses the commode armrests to lower into the seat. Plan for at least 30 inches of clear floor in front of the commode for the walker during use, and keep the approach surface non-slip and free of thresholds. A folding walker reduces the floor footprint during the transfer.
Wheelchair users: side transfer setup
Wheelchair users typically perform a lateral transfer using a transfer board or bridging technique. The wheelchair seats next to the commode with the transfer-side armrest removed or pivoted away. Set the commode seat height within one inch of the wheelchair seat height to allow a level or slightly downhill lateral slide. A commode with a drop-arm or swing-away armrest on the wheelchair side is worth specifying at purchase for users who need this configuration.
Nighttime lighting for mobility aid users
Mobility aid users need the approach path – not just the immediate transfer zone – illuminated at floor level. For a walker user, this means the path from the bed to the commode approach zone. For a wheelchair user, it means the arc from the bed to the parking position beside the commode. Motion sensors that activate along the entire approach path (rather than only at the commode) are worth the added cost when a mobility aid is part of the routine.
When a Bedside Commode Reduces Nighttime Walking Risk
A bedside commode is not the right solution for every bedroom layout or every person’s mobility situation. It is most clearly indicated when the bathroom trip is the risk – when the distance, the darkness, the floor surfaces, or the person’s balance during nighttime waking make that trip genuinely hazardous.
Roughly one in four adults older than 65 falls at least once per year3, and the overnight bathroom trip is a concentrated risk event. Among adults who get up two or more times per night to use the bathroom, the fracture and fall-related trauma risk is more than double that of those with fewer nighttime voids1. For adults with three or more nightly voids, a prospective cohort study found a 28% increased risk of an incident fall within three years compared with those without nocturia7. Eliminating the walk to the bathroom – and replacing it with a short, well-supported transfer – changes the risk profile of the night meaningfully for this group.
The commode reduces risk most effectively when:
- The bathroom is more than 10-15 steps from the bed, or requires navigating a hallway, threshold, or multiple direction changes.
- The person has a history of nighttime near-falls or balance instability on waking.
- The floor between the bed and the bathroom includes slick surfaces, high thresholds, or a dark hallway with no practical lighting solution.
- The person uses a mobility aid and the nighttime journey to the bathroom involves multiple transfers or door-width negotiations.
- Nocturia is frequent enough (two or more times per night) that the cumulative overnight walking distance and transfer count are significant.
When the bathroom is adjacent to the bedroom and the overnight path is short, well-lit, and unobstructed, a grab bar at the toilet, a raised toilet seat, and a motion-activated nightlight in the hallway may address the risk adequately without a separate commode. An occupational therapist can help determine which configuration best fits the specific person’s mobility and the specific home’s layout.
Common Placement Mistakes
Even a well-chosen commode becomes a hazard if placement details are not addressed. These are the most common errors in commode setup, and the fixes are straightforward once identified.
Placing the commode too far from the bed edge
The most common error is leaving too much space between the bed and the commode, assuming that more floor room is safer. In practice, a commode that is more than an arm’s length from the bed edge forces the person to take a step or two before reaching an armrest, which is exactly the unsupported walking the commode was meant to eliminate. Keep the commode close enough that the near armrest is within reach from the seated bed-edge position.
Using the wrong side of the bed
Placing the commode on the side that seems more convenient for daytime caregiver access rather than the side the person habitually exits from creates a conflict between the person’s automatic behavior and the equipment location. At night, habit overrides intention. If the person instinctively exits left, put the commode on the left side regardless of caregiver logistics.
Leaving a rug in the transfer zone
Remove any rug, mat, or runner from the transfer zone. A bedside rug feels welcoming during daytime setup but becomes a slip hazard during a groggy 3 a.m. pivot. If a soft surface is preferred, use a fully secured, low-pile, non-slip mat that covers the entire zone with no partial edge to catch a foot.
Setting the seat at the wrong height and not testing it
Many commodes ship at a height that is too low for most adults. A seat set too low increases sit-to-stand effort and extends the time spent balancing. Set height to the knee-flexion measurement from Step 2, confirm with a supervised test transfer, and adjust before the first overnight use.
Providing no nighttime lighting in the transfer zone
A well-placed commode in a completely dark room still poses a navigation risk. Without floor-level lighting, the user may misjudge the commode’s position, the armrest location, or the floor surface. At least one low-glare, motion-activated nightlight at baseboard level is a minimum requirement for a safe nighttime commode setup.
Frequently Asked Questions
How close should a bedside commode be to the bed?
The near armrest of the commode should be within comfortable arm’s reach from the person’s seated position on the bed edge – typically 6-12 inches from the mattress side. At this distance, the person can grip the armrest before beginning the pivot, which provides support throughout the transfer rather than only at the commode seat itself.
What height should a bedside commode be set to?
Set the seat height so the user’s knees are at roughly 90 degrees and feet rest flat on the floor when seated. Measure the popliteal height (floor to the back of the knee) while the person sits on the bed edge, and use that as the target seat height5. Most adjustable commodes cover 17-21 inches; test the height with a supervised transfer before regular use.
Can a bedside commode reduce nighttime fall risk?
A commode can reduce the nighttime walking distance and the number of unsupported steps a person takes during overnight bathroom trips. NIH clinical guidance notes that using a bedside commode may reduce the risk of falls associated with nocturia1. The degree of benefit depends on how well it is placed and how consistently the transfer technique is used – an occupational therapist can assess the specific person and setup.
Does a bedside commode need special lighting?
Yes. Floor-level or baseboard-mounted motion-activated lighting illuminating the transfer zone is an important part of a safe commode setup. Research published in 2024 found that increasing lighting in care-home bedrooms was associated with measurable reductions in fall rates4. Overhead or high-angle lights create glare that slows visual adaptation during nighttime waking; low-mounted, downward-directed lights are preferable.
How often should a bedside commode bucket be emptied?
Empty the bucket each morning to minimize odor, reduce the weight and spill risk during transport, and keep the setup hygienic for the next use. Most commode buckets hold 7-8 liters. Daily emptying is the standard practice recommended by home health care guidelines; overnight use rarely fills the bucket in a single night, but leaving it longer than 24 hours increases odor significantly in most residential environments.
Limitations and Edge Cases
- Covers standard bedroom layouts with floor access on at least one side. Murphy beds, beds in corners, or platform beds without clearance may need an assessment by a certified aging-in-place specialist.
- Height and transfer-technique guidance applies to adults with some standing capability. For individuals who cannot bear weight during any part of a transfer, an occupational therapy evaluation is required before introducing a commode.
- Lighting research figures come from care-home settings; individual visual needs vary. An eye care professional or occupational therapist can specify targets for a specific person.
References
- NIH National Library of Medicine – StatPearls – Nocturia, Leslie SW, Sajjad H, Singh S. Updated February 17, 2024.
- BMJ Open – Association between toileting activity and falls in older adults: a cross-sectional study, Zou et al. Published June 2023.
- Centers for Disease Control and Prevention – Older Adult Falls Data and Statistics. Updated 2024.
- Journal of Applied Gerontology – Shedding Light on Falls: Lighting Levels and Fall Outcomes in Long-Term Care, Emad et al. Published December 3, 2024.
- Journal of Exercise Rehabilitation – The effect of toilet seat heights on sit-to-stand in elderly adults, Lee S and Lee S. Published October 2016.
- HERD: Health Environments Research and Design Journal – Effects of Different Nighttime Lighting on Elderly Adults’ Sleep and Falls, Lu, Luo, Hu. Published July 2022.
- PMC – International Journal of Clinical Practice – Nocturia and the risk of incident falls in community-dwelling elderly, Vaughan et al. Published 2010.
Conclusion
Placing a bedside commode safely is a room-layout and transfer-mechanics problem, not just a product decision. The steps that matter most are choosing the correct exit-side placement for a short pivot, setting the seat height so the knees are at 90 degrees with feet flat on the floor, clearing the transfer path of rugs and obstacles, adding motion-activated floor-level lighting, and confirming that the armrests are within reach before the transfer begins. Done together, these changes replace a walk through a dark bedroom with a supported, short transfer – one that is meaningfully less demanding than the bathroom trip it replaces.
For the broader framework of nighttime safety decisions in the bedroom, see the overview in bedroom safety planning for context on how commode placement fits into the wider set of route, surface, and support decisions that shape safer nights at home.